DIY Wall Plaque Using Stamps, Wood, Embossing Powder…

HappyJoyFree

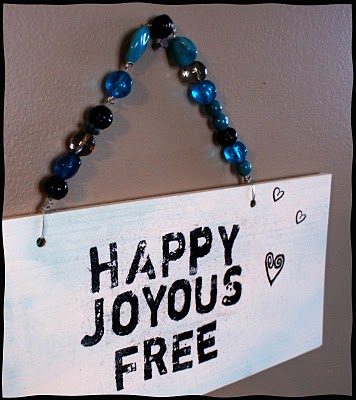
This was my first date with embossing powder, stamps and wood. It was fun, easy, and I love it. SOOO easy. I picked up some Martha Steward embossing powder, a heating tool, a $1.99 piece of unfinished wood. Drilled holes in the wood for the wire hanger. Spray painted the wood with Rustoleum Satin heirloom white on top of Robin Egg Blue. Then came the fun. I used an embossing stamp pad, stamped the words on the dry painted wood, sprinkled the black embossing powder on, shook off the excess and set it with my handy heating tool. For the hearts, I use rubber stamps and a jet black pigment ink pad. Threw some beads on the wire and there you have it…

I am so excited. I have 10 million other ideas for this whole embossing, stamps, words on wood with bead hangy things!

Quilted Wall Hanging

SONY DSC
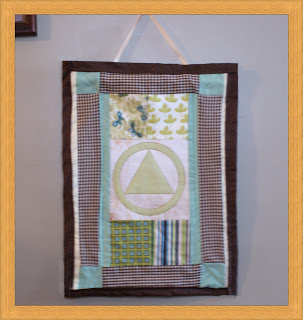
My first quilted wall hanging, inspired by an organization that has helped millions.

This was fun and easy. Debbie hooked me up with a bunch of old fabric scraps and I was on my way. I made the circle triangle in the center in photoshop, then printed it on fabric made for inkjet printers. I attached the pieces, layered and quilted, then attached a dowel rod and ribbon to the back for the hanger. I am super excited about mixing my love for graphic design with fabric for customized funky wall hangings. Busy girl. Busy…


Cupboard Door Turned Cute Chalkboard


SONY DSC


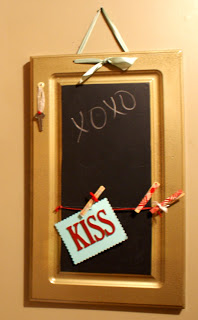
I got this cupboard door at a thrift store for $3. I sanded it lightly, drilled 2 holes for the ribbon hander, spray painted it (Rustoleum Hammered Gold). once it dried, I put a clear coat finishing spray (matte) and place adhesive chalk board paper to the inner rectangle. I guess chalkboard paint would be fine too. I have never used it. I am a sucker for adhesive papers.

I put various scrapbook elements on as shown, using glue gun and or nails. I decorated the clothespins with scrapbook paper to, an idea I first saw at the Creative Crate, on this tutorial. EASY and Adorable. Questions/comments appreciated.
Don’t forget to enter to win a free art print (click here or go to previous post). Be well…


Cute Tray Revamped With Funky Fabric and Decorative Tape
SONY DSC


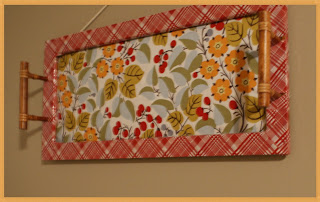
Found this tray at Goodwill marked $1.99. It gets better. It was red tag 50% off day. And the tag was red. Nice.

I popped the back out of it, attached some funky fabric from my remnants stash, and added decorative tape for the red plaid border.
Finally, I stapled some rope to the back and hung my new masterpiece above my fridge. Red and robin egg blue to continue my incorporation of this lovely color palate into my kitchen.
There you go. $1 plus stuff I had at home. Life is good. So is the movie Extraordinary Measures, which I saw this afternoon.
May you be well, live safely in the land, and prosper!

Cool Revamped Thrifty Find Wall Decor

SONY DSC

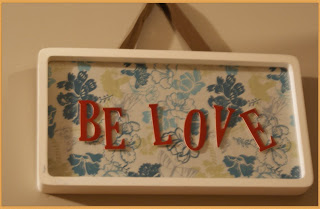
Here I am, milling through the aisles of my favorite Goodwill store with an awesome girlfriend (hi, Debbie), when this rounded corner white frame appeared in my periphery. For $0.99 I brought the lil’ thing home. After some trial and error crafting, I ended with the final product pictured. SIMPLE. I threw a piece of fabric between the 2 glass panes, stuck some chipboard letters from my scrapbook supply stockpile on the front, stapled a ribbon to the back and… there you have it.


Old Window Into Art…

SONY DSC


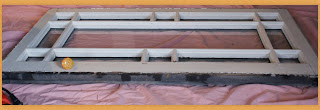
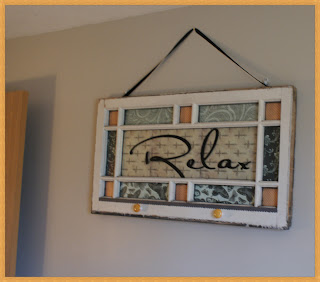
This is what came of my unrelenting urge to find an old window and make it purdy. The flame was lit when I ran across this post at Creative Crate. So cute, I had to get me a window…

After combing thrift stores and flea markets to no avail, I got on ol’ trusty google and searched “old windows for sale, Indianapolis”. One of the results was an architectural salvage warehouse. I called (and by that I mean I had my husband call) to see if they had old windows, which was funny to us when we arrived and they had 5 million old windows, amongst other treasures. That is for a whole other post. Suffice to say I found a lil’ piece of heaven that will surely provide craft materials for all of my days…
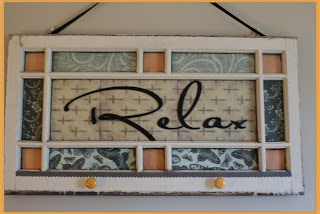
Anyway, I picked out the window you see here. Just seemed like the one. Turns out, it was ideal because of the dimensions of the individual panes of glass. The large center one was 8.5 inches in height, perfect for my Hobby Lobby 8.5x11in cross paper. The other rectangles were 12 inches wide, perfect for my scrapbook paper. For the tiny squares, I also used scrapbook paper, cut to the appropriate size.
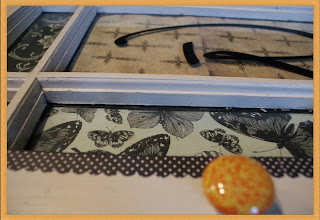
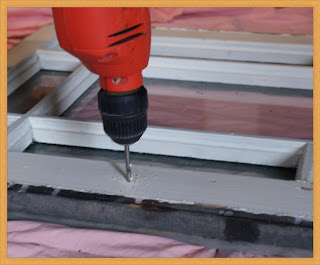
The orange knobs I picked up in the treasured $1 rack at Michael’s. Drilled 2 holes for them, screwed them in. Easy.
The “relax” is vinyl wall decal lettering from Michael’s as well. Again, perfect fit without any alteration from me. There was divine intervention in the choosing of this window. Finally, black bow for cuteness, stapled to top. 2 hinges already present on this heaven sent window provided the hanging mechanism.
This color scheme rocks out with my bedroom decor. And who couldn’t use a little reminder to RELAX as the first thing seen upon awakening?!
Comments are my favoritest things these days…

Revamped Thrift Store Pic…

SONY DSC


Can you tell I found a lot of pics with potential during my thrifting adventures this week? Anyway…
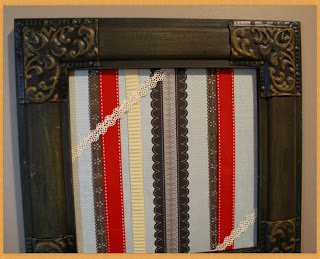
This was easy. I popped the picture out of the frame, adhered a piece of scrapbook paper onto it, using spray adhesive. Then I arranged borders and ribbons, dabbing a bit of hot glue to the ends folded over on the back of the pic.
I am obsessed with scrapbook paper and embellishments at the moment. I plan to vintage -ize some family pics in photoshop, and slide a couple of them under the ribbons when I get a chance.
Also upcoming… I found the perfect old wood framed window from a project I have had my eye on for awhile. You can rest assured it, too, will involve scrapbook paper and some mod podge…
Blessings…

Thrift Store Pic Scrapbooking Paper Project

SONY DSC


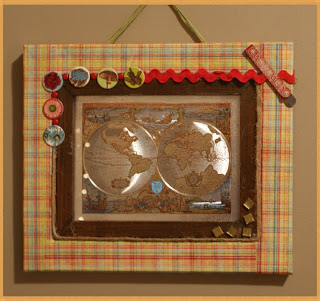
I scored with my recent thrifting. Here is a pic of a map I picked up for $2. I used a gift card I was given for Hobby Lobby to get some fresh scrapbook pages in the color scheme I am adopting for my kitchen. I used some other embellishments I had laying around. Modge Podge and hot glue gun holds it all together. There you go. I love it. Quick, frugal, easy.
I heart comments.

Framed Crochet Butterflies

SONY DSC

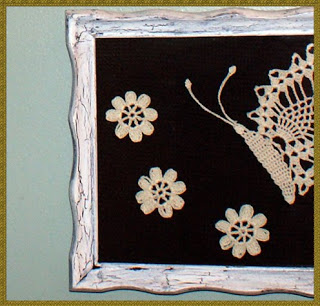
I found these pics at a thrift store for $1.50 each. I was delighted. I didn’t take pics of them as they were when I bought them, but I didn’t have to change much. All I did was remove the green felt the butterflies were on and replace it with the brown fabric shown. I also redid the brown frames with antique white spray paint and crackle medium (covered in my earlier tutorial, here).
I, of course, also had to track down a pattern for these doily-ish butterflies. I found this awesome free pattern. How lovely. And the transformation symbolized by the butterfly always lifts my spirit, reminding me that God turns destruction into beauty.
Blessings,

Beautify Thrift Store Picture Frame Antique Style

FinalCrackleFrame

(Final Product!!)

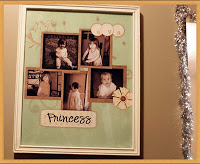
This is the process I use for most framing projects. I find a cheap framed pic at Goodwill, yard sales… I prefer wooden frames, as my options are open in terms of revamping. I can stain, or paint. My artwork to be framed was 16×20, so I was armed with a tape measurer. I went into this knowing I wanted to create an antique white frame for the collage of Princess Ava I showcased in the previous post.
  • I removed the artwork from the frame
  • Sanded frame lightly with sandpaper, and wiped clean with damp cloth
  • Painted with white acrylic paint using paintbrush (I only did one coat, as the original frame was light wood. If you need to recoat for coverage, let first coat dry completely)
  • While this was drying, I cleaned the glass with Windex
  • After about 1 hour, I applied crackle medium and let dry for 2 hours. (I applied a thin layer of crackle medium, as I didn’t want a very drastic crackle)
  • Once dry, I sprayed a coat of Rustoleum clear coat finish for protection.
  • Placed the glass, my collage, and the picture’s original backing and that is all
Privacy Policy