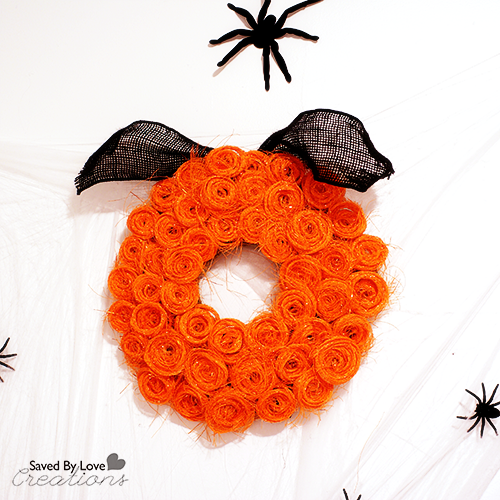
Halloween Party Decor with FloraCraft® Make It: Fun® Foam

[pinit]Decorative Mesh Halloween Wreath[pinit]

*NOTE:  I recieved product and compensation for this project.  All opinions are mine and honest.

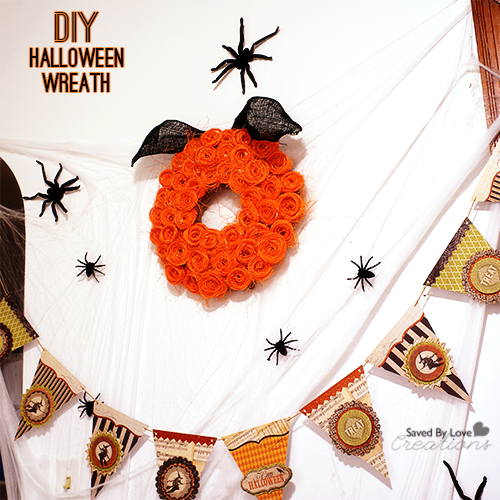
With just a month until Halloween, it is time to get down with some creepy decor.  Today I am going to show you how to do just that with a little help from Make it Fun: Crafts.  Using Design It:® Simple Style® Decorative Mesh and Burlap with FloraCraft® Make It: Fun® Foam we will create a festive orange rosette wreath, perfect for your Halloween festivities!

Decorative Mesh Halloween Wreath DIY

SUPPLIES:

Make it Fun Burlap Garland

 Design It:® Simple Style® Decorative Mesh

 Design It:® Simple Style® Burlap Garland

FloraCraft® Make It: Fun® Foam Sheet

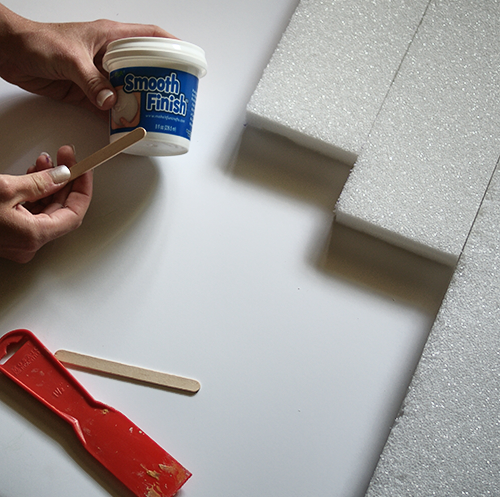
FloraCraft® Make It: Fun® Foam Cutter

Black wired ribbon or burlap

Hot glue gun

TUTORIAL:

#Makeitfuncrafts

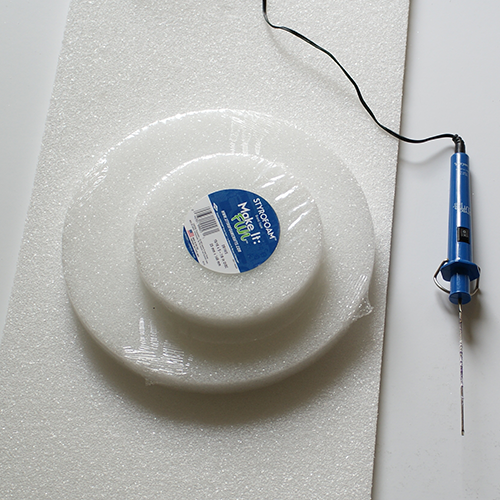
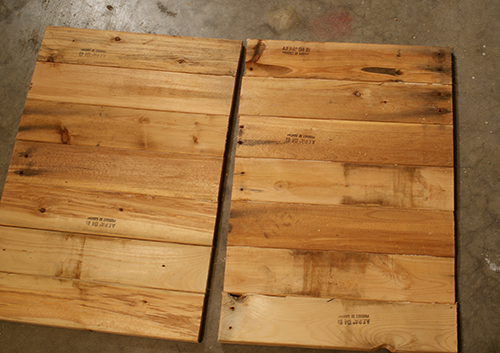
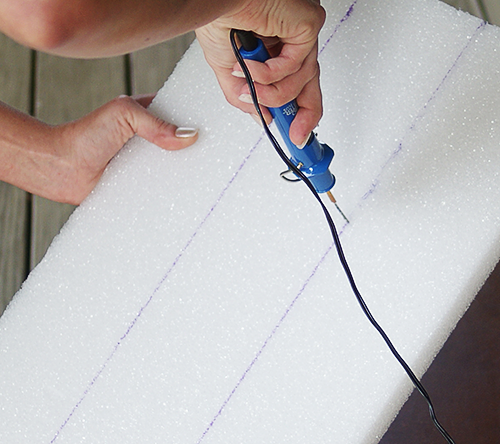
I cut my wreath form from a sheet of foam using the foam cutter (which you can find on the Make it Fun website linked above).  You could also just use a precut wreath form.

How to cut foam

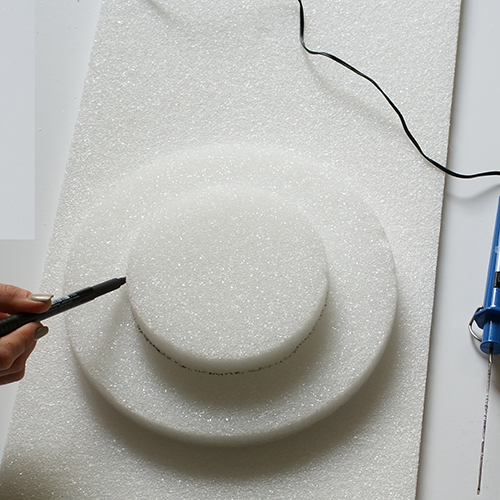
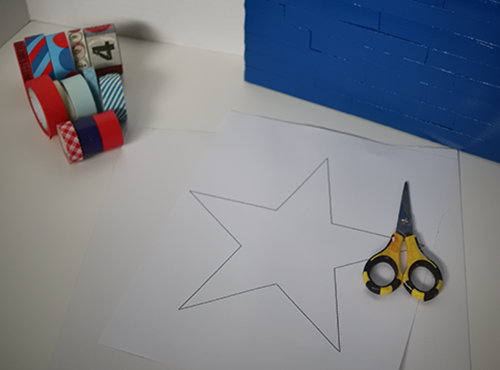
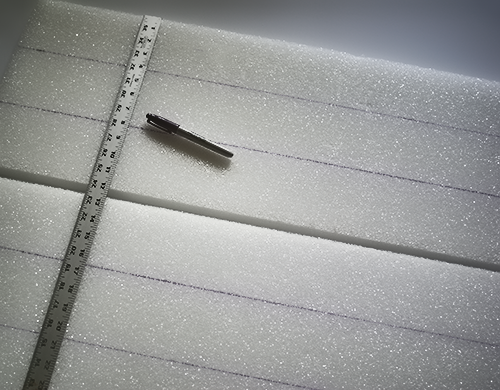
Trace the donut shape onto the foam sheet.  I used two foam circles, one small and one big, for my “donut”.  You could use a plate or other round object.

Styrocutter Tutorial

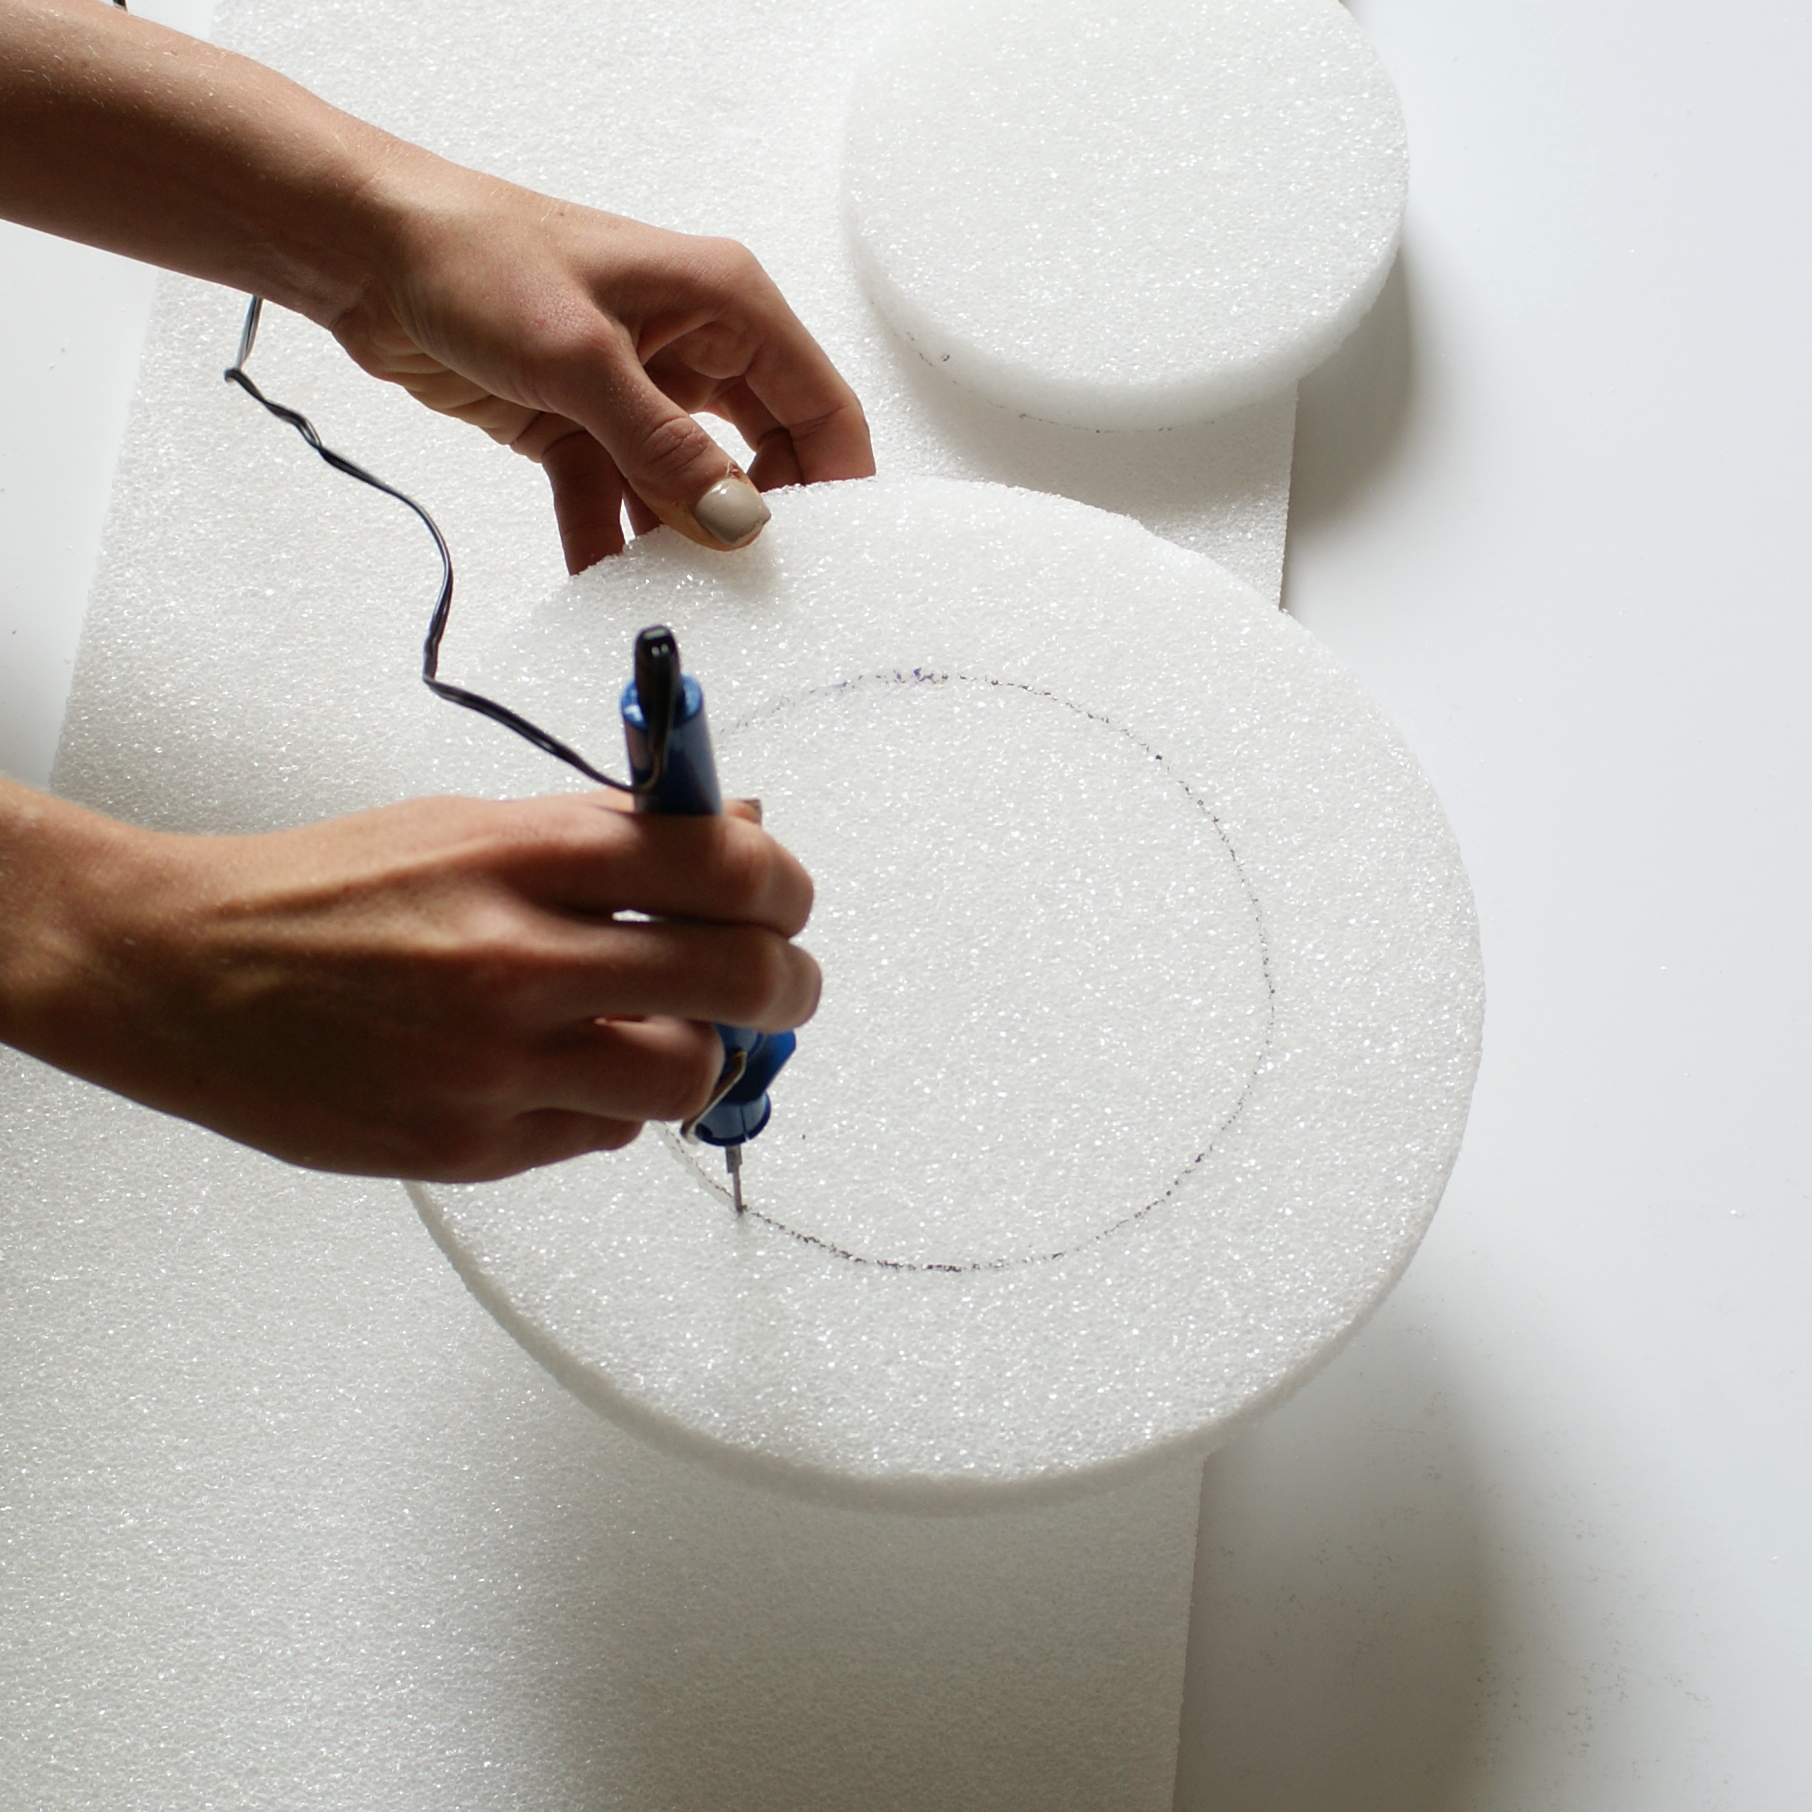
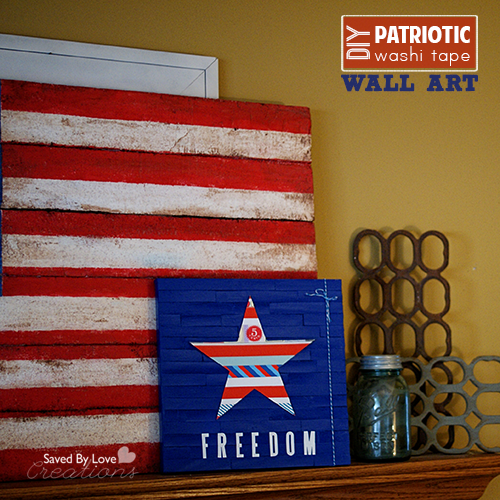
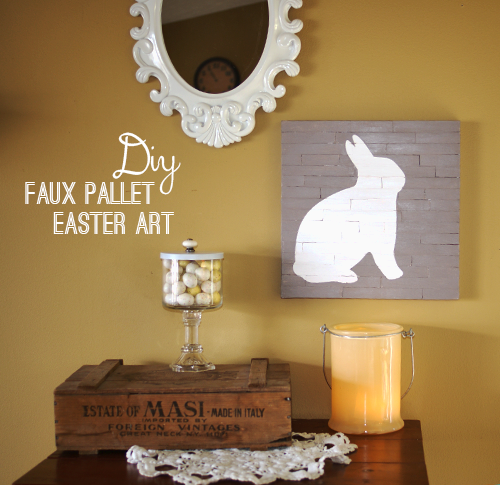
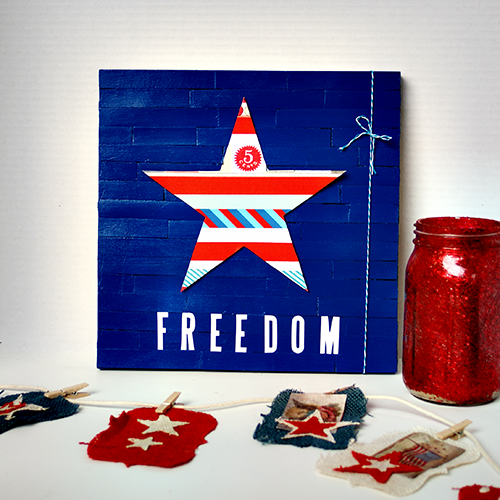
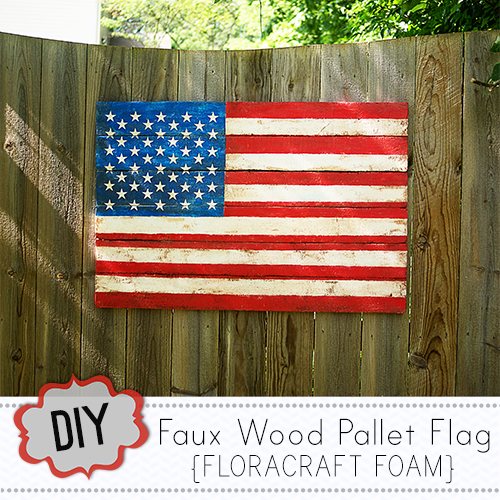
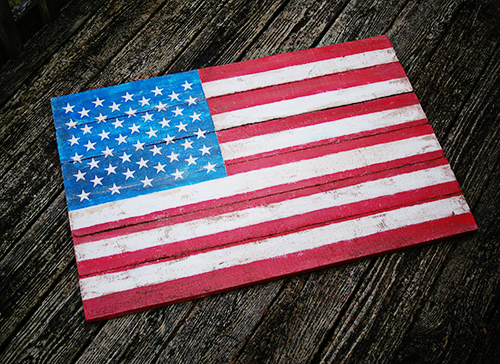
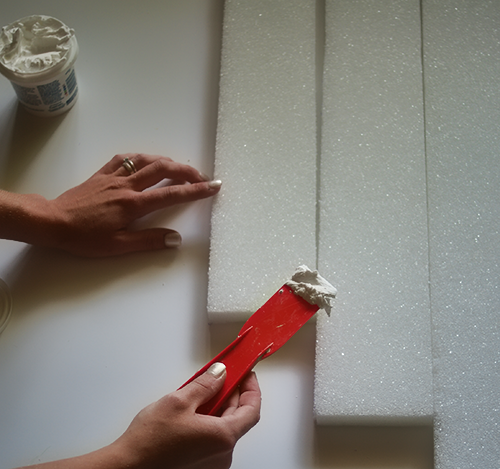
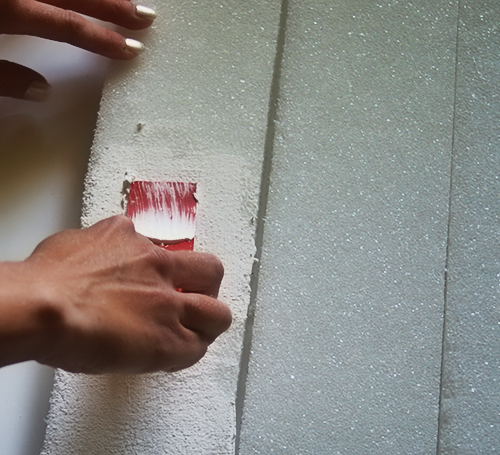
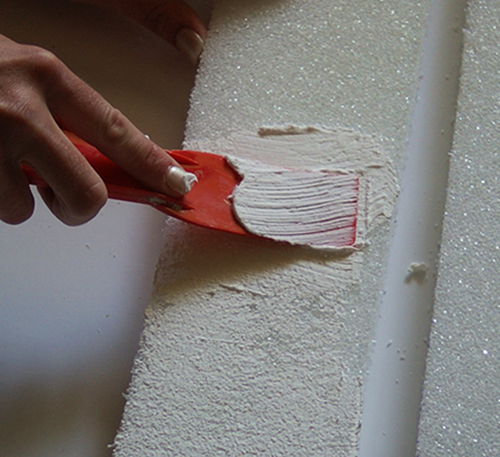
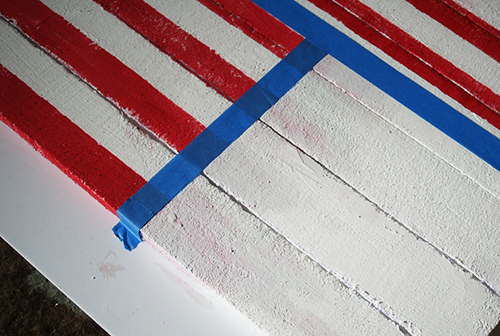
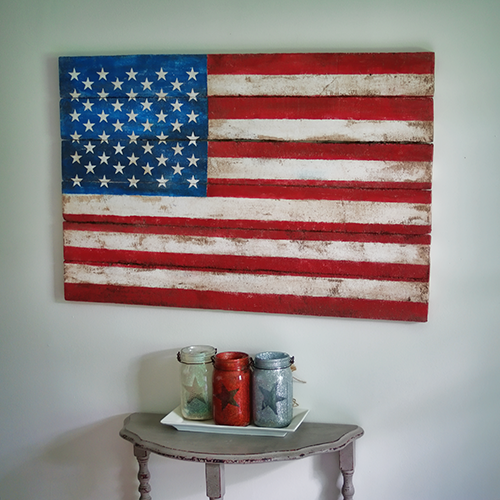
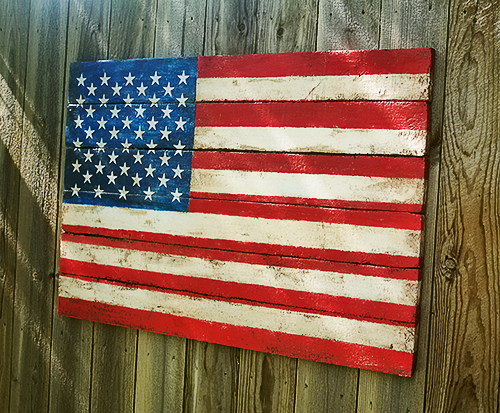
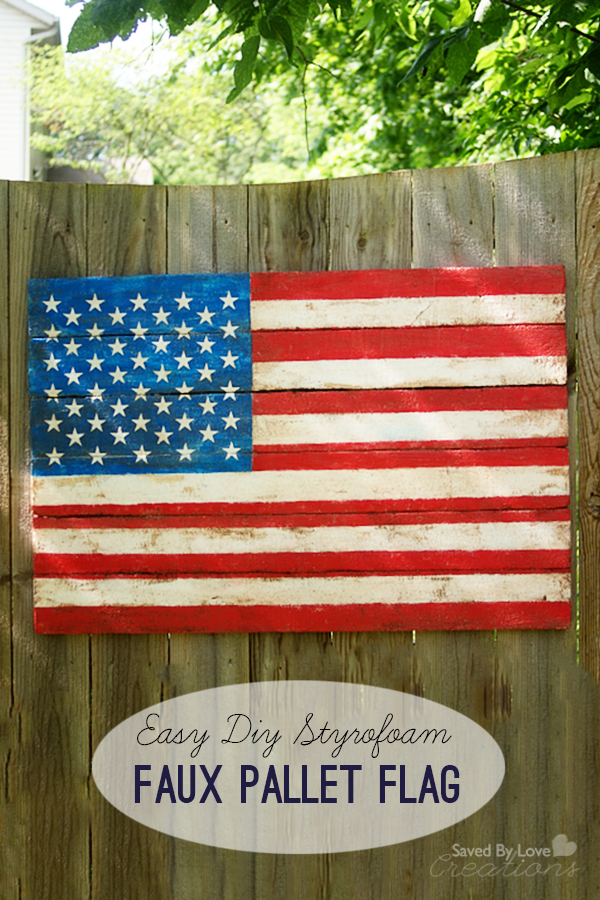
Cut along the outlines with your Styro Cutter Plus®, like I showed you in my faux pallet flag post.

Deco Mesh Wreath

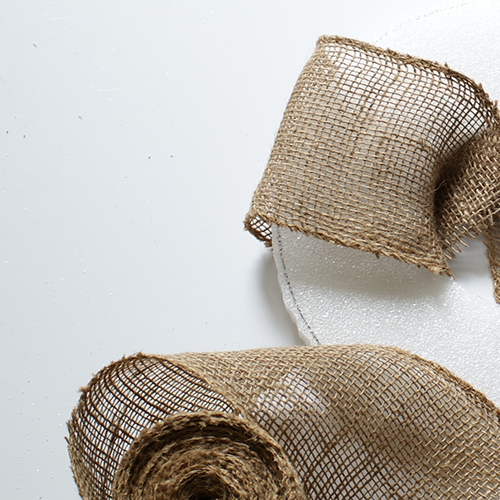
Wrap your wreath with the burlap garland.  This is to have brown instead of stark white showing through in any gaps that may remain after rosettes are added, as well as to give hot glue something to adhere to.

Make a rosette wreath

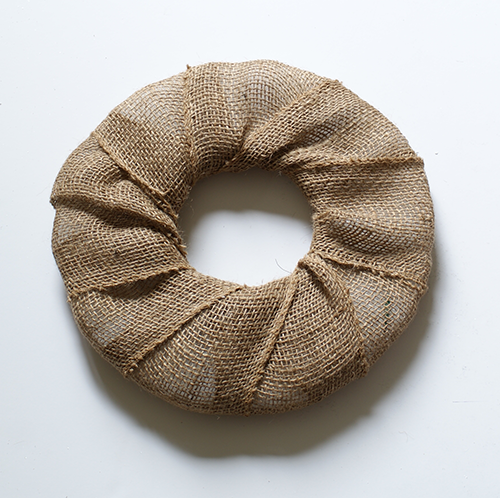
Once entirely wrapped, cut burlap from roll and hot glue in place on back of wreath.

How to make a spiral rosette

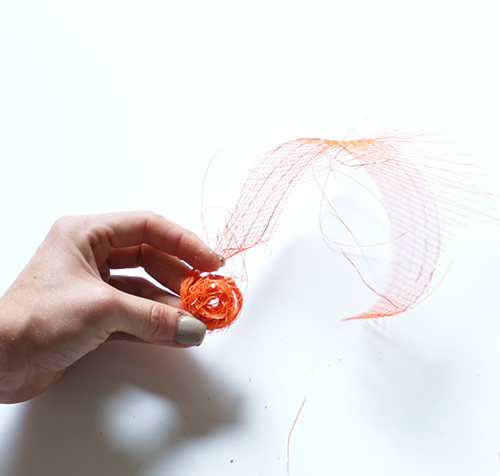
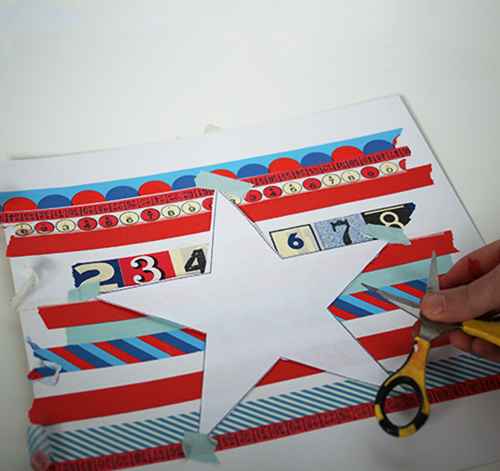
Cut a 1.5 inch strip of orange Deco Mesh about 10 inches long.  Twist into spiral shape from center towards the outside to make the rosette.

How to make fabric rosettes

Hot glue rosettes onto wreath form until it is covered.

DIY Halloween Wreath

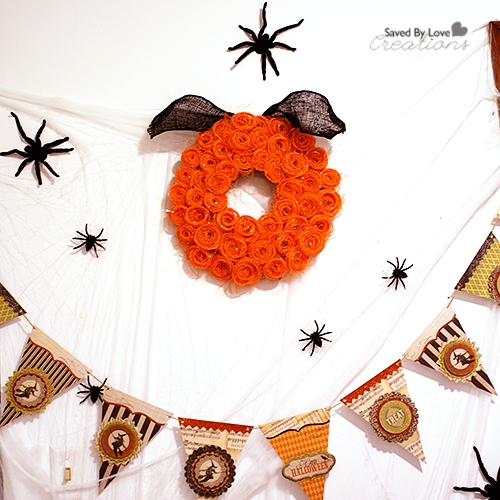
Hot glue black wire ribbon or burlap to the back and secure on nail to hang.

There are tons of ways to use these products in y0ur fall decor.  Make sure to visit Crafts n’ Coffee to stay up to date on products and project ideas!

Make Paper Mason Jar Garland

[pinit]Easy DIY Mason Jar Garland[pinit]

Mason jar crafts have become a phenomenon over the past 2 years, to say the very least.  I, for one, am a huge fan of incorporating them into my home decor whenever possible.  You combine mason jars with my papercrafting obsession, and it is almost more excitement than a blogger like me can withstand.  Well, those two worlds collided for me in this Sizzix Canning Jars Die by Eileen Hull.  Today I am sharing how I used it on some recycled cardboard and fall patterned scrapbook paper to make this fun garland adorning my headboard.

Mason Jar Decor

Eileen Hull Picket Fence

I told you about Eileen Hull’s Picket Fence Sizzix line a few months back, and am having as much fun with it as I predicted I would!

For this project, you will need:

Eileen’s Sizzix Canning Jars, 3-D

Harvest Deight Fall Paper

Fall or other patterned scrapbook paper; I used Recollections Harvest Delight

Corrugated Cardboard

Paper Cement

Jute or other twine

Mini Clothespins

Tim Holtz Distress paint Silver

Ranger Distress Ink Vintage Photo

3D foam adhesive squares

TUTORIAL:

Die Cut the larger jars out of paper and cardboard

Adhere paper to cardboard with Paper Cement or favorite adhesive

Cut tops out of corrugated cardboard and adhere to jars with 3D foam squares

Paint mason jars with distress paint

Paint tops with silver distress paint, or leave as they are.  they look cool either way!

Mason Jar Garland DIY

Ink edges with distress ink on foam applicator and attach to twine with clothespins.

I love my garland, and have several more projects in mind for this die alone.  Make sure you visit Eileen at her blog for tons of inspiration!  You will want to set aside a chunk of time and be ready to watch your creative project to do list grow!

Make Quick & Easy Inspirational Doodle Art

[pinit]

Mother Theresa artwork


[pinit]

How excited was I to discover that Unity Stamp Company has a new line of stamps designed by Stephanie Ackerman?!  The answer is very… much… tons.  I ordered several from this line and others.  They are full of inspiring words and I couldn’t wait to get creating with them.  Today I am sharing the easiest project out there.  Just stamp, scan, enlarge, print, cut out and frame!

Inspiring artwork tutorial

Inspiring art tutorial

You can color with copic markers if you want, or scan and open in Photoshop to color digitally.

Stamping techniques

For this one, I added shading in Photoshop with the drop shadow function.  Stephanie has a great class (several great classes, actually) teaching you how to shade the letters.  I told you all about it my Marker Art post over the winter:

This was my first class from Stephanie, and I would take them all if I had time!  She has a wonderful way of explaining her techniques so that about anyone can create lovely art in no time.

Make your own stamp art with Unity Stamps @savedbyloves @unitystampchick

I love the Mother Teresa quote!  I colored the heart with red copic markers in 3 shades before scanning and enlarging.

Framed Scrapbook Paper Art TutorialThis one I scanned in without color and added the yellow/blue-green in Photoshop.  Pretty cool because I can just change it if I don’t like the outcome.  That is the biggest perk of digital art in my opinion!

Framed stamp artwork

I think next I will go the other way  with these designs and shrink them down for creating a soldered pendant, or shrink film jewelry!

How do you use stamps in your artwork?

This is not a paid post!  I just wanted to share Unity Stamps and Stephanie’s new line because I love them.

50+ DIY Scripture/Inspirational Projects to Make

[pinit]

50+ #diy scripture art and inspirational decor tutorials you can make @savedbyloves

[pinit]

I have always loved scripture verse and inspirational art, which is what today’s round-up contains. Having words that feed my soul displayed on the walls or dangling as a charm from my necklace helps keep me centered when life pulls in all of its directions. I am excited to share with you 50+ of my favorite DIY scripture art and inspiration projects. If you have a project that fits, send me a link so I can add it to the collection!


DIY Rustic Hand Painted Signs from Reclaimed Wood

[pinit]
How to make a handpainted rustic sign from #reclaimedwood @savedbyloves
[pinit]

I was recently blessed to meet Pam, a local talent with a passion for hand painting rustic, inspirational signs.  I have noticed her signs fly off of the shelf (or porch, more accurately).  At the venue where we met, every sign I thought needed to come home with me was on hold, waiting for it’s lucky recipient.  Pam is a busy mom, wife and small business woman who found the time to invite my husband and I into her lovely farmhouse for a day.  As a result I get to bring you this detailed tutorial showing you how to make your own hand painted, distressed wood signs.  Pam has an abundant supply of reclaimed wood and a rocking wood shop at her disposal, but you can make these without all of that.  The best news is I have had several of you ask about die cut machines and how to make stencils for your signs without one.  Pam does this with a cheap text editor on her computer, and a regular printer with black and white ink.  Let’s get started!

How to make distressed wood signs by Little Red Porch @savedbyloves

CLICK HERE TO CONTINUE TO TUTORIAL

Mosaic Frame From Recycled Gift Cards + Free Printable

[pinit]
How to Make a recycled gift card Mosaic frame, + cool free Psalm 56:3 scripture verse printable from @savedbyloves

[pinit]

Hi Saved By Lovies!  Today I am sharing with you a fun project you can make for next to nothing using recycled gift cards/credit cards.  It has all my favorite components, and if I know you at all, yours too.  It is a great upcycled craft project, lending to a unique piece of home decor that will leave your friends saying “You made that from what?”.  Oh yeah, and since I created a printable to go inside of my new frame, you get that too.

Are you ready?  Let’s do this.

Recycled gift card mosaic picture frame tutorial #upcycled #recycledcrafts

Supplies:

Sizzix home decor project #Sizzix #recycled

Old Gift/Credit Cards (I have had everyone under the sun keeping these for me for months and months)

I used my Sizzix machine and the Squares #3 Die (which is on sale over there for $8.79), but you can use cut squares from your credit cards with hefty scissors, like Tonic Studios Tim Holts Scissors

Craft Glue like Crafter’s Pick, which I use for just about everything.  It is non toxic, strong as can be and is great for metal, paper and more

Frame to mosaic

Acrylic paint for tiles if you don’t want to use them as they are (I used Tim Holtz Distress Paint because I am head over heels in love with it)

Free Scripture verse Printable Psalm 56:3

If you want to use the printable I created from Psalm 56:3, just right click the above thumbnail and the full res version will magically appear.  Save it and have it printed your preferred way, or print from your computer.

This verse is coming up all over the place for me, and I use it whenever life hits to remind me that I am held.  I created the printable in Photoshop specifically for this frame, so I went simple black and white since the credit cards have lots of color.  I used Gill Sans, one of my go to fonts.  The lovely crown and design element at the bottom come from Karen at The Graphics Fairy.  What would I do without her library of images??!

Find them at the following links to use in your own creations:

Free Vintage Crown Graphic

Free Ornamental Graphic Separators

TUTORIAL:

CreditCardFrame2

Cut and paint squares from gift cards into the size you want for your mosaic surface.  I used the small and next up size from the Sizzix Square Die.

How to Mosaic a Frame

Lay out your “tiles” to get the design you want before you begin gluing.  Trust me.  Do that.

How to glue on Mosaic Tiles

Once your tiles are dry, adhere them to the surface of your frame using craft glue.  I put some craft glue in a cupcake wrapper and applied it to my tiles with a scrap piece of plastic.  You can use a popsicle stick, paintbrush or whatever.  Use a thin layer of glue so that if you move your nudge your tiles to get the spacing you want, you won’t have bleeding out from the edges.

How to make upcycled home decor; DIY mosaic picture frame from recycled credit cards

Let the glue dry so the tiles are secure and add a photo, mirror, or even leave empty as a design element all in itself!

Upcycled gift card home decor; How to Make a Faux Mosaic Picture frame

If you like this project, check out the 20+ Gift Card Projects to Make at Totally Green Crafts

20 Ways to Upcycle Gift Cards

Easy Pallet Sign Using Kreg Jig

[pinit]

SerenityPallet2

[pinit]

I have been a long time fan of making signs from reclaimed wood.  If you have tried to make a pallet sign, you may have run into the same dilemma as I have.  How do you attache the wood pieces together?  Some people use the pallets as they are and just paint on them.  I prefer each plank to be the touching edge to edge.  Before I discovered the Kreg Jig, I scabbed my pallet planks together like I showed you in this How to Make a Sign From Reclaimed Wood Tutorial.  This is a way easier process using the jig.  You drill perfect pocket holes based on the wood thickness and the join is flush, edge to edge.  A Clean, strong, quick and easy attachment, that I am told doesn’t even require wood glue!  I used it anyway because I am just like that.  Pallet signs have gotten way easier since I made this investment.  This is not a sponsored post!  Read on to see how it works.

SUPPLIES:

how to use a kreg jig

Kreg Jig with drill bits and clamp

1 1/4 inch Kreg Screws

Shipping Pallet Boards (I pry mine off of the pallet with a pry bar a.k.a I have my husband do that part)

Stencils for words (I cut mine with my cricut machine)Wood Stain and lint free cloth

Acrylic paint (I used Tim Holtz Distress paint but anything will do)

TUTORIAL:

how to drill pocket holes with Kreg Jig

I drill two holes in each pallet, one one each end, a few inches in.  The pocket guide is set to 3/4 inch since that is the thickness of this pallet wood.  You can go down to half an inch but remember to use shorter screws.  There is a great chart that shows you what settings to use.  So the neck of the drill bit has a stopper that you set, then the guide with the holes that you drill through is set to that number, and there is a corresponding screw length.  The jig comes with a handy chart for quick reference.  SUPER easy!

Kreg jig pallet sign tutorial

Once your holes are drilled in each board (except the bottom one, which doesn’t need holes), swap to the screw driver bit which is shown in the drill in this photo (both bits you need come with the jig).

How to make a reclaimed wood sign @savedbyloves

Add some wood glue or don’t (see above).

SerenityPallet10

Then drill your screw into the pocket hole.

SerenityPallet11

Keep going until all of your pieces are attached.  I stained my sign with Walnut color Minwax Gel Stain.  Let dry.

SerenityPallet12

Use your stencil to create the phrase.  I cut mine from contact paper using my Cricut.

Attach wire to the back with nails or a staple gun and hang!

Over 50 Easy Wall Art DIY Ideas You Can Make


[pinit]Wall[pinit]

Today’s 50+ round-up is all about wall art you can make yourself.  This is one of the first things I got into creatively.  I would cover old canvases with fabric, stapled to the back and make cheap wall art.  From there it exploded, and I tried several of the projects collected here today. You will see lots of upcycled, recycled materials used, as well as designer knock off wall decor.  I hope you are inspired to try a few yourself.  Please share if you have a worthy project to be considered for this roundup!


Easy Mini Pallet Patriotic Canvas Art


[pinit]
Easy diy patriotic wall art #washitapecrafts #washitape #fourthofjuly @savedbyloves

 [pinit]

While we are on a roll with patriotic decor around here, I thought to keep the momentum going with a quick and easy washi tape stars n’ stripes canvas.  See how to use craft sticks for a mini pallet on canvas that you can dress up to fit any occasion!

Easy diy patriotic wall art #washitapecrafts #washitape #fourthofjuly @savedbyloves

SUPPLIES:

How to make washi tape art diy

Jumbo Craft Sticks

Fabri-Tac craft glue

An old canvas (can be used; grab one for cheap at a garage sale or thrift store)

Star Template printed to size, and scissors

String, letter stickers, other embellishments

White Gesso

Sponge brush

Acrylic paint in choice of colors

Washi tape in coordinating colors and prints

Scrap white card stock or cardboard

Foam mounting squares or other adhesive

TUTORIAL:

For this project, I updated the Easter Faux Mini Pallet Art I showed you before.  Head to that tutorial for how to make the canvas.

Recycle old art with spray paint

I took the bunny silhouette piece and spray painted with blue Krylon I had on hand.

free star template

 Right click this star image and print to size for your project.

how to make patriotic decor #fourthofjuly

Apply strips of washi tape to scrap white cardboard or card stock.  I used the cover flap for a scrapbook paper pad.  Cut out your star template and tape on top of washi tape stripes where you want your cut out to be.  Cut along template edge to get a washi tape striped star.

How to make easy diy wall art

Adhere to mini pallet canvas with foam mounting stickers.  Embellish with stickers for words, baker’s twine, buttons and more!

For more patriotic project ideas to get you inspired, visit our 50+ DIY Patriotic Crafts, Jewelry and Decor Roundup:

Faux Pallet American Flag With FloraCraft

Make a Faux Wood Pallet Flag using #FloraCraft foam @savedbyloves

You have probably noticed that repurposed pallet decor is all the rage. I have been hooked since the first project I saw, and have created some pallet pieces myself. I will never forget the look on my husband’s face when he came home to find me mounting a pallet to the wall of my studio (Pallet Organizer DIY). His concern was it’s weight, and I have to say, they are pretty hefty.  Some people are opposed to bringing pallets into their homes because of possible toxins, or they don’t have the tools to work with pallet wood. That is why I was so thrilled when I learned about Smooth Finish™, a paintable coating for FloraCraft® Foam.  Learn to create this faux wood pallet flag that you could lift with your pinky, and enter to win a product pack from FloraCraft to make your very own!

DIY patriotic home decor

SUPPLIES:

FloraCraft SmoothFinish

Smooth Finish™

Make it Fun® Foam 2 – 1″ x 12″ x 36″ sheets

StyroGlue®

Styro Cutter Plus® (you don’t have to have a special cutter, but it makes the process much easier)

Serrated kitchen knife waxed with candle or soap if you don’t have a foam cutter

Red, white and blue acrylic paint

Mod Podge Mat Finish

Antiquing glaze

White star stickers or stencil

Yardstick and chalk pencil

Marker

Craft stick for stirring

Putty knife or spatula

1 inch paint brush

Measuring tape

Medium Grit sandpaper

TUTORIAL:

CUT THE FAUX BOARDS

FloraCraft7

I divided the foam sheets into three 4 inch wide pieces (36 inches long).  I measured each 4 inches and made my cut line with a sharpie.

FloraCraft StyroCutterPlus

Plug in the StyroCutter Plus and it is ready to cut in 30 seconds.  Be careful, it is quite hot.  The cutter works well, just be sure to let it do the job for you.  If you force it to move, there’s a chance that the wand/tip will snap off. If you don’t have the StyroCutter, you can use a serrated kitchen knife.  Waxing the blade with a candle or bar of soap first will help make the cutting smoother.  Just for fun, I cut one of the lines using my jig saw.  It worked fine, but there was a lot of flying foam dust.  The StyroCutter prevents this my cauterizing at the cut edge.

APPLY PAINTABLE COATING

FloraCraft SmoothFinish

Open the smooth finish and stir with a craft stick.  The consistency is like paste.

FloraCraft11

FloraCraft13

FloraCraft12

 I spread it onto the foam in about 5 inch sections at a time since it becomes difficult to spread and stick as it is exposed to the air.  Spreading in multiple directions helps fill more of the pockets in the foam for a smoother finish.  I wasn’t too concerned about having a perfect surface since I knew I was going for a distressed look, so I worked fast.  The coating was easy and quick to apply.  Each sheet took one tub of Smooth Finish.

I let it dry overnight, but I am sure that wasn’t necessary.  I would say 1 hour would be enough.

PAINT THE FLAG

DIY Patriotic Crafts

For 13 stripes, each one is 2.75 inches.  I marked and taped them off with painters tape, and taped off the blue square.  I painted with a flat brush using acrylic paint.

FloraCraft17

I did the blue last.  The stars were cut using my Sizzix machine, out of Duck tape white sheets.  I drew a grid with my ruler and chalk pencil to guide placement.

DISTRESS THE PLANKS

I wanted my pieces to look rough like pallet wood, so I sanded some edges to make them uneven, and removed paint in random areas to reveal the white layer.  The texture i left with my spatuala, combined with the distressing provide recessed areas for the antique glazing to highlight at the end.

GLUE PIECES TOGETHER

I used StyroGlue since I know not a lot of glues work with foam.  The workbench was the perfect spot for gluing.  I used clamps to keep pieces pressed firmly edge to edge while the glue dried.

It holds perfectly!

SEAL WITH MOD PODGE

FloraCraft19

I sealed the piece with Mod Podge matte finish.

FINAL ANTIQUING

American Flag Pallet Tutorial

I used Scupley antiquing glaze, which is no longer in production.  Any glaze is fine.  Just apply and wipe away quickly with paper towel.  If there is too much glaze left behind, use a damp paper towel.

FloraCraft2

Hot glue a loop of twine or wire to the back to hang.  You only need a small nail or tack.

DIY wood pallet flag knock off with foam

I love my flag, and my husband loves it’s weight.  This is a great option if you want the reclaimed wood look, but don’t have power tools or if you prefer light weight pieces on your walls.

Make a Faux Pallet Flag using Styrofoam

A big thank you to Sharon at Crafts n Coffee Blog for introducing me to the world of Styrofoam/Make it Fun Foam.  She shared a piece with me at a conference that inspired me to make this faux pallet flag.  She also sent me the products used in this tutorial, and is standing by to send them to one of you!!

For even more great foam projects to inspire you, check out Make it Fun on Pinterest: http://pinterest.com/makeitfuncrafts/


Privacy Policy