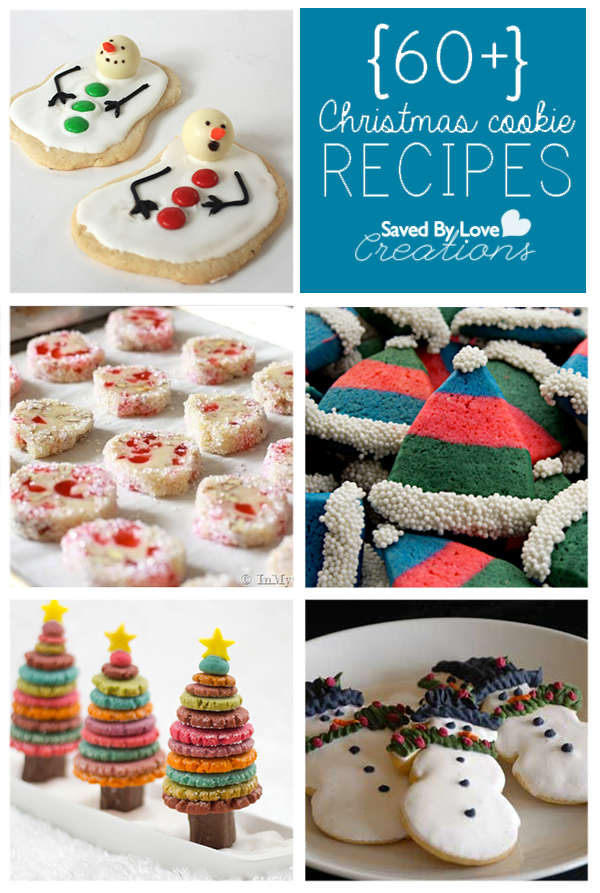
We have moved things around a bit, and are now sharing with you our 60+ Christmas Cookies to Make from Taste Every Season. These will be great neighbor gifts and party treats this holiday season! Enjoy.
Upcycling DIY home decor, woodworking and Crafts

We have moved things around a bit, and are now sharing with you our 60+ Christmas Cookies to Make from Taste Every Season. These will be great neighbor gifts and party treats this holiday season! Enjoy.
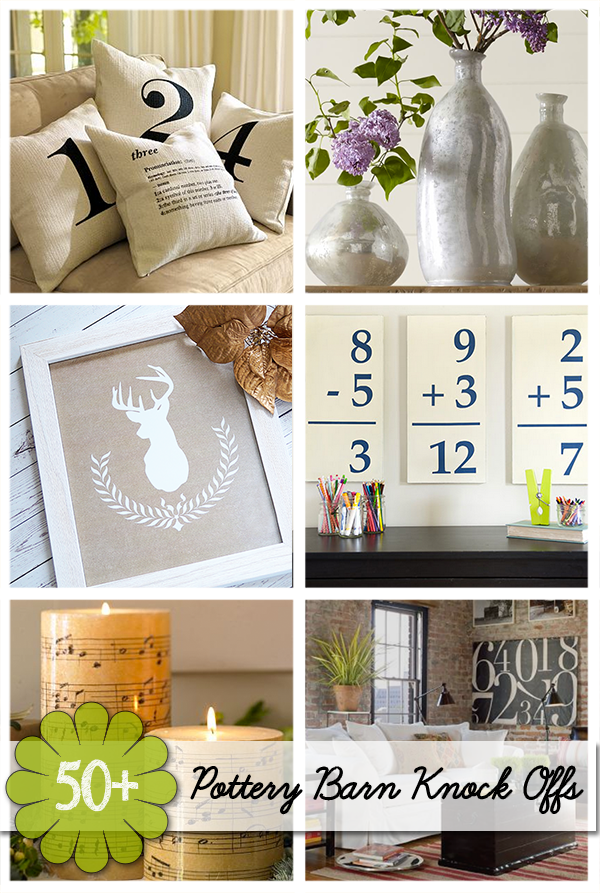 Who doesn’t love getting designer home decor and furniture for a fraction of the price? Today I am sharing our favorite Pottery Barn knock off decor DIY tutorials from around the web. If we missed your project, leave us a link!
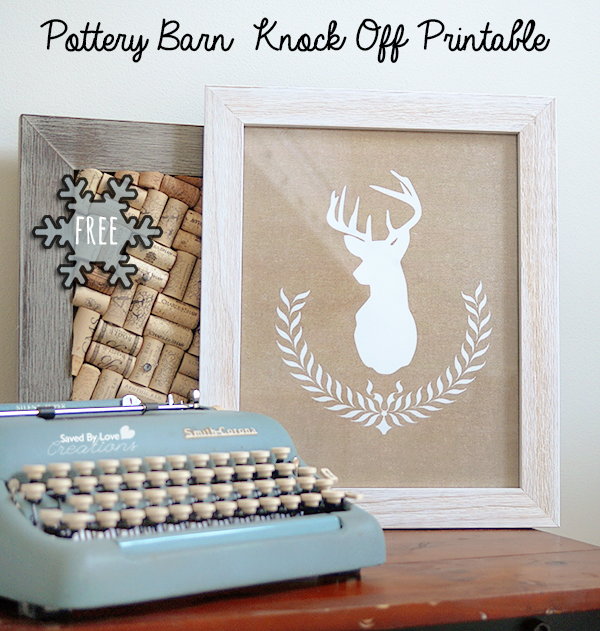
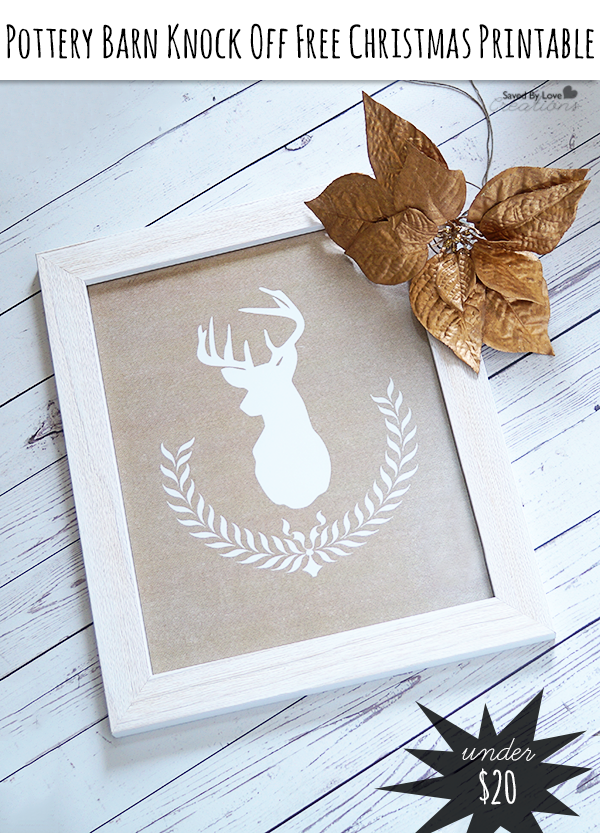
Sometimes when I am having trouble coming up with a project, I visit my favorite store catalogs or websites for inspiration. This project is inspired by a Christmas Wall Art piece from Pottery Barn that cost $99 on the website. I got the print for $1.75 at Office Depot by downloading it to my flash drive and taking it to my local store. Total, my version was under $20!
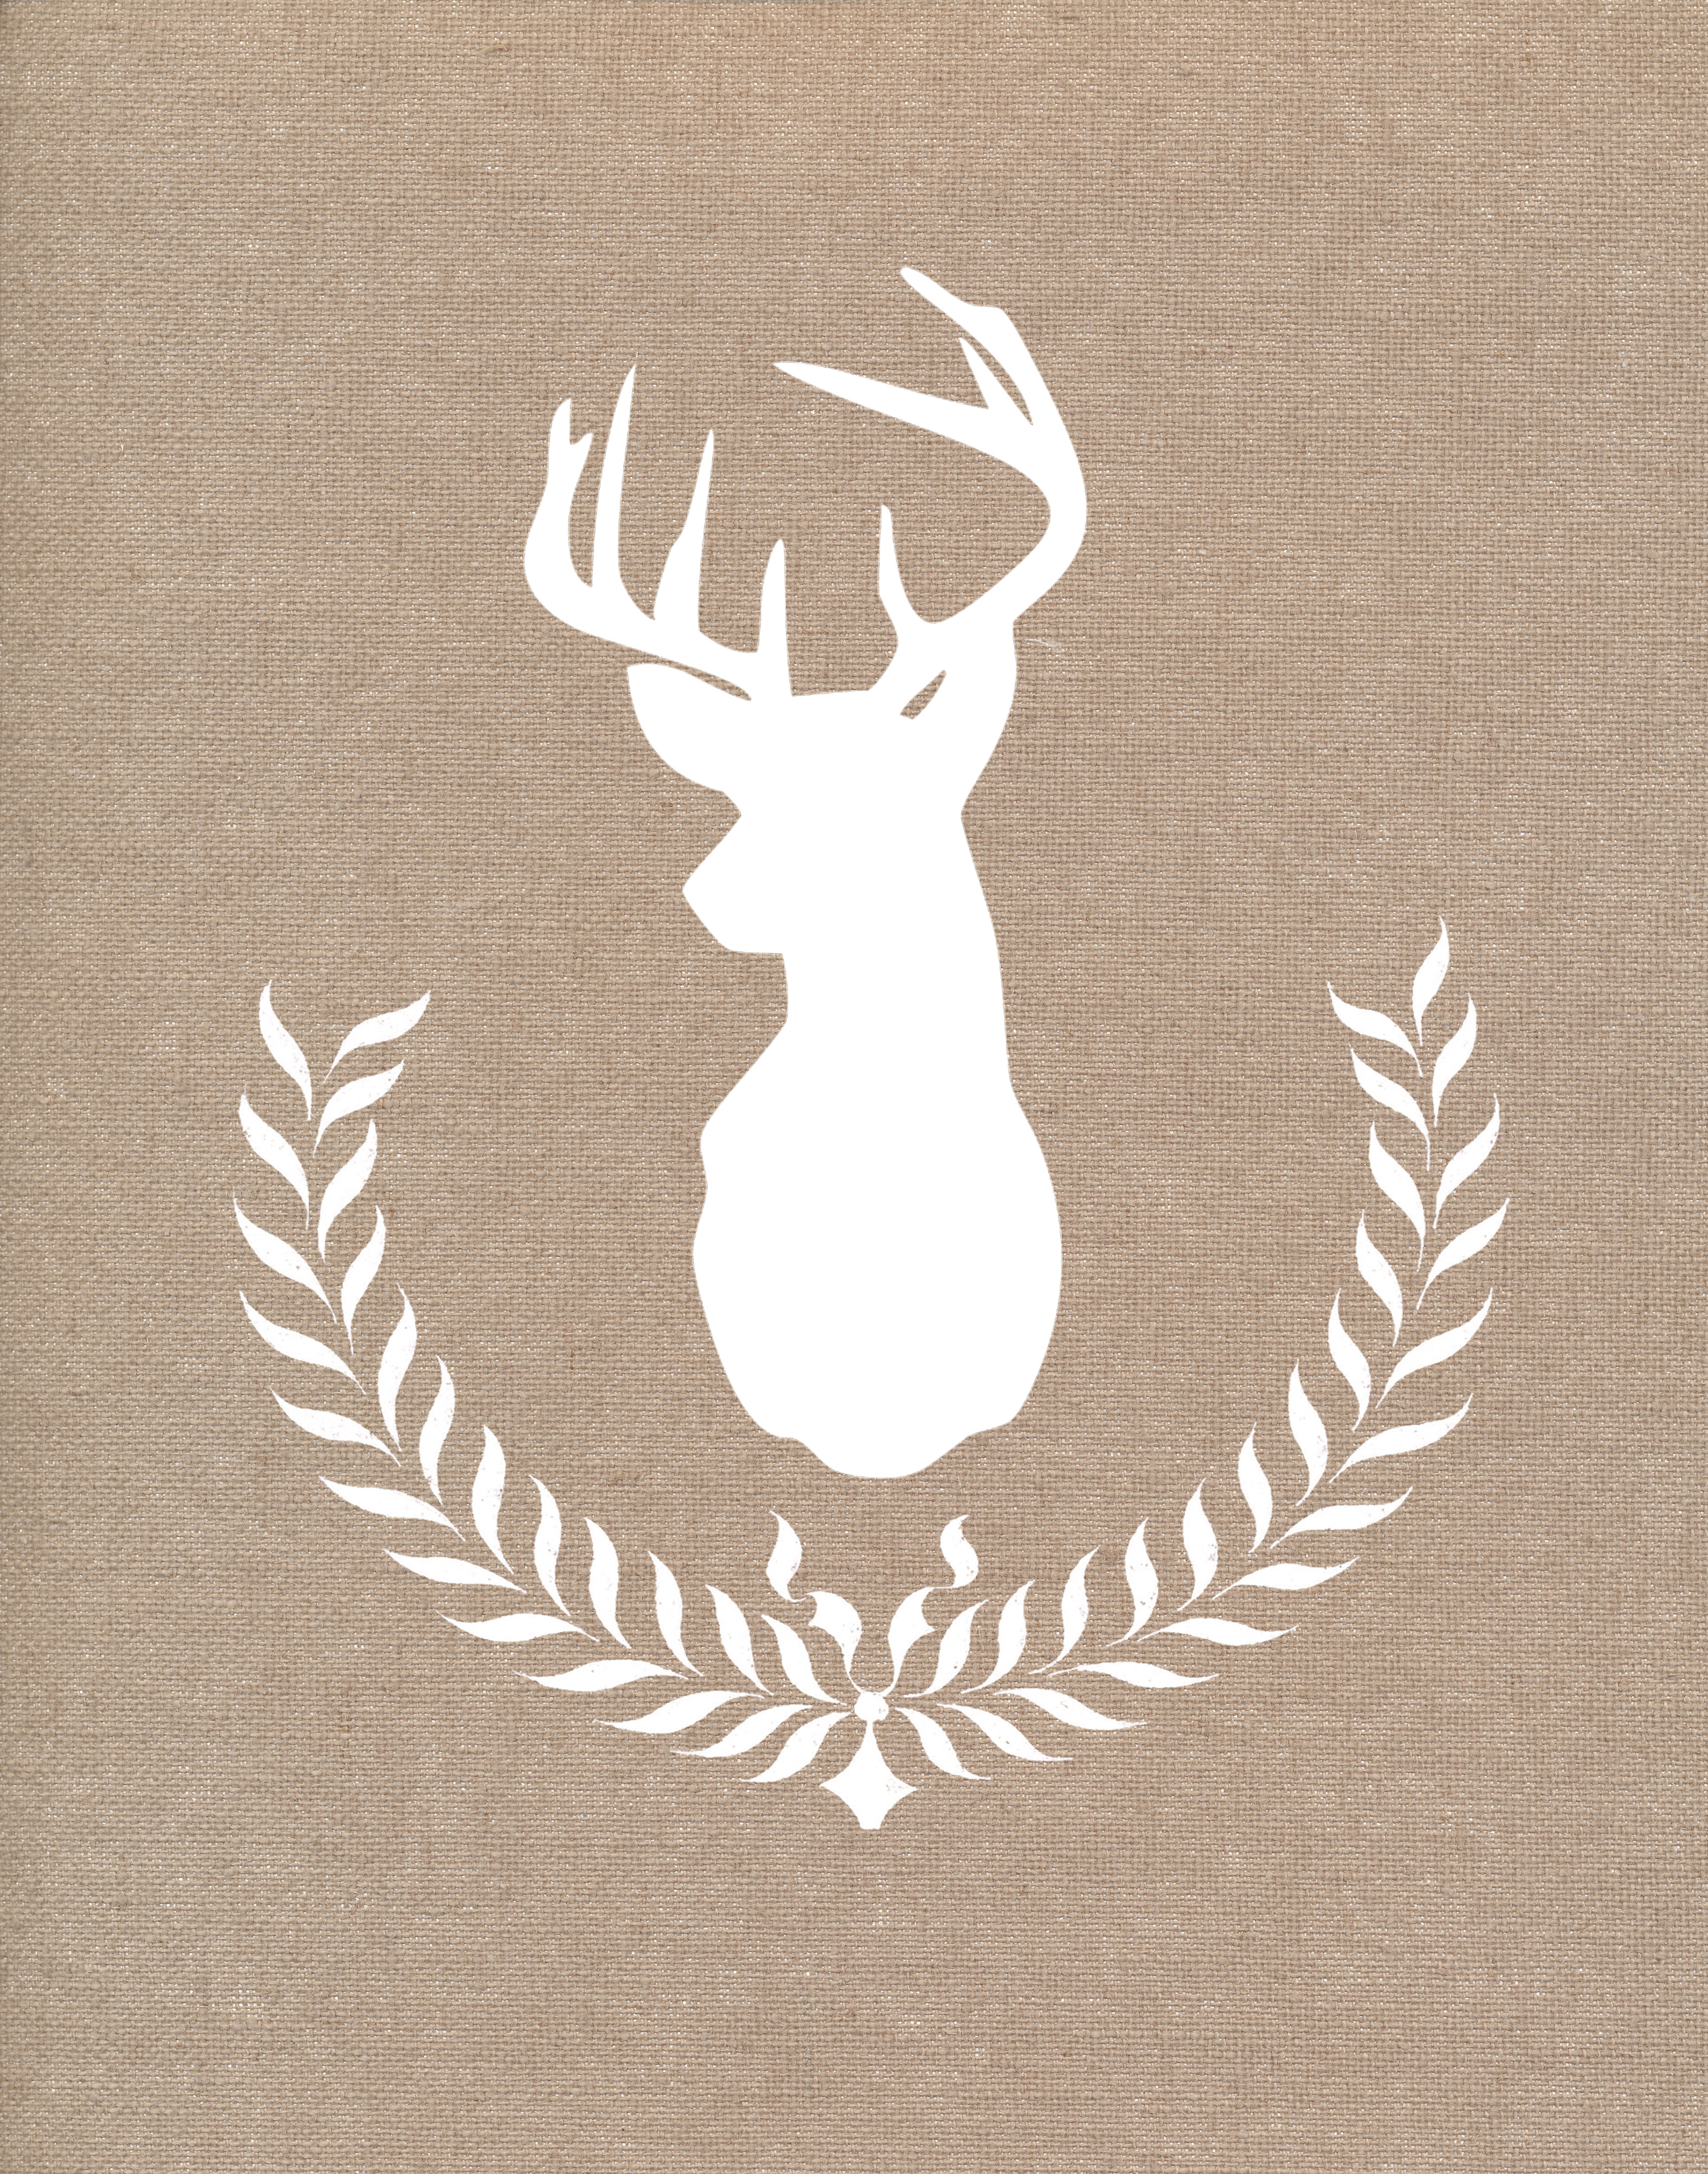
Download the 11×14 Reindeer Wreath Printable and grab a frame with your Michaels 40% off coupon and you can have your own Pottery Barn winter art knock off for 1/5 of their price. You can click the above link or thumbnail to pull of the full res version and save to your flash drive for going into the store, or save to your computer and order a print electronically.
I hope you enjoy!
Do you want to see more knock off designs for decor, jewelry and more? Visit our 50+ Knock Off Designs Roundup:


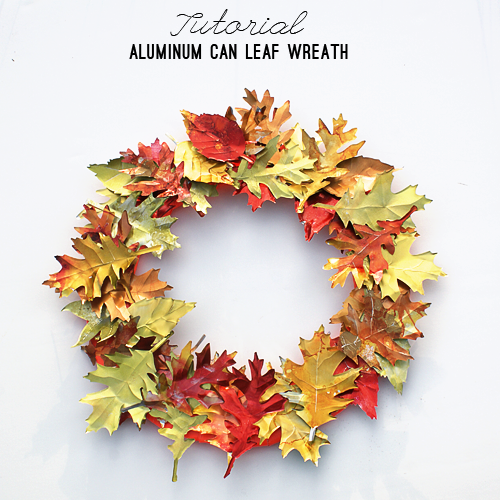
If you are anything like me, you love Ranger Ink products. I am particularly obsessed with alcohol inks, which paint vivid color on non-porous surfaces such as aluminum and glass. How excited was I to be invited to share a Christmas project on the Ranger Ink Blgo?! Very. Come see how I created this Recycled Pop Can Poinsettia Wreath for less than $3 with cans, dollar store supplies and alcohol inks! With tons of other projects to inspire you, you will want to make sure to look around while you are there!
If you like this project, I have lots more you don’t want to miss!
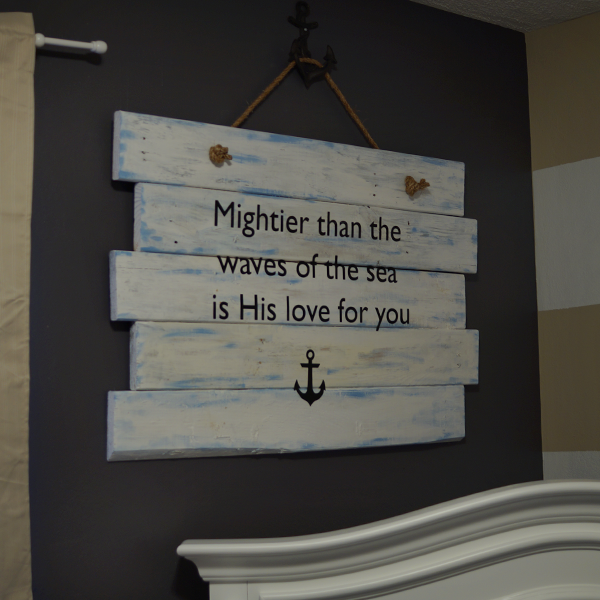 My friend Jordan will be a momma any day now. I wondered if I would end up delivering the little guy the day she came over to make this nursery wall art, but he is not here yet! Today I am sharing how we created this lovely Psalm 93:4 sign for next to nothing out of pallet wood. It is so perfect in her nautical themed nursery! Download the cut file below and follow the steps to make your very own!
Five pallet wood planks (Here is my video: How to Break Down Wood Pallets)
White chalky paint
Blue acrylic or chalky paint
Black vinyl for your die cut machine and transfer tape if you are die cutting the letters (if you don’t have a die cut machine, you could download the phrase below and transfer the letters to the sign to hand paint it like I showed you here: DIY Hand Painted Rustic Wood Signs)
Die Cut machine and software to trace jpg file provided below (this is not needed if you are hand-painting the sign as shown in the previous link)
Drill and 1/2 inch hole saw bit
Rope
Kreg jig
1 1/4 inch Pocket Hole Screws
2 inch flat paint brush and round stencil brush
Mod Podge Matte Finish
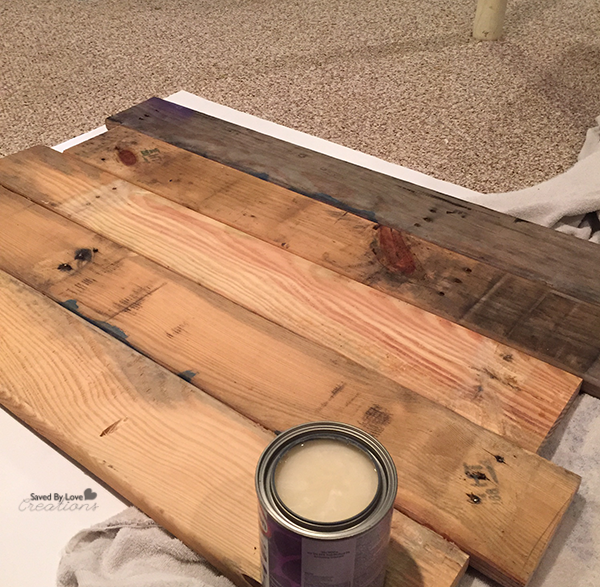
Cut your boards to about 45 inches wide and attach them with pocket holes, staggered as shown – (Here is How to Use a Kreg Jig).
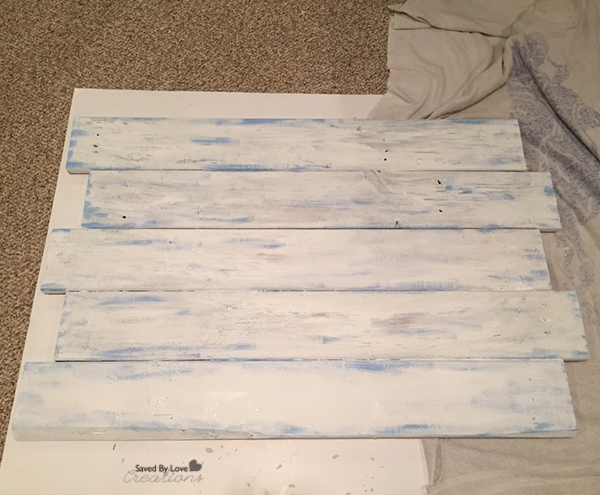
Paint the sign white with chalky paint (we used Folk Art Home Decor Chalk).
Let that dry, then dry brush blue randomly as shown. We used a round stencil brush for this.
Let dry and cut or print and transfer text and anchor. We used a 12×24 inch mat and filled the entire area with the text. We sized the anchor to 5 inches and cut everything in black vinyl.
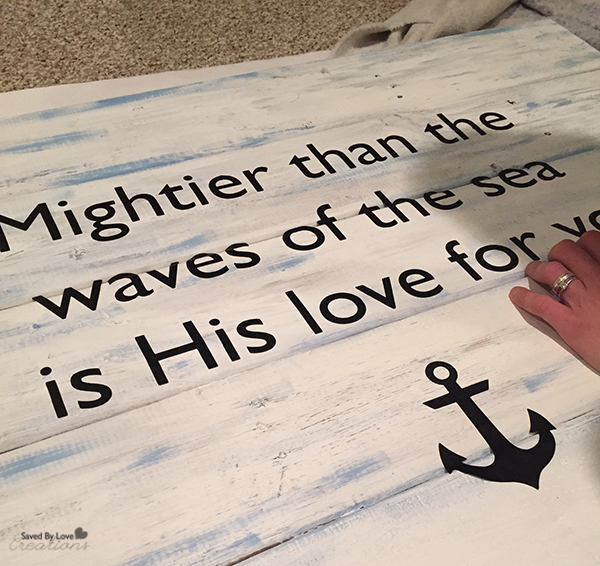
Center and adhere vinyl letters and anchor using transfer tape. Seal letters and sign with Mod Podge Matte or desired finish.
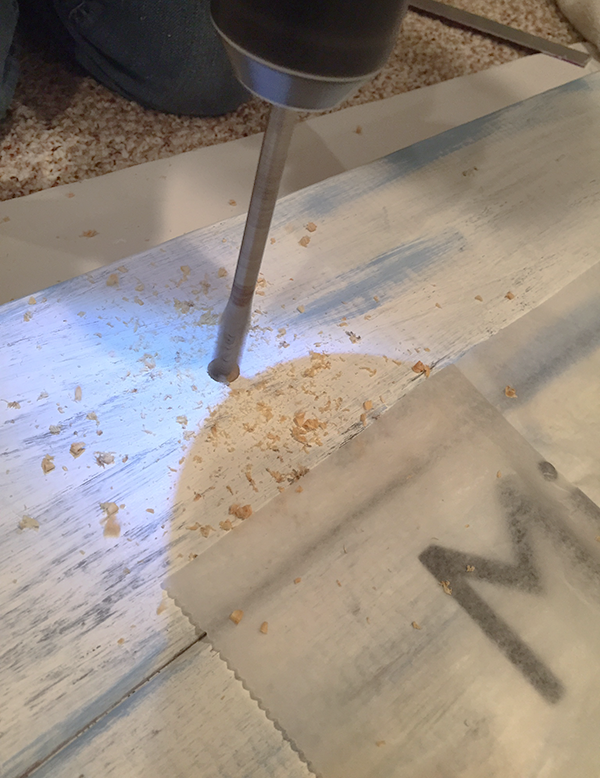
Mark desired placement of holes and drill with spade bit to fit diameter of rope you are using. (We have the letters covered in this image because the Mod Podge wasn’t dry and the saw dust would stick in it. Don’t judge, we were in a hurry)!
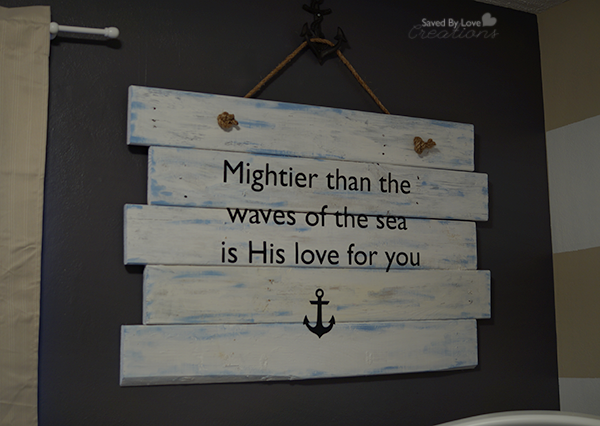 We inserted the rope and hung it from a cool anchor hardware piece that Jordan found at Hobby Lobby for just $3!
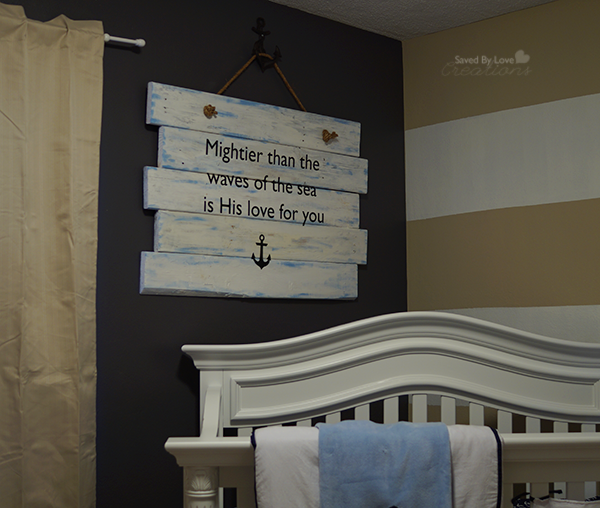
We LOVE it!! Jordan did a fantastic job with this nursery, and our sign tops it off perfectly.
We hope you are inspired to create your own!
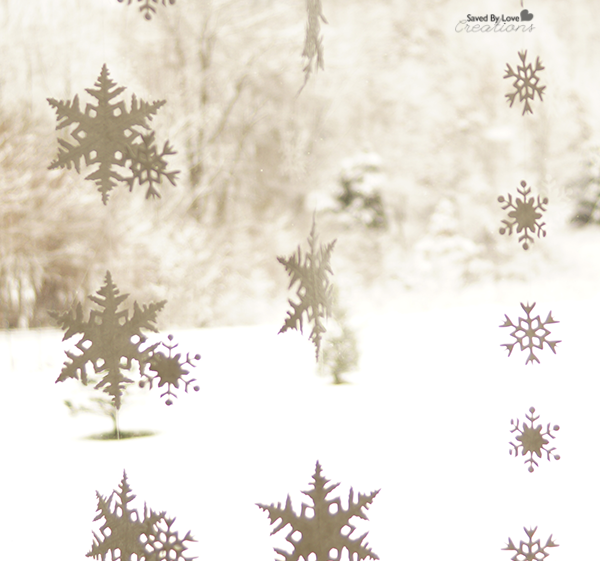
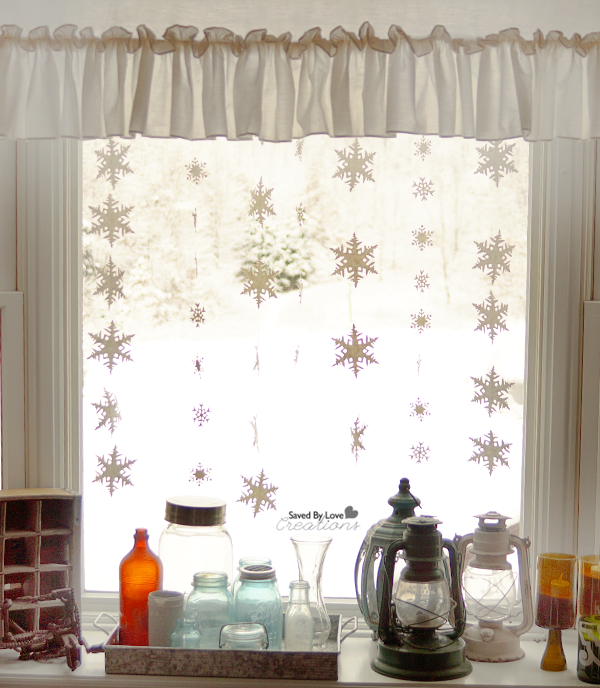
Today I am sharing with you a simple way to add some wintery snowflake decor to your house for the season! This project is super quick, easy and cheap with the right supplies. I love it with the first snowfall of the season painting the landscape beyond the window. Perfect!

White paper (I used filter paper I was given from the local recycling center)
Sizzix Snowflakes #3
Sizzix Snowflake With Texture Fade by Tim Holtz
Clear string
Hot Glue and glue gun
Sticky foam mounts or other removable tape
Die cut several snowflakes from white paper.
Add a line of hot glue to the back of the snowflakes and adhere the clear string.
Continue adding snowflakes this way until the strand is as long as you want.
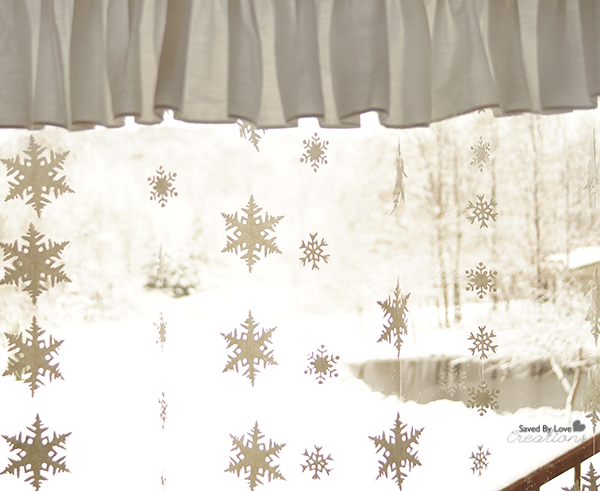
I made 7 strands of snowflakes and stuck them to the window’s “ceiling” using removable foam mounting tape.
If you don’t have a die cut machine, you can make your paper snowflakes with this detailed tutorial from Instructables:

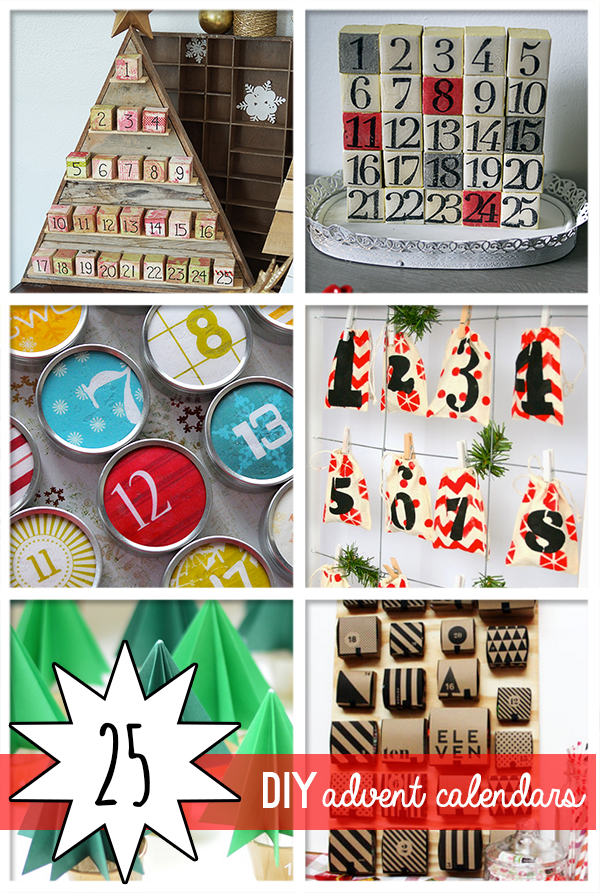 Since the mid 1800’s, we have been counting down to Christmas with advent calendars, and the tradition continues. It is a favorite childhood Christmas memory for people around the globe. Get a jump start on your Christmas anticipation with this round-up of 25 amazing DIY advent calendars you can make!
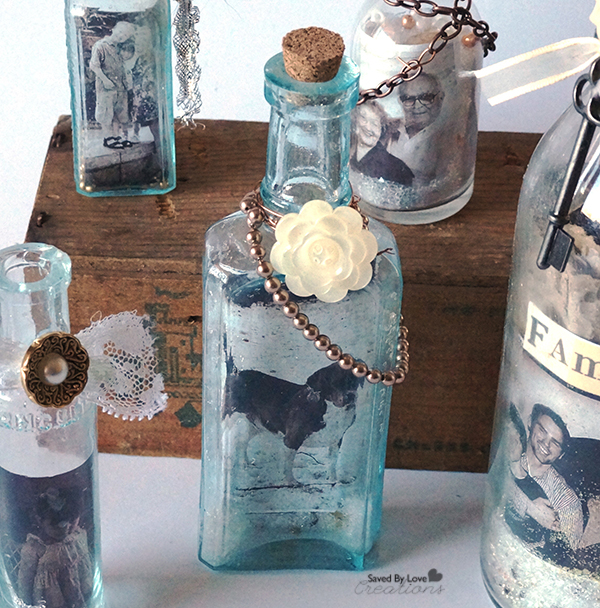
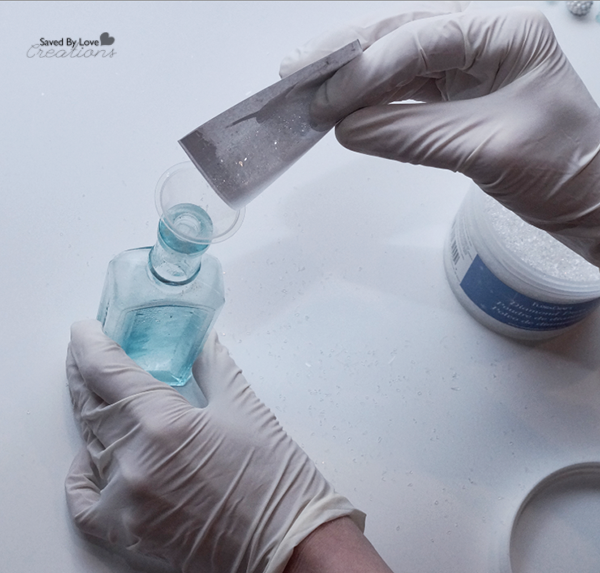
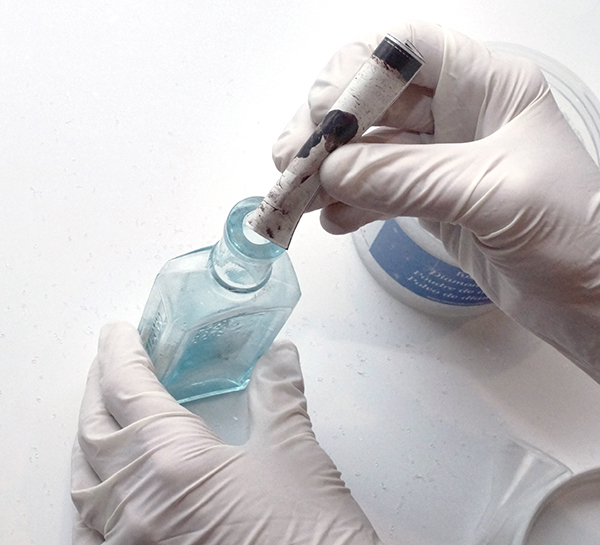
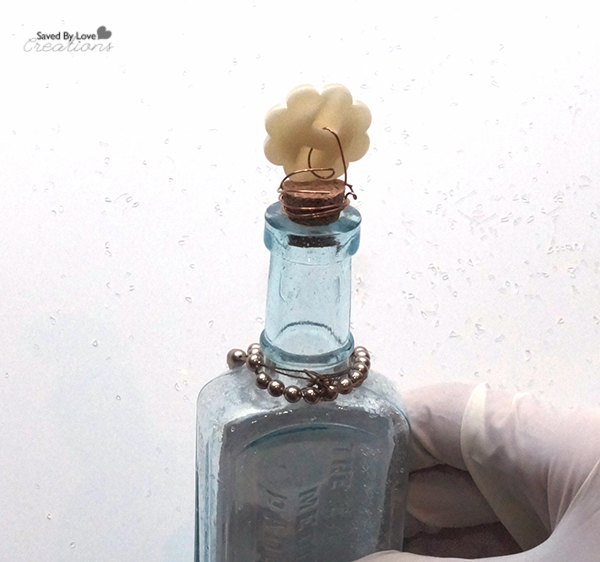
Display meaningful photos in a unique way while busting through your stash of vintage buttons, ribbons, fabric scraps and found objects. These little medicine bottles can be found in thrift stores, at tag sales and online for cheap. Use them for Christmas gifts, or as photo frames for yourself!

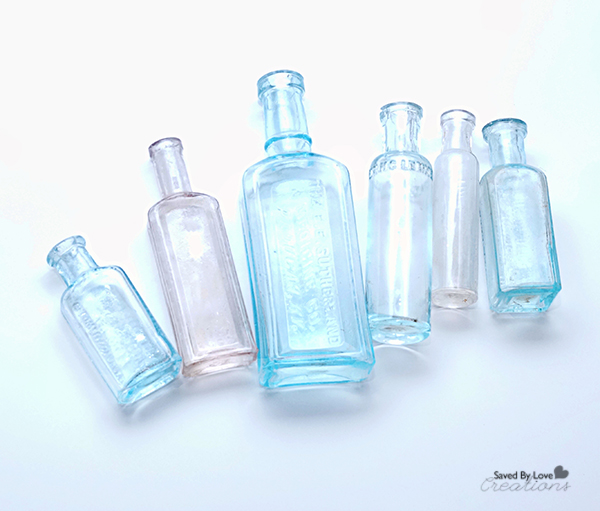
-Variety of antique medicine and food bottles
-Photos sized to fit in bottles and printed in black and white or sepia tone on copy paper
-Glitter, sand or other filler
-Found objects, beads, vintage buttons, old keys and other embellishments
-Decorative ribbon, twine, lace, burlap and fabric scraps
-Corks for bottle tops
-Copper craft wire gauge 20-22
-wire cutter
-scissors
-hot glue
-Bamboo skewer or pencil

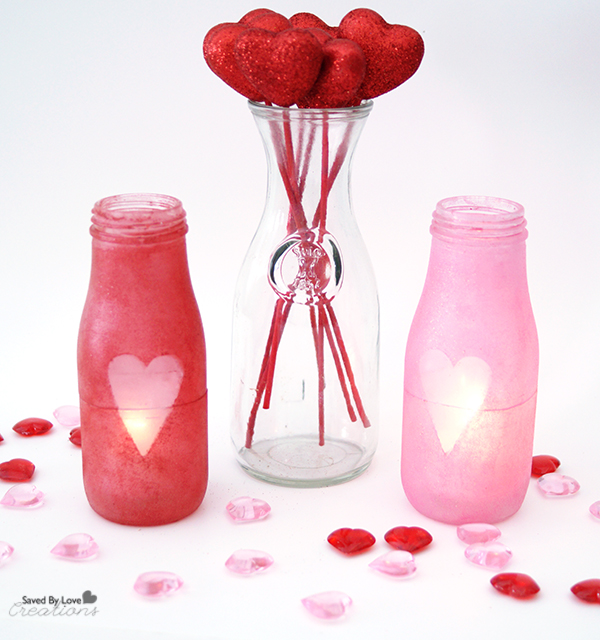
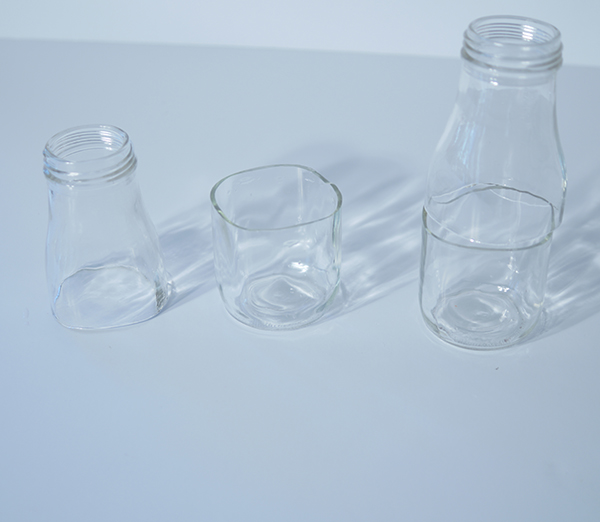
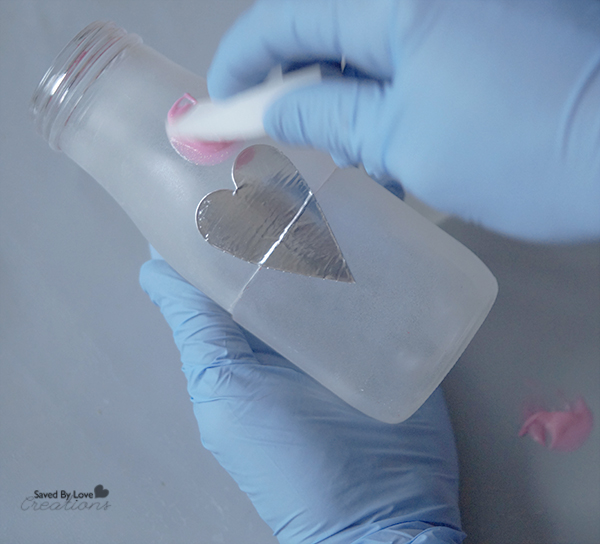
Handmade lanterns are all the rage. With adhesive stencils and paints made just for glass, creating fun designs on bottle is easier than ever. This project involves cutting the bottles roughly in half. Frost and glitter paint are used with heart stickers in a masking technique, so that light from the candles shines through the frosty heart shapes. Create a warm glow for your Valentine’s Day dinner at home!

MATERIALS
– Frappuccino bottles
–Martha Stewart frost glass paint in white
– glitter glass paint in red and pink
– heart stickers cut from foil tape or adhesive vinyl
– cosmetic sponge
– Rubbing Alcohol
– Lint free dry cloth
– Protective gloves
– heart stickers that adhere well to glass
-Surface protector such as newspaper or craft sheet
-bottle cutting supplies (See How to Cut Glass Bottles)
DIRECTIONS


EXTRA TIPS
○ Masking Tips – Foil tape in the electrical section at the hardware store works great for these projects. It adheres well so that the paint doesn’t seep underneath, but doesn’t disturb any base layers of paint when removed. A large roll of it is under $8 and lasts years. Don’t leave the stickers on overnight, or the surrounding paint will peel away with them upon removal. You want to remove them soon after your last coat of paint.
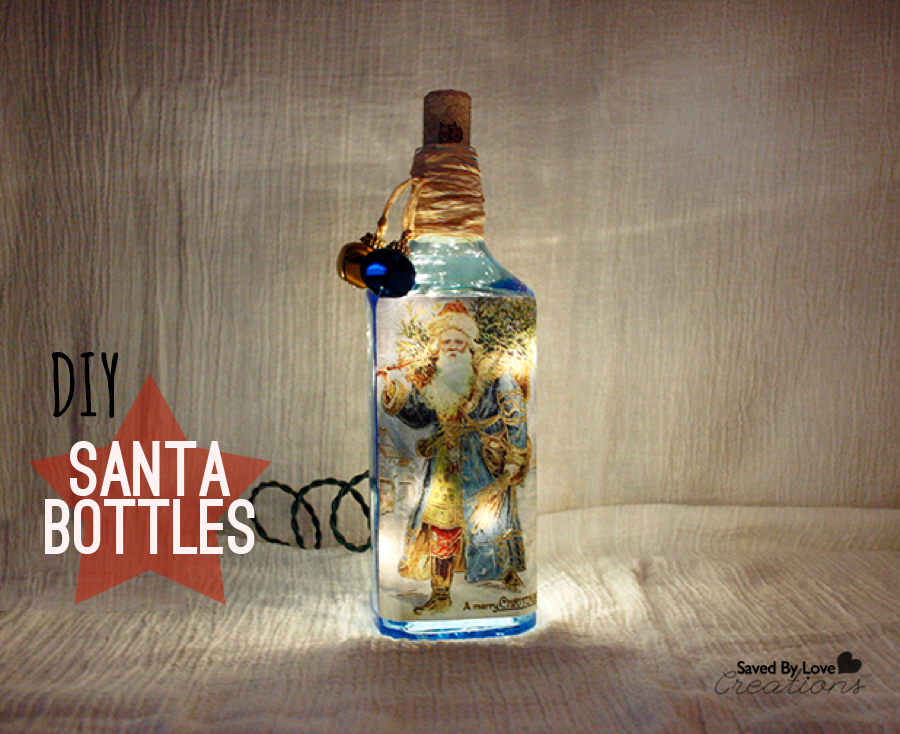
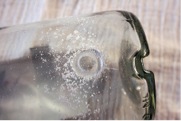
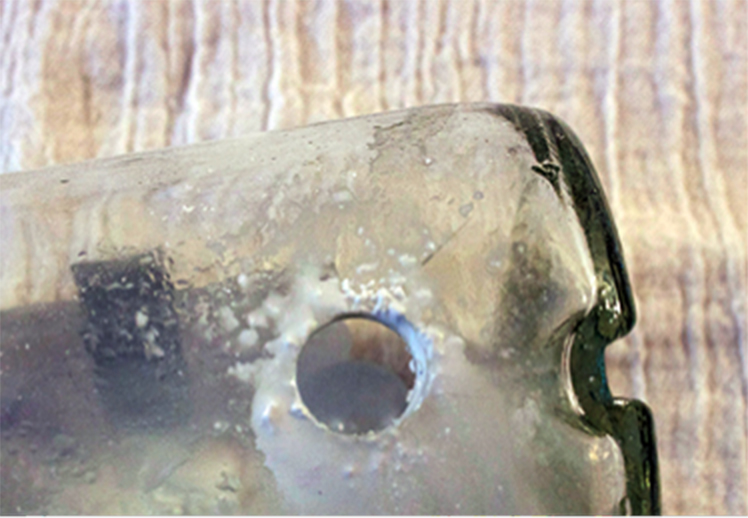
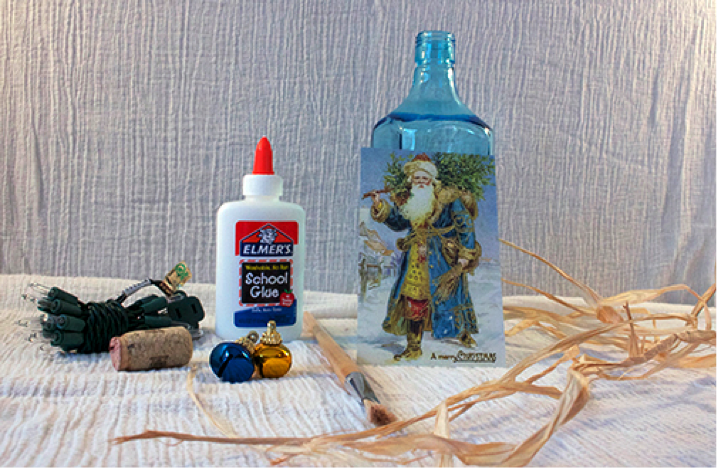
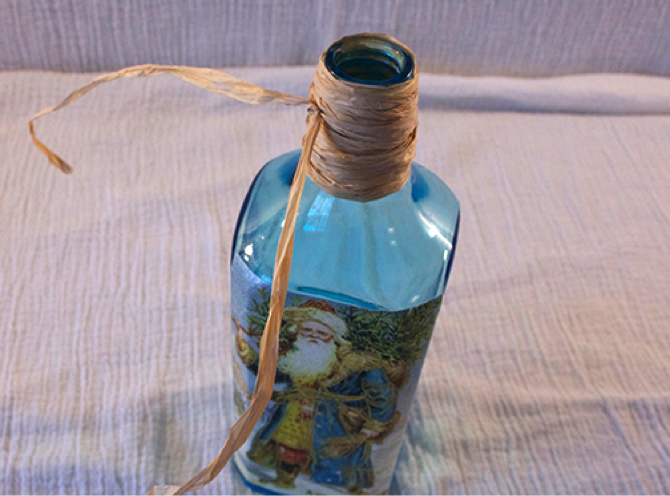
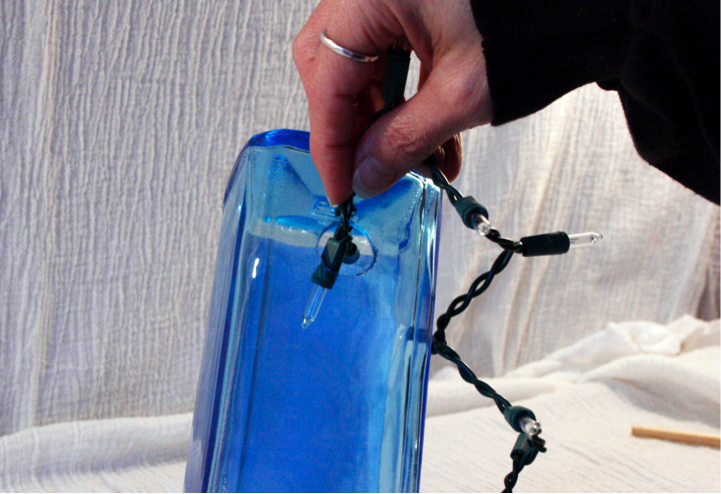
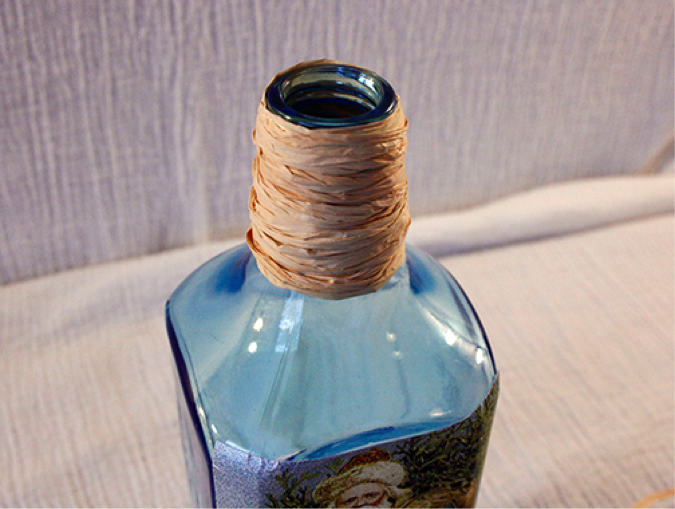
This handmade Santa light-up bottle adds a warm and cozy feeling to any space for the Christmas season. This project requires a recycled bottle and drilling a hole in the lower backside of the bottle. Also required is a fun search for a Santa image. The choices are endless, ranging from recycled Christmas cards, magazines, printed images, and the imagination goes on. Most importantly don’t forget a strand of Christmas lights. Now let’s get started and enjoy the fun.
Materials for drilling a hole in glass

Directions

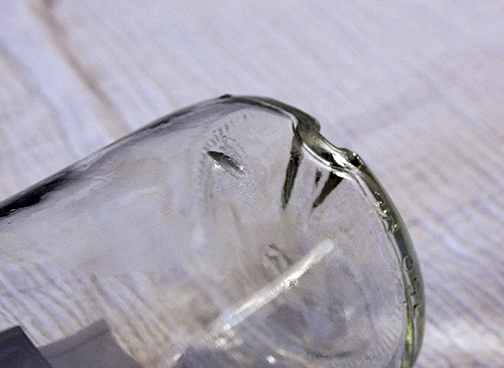

Tip: I have also seen websites online where you can purchase predrilled bottles from suppliers.
Materials for Santa bottle
Tip: If the inside of the bottle has any residue from the drilling process you can tear off a small piece of a cleaning cloth and swish it around with the water in the bottle and that will help to rid of it.
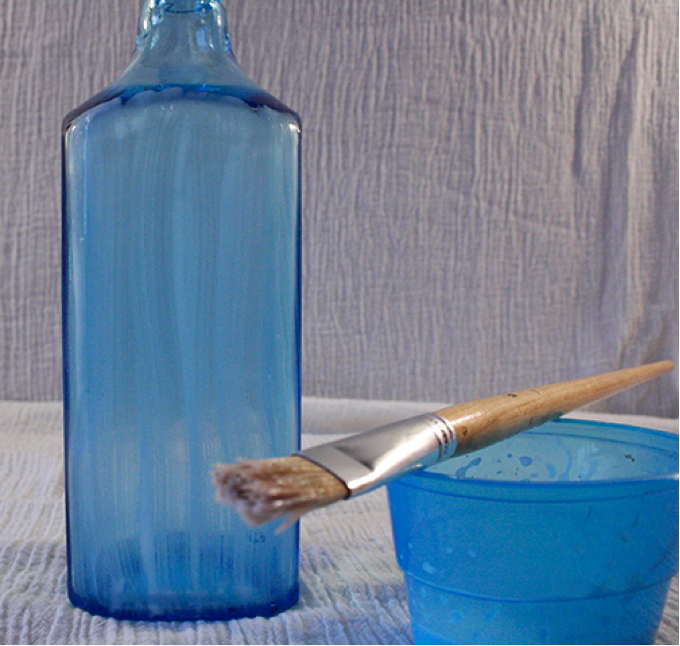
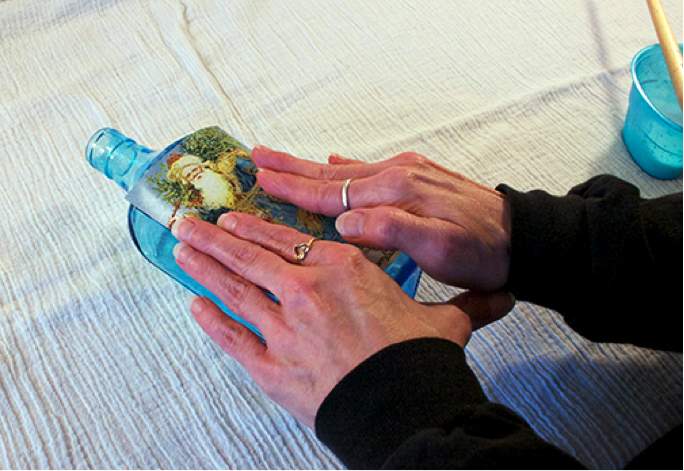
Measure the Santa image up to the bottle to insure the placement of the image will be where you want it. Using your paintbrush brush glue on the area where the image will be placed. Starting from the center of the image place your image on the bottle and gently glide your fingers from the center to outer edges of the image. Once you have the image glued down brush some more glue over the top of the image. Start this from the center working your way out as well. If any bubbles occur on the image you can smooth them out with your fingers from center to outer edges. Allow image to dry. Note: Once dry you can add glitter or a coat of crafting varnish on the Santa image.


