50+ Things to Make From Drop Cloth

[pinit]

[pinit]

over 50 Drop cloth projects to make @savedbyloves

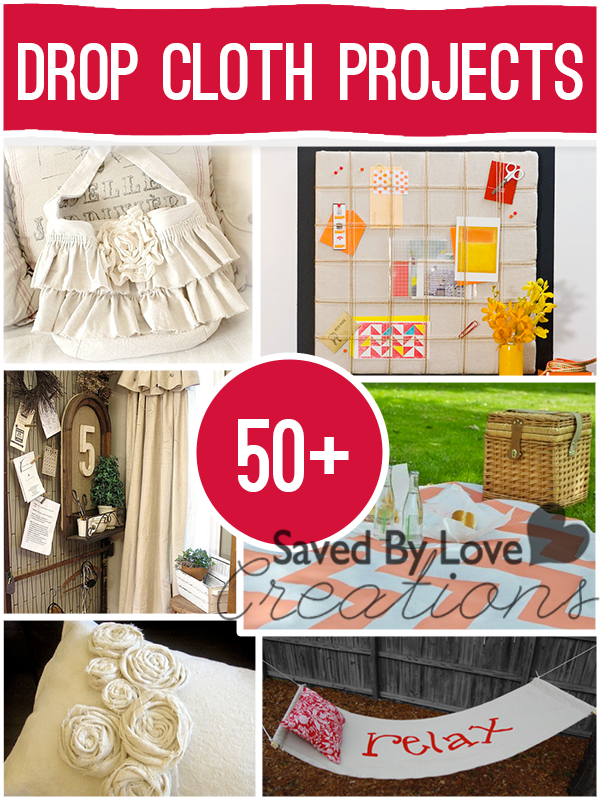
Drop cloth painters tarp is a great material for home decor and crafts.  It has that natural color and canvas texture, is inexpensive, and easy to paint, sew, stencil and swirl into a host of beautiful creations.  I find it to be as appealing in decor as burlap, but much easier to do things to, which is why I lean towards it.   Today I will showcase some of my favorites, followed by the complete list of over 50 drop cloth projects to make.

Make #DropCloth #DIY #Pumpkins #Thanksgiving Decor

Lucy from Craftberry Bush knows how to drop cloth her way to beautiful white pumpkin decor.  Super easy project, with a clean, crisp fall feel.

#DIY #DropCloth #Crafts to make #50+ @savedbyloves #Decor

At Attempting Aloha, see how genius DIY momma Charlie created scrabble tile wall art with drop cloth.  I love scrabble as a game, and scrabble tiles as jewelry waiting to happen.  I am also a fan of using what you have on hand and the creativity that comes from that necessity.  Charlie was determined not to purchase new supplies for this, so she made do, and then some!  Her tutorial reminds me that I must try freezer paper transfer.  She makes it look super easy.

If only I could afford to fly Donna from Funky Junk Interiors to my home for some renovation.  She takes the fact that she doesn’t sew, and turns it into gorgeous, no sew DIY drop cloth curtains.  Again, making do leading to amazing design.

#DIY #DropCloth #Crafts to make #50+ @savedbyloves #Decor

One of the first projects that came to mind when starting this round-up was Beckie at Infarrantly Creative’s glittery Christmas ornament pillow DIY.  Simply beautiful.

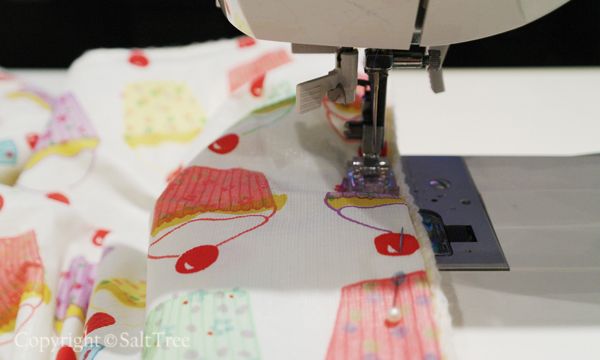
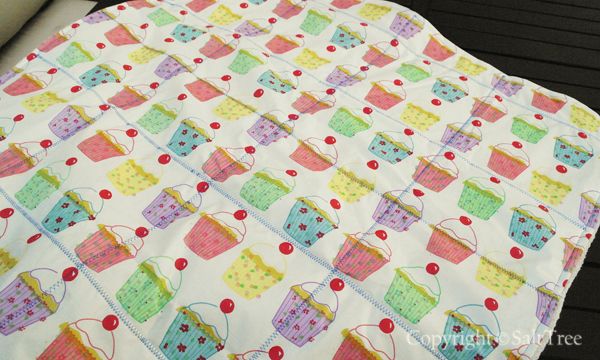
Relax in style with this DIY drop cloth hammock from My Magic Mom. Basic sewing machine skills and the desire to take a nap are needed.

Run to the hardware store for some canvas painters tarp, or order 9×12 feet of drop cloth on Amazon for $20.  That is a lot of fabric.  Here is what to do with it…


Upcycled Sweater Cowl DIY

Make Upcycled Sweater Cowls with Steph at Stuff Step Does, featured @savedbyloves

[pinit]

Winter weather is here, and it is time to start thinking about cowls.  Over at Stuff Steph Does, learn how to upcycle your old sweaters into this cozy neck warmer.  What a perfect project for a Christmas gift.  Grab that pile of sweaters and get going.

Make a Fall Infinity Scarf

Fall infinity scarf DIY By Desiree' featured @savedbyloves

[pinit]

I found a cool free infinity scarf pattern at Sweetest Keepsakes that I just had to share.  Go see how Desiree takes a couple of yards of knit fabric and creates this beautiful autumn accessory with just a few simple steps!

Guest Post: 20 Ways to Reuse Old Bed Sheets

[pinit]

20+ Bed Sheet #Repurpose Ideas @savedbyloves

[pinit]

In these times of economic uncertainty, it is more important than ever to get creative. Instead of throwing something away, it is time to reuse it, recycle it, and make it into something new. That shoe box? A great place to hold your stationary. Those dried up mushrooms? Perfect to make a mushroom stock for cooking. There is almost nothing out there that cannot be turned to a better use. Old bed sheets may seem like they should be thrown away, but that is thinking inside the box. Instead of tossing them, put them to better use. Here are twenty ideas to get you started, but feel free to do something entirely different!

1. It’s almost Halloween so that means you can turn your bed sheets into a costume, one of the oldest, most well recognized costumes out there: Make yourself into a ghost!

20+ Bed Sheet #Repurpose Ideas @savedbyloves
Source: www.cafemom.com

2. If a ghost sounds too scary for you, think about creating a toga. Throw a Halloween toga party and invite all your friends! Or throw a toga party any other time of year. Great step-by-step instructions here: http://www.wikihow.com/Make-a-Toga-out-of-a-Bedsheet

20+ Bed Sheet #Repurpose Ideas @savedbyloves
Source: www.wikihow.com

3. Make some aprons for yourself – they are meant to get dirty anyway, so why not use some old bed sheets to make them!

20+ Bed Sheet #Repurpose Ideas @savedbyloves
Source: www.craftyminx.com

4. Turn your old bed sheets into curtains for your windows. If you have patterns, use them to get even more creative! Cut out shapes and sew them on. Check out this handy tutorial from Fun Frugal Mom.

http://www.fun-frugal-mom-survival-tips.com/how_to_make_curtains.html

5. Cut up your old bed sheets and use them as cleaning rags. This is doubly good for the environment because it saves the sheets and stops you from using paper towels.

6. Use your sheets to line your pet’s crate – they might be too old for your use, but your dog won’t mind.

7. Store your old sheets in your car trunk so that you will always have them on hand for impromptu picnics!

20+ Bed Sheet #Repurpose Ideas @savedbyloves
Source: www.blog.babble.com

8. Use the sheets as drop cloths for your next painting or other messy creative project to protect the floor.

 9. Donate your sheets to a local charity. They are probably less picky than you are and won’t mind that they are old as long as they are clean!

10. Save your sheets to use in the winter to cover plants and protect them from frost.

11. Cover furniture in unused rooms in your house. The sheet will protect the furniture from accumulating dust, so you don’t have to keep cleaning it.

12. Turn the old sheet into a tote bag. Use it at the grocery store instead of a plastic disposable one. Check out this helpful tutorial from Craft Stylish.

http://www.craftstylish.com/item/39876/how-to-turn-old-sheets-into-shopping-totes/page/all

13. Build a tent in your living room! Or make it a teepee and teach your kids about Native Americans.

20+ Bed Sheet #Repurpose Ideas @savedbyloves
Source: www.thesoho.blogspot.com

14. Transform the bed sheet into a bed skirt!

15. Make a rag rug – it never goes out of fashion to be frugal! My favorite design is this one from the lovely Elizabeth Anne. http://www.elizabethannedesigns.com/living/2009/04/09/craft-braided-rag-rug/

 20+ Bed Sheet #Repurpose Ideas @savedbyloves

16. Use the sheet for a skirt for your Christmas tree – holiday season is just around the corner after all!

17. If only part of the sheet is damaged and the rest is in good condition, turn it into a pillow case.

18.  If your sewing skills are just basic ones, turn the sheet into a new laundry bag – it is one of the easiest sewing projects out there!

20+ Bed Sheet #Repurpose Ideas @savedbyloves
Source: www.ihavetosay.typepad.com

19.  Make a new cover for your ironing board. It will make ironing feel less like a chore if your ironing board is covered in a funky new pattern.

20.  Use the least faded parts of the sheets to make a cover for a bulletin board. You can still pin anything you want on top of it, but now the background is more fun thank plain old cork.

About the Author: Elena Morgan is a thrifty, DIY mom, committed to making the world a better place through recycling. When she’s not repurposing household items, you can find Elena reviewing bedding, furniture and home décor. Click here see some products she recommends!

Make a Skirt from Lace Curtain

How to Make a Skirt from an Old Curtain by Wilma

I found this adorable skirt fashioned from thrifted lace curtains over at By Wilma.  What an adorable, vintage feel.  She makes it look super simple to create.  Even someone horrified of their sewing machine (myself included) could tackle this project!

Simple Beginner Skirt DIY

Simple sewing tutorial at Shrimp Salad Circus

This sew a beginner skirt tutorial at Shrimp Salad Circus is a must do sewing project.  I am loving the color, and the simplicity.  If you are a beginner like me, this is right up your alley.

Guest Post: Cute Toddler Mattress Topper

http://salttree.net/

Hello everyone!  My name is Amber and I blog over at SaltTree.  Food, family, crafting and all things DIY is what you will find there.  I do hope you will come by for visit.  I’m sure you will find something you like!

Thanks so much to Johnnie for having me guest post here on Saved By Love Creations.  As a reader of SBLC, I am honored to be posting here!

Often, we create out of necessity.  Having children usually kicks that into overdrive, especially babies and toddlers.  I know all of you mothers are nodding your heads in agreement!

We very recently transitioned our 20 month old son to his big boy bed.  Foster is very tall (like his Mom & Dad) and could escape his crib.  Needless to say, it was time to switch!

We put his bed together, popped in the new mattress and made it up for the night.  It was then that I realized I didn’t have a protector for the mattress.  I thought… “he should be fine for one night… he probably wont leak his diaper”…. wrong!  First night and the mattress was christened.  I should have known better.

The next day, I made a trip to my local dollar store to get some supplies.  A 30×30 inch blanket from the baby section, and a flannel backed vinyl tablecloth from the kitchen aisle.  I couldn’t resist the cupcakes!  I was now armed with everything I needed to make my own, $2 mattress protector.  This project took approximately 15-20 minutes to complete.  A do-able nap time project indeed.  Here’s how!

Spread out the table cloth and lay the blanket out over top of it.  Cut out the table cloth so it is an inch or so larger then the blanket, all the way around.  I had enough table cloth left over to make a second mattress protector.  It’s always good to have a back up when one is in the wash.

Pin the back side of the blanket and flannel side of the table cloth together, folding under the table cloth so it ends up with a finished looking edge.

Sew the fabric together all the way around.  I used blue thread so you could see what I was doing, but you may want your thread to blend in.  In the end, it’s going under the bedding, so nobody will really see it.

I added extra stitching in a grid pattern across the fabric so that it wouldn’t shift or bunch up while on the bed or in the wash.

Done!  A crinkle free, soft mattress protector for your toddlers bed.  The table cloth side will keep things dry, the blanket side will absorb any leaks, keep the pad from shifting under the bedding and make it softer to lay on.  (Use it blanket side up).

This would also be great to take on an overnight trip to slip under the bedding.  I’m sure your friends / relatives would appreciate it!

For washing, I recommend cold wash, hang to dry.  Remember, sunshine is the best bleach.

Thanks again to Johnnie for having me here at Saved By Love Creations!

I look forward to seeing you over at SaltTree!

French Seam Envelope Pillow Covers

How to Sew Pillow CoversDo you want to refresh the look of your pillows and learn a fancy seam technique?  The French seam used in these envelope pillow cover means there are no raw edges, even on the inside cover’s inside.  The look is professional and neat.  No stray frayed ends.  Not that they are a huge deal since they would be on the inside, but the french seam is super easy.  If you are going to the trouble to sit in front of your machine, there is really no reason not to do it this way. I am a very new seamstress, so this tutorial is beginner friendly. Not to mention, it uses an old pillowcase and a tea towel, so you can probably make it now with things you have on hand.  If not, the supplies are no further from you than the nearest thrift store or Dollar Tree.

Easy Pillow Cover Tutorial

Supplies:

  • Fabric for front and back of pillow; Big enough to cut the following; for the front, 17 inch square and for the back 2 rectangles 17 x 12.75 inches each. This is for a 16 inch pillow form or throw pillow, with an extra inch for seam allowance.  If yours is a different size square, no problem.  Say you have a 20 in pillow form.  Cut your front square 21 in x 21 in (you don’t need to worry about adding seam allowance since the pillow will fit in and be nice and full).  For the 2 back rectangles, one dimension is the same as the length of your square sides (21), and the other is that length multiplied by 3/4.  For a 20 inch pillow, that would be 21 x 15.75  inches.

***For my fabric, I found an old shabby pillow case (the beige color on the back) and a cool striped tea towel for the front.

  • Self healing cutting mat and rotary cutter
  • Quilting ruler or other straight edge
  • Scissors
  • Threaded sewing machine in matching color to your fabric
  • Iron
  • Ironing board
  • pins
  • fabric pencils or air soluble disappearing marker

Instructions:

  • Cut your fabric on your cutting mat.  I like to measure and draw the lines on the back of the fabric.  In this case, the front and back of the tea towels are pretty indistinguishable.  If yours has a clear front and back, turn it over so you are looking at the back, and use your straight edge to draw the 17 inch square.  Then cut it with your straight edge and rotary cutter, making sure to cut away from yourself.  Here is my 17×17 square…
  • How to Sew PillowsSteam press the back fabric to smooth out wrinkles.  Now you are ready to cut your back pieces the same way, folding your fabric over on itself so that you can cut both rectangles at the same time, since they are the same size…


NOTE
:  If you are using an old pillow case or other fabric with seamed edges for the back, make sure your cut so that you have the the seamed edges as the long edges on your rectangles.  That way you will not have to seam the back flaps.

How to sew pillows

Sewing pillows

  • Now you are ready to pin the front to the back.  You will have WRONG sides together.  This is unusual, I know.  You want to be looking at the right (fabric side you want to end up showing in your final project) sides of the fabrics when they are pinned together for the french seam.  Pin about every inch or so, close to the edges, all the way around.  Sew straight stitch length setting 2.5, stopping to remove each pin before you get to it, pivoting at each corner.  (I don’t like sewing over pins, it stress me out).  Back stitch for stability when you get back to where you started.

Easy sewing project

Easy sewing project

  • Press your stitch line to set the stitches.
  • Now cut around the edges, very close to the line you just stitched.  This doesn’t have to be perfect, it is more just to get rid of the bulk of the excess fabric outside of the seams.  BE CAREFUL.  You don’t want to cut through what you just sewed, but if you do, just go back and sew that area again.

Easy sewing project

Easy sewing project

NOTE:  I am far from perfect in my cuts and stitch lines.  These things will look great, even if you are a little off.  Don’t be hard on yourself!

  • Now you are almost done!  Turn the pillow inside out (so that the wrong sides are now on the outside.  Use a bamboo skewer to gently push out the corners, being careful not to poke all the way through.  Press the piece, then go back to your machine and sew 1/4 inch from the egde all the way around the pillow.  This step hides the raw edges, so that when you turn the pillow cover the right way, no raw edges will be on the inside!  Pivot at each corner, keeping your 1/4 distance from the edge.  Reverse stitch when you get back to the starting point and you are done.  Cut the thread, turn your pillow right side out and push out the corners with your skewer or a not too sharp pencil.  Press if you want.  Shove your throw pillow or pillow form in there and beam with pride at the beautiful home decor accessory you just made from a towel and raggedy bed linen.  Yay you!

Easy sewing projectSee the stenciled word pillow from a couple of weeks ago.  I would love your feedback.  I am just getting to know my machine, and have never written this involved of a sewing tutorial.


Old T-shirt to Skirt {Who Cares if it’s Winter}

Old T-Shirt Crafts

I am soooo excited about this project!!  I really suck at sewing.  My sewing machine completely freaks me out.  I get way stressed when I think about threading a bobbin, and a gather stitch???  Forget it.  Nuh – uh.  Well guess what… I threaded my bobbin and turned an old T-shirt of hubby’s into a skirt, and used a gathering stitch in the process.

Here is how I did it…

Supplies:

  • Old T-shirt with a circumference 1/3 larger than your measured waist
  • Sewing machine with thread matching your fabric
  • 3 inch elastic band (I got mine from an old pair of thrift store leggins)
  • Fabric pencil
  • Straight edge
  • Fabric scissors

skirt from old t-shirt

Instructions:

  • Lay your t-shirt out and smooth it, making sure the bottom edges are lined up.

Recycled t-shirt craft

  • With your fabric pencil, draw a straight line horizontally across the T-shirt just beneath the armpits.

Recycled T-shirt crafts

  • Now cut across the line with your fabric scissors.

Recycled T-shirt skirt

  • 1/4 inch from the top of T-shirt segment you just cut, sew a gathering stitch (long straight stitch with low tension), leaving long thread tails.  Stitch again 1/2 inch from the top edge (so 1/4 inch below the line you just stitched).
  • Now for the waistband… Mine was already stitched at the edges since I cut it off of a pair of leggins.  {If yours is not, wrap it around your waist and mark where it feels snug (but not girdle snug), then mark 1 1/4 inch past that to account for seam allowance of 5/8 inch along both sides.  Align the ends and stitch, then stitch again 1/4 inch from the first stitch.  Zig zag finish the raw edges.}

skirt from old t-shirt

  • Right sides facing up:  Now position your waistband lower edge 5/8″ past the upper edge of the skirt  and pin.
  • Gently pull the lower thread tails to gather the upper edge of the skirt until it is the same circumference of the waistband.  Pin the heck out of it.
  • From the wrong side of the skirt, zig zag stitch over the gathering stitch through the band and skirt.

T shirt to Skirt DIY from @savedbyloves
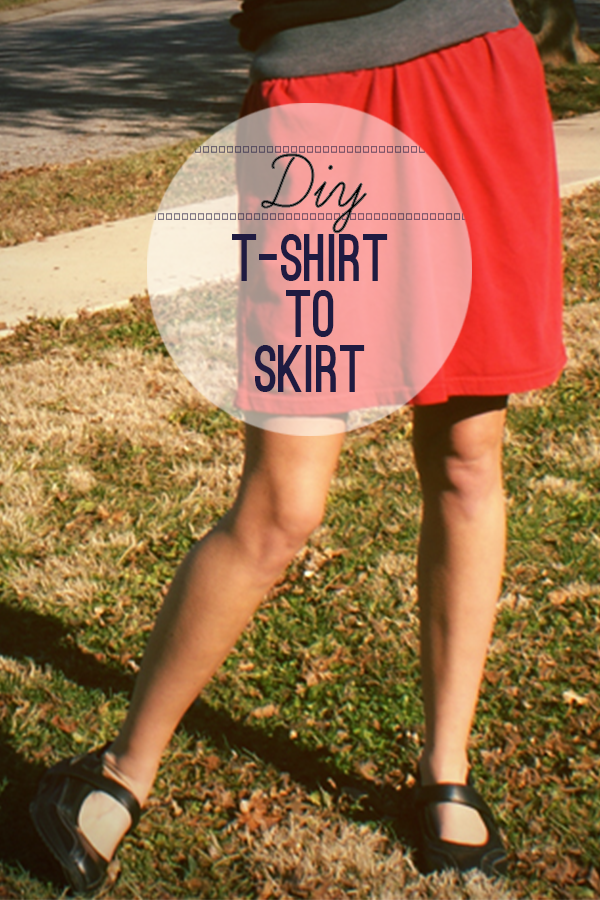
Then you are done.  Wear that bad boy out on the town.  I can’t believe it is 50° here in the middle of December.  I think that, mixed with the sunshine, contributed to my sudden urge to make a skirt.  Thanks for following along.  Let me know if you have questions.

Burlap Tag Embellished Star Ornaments

Handmade Christmas Ornaments

{Originally shared at Sew Woodsy}   Today I will share with you my easy burlap tag embellished fabric star ornaments.

Supplies:

  • White fabric; I used leftover tea towel scraps
  • Fabric scissors
  • Burlap
  • Printer
  • Sewing machine or needle and thread
  • eyelets and eyelet setter
  • string or twine for hanging
  • Pencil for tracing template

Instructions:

  •   You are going to cut 4 layers of fabric at once, so fold fabric accordingly before tracing star shape.  Print and cut template star and trace onto fabric with pencil.

Star Christmas Ornament

  • Cut out star shape from 4 layers at once.

Star Christmas Ornament

  • Sew along outside of star with machine or by hand.  I used a cream colored thread and my machine.  You could use different colors for cool effect to match your decor.

Star Christmas Ornament

  • Print words on burlap, cut them to fit your star, and stitch them in place.  If you have never printed on burlap, there are tons of tutorials out there.  It is easy.  Here are the words I used if you want to print them.

Fabric Christmas Ornament

  • For the hanging mechanism, I just poked a hole at the top, insert an eyelet and set it, then put the string through there.  If you want you could sew a loop of thread to the back and forget the eyelet.  I like the look of the metal with the fabric and burlap.

Fabric Christmas Ornament

That’s all!

Privacy Policy