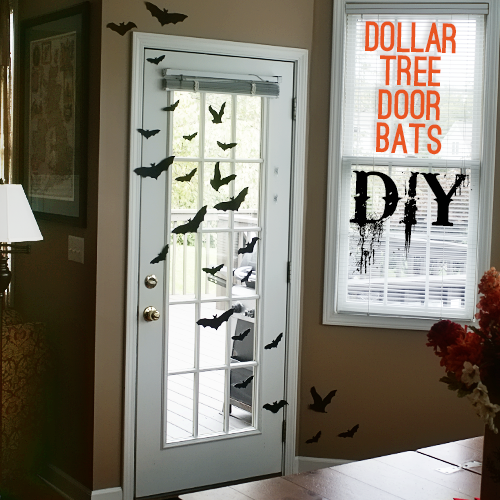
DIY Dollar Tree Halloween Door Bats & $100 Giveaway

[pinit]Printable Bats[pinit]

As you may know, Dollar Tree is one of my favorite places to go for creative project supplies.  I love wandering through the aisles letting my imagination run wild with ideas.  Just recently, I discovered Dollar Tree Value Seekers Club, which is packed with crafts, recipes, décor, tips, contests, insider information, frugal fun ideas, and other awesomeness.   You can join too, for free, and get a chance to win a $20 Dollar Tree gift card!   You will never run out of seasonal inspiration, as the creative content changes each month.  Just pick out a project, print the project sheet or save it to your phone, and then use it as your shopping list in the store!  Today I am sharing how I created this bat door using Dollar Tree supplies and a bat template I found while browsing the fun Halloween projects.  It is super simple and it cost just $3.

***I received compensation for this post.  All opinions are mine and honest!

DOLLAR STORE SUPPLIES:

Dollar Tree Craft Halloween

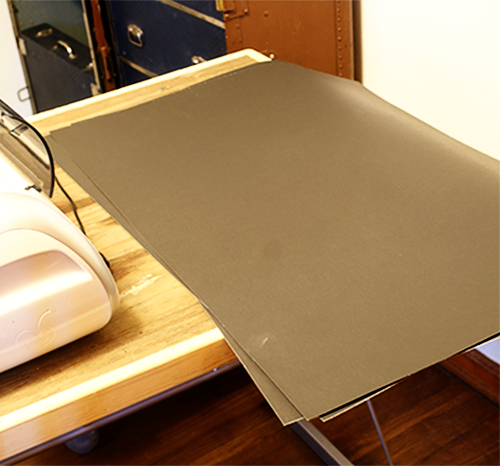
You can use Dollar Tree black poster board, construction paper or foam sheets for your bats; For the number of bats I made, I used 2 sheets of poster board

Scissors or Die cut machine with software you can use to cut imported images

Bat Template Available at Dollar Tree Value Seekers Club

Printer unless you are using die cut machine

Clear tape


TUTORIAL:

Dollar Tree Crafts

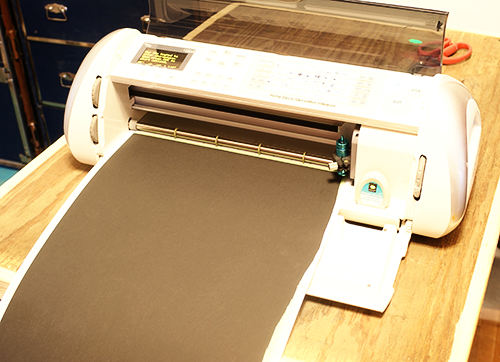
Download and print the bat template from Dollar Tree Value Seekers Club “Front Door Bat Printable” project, or download and open in your die cut machine’s software.  I used Sure Cuts A Lot (which I don’t think is available anymore) and my Cricut machine.

DIY Dollar Store Bat Silhouettes

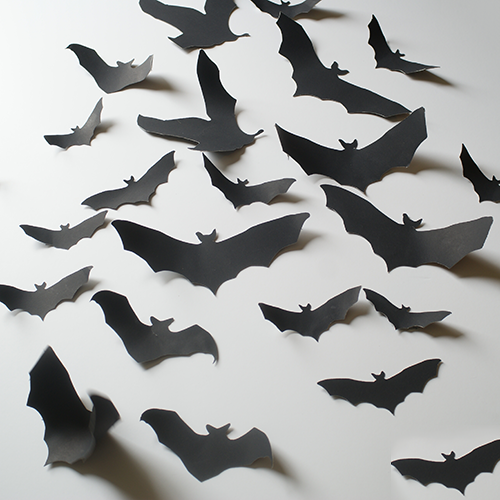
If not using die cut machine, cut out the bats on the free template with scissors,tape to your black poster board and cut around them to create your bats.

How to Decorate for Halloween

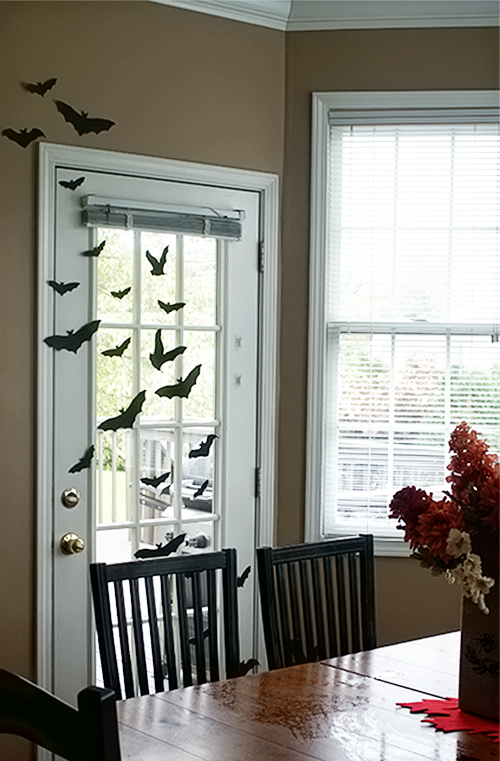
Tape your bats to the door and enjoy!

I love the look and the simplicity of this project.  Join Dollar Tree Value Seekers Club for it, and tons more inspiration!

$100 Dollar Tree gift card giveaway

Want to win $100 from Dollar Tree?  Sign up for Dollar Tree Value Seekers Club and leave me a comment below this post telling me which project you want to try if you win!  Good luck.

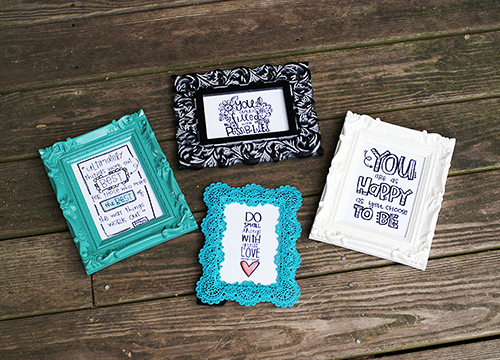
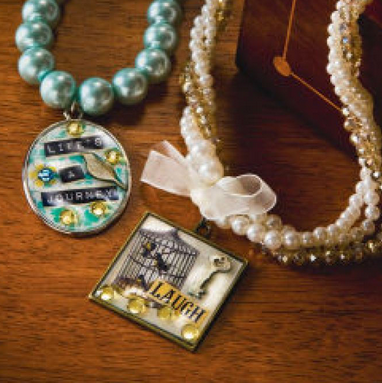
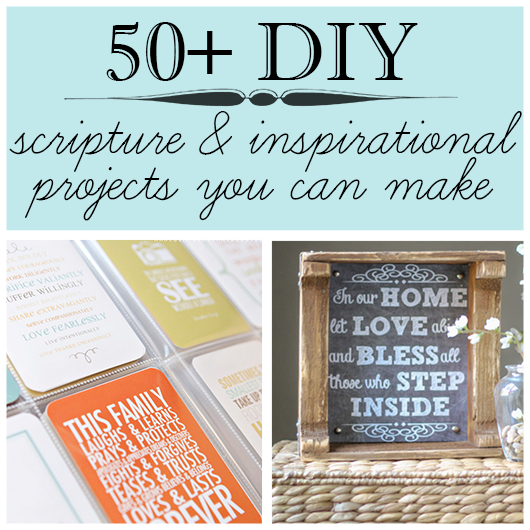
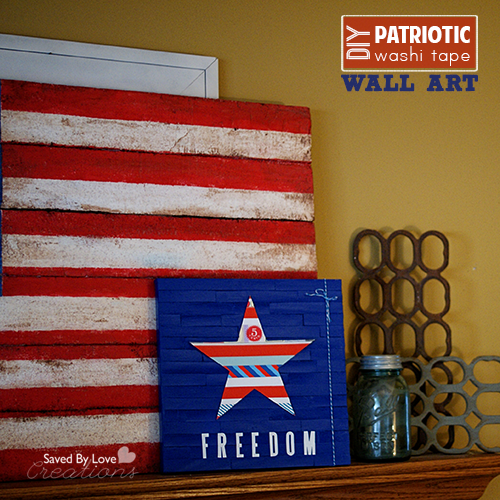
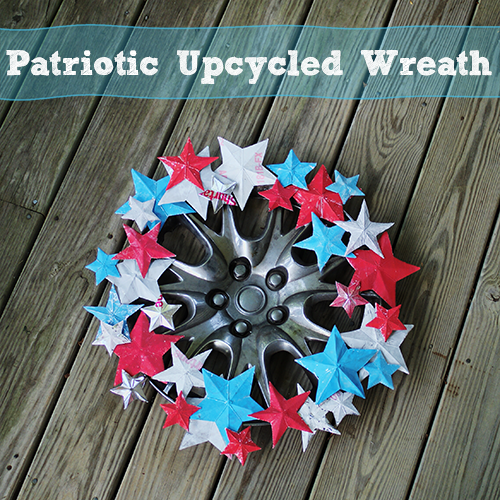
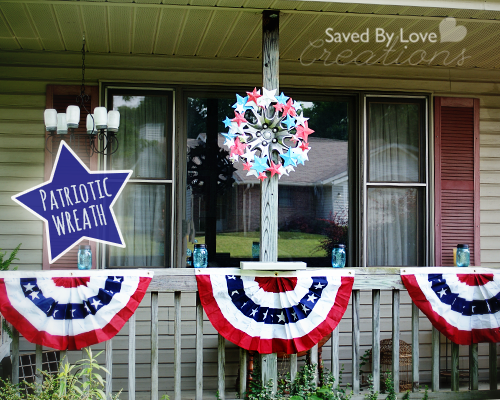
Here are some other great projects inspired by Dollar Tree Value Seekers Club:


Make Paper Mason Jar Garland

[pinit]Easy DIY Mason Jar Garland[pinit]

Mason jar crafts have become a phenomenon over the past 2 years, to say the very least.  I, for one, am a huge fan of incorporating them into my home decor whenever possible.  You combine mason jars with my papercrafting obsession, and it is almost more excitement than a blogger like me can withstand.  Well, those two worlds collided for me in this Sizzix Canning Jars Die by Eileen Hull.  Today I am sharing how I used it on some recycled cardboard and fall patterned scrapbook paper to make this fun garland adorning my headboard.

Mason Jar Decor

Eileen Hull Picket Fence

I told you about Eileen Hull’s Picket Fence Sizzix line a few months back, and am having as much fun with it as I predicted I would!

For this project, you will need:

Eileen’s Sizzix Canning Jars, 3-D

Harvest Deight Fall Paper

Fall or other patterned scrapbook paper; I used Recollections Harvest Delight

Corrugated Cardboard

Paper Cement

Jute or other twine

Mini Clothespins

Tim Holtz Distress paint Silver

Ranger Distress Ink Vintage Photo

3D foam adhesive squares

TUTORIAL:

Die Cut the larger jars out of paper and cardboard

Adhere paper to cardboard with Paper Cement or favorite adhesive

Cut tops out of corrugated cardboard and adhere to jars with 3D foam squares

Paint mason jars with distress paint

Paint tops with silver distress paint, or leave as they are.  they look cool either way!

Mason Jar Garland DIY

Ink edges with distress ink on foam applicator and attach to twine with clothespins.

I love my garland, and have several more projects in mind for this die alone.  Make sure you visit Eileen at her blog for tons of inspiration!  You will want to set aside a chunk of time and be ready to watch your creative project to do list grow!

Make Quick & Easy Inspirational Doodle Art

[pinit]

Mother Theresa artwork


[pinit]

How excited was I to discover that Unity Stamp Company has a new line of stamps designed by Stephanie Ackerman?!  The answer is very… much… tons.  I ordered several from this line and others.  They are full of inspiring words and I couldn’t wait to get creating with them.  Today I am sharing the easiest project out there.  Just stamp, scan, enlarge, print, cut out and frame!

Inspiring artwork tutorial

Inspiring art tutorial

You can color with copic markers if you want, or scan and open in Photoshop to color digitally.

Stamping techniques

For this one, I added shading in Photoshop with the drop shadow function.  Stephanie has a great class (several great classes, actually) teaching you how to shade the letters.  I told you all about it my Marker Art post over the winter:

This was my first class from Stephanie, and I would take them all if I had time!  She has a wonderful way of explaining her techniques so that about anyone can create lovely art in no time.

Make your own stamp art with Unity Stamps @savedbyloves @unitystampchick

I love the Mother Teresa quote!  I colored the heart with red copic markers in 3 shades before scanning and enlarging.

Framed Scrapbook Paper Art TutorialThis one I scanned in without color and added the yellow/blue-green in Photoshop.  Pretty cool because I can just change it if I don’t like the outcome.  That is the biggest perk of digital art in my opinion!

Framed stamp artwork

I think next I will go the other way  with these designs and shrink them down for creating a soldered pendant, or shrink film jewelry!

How do you use stamps in your artwork?

This is not a paid post!  I just wanted to share Unity Stamps and Stephanie’s new line because I love them.

Over 60 Things to Make From Paper

[pinit]

Things To Make From Paper #diy #homedecor #upcycledjewelry @savedbyloves #papercrafts

 [pinit]

Is it just me, or do you all love paper to bits too? I switch mediums and techniques all the time, but paper is a constant. I don’t scrapbook, but you wouldn’t know it by looking at my studio. Piles and piles of decorative paper adorn the shelves, and don’t get me started on the stacks of magazines, newspapers and vintage sheet music. You don’t have to spend any money to make gorgeous jewelry and home decor if you go the recycled paper route. Check out some of my favorite diy paper projects, and share with me some of yours!


Make Mixed Media Mod Podge Necklaces

[pinit]
DIY Mixed Media Mod Podge Necklaces from Michael's, featured by @savedbyloves[pinit]

I found these cool new pendant blanks by Mod Podge at Michael’s a couple of weeks ago, and have been waiting for some inspiration (and time) to create with them.  This Mod Podge® Antique Urban Pendant Necklace Tutorial at Michaels.com is just the nudge I needed.

Have you created with these pendant blanks and papers?  If so, do share.

For more jewelry ideas, visit our Paper Jewlery Projects Roundup:

50+ DIY Scripture/Inspirational Projects to Make

[pinit]

50+ #diy scripture art and inspirational decor tutorials you can make @savedbyloves

[pinit]

I have always loved scripture verse and inspirational art, which is what today’s round-up contains. Having words that feed my soul displayed on the walls or dangling as a charm from my necklace helps keep me centered when life pulls in all of its directions. I am excited to share with you 50+ of my favorite DIY scripture art and inspiration projects. If you have a project that fits, send me a link so I can add it to the collection!


Easy Mini Pallet Patriotic Canvas Art


[pinit]
Easy diy patriotic wall art #washitapecrafts #washitape #fourthofjuly @savedbyloves

 [pinit]

While we are on a roll with patriotic decor around here, I thought to keep the momentum going with a quick and easy washi tape stars n’ stripes canvas.  See how to use craft sticks for a mini pallet on canvas that you can dress up to fit any occasion!

Easy diy patriotic wall art #washitapecrafts #washitape #fourthofjuly @savedbyloves

SUPPLIES:

How to make washi tape art diy

Jumbo Craft Sticks

Fabri-Tac craft glue

An old canvas (can be used; grab one for cheap at a garage sale or thrift store)

Star Template printed to size, and scissors

String, letter stickers, other embellishments

White Gesso

Sponge brush

Acrylic paint in choice of colors

Washi tape in coordinating colors and prints

Scrap white card stock or cardboard

Foam mounting squares or other adhesive

TUTORIAL:

For this project, I updated the Easter Faux Mini Pallet Art I showed you before.  Head to that tutorial for how to make the canvas.

Recycle old art with spray paint

I took the bunny silhouette piece and spray painted with blue Krylon I had on hand.

free star template

 Right click this star image and print to size for your project.

how to make patriotic decor #fourthofjuly

Apply strips of washi tape to scrap white cardboard or card stock.  I used the cover flap for a scrapbook paper pad.  Cut out your star template and tape on top of washi tape stripes where you want your cut out to be.  Cut along template edge to get a washi tape striped star.

How to make easy diy wall art

Adhere to mini pallet canvas with foam mounting stickers.  Embellish with stickers for words, baker’s twine, buttons and more!

For more patriotic project ideas to get you inspired, visit our 50+ DIY Patriotic Crafts, Jewelry and Decor Roundup:

Upcycled Hubcap Patriotic Star Wreath

[pinit]

Upcycled #repurposed hubcab to patriotic star wreath #timholtz #distresspaint @savedbyloves[pinit]

I stopped and pulled a U-turn to rescue a hubcap roadside a few months ago, knowing I would use it for something.  This upcycled soda box star wreath was the perfect project for it since I was going for a grungy americana look.  This was super easy to make and I had everything on hand.  I used my Sizzix machine to cut the stars, but fear not, you can do this project without all that.

Make an upcycled patriotic americana star wreath with @savedbyloves #sizzix

SUPPLIES:

Recycled Hubcap to patriotic americana star wreath @savedbyloves

Hubcap or other wreath form

Empty cereal/soda/food boxes

Foil Tape (available at your local hardware store)

Tim Holtz Distress Paint; Barn Red, Salty Ocean and Picket Fence

Tim Holtz 3D Star Die Sizzix

Tim Holtz Star Bright Die and Sizzix Machine, or 3 D Star Templates and scissors

Hot glue gun and sticks or other adhesive

TUTORIAL:

PatrioticStarWreath7

Cut sheets from cardboard boxes and cover with foil tape, smoothing out wrinkles with your hands.

free 3d paper star template

Cut stars from foil covered cardboard using die or by hand with 3D star template like this one.  I made my stars in 3 sizes; 2 from the die and the middle size by hand from the template.  You can resize and print in small, med and large stars.

Why the foil tape, you ask?

I have made these stars in the past from aluminum cans, paper only, cardboard, heavy cardstock, grunge paper and chickens (I made the last one up).  The best result, in my opinion, in terms of shape and folds is cereal box thickness cardboard.  It holds the creases and 3D shape well, and is free.  Plus you are recycling.  Now doesn’t that feel nice?  Aluminum can stars are cool, but you bend them up while trying to make the creases, so they don’t look as nice.  The foil came into play because I love Tim Holtz Distress Paint on it, and I knew I wanted to use the red, white and blue for this project.  You could paint directly on the cardboard and skip this step if you wanted.  A happy accident happened when the red lettering on my foil tape showed through a the paint and I liked it.  I made a couple of stars with just the tape.

Americana 3D start wreath tutorial #fourthofjuly #patriotic @savedbyloves

Paint your stars as desired and let dry.

Upcycled #repurposed hubcab to patriotic star wreath #timholtz #distresspaint @savedbyloves

I started with the biggest stars, adhering them onto hub cab with 3D foam stickers.  Then I adhered stars to stars for the upper layers using hot glue.  Just play with the placement until you are happy with your design.

Make an upcycled patriotic americana star wreath with @savedbyloves #sizzix

For more patriotic project ideas to get you inspired, visit our 50+ DIY Patriotic Crafts, Jewelry and Decor Roundup:

How to Make a Paper Feather Wreath

Learn how to make this paper feather wreath by Lia Griffith, featured @savedbyloves

[pinit]

This paper feather wreath by Lia Griffith is just the accessory to top off your summer home decor.  Lia used 36 paper feathers and a 12 inch wreath form to make this beauty.  Head over to her post for the link to the leaf template and create your own inexpensive, fabulous wreath in colors that scream you.

To make it even cheaper, check out this aluminum can leaf wreath post where I showed you how to make your own wreath from from cardboard.

Speaking of paper feathers, check out how to make these earrings I shared recently.  Might as well cut 38 instead of 36, right?!

Sizzix Rose Charm Bracelet

[pinit]
Sizzix Charm Bracelet Tutorial using washi tape @savedbyloves

[pinit]

Today I am sharing how to make this washi tape rose charm bracelet at the Sizzix Blog.  There are so many ways to use these adorable charms, from bracelets like this one, to earrings, paper craft embellishments and more.  Come on over and make your own!

Privacy Policy