Knock Off Craft Store Easter Wreath

[pinit]#Easter Wreath #DIY from @savedbyloves

[pinit]

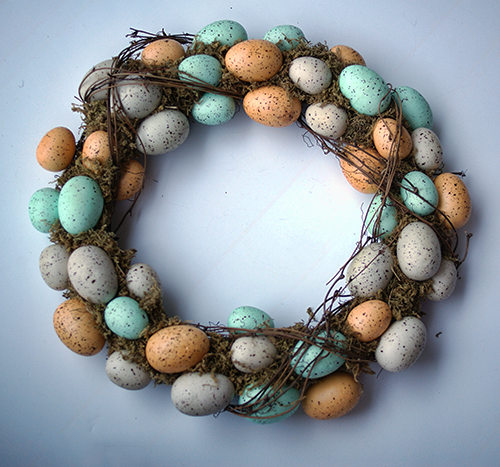
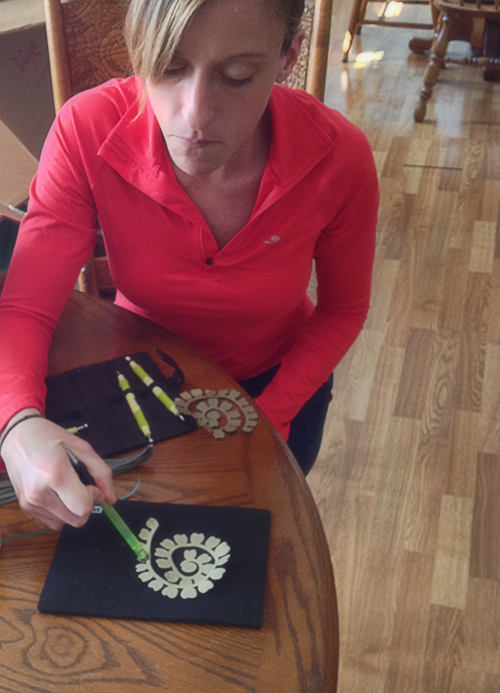
I saw this wreath a Joann’s a few weeks ago and decided I could make one.  Had I thought it through, I may have just bought theirs with a coupon, but where is the challenge in that?  I used a 16 inch grapevine wreath that I picked up along the way somewhere, some moss I believe I got at the dollar store, and speckled eggs from Joann’s.  My trusty glue gun holds it all together.  I kinda love it.
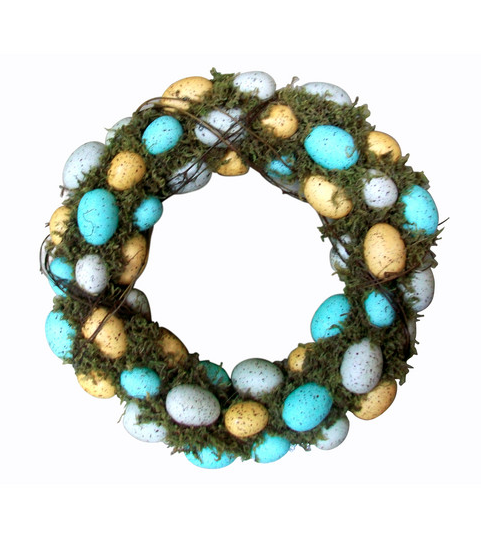
The inspiration:

Joann's Easter Egg Wreath

My Knock Off:

#Easter Wreath #DIY from @savedbyloves

Don’t forget to check out our 75 Easter Projects Roundup:

75 Easter Crafts to Make @savedbyloves

Paper Flower Topiaries With Sizzix

[pinit]

Make #Sizzix paper flower topiaries for #Spring @savedbyloves

[pinit]

Make #Sizzix paper flower topiaries for #Spring @savedbyloves[pinit]

3D flower dies from Sizzix are some of my favorite die cuts to use.  I was thrilled to find a new die this weekend while at Michaels.  These fun green and yellow spring topiaries are my first project using them.  This project is simple, but I won’t lie, it is not quick.  I had a little help from my sister and husband, who shaped petals for me as I rolled the flowers and pinned them to the topiary shape.

SUPPLIES:

Sizzix Sizzlits Die – Flower, Rose 3-D

Cardstock in your favorite colors

Glossy Accents

Straight Pins

Topiary Form (got mine at Walmart recently; you could use a stryofoam sphere and dowel rod)

Pot (Got mine at the dollar store last year)

Green moss or other filler

Stylus with large ball or other rounded end (like a pen or sharpie)

Foam pad or mouse pad

Tutorial:

Cut several, I mean way more than you think you’ll need, 3d rose shapes using the Sizzlits die linked above.  I used Coordinations paper in several shades of yellows and greens.  With the Sizzlits dies, you can only cut one piece of cardstock at a time, so get cozy.  I have done a similar project here with the Sizzix Originals 3D rose die, which cuts through several layers of cardstock at a time.  I really wanted to use this shape die though, so I just cut one shape at a time.

Shape the petals with a rounded end stylus ball, or whatever you have on hand that works.  I figured out I really liked the shape of the flower if I pushed in the 7 outer petals of the spiral, then flipped it over and pushed in the remaining petals.  I roll the flower into shape so that the outer petals of the spiral (which become the center petals of the 3D flower) curl inward towards the center like in a real rose.  The remaining flowers bloom outward like a blossoming rose.  I don’t have detailed pics of this, so I hope that makes sense.

This pic shows me starting on the outer petals of the spiral (central petals in final rose).

Shaping paper flower petals

To shape them I just press hard in the center, and draw tiny circles with my stylus ball.  The flower petal “cups”.  I do this for the first 7 petals, then turn the spiral over and do the same thing on the remaining petals.

Make #Sizzix paper flower topiaries for #Spring @savedbyloves

Roll the flower from the outer petals to the center, keeping the bottom strip at the base of the petals aligned.  When you get to the end, glue the tab you see at the center to the base of your flower.  I like to use Glossy Accents for this since it dries so fast and holds great with paper to paper.

Once I had 10 flowers made, I pinned them to the topiary with a straight pen through the center and continued this way until the spheres were full.

Make #Sizzix paper flower topiaries for #Spring @savedbyloves

Make #Sizzix paper flower topiaries for #Spring @savedbyloves

Faux Pallet Easter Canvas DIY

[pinit]

Make Faux Wood Pallet Art #Easter @savedbyloves

[pinit]

Today’s project is a fun, simple Easter decor DIY.  Use jumbo popsicle sticks  and an old canvas to create faux wood pallet bunny silhouette wall art.  The inspiration for this project came from Laura at The Shed Blog, and her Mini Pallet Art tutorial.  I loved her end result so much that it is now on my wall (an endearing story I shared with you here).

Make Faux Wood Pallet Art #Easter @savedbyloves

SUPPLIES:

Jumbo Craft Sticks

Fabri-Tac craft glue

An old canvas (can be used; grab one for cheap at a garage sale or thrift store)

Bunny Silhouette

Die cut machine or printer and scissors

Clear contact paper or vinyl for die cut machine

White Gesso

Sponge brush

Acrylic paint in choice of colors

TUTORIAL:

Head to Laura’s post for a detailed description.  Here is a photo montage of what I did.  She has some great tips for removing the paint between the craft sticks.

Easter decor tutorial Faux Wood Pallet canvas @savedbyloves

What do you think?  I love it and it is super inexpensive to create.  Won’t take you very long either.  This is a great project for each holiday.  Just swap out the silhouette for the current theme and make cool art for the whole year round.

Don’t forget to check out our 75 Easter Projects Roundup:

75 Easter Crafts to Make @savedbyloves

75 Great Easter Crafts


[pinit]Easter Craft Ideas

[pinit]

Easter is my very favorite holiday.  It celebrates the single most important event of all time, bringing with it the spring season.  It is here in just a few days, so get busy on those eggs, baskets and decorations.  This round-up will give you plenty of inspiration and ideas.  Happy Easter!!


{Guest Post} Easter Cards With Fabric

Easter Crafts DIY

Today, I am thrilled to bring you this adorable Easter craft from Paula at Sweet Pea.  I love the gingham fabric she chose, and using cookie cutters to create templates is brilliant.  Check out her fun projects and tutorials, fitness tips, and her current series on Glogging (I learned a ton from the first lesson).  Thank you for being here, Paula, and for sharing with us!
Hello, I’m Paula from Sweet Pea. I enjoy blogging about crafting, cooking, gardening, decorating, travel, and exercise. I’m excited to guest post today for Johnnie at her wonderful blog, Saved By Love Creations.

Easter is coming up quickly and I thought it would be fun to make cards to send to friends and relatives.

EasterCollage1

Aren’t these cute?  They are easy to make and require materials that you probably already have around your house.

Supplies:

Easter themed cookie cutters, fabric, felt, scrap cardboard, pen, pencil, scissors, spray adhesive, craft glue, Easter stamp and stamp pad, and cards with envelopes.

Step 1:

Trace the cookie cutter onto a scrap piece of cardboard.  I used a piece that was part of the packaging for a dress shirt.

CookieCutterCard1

Cut out the pieces and decide on a fabric choice for each piece.

CookieCutterCard2

Step 2:

Trace each design onto fabric using a pencil and cut out.  Be sure to cut inside the pencil line if you are using light colored fabric.

CookieCutterCard3

Step 3:

Cut out felt embellishments to add character to each design.

CookieCutterCard5

I didn’t have a sheep cookie cutter but wanted a sheep card so a drew a pattern onto the cardboard to make one.

CookieCutterCard4

Step 4:

Spray the back of each fabric piece with spray adhesive.  Wait a minute or two until it is tacky before applying to your cards.

CookieCutterCard6

Step 5:

Apply to cards.  Press down firmly.

CookieCutterCard7

Step 6:

Add felt and ribbon embellishments.  Let dry.

CookieCutterCard8

My little chick had pencil marks showing on his sides.

CookieCutterCard9

To cover this, I edged with orange glitter glue.

CookieCutterCard10

Step 7:

Stamp “Happy Easter” in each card.

CookieCutterCard11CookieCutterCard12

That’s it!  Enjoy your new cards.

I know I’d rather receive a handmade card any day over a store bought one.

CookieCutterCard13CookieCutterCard14CookieCutterCard15CookieCutterCard16

I’m not sure which is my favorite and it’s going to be hard to decide the recipient of each card.

Thanks so much to Johnnie for having me today.  I’d love it if you’d stop by my blog, Sweet Pea, for a visit.&nbsp

Free Easter Printable Round 2

The cross… the single greatest act of love in history.  Click here to download the full resolution 5×7.  Glory to God.

Free Easter Printable

This is my absolute favorite time of year… Easter.  I made this watercolor from a photo in photoshop and put it with the beautiful verse, Hebrews 11:1.  You can download the full resolution file by clicking here.  

Spring Inspired Crochet Headband With Free Pattern

crochet headband pattern
 

I am on a spring headband kick these days. In fact, spring everything, really. Just got back from a sunny, warm vacation and now I am doing all I can to deny what is left of winter here in Indiana.

 
Here is the pattern I designed for the above headband, composed of three granny squares and two triangles made in the round, with slip stitch ties. This beauty works up quick. I used DMC thread size 5, and a size D crochet hook
 
 
Materials:
3 colors of DMC size 5 (Color A=bright pink, B=Green, C=light pink in the above pictures)
Size D crochet hook
Tapestry needle for finishing
 
Instructions: (For a Crochet Abbreviation Glossary, click HERE)
Flower Square Motif (Make 3 total—> 2 using A as center and 1 using B as Center)
Foundation Ring: Using A (B), ch 6, join with sl st to form a ring
Round 1(RS): Chain 5 – this counts as first dc and ch 2; (dc in ring, ch 2) 7 times; join with sl st in 3rd chain of beginning chain 5—8 dc and 8 ch-2 loops.
Round 2: With RS facing, join B (A) with sl st in next ch-2 sp, ch 1, in same sp work sc, hdc, 2 dc, hdc and sc; join with sl st in first sc. Fasten off.
Round 3: With RS facing, join C in back lp of same sc as last sl st, ch 5; working in back loops, (sl st in first single chain of next petal, ch 5) 7 times; join with sl st in first ch of ch-5.
Round 4: Sl st into next ch-5 sp, ch 1, 6 sc into same sp; *work 3 dc, ch 2, and 3 dc in next ch-5 sp**, 6 sc in next ch-5 sp; rep from*twice and from*to**once again; join with sl st into first sc. Fasten off.
 
Triangle Motifs (make 2 using color C)

Foundation Ring: Ch 3, join with sl st to form ring.

Rnd 1:Ch 3 (counts as first dc), 11 dc into ring, sl st in top of turning ch—12 dc total.

Rnd 2: Ch 3(counts as first dc), 2 dc in each st around and in same st as beginning chain 3, sl st in top of beginning

ch—24 dc.

Rnd 3: Ch 3, *(2 dc, tr, 2 dc) all in next st, dc in each of next 7 sts;

rep from * 2 times, sl st in top of turning ch—33 dc plus 3 ch-2

corner spaces. Fasten off.


Finishing:

Seam one triangle motif, 4 flower square motifs and 1 triangle motif

together, either by sewing, slip stitching, or single crocheting. When

seaming tog the last square and triangle, at the end of the seam

turn the work and sc along the edge of the joined motifs. Cont

down to the point of a triangle. To make tie: Sl st into st at point

of triangle, then ch 50. Skip first ch st and sl st in rem ch, then sl

st into the st at the point of the triangle again. Cont to sc along

the edge of the joined motifs to the point of the second triangle

and make a second tie. Sc to beg of sc edge and fasten off. Weave

in all ends.


Here are some more of my favorite spring colors you will see all headband-tastic in the near future!


Privacy Policy