Make Mixed Media Mod Podge Necklaces

[pinit]
DIY Mixed Media Mod Podge Necklaces from Michael's, featured by @savedbyloves[pinit]

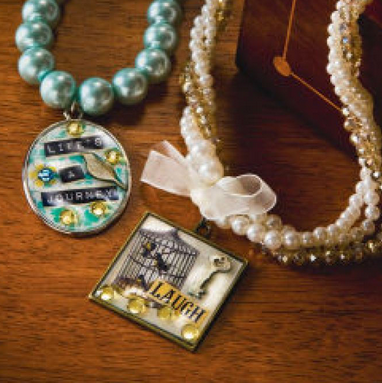
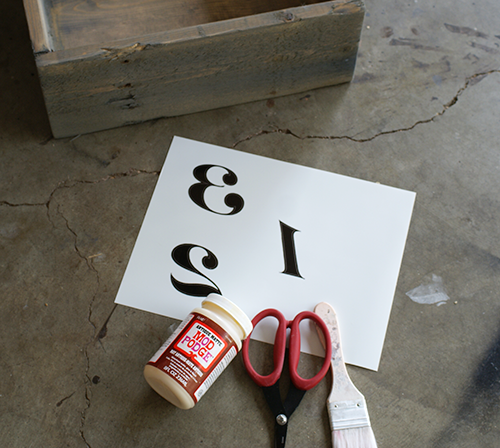
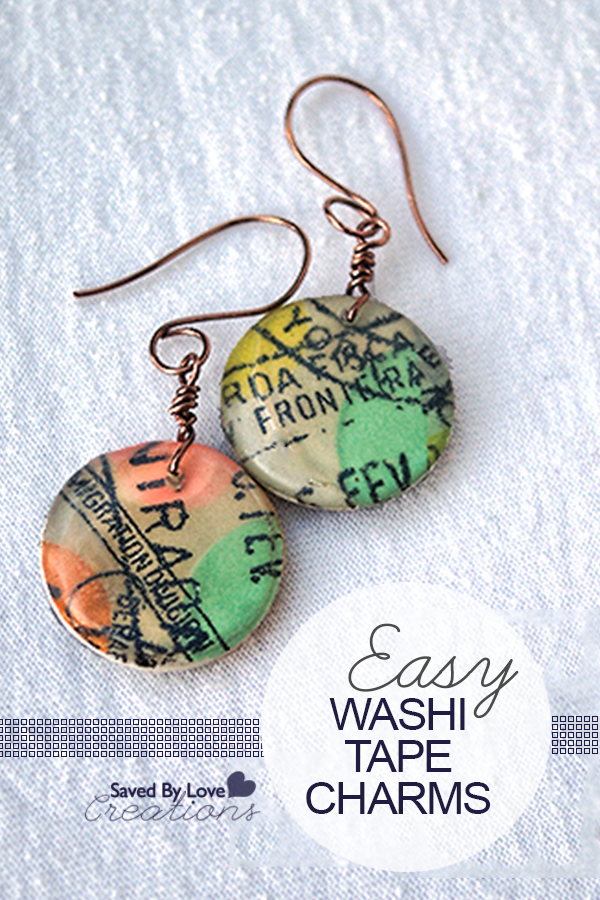
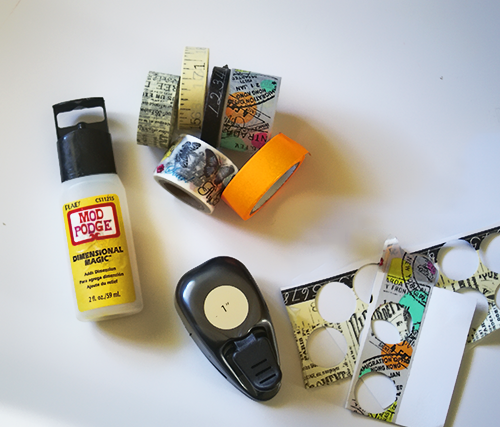
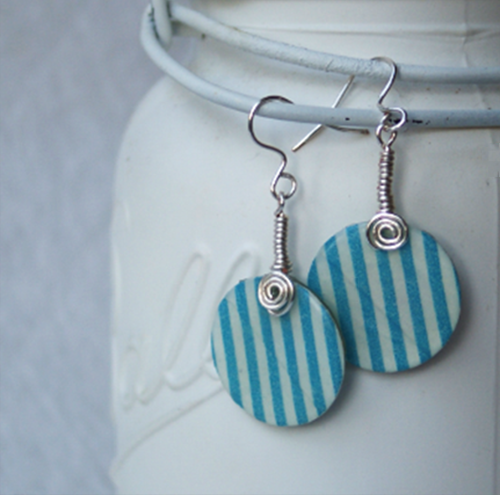
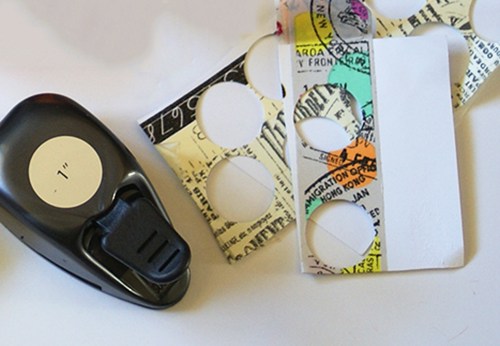
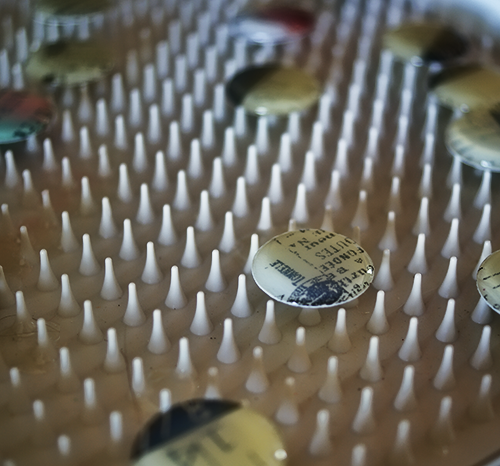
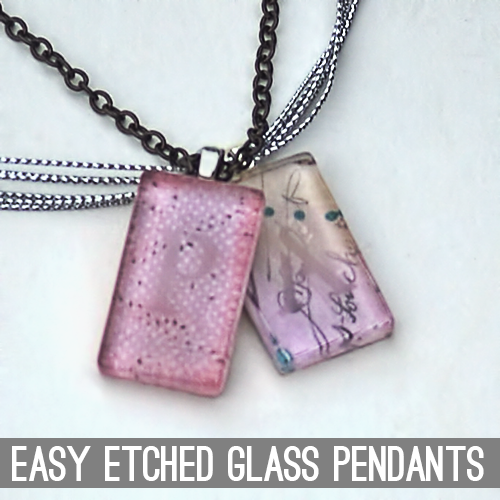
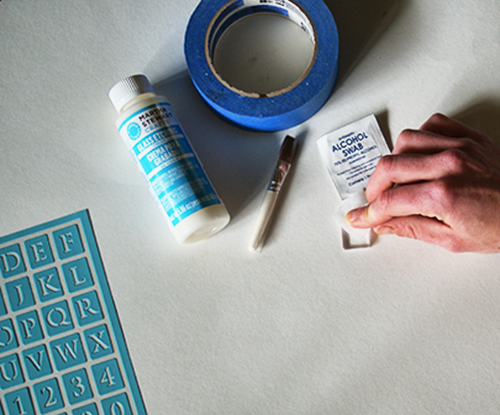
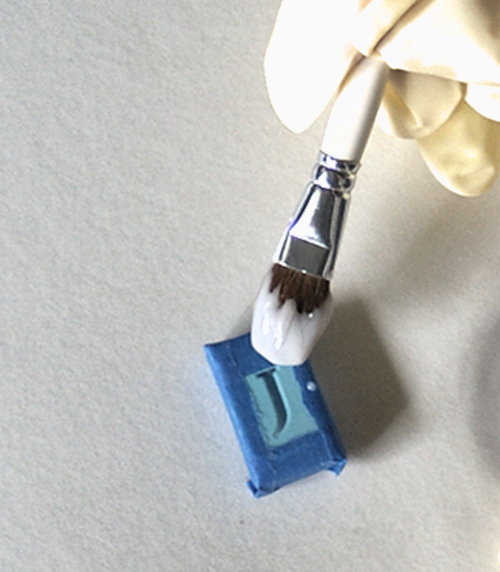
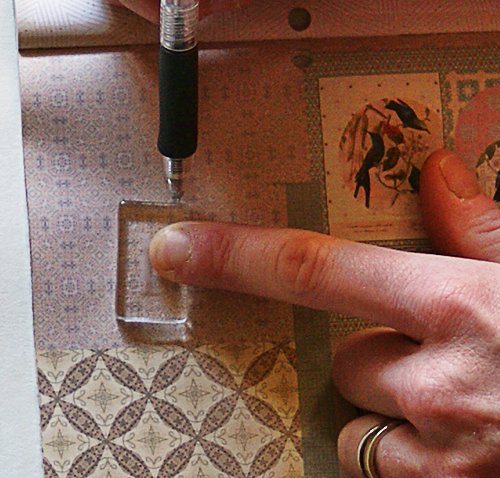
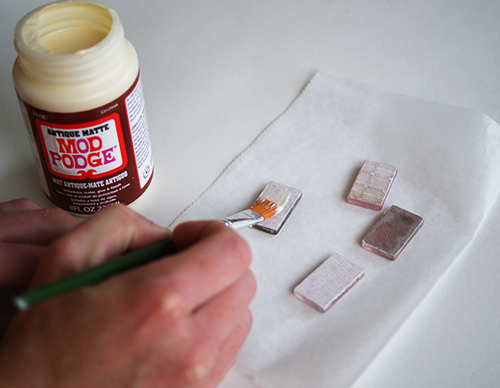
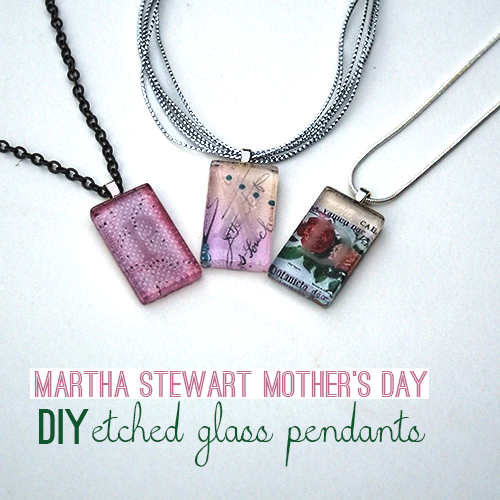
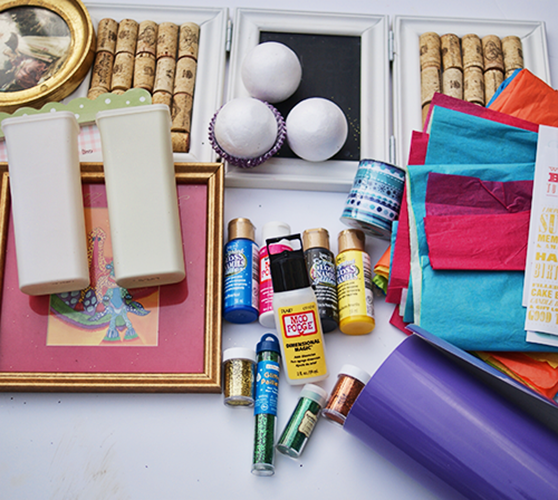
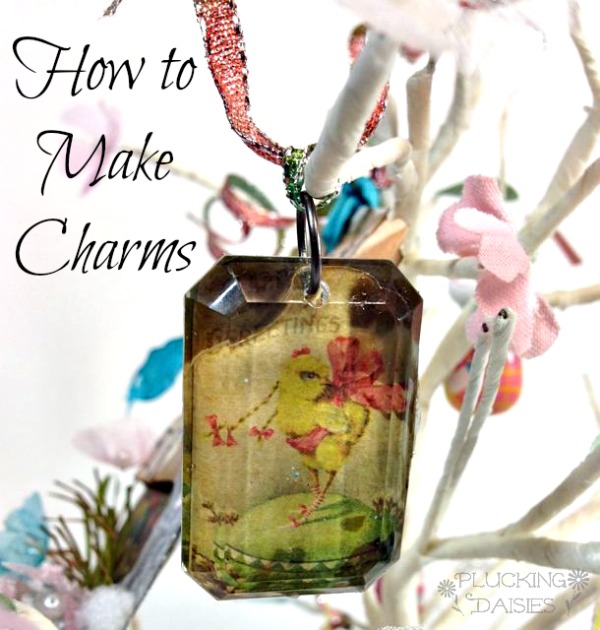
I found these cool new pendant blanks by Mod Podge at Michael’s a couple of weeks ago, and have been waiting for some inspiration (and time) to create with them.  This Mod Podge® Antique Urban Pendant Necklace Tutorial at Michaels.com is just the nudge I needed.

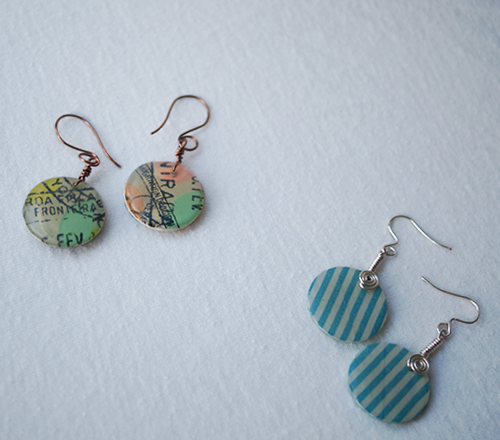
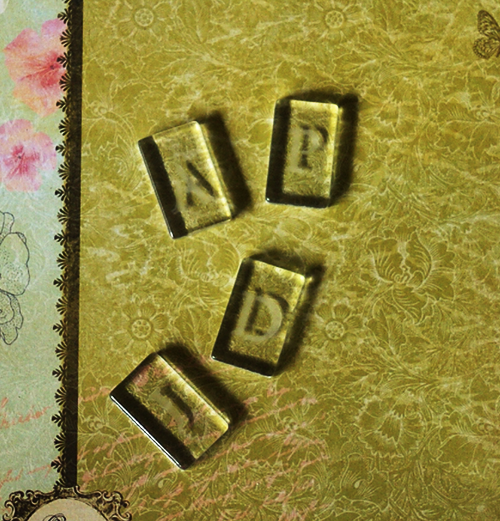
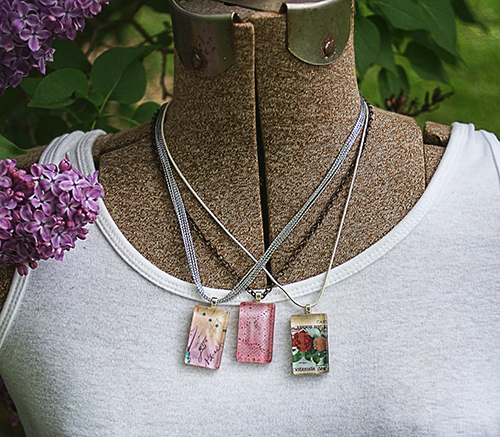
Have you created with these pendant blanks and papers?  If so, do share.

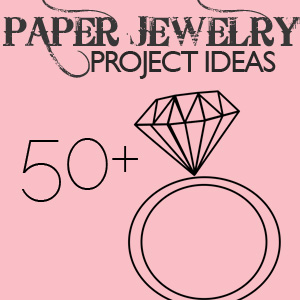
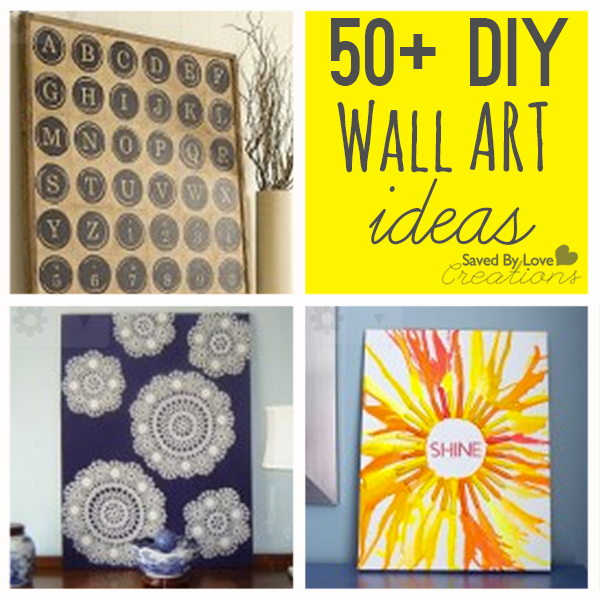
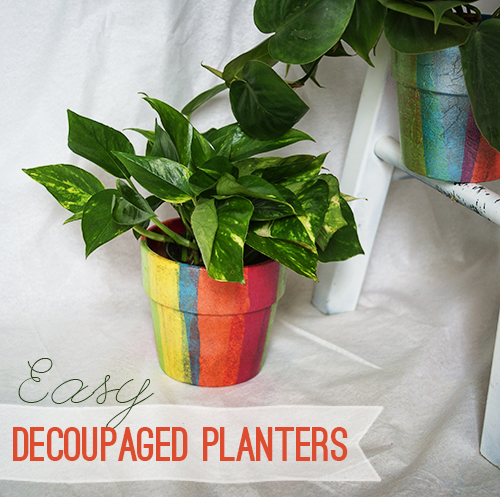
For more jewelry ideas, visit our Paper Jewlery Projects Roundup:

DIY Storage Boxes from Recycled Pallets

DIY Numbered shipping pallet crates

Wanna make cool DIY storage boxes from old shipping pallets?  That is what you will find here.  This project came about because I have never really loved my tapered bookshelf and decided it was time to make it lovable.  I found these DIY storage crates from pallets at Ana White, and came up with a plan to make small, medium and large ones to custom fit to my shelves.  During the process of getting the numbers on there, I found a cool, accidental image transfer to wood technique.  I finished the three boxes over 2 days, including letting stain sit overnight.  Keep reading to see how.

reclaimed wood storage boxes

SUPPLIES:

Wood from shipping pallets – (There are 1000 ways to break down pallets.  I use a pry bar and circular saw.  Google it to find videos.)

Kreg jig and screws (My wood was .75 inches thick so I used 1.25 inch Kreg screws)

1×12 board for bottoms of crates

Wood Glue

Clamps

Mod Podge (I used Antique Mod Podge)

Wood Stain and Conditioner or preferred finish

Scrapbooking Attitude or materials for your preferred transfer technique

TUTORIAL:

How to make a storage box from recycled wood pallets

Based on my 3 shelf sizes, I decided to make three boxes sized as follows: 12×12.5 inch, 13×12.5 inch and 14×12.5 inch.  To do this, I cut 6 sides from pallets, each 11 inches for the box sides.  I cut a front and box in 12, 13 and 14 inches for each box.  The bottom of the box I cut from 1×12 board to 1.5 inches shorter than the front/back pieces of each box (to account for the width of the sides).  See all the pieces above.

Use Kreg Jig Pocket holes to join pallet wood

Here you can see that I drilled pocket holes on each edge of the inner surface of the side boards for each box (to see how to use Kreg Jig and join wood with it, go to my Pallet Sign Tutorial)

Drill pocket holes in the bottom of the box

Drill pocket holes in the bottom of the box for attaching it to the front, back and side box boards as pictured.

PalletCrates7

Start by attaching side to bottom using holes you drilled in bottom.

How to screw in kreg screws in tight space

PalletCrates12

Here it is with all the boards attached.  I used wood glue in addition to the screws.  I always do.  I learned that from Ana.

Sand before wood conditioner

I sanded with 80 then 120 grit paper.

How to use Minwax Wood Conditioner

Clean away debris from sanding with damp lint free towel, then apply wood conditioner.  Let sit 15 min, wipe away excess.

Stain wood after wood conditioner

I stained with Minwax Classic Gray Wood Stain.  I did an extremely quick and dirty finishing job on these since the wood is rustic and uneven anyway.  That is one of the many things I love about pallet wood projects.  I get to move quick and messy fits right in with the look.

How to image transfer onto wood

I used these free cool vintage numbers from The Graphics Fairy.   To get them filled in, I just pulled them into Photoshop and painted the open spaces black.  I flipped them backwards and printed them onto Scrapbooking Attitude, an image transfer product you can read all about in my Image Transfer Halloween DIY using the product.

How to use Scrapbooking Attitude for Image Transfer onto Wood

Cut out around number. Set aside and go to next step.

Apply Mod Podge to area for image transfer

Apply a thin layer of Mod Podge where the image will be placed.

How to transfer images onto wood

Peel film away from backing and place image, ink side down, onto the surface.  Smooth out any wrinkles and press into Mod Podge/wood with fingers.

How to make a wood pallet storage box

O.k.  Here is where the happy accident starts.  You can see the transfer film where you cut out the number and the clear “paper” around it.  At this point I would just mod podge over everything, hoping that hid the edge of the film to an acceptable degree.  What happened here was I realized I accidentally put the 2 on the largest box, where I really wanted the three.  So, I tried to remove it, and the film came away leaving the ink behind!  Yay!  I did sanded it off the box so I could put the 3 on there, but removed the film for the rest of the numbers.  I love how it looks!

remove film, leaving ink behind for the image transfer

PalletCrates24

Here you can see me removing the film, and the ink staying behind!

Seal with Antique Mod Podge

Brush a coat of Mod Podge over the entire surface, and the entire box to seal.  I used Antique for an aged effect.  Let dry and you are done!

DIY wood pallet storage boxes

DIY storage from wood pallets

So, they are awesome, am I right?

Wanna make everything under the sun from wood pallets?

Check out our 50+ Wood Pallet Project Round-up!

We also have 50+ Image Transfer Projects to inspire your creativity!

Mosaic Frame From Recycled Gift Cards + Free Printable

[pinit]
How to Make a recycled gift card Mosaic frame, + cool free Psalm 56:3 scripture verse printable from @savedbyloves

[pinit]

Hi Saved By Lovies!  Today I am sharing with you a fun project you can make for next to nothing using recycled gift cards/credit cards.  It has all my favorite components, and if I know you at all, yours too.  It is a great upcycled craft project, lending to a unique piece of home decor that will leave your friends saying “You made that from what?”.  Oh yeah, and since I created a printable to go inside of my new frame, you get that too.

Are you ready?  Let’s do this.

Recycled gift card mosaic picture frame tutorial #upcycled #recycledcrafts

Supplies:

Sizzix home decor project #Sizzix #recycled

Old Gift/Credit Cards (I have had everyone under the sun keeping these for me for months and months)

I used my Sizzix machine and the Squares #3 Die (which is on sale over there for $8.79), but you can use cut squares from your credit cards with hefty scissors, like Tonic Studios Tim Holts Scissors

Craft Glue like Crafter’s Pick, which I use for just about everything.  It is non toxic, strong as can be and is great for metal, paper and more

Frame to mosaic

Acrylic paint for tiles if you don’t want to use them as they are (I used Tim Holtz Distress Paint because I am head over heels in love with it)

Free Scripture verse Printable Psalm 56:3

If you want to use the printable I created from Psalm 56:3, just right click the above thumbnail and the full res version will magically appear.  Save it and have it printed your preferred way, or print from your computer.

This verse is coming up all over the place for me, and I use it whenever life hits to remind me that I am held.  I created the printable in Photoshop specifically for this frame, so I went simple black and white since the credit cards have lots of color.  I used Gill Sans, one of my go to fonts.  The lovely crown and design element at the bottom come from Karen at The Graphics Fairy.  What would I do without her library of images??!

Find them at the following links to use in your own creations:

Free Vintage Crown Graphic

Free Ornamental Graphic Separators

TUTORIAL:

CreditCardFrame2

Cut and paint squares from gift cards into the size you want for your mosaic surface.  I used the small and next up size from the Sizzix Square Die.

How to Mosaic a Frame

Lay out your “tiles” to get the design you want before you begin gluing.  Trust me.  Do that.

How to glue on Mosaic Tiles

Once your tiles are dry, adhere them to the surface of your frame using craft glue.  I put some craft glue in a cupcake wrapper and applied it to my tiles with a scrap piece of plastic.  You can use a popsicle stick, paintbrush or whatever.  Use a thin layer of glue so that if you move your nudge your tiles to get the spacing you want, you won’t have bleeding out from the edges.

How to make upcycled home decor; DIY mosaic picture frame from recycled credit cards

Let the glue dry so the tiles are secure and add a photo, mirror, or even leave empty as a design element all in itself!

Upcycled gift card home decor; How to Make a Faux Mosaic Picture frame

If you like this project, check out the 20+ Gift Card Projects to Make at Totally Green Crafts

20 Ways to Upcycle Gift Cards

Over 50 Easy Wall Art DIY Ideas You Can Make


[pinit]Wall[pinit]

Today’s 50+ round-up is all about wall art you can make yourself.  This is one of the first things I got into creatively.  I would cover old canvases with fabric, stapled to the back and make cheap wall art.  From there it exploded, and I tried several of the projects collected here today. You will see lots of upcycled, recycled materials used, as well as designer knock off wall decor.  I hope you are inspired to try a few yourself.  Please share if you have a worthy project to be considered for this roundup!


Make Washi Tape Jewelry and Charms

[pinit]
Easy Washi Tape Earrings

Today’s project is a fun, inexpensive earring tutorial using washi tape, wire and Dimensional Magic by Mod Podge.  I am in love with these.  I wore them on a recent getaway and got so many compliments.  A random lady in a boutique ordered a pair when I told her I made them!  Think about all the washi tape prints and colors.  You could make a pair for every outfit or occasion.  You can use them as charms for embellishing paper crafts, cards, and jewelry projects of all kinds.

Let’s get started!

SUPPLIES:

WashiTapeEarrings5

Mod Podge Dimensional Magic

Circle punch or other shape you want for your charms (you could also cut by hand)

Washi Tape

White Card Stock

Dremel for creating hole or glue on bail (hanging mechanism)

Jewelry Wire – I used 20 gauge copper artistic wire and 20 gauge artistic wire silver coated

Wire cutter

Round nose and flat nose pliers

Make easy Washi Tape Earrings with Mod Podge and a circle punch! @savedbyloves

TUTORIAL:

Make easy Washi Tape Crafts Earrings with Mod Podge and a circle punch! @savedbyloves

Apply tape to front and back or card stock.  Line strips of tape up so that there is no space between them.  Line up patterns for seamless look if your hole punch is bigger than the width of the tape.  Punch out shapes.

Make easy Washi Tape Earrings with Mod Podge and a circle punch! @savedbyloves4

Lay shapes on flat, protect surface.  I like to use this spikey tray I got at Michaels (pretty sure it is Martha Stewart).  That way if I put too much Dimensional Magic on, it will runs off the side and collect in the bottom of the tray, sparing my piece from becoming a big blob.  Apply Dimensional Magic starting in the center, then pulling out to the edge of the shape with the tip of the bottle.  Let sit for about 20 minutes, then come back and remove any air bubbles with a toothpick or with your fingernail.  Then let dry overnight, flip them over and do the other side.  If you want a flat side, you can just brush on Mod Podge with a brush to seal instead of doming both sides.

Make easy Washi Tape Earrings with Mod Podge and a circle punch! @savedbyloves

Use as charms, make earrings, magnets, embellish your paper crafts and more.

I played with wire using a jig from Bead Landing.  I plan on sharing a tutorial on making your own earring findings like I did for these.

Check out some more things to make with washi tape by clicking the thumbnails below:

Washi Tape Rosette  Earring Tutorial

50+ Washi Tape Projects to Make

Martha Stewart Mother’s Day Etched Glass Pendants

[pinit]
@savedbyloves DIY Etched Glass Tile Pendant #MarthaStewartCrafts #mothersday
[pinit]


Today brings a fun, simple Mother’s Day gift DIY using Martha Stewart Crafts glass etching cream to create customized glass tile pendants!  As I mentioned Monday when I showed you my doily etched wine bottles, this etching cream is simply amazing.  No glass is safe around me now!  Read on to see how to make these lovely pendants in no time!

#marthastewartcrafts #mothersday

SUPPLIES:

#MarthaStewartCrafts

Glass tiles (I ordered mine on Etsy – size 1 7/8 x 7/8 inch

Martha Stewart Etching  Cream and included brush

Martha Stewart Adhesive Stencils

Rubbing alcohol

Pendant Bail (I use aanraku small silver bails from Etsy or Ebay)

Pretty Patterned Paper

Mod Podge Dimensional Magic and Antique (optional)

Sandpaper (150 grit)

E6000

Chain or cord of choice

Masking Tape

Protective gloves

TUTORIAL:

EtchGlassPendants7

Clean glass tiles with rubbing alcohol.

#MarthaStewarCrafts #Mothersday

Place adhesive stencil.

#MarthaStewarCrafts #Mothersday

Tape off area you don’t want etched and apply thick layer of etching cream.

#MarthaStewarCrafts #Mothersday2

Wait 15 minutes and then rinse cream away under faucet.  Make sure to clean stencils well.

#MarthaStewarCrafts #Mothersday3

Find area of paper you want as background.  Trace pendant and cut out paper for backing.  Using double sided paper gives the back of your pendant a pretty, finished look.

#MarthaStewarCrafts #Mothersday4

Use your favorite decoupage medium to adhere backing to tile.

#MarthaStewarCrafts #Mothersday5

When that is dry, sand edges to even things up a bit.

#MarthaStewarCrafts #Mothersday7

Seal paper backing with your favorite medium.  I love the antique Mod Podge.  Apply 2-3 coats, allowing 30 minutes dry time between each.

#MarthaStewarCrafts #Mothersday8

Adhere pendant bail using E6000 or other industrial strength adhesive.

@savedbyloves DIY Etched Glass Tile Pendant #MarthaStewartCrafts #mothersday

Let your bail set overnight and add your chain to finish!

EtchedGlassTilePendant4

I love them!  I made one for my grandma, mom and sister.  What a cool way to add a special touch to customize glass tile pendants.  Use a meaningful photo instead of scrapbook paper as an alternative.  Make them as wedding/anniversary gifts with the couple’s wedding date!  The possibilities are endless.

 Be sure to check out the other Mother’s Day and Father’s Day projects my cohorts are making with Marth Stewart Crafts in the list below this post.

FOLLOW PLAID CRAFTS WITH ME!!

Website :: Facebook :: Twitter :: Pinterest

Disclosure: I wrote this post as part of a sponsored campaign with Plaid and The Blueprint Social.  All opinions are honest and mine!


Decoupage Rainbow Planters

[pinit]
Make rainbow decoupaged planters easy DIY Mod Podge @savedbyloves

 [pinit]

When I saw Margot Potter’s tissue decoupaged planters on the I Love to Create blog, I just knew that was a project I would be doing.  It is perfect for spring, and so easy to do.  Well, as luck would have it, I got a package from my Thrifty Stashy SNAP! Swap partner with just the supplies I needed for not only that project, but several others on my to do list.

Make rainbow decoupaged planters easy DIY Mod Podge @savedbyloves

The tissue paper was perfect for the project.  Using the tissue and Mod Podge, I followed Margot’s tutorial linked above, with just a couple of tweaks.  I made my strips wider for wider color stripes.  To seal and and sparkle, I sprayed my decoupaged planters with Mod Podge Pearl.

Make rainbow decoupaged planters easy DIY Mod Podge @savedbyloves

I love the end result!  The project is so easy, cheap and quick.  I must say it is a little creepy how my swap partner, Jessica from Mom4Real, sent me so many things that I need for upcoming projects.  I think she may have my house bugged!  If you haven’t visited her blog, you are in for a treat.  She has some serious style, and she shares tons of creative ways to decorate your home on a budget.  This is the first of several projects you will see not only from me using the awesome supplies Jessica sent, but from the rest of the talented bloggers participating in the swap, so be on the lookout.  We are all attending the upcoming SNAP! conference and are getting to know each other beforehand by participating in this fun swap and create event.

Make rainbow decoupaged planters easy DIY Mod Podge @savedbyloves  DecoupagedPot

DecoupagedPot1

DecoupagedPot3

Check out the other projects from the participants. The list will be growing as they post their projects, so stay tuned!


How to Make Charms

how-to-make-charms-beauty-chick-text (1)

Happy spring time SBLC friends! Amy here from Plucking Daisies to share with you how to make some sweet springtime charms. These charms are super easy to make and use for a variety of crafty ventures! You can use them for custom jewelry pieces, ornaments or even wine charms for your Easter Brunch or spring celebrations!

I used my charms to decorate an Easter Bunny Tree. They are a lovely addition to my spring table decor and oh so charming!

How to make Charms | @PluckingDaisy #RangerInk

How to make Charms

You can make your own charms for adornments, jewelry, gifts and pretty much anything you can dream up. Grab your favorite images and prepare to be “charmed”!

Supplies:

Tim Holtz Idea-ology Facets or Fragments

Glossy Accents

Images or Photos (copies NOT originals)

Ribbon or Chain

Alcohol Ink

Ranger Foil Tape Sheets

Adhering Images to Charms

You can select any image you like to use when making your charms, a favorite photo (color copy), old greeting cards, a childs artwork…the possibilities are truly endless! For my charms I used these delightful vintage Easter Images from Tim Holtz Seasonal Paper Stash.

STEP 1: Apply Glossy Accents to the back of your charm and press down onto image.

STEP 2: Flip paper over and use a credit card or craft scraper to press out any air bubbles.

How to make Charms | @PluckingDaisy #RangerInk

STEP 3: Allow to dry for several hours then trim off excess paper.

Create Metal Backing for Charms

To finish and complete the look of your custom charms you can easily create a metal backing with Ranger foil tape sheets. Not only will the foil tape enhance the look of your charms, it will also smooth any rough edges and ensure your image stays put.

STEP 1: Ink a sheet of Ranger Foil Tape with Alcohol Ink. I used: Shell Pink – Salmon – Citrus – Aqua

How to make Charms | @PluckingDaisy #RangerInk

STEP 2: Emboss Alcohol Inked foil tape with Sizzix Embossing Folder. *I used Sizzix Dots and Flowers set A2

How to make Charms | @PluckingDaisy #RangerInk

STEP 3: Peel away the backing of your embossed foil tape and press cut out charms onto it. Cut around the charm leaving a slight edge all the way around. Fold edges over onto charm to secure your image.

Hanging Charms

Now that your charms are complete you will need to hang them. Whether you will be using them for jewelry, gift wrap or decor you can customize how you hang them just as easily as you made them!

STEP 1: Add Jump Rings

STEP 2: Reapply Alcohol ink to blending tool and stamp (DON’T swipe) onto Metallic ribbon.

How to make Charms | @PluckingDaisy #RangerInk

Use your stamped ribbon to create pendants, ornaments or “Charming” gift toppers!

How to make Charms | @PluckingDaisy #RangerInkI hope you enjoyed this little lesson in Charm making and will take what you learned to make some “Charming” gifts, jewelry and decor! Thanks for having me back at SBLC! Until next time…

Have a Charming Day!

Amy*

50+ Candy Wrapper Crafts

[pinit]


Over 50 Candy Wrapper Crafts to make #DIY from @savedbyloves
[pinit]

This week’s 50+ is all about candy wrapper crafts.  There are tons of things to make from them.  Just in time for those Easter candy wrappers, get ready to create luminaries, vases, decoupage, jewelry and more!


Harlequin Bracelet DIY


[pinit]Harlequin Bracelet with Mod Podge DIY by My Poppet, featured @savedbyloves

[pinit]

My Poppet has shared a great DIY harlequin bracelet tutorial, using Mod Podge and a few other supplies.  No special skills needed, and you can have your very own handmade arm bling.  If there is anything I love as much as bracelets, it may be harlequin!  Head over for the how to.

Privacy Policy