Archives for January 2014

Quick and Easy DIY Valentine’s Day Gift Idea

This simple and quick Valentine’s Day gift idea from Barbara at Chase the Star is just my kind of project.  It would be great as a centerpiece and teacher gift too!  Welcome the first contribution from this super creative blogger…

Hey everyone! I’m Barbara from Chase the Star, and I’m thrilled to be a brand new regular contributor! At my blog I write about my adventures in decorating, crafting, cooking, parenting, and all things in between. I love to be creative and but I don’t like to spend too much time or money, so a girl’s gotta improvise, reinvent, and repurpose whenever possible!

It’s just about time to start planning for Valentine’s Day! For my very first post I’m sharing an easy and inexpensive DIY gift idea for a special someone in your life!

DIY Gift Idea for Valentine’s Day

Valentines Gift via Chase the Star for Saved By Love Creations #conversationHeart #candyHeart #valentine #modPodge #decoupage #chalkboard #diycraft #craft #gift #repurpose #bucket

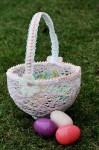
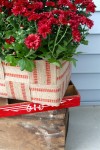
A galvanized mini bucket can be used so many ways! Today we’re going to decorate it and use it to hold ‘conversation hearts’ (or ‘candy’ hearts) for Valentine’s Day:

Materials:

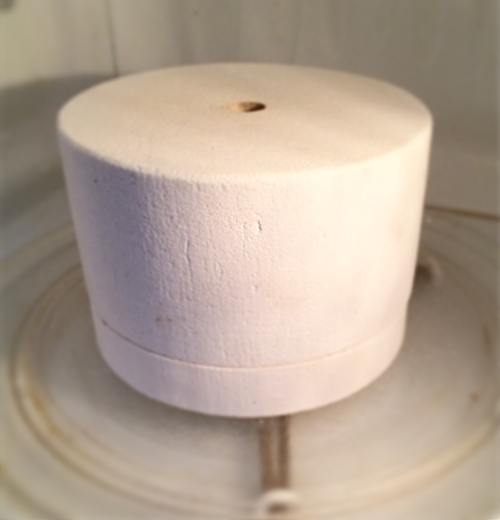
A small bucket (mine was from the thrift store)

Paper (gift wrap, craft paper, newspaper, any type of paper will do)

Decoupage medium (such as Mod Podge)

A small brush

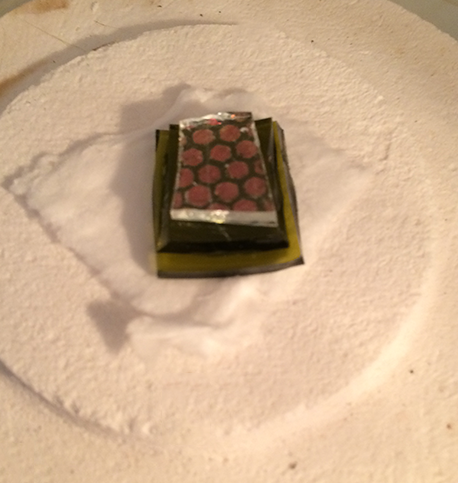
A bag of ‘conversation hearts’

Optional:

Chalkboard cupcake toppers

Ribbon

Repurpose a galvanized bucket for a sweet Valentines Gift via Chase the Star for Saved By Love Creations #conversationHeart #candyHeart #valentine #modPodge #decoupage #chalkboard #diycraft #craft #gift #bucket

Step 1:

Cut the paper into pieces that will fit around your bucket.
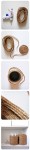
Step 2:

Decoupage!

Add the paper pieces one at a time by brushing a light coat of decoupage onto the bucket, then gently placing the paper over it, and pressing it firmly with your fingertips. Get it as smooth as possible but don’t worry about it wrinkling, you can fix that later. Let that set for a few minutes, then add another light coat of the decoupage over the entire piece. This time be sure to smooth it out completely with your fingertips, carefully. Allow it to dry for about 30 minutes.
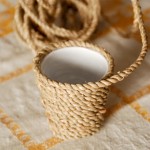
Decoupage a small bucket for a cute Valentines Gift via Chase the Star for Saved By Love Creations #conversationHeart #candyHeart #valentine #modPodge #decoupage #chalkboard #diycraft #craft #gift #repurpose #bucket

Step 3:

Fill it with the candy hearts, and you can add a cute touch by inserting a chalkboard cupcake topper or any other type of topper! I used these from American Crafts:

DIY an Easy Valentine's Day Gift via Chase the Star for Saved by Love Creations

To complete the project I tied some satin ribbon in a bow to the handle.

Easy Valentines Gift via Chase the Star for Saved By Love Creations #conversationHeart #candyHeart #valentine #modPodge #decoupage #chalkboard #diycraft #craft #gift #repurpose #bucket

I love this idea for a teacher’s gift, a nice treat for your neighbor, or even to pass out at work! Kids will love this too!

Have you started to plan your crafting for Valentine’s Day?

For more DIY ideas stop by Chase the Star, and follow me on Facebook, Google+, Pinterest, and Instagram!

See you next time!

signature

Beginner’s Glass Fusing ; Recycled Glass Dichroic Earrings

[pinit]

How to make dichroic glass with microwave kiln

[pinit]

I have had a microwave kiln kit by Fuseworks for at least a year, and have finally gotten around to experimenting with glass fusing for the first time.  This pair of earrings showcase the very first attempt using the kiln!  I love them.  For so many reasons, I love them.  First, fusing in your microwave is super easy and fun.  It takes like 3 minutes for the glass to turn all glowy and molten.  So awesome.  Secondly, you can use recycled glass and you all know how all about repurposing and eco-crafts I am, right?  Once you invest in the kiln, you can break old bottles for your base, and purchase dichroic, fusible glass for not too high a price.  Especially considering how beautiful it makes the pieces.  I got sheets of it at Hobby Lobby for $4.99, and can get at least 10 fused glass focal beads out of that.


How to fuse glass in microwave tutorial

SUPPLIES:

Fuseworks Microwave Kiln Tutorial

I got my Beginner’s fusing kit at Hobby Lobby.  It is cheaper on Amazon; Fuseworks Beginner’s Fusing Kit

Broken beer or wine bottles in colors of your choice

Dichroic and other fusible glass

Glass cutter

Running Pliers

Flush Wire Cutters

Round nose pliers

flat nose pliers

Antiqued Copper Wire 20 Gauge

Bead Landing Jig to make earring findings – you can make them your own way or buy them made, but I love this jig and it saves money to make my own!

TUTORIAL:

Kiln with glass bead layers

I used very imperfect rectangles of wine bottle shards, one slightly larger than the other, and a piece of transparent dichroic glass that came in my Fuseworks kit.  Per the instructions that came with the kit, I placed the include fusing paper on the kiln, then stacked my glass layers on top of that.  It is easiest to do this in the microwave because moving the kiln will cause your pieces to go all over the place and it gets really annoying.  Put it in place in the microwave, then start layering your glass.

The larger green piece went first on top of the kiln paper.  Next the smaller, then the even smaller dichroic shard, with the foil side face down.  The kiln is small, but I did both of my earrings at the same time (not shown in pic).

Microwave kiln for glass fusing tutorial

Place kiln lid and turn on microwave for 2 minutes at first to begin fusing.  Check after two minutes, making sure to wear gloves, by lifting lid.  If your piece is uniformly glowing orange and the edges are rounded and fused together, you are done, but that is unlikely at 2 minutes.  I kept going for 30 second intervals.  The first attempt fused in 4 minutes.  Then remove the kiln from microwave (without removing lid, which can cause rapid cooling and cracking of the glass) and place on heat resistant surface.  I put mine on my stove burner.

Let cool for at least 30 min before removing lid!  Don’t touch glass for 45 min, and even then, be careful!  You can’t tell if it is hot by looking at it.

DIY Dichroic glass jewelry begginers glass fusing

 I left my pieces alone overnight while I decided what to do with them.  Then I wire wrapped them like I showed you in this Bail free, glue free way to hang pendants tutorial.  Or you can glue on a bail.  Those came in the kit too!

I am addicted!  I have had a couple of fails, but mostly just fun creating with a new technique, resulting in beautiful fused glass creations!  I hope you love this medium as much as I do.  Have you tried it before?  Any tips you want to share?

Over 50 Projects to Make Using Twine

[pinit]Over 50 Things to make with Twine #bakerstwine #twinecrafts @savedbyloves[pinit]

About two years ago, I discovered baker’s twine and fell a little in love.  Today I am sharing some of the best twine crafts out there, using all kinds of twine, including my precious baker’s!  You will find home decor, jewelry, paper craft tutorials and more.  If we missed a favorite of yours, let us know!  Enjoy and try *knot* to tie yourself to anything!


DIY Handpainted Sign + Free Printable Template

[pinit]DIY Hand-painted #reclaimed Wood Sign tutorial and printable cut file or traceable template @savedbyloves #verseprintable #Love #valentinesday [pinit]

I am loving making signs these days.  With Valentine’s Day coming up, I decided to go with this love Corinthians verse, which is great all year round, but particularly so now.  For the detailed tutorial on how to make this sign, see our Rustic DIY Wooden Sign Tutorial.   Below you will find the Photoshop file I used.  The tutorial just linked  shows how to transfer the file to wood and hand paint it.  I used my cricut with the file below to make a stencil.  You can do either with the download.

Corinthians love verse printable template from @savedbyloves

Click the image to bring up the full size version and either print to transfer like I showed you in the tutorial linked above, or use as a cut file.  I use Sure Cuts A Lot for this.  Not sure if that is still available, but I do know that it doesn’t work with newer Cricut machines.  Good luck!

Corinthians Love Verse Sign DIY

Saori Technique; How to Weave a Coaster

[pinit]

how to loom weave a coaster

[pinit]

I am thrilled to introduce the first of SBLC’s weekly contributor posts!  Welcome Cyn from Creative Cynchronicity.  She is sharing a great cardboard loom weaving technique that you can use to creative beautiful fiber are.  Make unique gifts, and teach your children the technique for an inexpensive and fun kid’s craft.  Cyn shows you how!

Hi! My name is Cyn and I’m so excited to be here today sharing one of my favorite forms of crafting with you. Saori is a modern type of hand weaving that was developed by Misao Jo, a Japanese woman, about 40 years ago. It’s an inexpensive and simple method of weaving that can be done by children and adults alike. It is easily transportable and requires few materials, making it an ideal craft to take along on trips or to appointments. I became aware of it a few years ago and have been experimenting with it ever since. Here are the basics in Saori weaving:

Materials needed: remnants of yarn, a couple pieces of cardboard (one of these will form your loom), a pair of scissors. Optional: You may want a large eyed blunt needle (plastic ones work great for this especially with children), a few pieces of tape to hold loose strands of yarn out of your way, a ruler, and a rotary cutter with cutting mat.

 photo loomcollage1_zps86f69dc1.jpgYou’ll want your piece of cardboard for the loom to be roughly the same size as your finished project. I’m making a mug rug so I made mine about 6-7 inches square. For my next project, I plan to try something a bit bigger and I’m going to make some place-mats. Make little snips along the top and bottom edges of the loom – about 1/8 to 1/4 inch apart. The closer together the little slits are, the tighter the weave will be (and therefore, the more stable it will be!)

 photo loomcollage2_zps003935c3.jpg

Left: front of loom, Right: back of loom

Begin at one corner of the loom and create your “warp” threads by leaving a bit of a tail about half the width of your loom (you might want to use a little piece of tape to secure it to the loom and get it out of your way). Then hook the yarn through a slit at the top of the loom, down through the slit directly across from it at the bottom of the loom, wrapping the yarn all the way around the back of the loom, and going back up to the next slit at the top of the loom to repeat the process again. When you have gone all the way across the loom, be sure to leave another “tail” of yarn, again about half the width of your loom. A hint: don’t use a yarn that stretches for the warp threads. Also, be careful with very fibrous yarns as some of them are a bit on the delicate side and aren’t strong enough to hold up as warp threads.

 photo loom11_zpsf848cffe.jpgNow, you want to cut a length of yarn to begin weaving with. Saori is considered a very intuitive, “go with the flow” kind of weaving. Just grab whichever yarn strikes your fancy and use it! Some people even use this as a sort of meditative process – it IS very relaxing! Now, start weaving. Under, over, under, over – just like you did with paper weaving as a kid. The big difference here is that in standard weaving, when you get to the end of a row, you just turn around and start heading back in the opposite direction. In Saori weaving, when you get to the end of a row, just wrap the yarn right around the back of the loom and then start your next row directly above where the previous one began. Remember that if you started the first row by going over, under, over, under, you’ll want to start the next one under, over, under, over.

 photo loom12_zps9f698e8d.jpgYou can simply weave using your fingers but you may find that using a needle or creating a shuttle will make it easier. You can fashion a shuttle out of a scrap of cardboard that you wrap your yarn around but my personal preference are the large eyed plastic needles. They’re safe and simple to use for both children and adults. When you get near the end of your weaving, the needle is also better able to make it through the increasingly tighter space. Once you’ve completed all of the weaving, you’ll once again want to leave a tail of yarn that is at least half the width of your loom.

 photo cutcollage_zps65940f46.jpg

Flip your loom over so that the back of the loom is face up. This is where you use another piece of cardboard. Carefully slide a piece of it under the “weft” threads (the ones you were weaving with) to provide a bit of a barrier between them and your warp threads. This will keep you from accidentally cutting the warp threads! Cut right down through the middle of your weft yarns, using that cardboard to keep your scissors away from the warp threads.

 photo IMG_3092_zpsa71b2fb7.jpgTake 2-4 (depending on how thick they are) of your cut yarns and tie them off using an overhand knot as close to the weaving as you can to secure them. Next you want to cut the warp threads right down the center just as you did with the weft. Leave them hooked onto the loom though and only take a couple off at a time to tie them off.

 photo loom24_zpsb0fd3281.jpgTrim the tied off threads so they are even and at the desired length. This makes a really pretty fringe all around the edges of your mug rug (or other project).

 photo loom25_zps9f9b19a7.jpgOf course, once you get the basics down, it can be a lot of fun to experiment with Saori weaving. Add in some beads to the weaving or the fringe, weave in some non-traditional materials like feathers or wool roving, or try a variety of weaving patterns beyond the typical over-under!

If you enjoyed this project, I’d love to have you visit me over on my blog Creative Cynchronicity. You can also find me on Facebook, Twitter, Instagram, Pinterest, and Google+.

Build Your Own Butcher Block Kitchen Island

[pinit]DIY Butcher Block Island

[pinit]

My sister needed a kitchen island, giving me a great Christmas gift idea, and an excuse to tackle another Ana White woodworking plan.  I used Ana’s Easy Kitchen Island plan, adjusting the dimensions to fit in Amber’s kitchen.  Instead of 54 inches wide, we made our version 36 inches.  This was a quick and easy build.  I have some tips to share that  I wish I had known before this build, but we learn by making mistakes, right?!

DIY Kitchen Island Woodworking Plan

I highly recommend staining the “planks” before attaching them for the bottom and middle shelves.  Ana attached the planks with Kreg joins.  This seemed like a ton of work and I couldn’t think of a reason that using my nail gun and wood glue wouldn’t suffice, so that is what I did.  Super quick and easy with my Ryobi AirStrike Nailer.

Also, I used a 5 gallon bucket paint stirrer to space the planks, which worked out well.

Furniture plans

Other than those few changes, I followed Ana’s plan linked in the first paragraph.

DIY Distressed Starburst Mirror for $5

[pinit]Distressed Starburst Mirror DIY #upcycle #paintstickcrafts #diy #repurpose #reclaimedwood @savedbyloves
[pinit]

This project has been on my to do list for months and months.  I finally got around to making a distressed, chippy starburst mirror from recycled paint stirrers and other reclaimed wood I have collected from various discard piles.  The hold up was finding a circle mirror, which I ended up finding at Joann Fabrics for just a few dollars.  This piece took about an hour to make start to finish and cost under $5!

Knock off decor

 Pretty amazing when you consider this similar mirror at Iron Accents is $410!  If you are considering paying that price for something like this… don’t!  Make your own version for way cheaper, and feel awesome about it.

SUPPLIES:

*** NOTE:  I used a cordless Ryobi AirStrike Nailer which is not a must have, but makes this project (and most of my woodworking projects) go smoothly and quickly.  Work smarter, not harder!

***Oh yeah, and also:  The wreath form on top of the mirror is optional.  I preferred the project with it, but it looks cool without as well.

10 inch diameter round mirror

E6000

Scrap wood about 12×12 inches

Ryobi Airstrike nailer

Wood Glue

Paint stirrers or other wood scraps painted with your favorite colors (I used Chalky finish paint from Americana) – I cut mine to about the same length with my chop saw.  You can have them random lengths or create your own pattern of rays.  Lay out your pieces and play with the design until you love it.

10 inch chipboard wreath form or other circle to place over mirror for a more finished look

Wire or other picture hanger hardware

TUTORIAL:

How to make a starburst mirror

Paint Stirrer Craft

Use E6000 on the back of the mirror to attach it to the 12×12 inch wood scrap.  It doesn’t have to be exactly 12×12, but there needs to be enough wood all the way around the circle mirror for nailing paint stirrers to.

DIY Mirror

Lay out “rays” to determine placement.  I did two layers.  I applied wood glue and nailed the bottom rays into the 12×12 inch wood with 18 gauge 1/2 inch brad nails in my nailer.

How to make an upcycled starburst mirror

I placed the second layer or rays using the nailer, no glue.  I painted the wreath form with “lace” Chalky Finish Americana paint and nailed it to the underlying rays to frame the mirror.

Upcycled Home Decor Starburst Mirror @savedbyloves

Staple craft wire to the back for hanging and enjoy!

Want more?  Visit our 50+ Paint Stick Projects:


Privacy Policy