
[pinit]
[pinit]
I am thrilled to introduce the first of SBLC’s weekly contributor posts! Welcome Cyn from Creative Cynchronicity. She is sharing a great cardboard loom weaving technique that you can use to creative beautiful fiber are. Make unique gifts, and teach your children the technique for an inexpensive and fun kid’s craft. Cyn shows you how!
Hi! My name is Cyn and I’m so excited to be here today sharing one of my favorite forms of crafting with you. Saori is a modern type of hand weaving that was developed by Misao Jo, a Japanese woman, about 40 years ago. It’s an inexpensive and simple method of weaving that can be done by children and adults alike. It is easily transportable and requires few materials, making it an ideal craft to take along on trips or to appointments. I became aware of it a few years ago and have been experimenting with it ever since. Here are the basics in Saori weaving:
Materials needed: remnants of yarn, a couple pieces of cardboard (one of these will form your loom), a pair of scissors. Optional: You may want a large eyed blunt needle (plastic ones work great for this especially with children), a few pieces of tape to hold loose strands of yarn out of your way, a ruler, and a rotary cutter with cutting mat.
 You’ll want your piece of cardboard for the loom to be roughly the same size as your finished project. I’m making a mug rug so I made mine about 6-7 inches square. For my next project, I plan to try something a bit bigger and I’m going to make some place-mats. Make little snips along the top and bottom edges of the loom – about 1/8 to 1/4 inch apart. The closer together the little slits are, the tighter the weave will be (and therefore, the more stable it will be!)

Left: front of loom, Right: back of loom
Begin at one corner of the loom and create your “warp” threads by leaving a bit of a tail about half the width of your loom (you might want to use a little piece of tape to secure it to the loom and get it out of your way). Then hook the yarn through a slit at the top of the loom, down through the slit directly across from it at the bottom of the loom, wrapping the yarn all the way around the back of the loom, and going back up to the next slit at the top of the loom to repeat the process again. When you have gone all the way across the loom, be sure to leave another “tail” of yarn, again about half the width of your loom. A hint: don’t use a yarn that stretches for the warp threads. Also, be careful with very fibrous yarns as some of them are a bit on the delicate side and aren’t strong enough to hold up as warp threads.
 Now, you want to cut a length of yarn to begin weaving with. Saori is considered a very intuitive, “go with the flow” kind of weaving. Just grab whichever yarn strikes your fancy and use it! Some people even use this as a sort of meditative process – it IS very relaxing! Now, start weaving. Under, over, under, over – just like you did with paper weaving as a kid. The big difference here is that in standard weaving, when you get to the end of a row, you just turn around and start heading back in the opposite direction. In Saori weaving, when you get to the end of a row, just wrap the yarn right around the back of the loom and then start your next row directly above where the previous one began. Remember that if you started the first row by going over, under, over, under, you’ll want to start the next one under, over, under, over.
 You can simply weave using your fingers but you may find that using a needle or creating a shuttle will make it easier. You can fashion a shuttle out of a scrap of cardboard that you wrap your yarn around but my personal preference are the large eyed plastic needles. They’re safe and simple to use for both children and adults. When you get near the end of your weaving, the needle is also better able to make it through the increasingly tighter space. Once you’ve completed all of the weaving, you’ll once again want to leave a tail of yarn that is at least half the width of your loom.

Flip your loom over so that the back of the loom is face up. This is where you use another piece of cardboard. Carefully slide a piece of it under the “weft” threads (the ones you were weaving with) to provide a bit of a barrier between them and your warp threads. This will keep you from accidentally cutting the warp threads! Cut right down through the middle of your weft yarns, using that cardboard to keep your scissors away from the warp threads.
 Take 2-4 (depending on how thick they are) of your cut yarns and tie them off using an overhand knot as close to the weaving as you can to secure them. Next you want to cut the warp threads right down the center just as you did with the weft. Leave them hooked onto the loom though and only take a couple off at a time to tie them off.
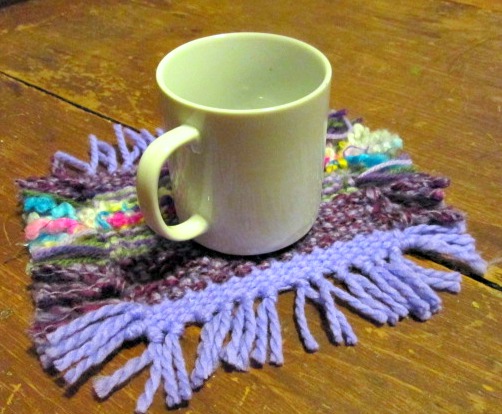
 Trim the tied off threads so they are even and at the desired length. This makes a really pretty fringe all around the edges of your mug rug (or other project).
 Of course, once you get the basics down, it can be a lot of fun to experiment with Saori weaving. Add in some beads to the weaving or the fringe, weave in some non-traditional materials like feathers or wool roving, or try a variety of weaving patterns beyond the typical over-under!
If you enjoyed this project, I’d love to have you visit me over on my blog Creative Cynchronicity. You can also find me on Facebook, Twitter, Instagram, Pinterest, and Google+.
