Make a Cool Wreath From Fabric Scraps

Hi everyone! It’s Vidya from Whats Ur Home Story. Great to back here sharing an exciting project!

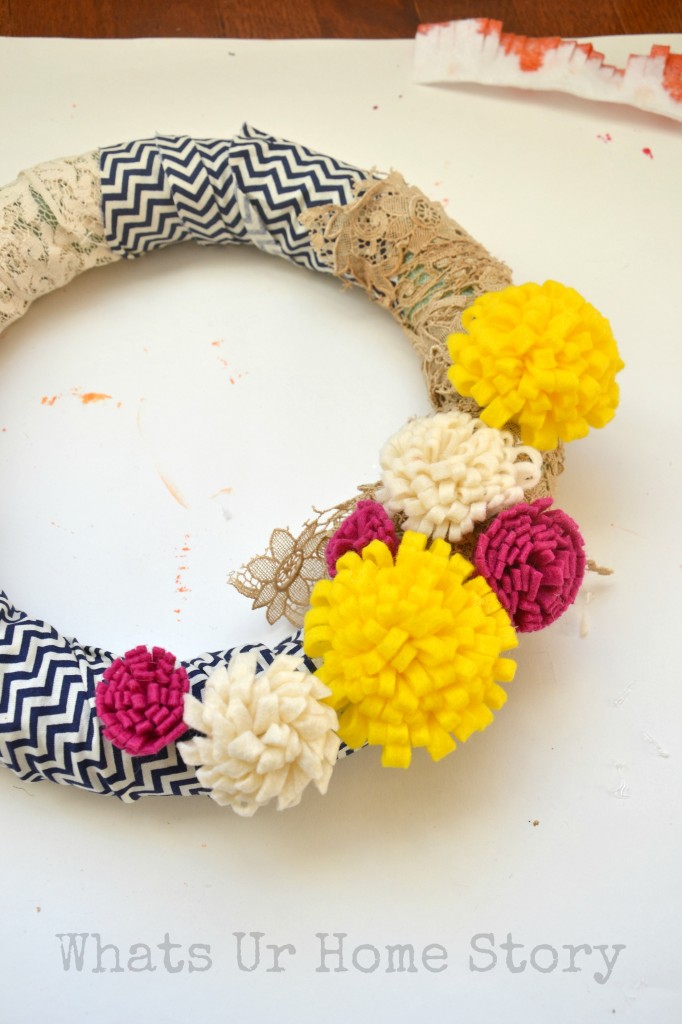
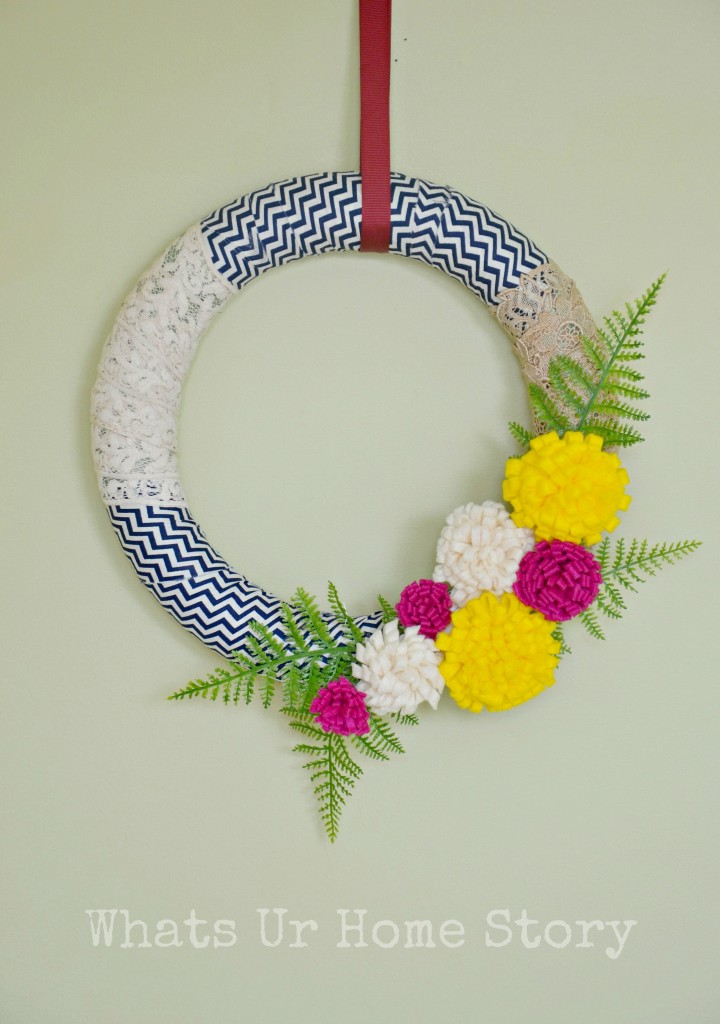
Don’t know about y’all but after all the cold and snow this winter I’m so ready for Spring! I know we have got over a month to go but no harm in pretending that it is already Spring around here especially when you have this bright and cheery wreath made out of fabric scraps and felt flowers hanging on your front door.

[pinit]

fabric scraps wreath, spring wreath, felt flower wreath

[pinit]

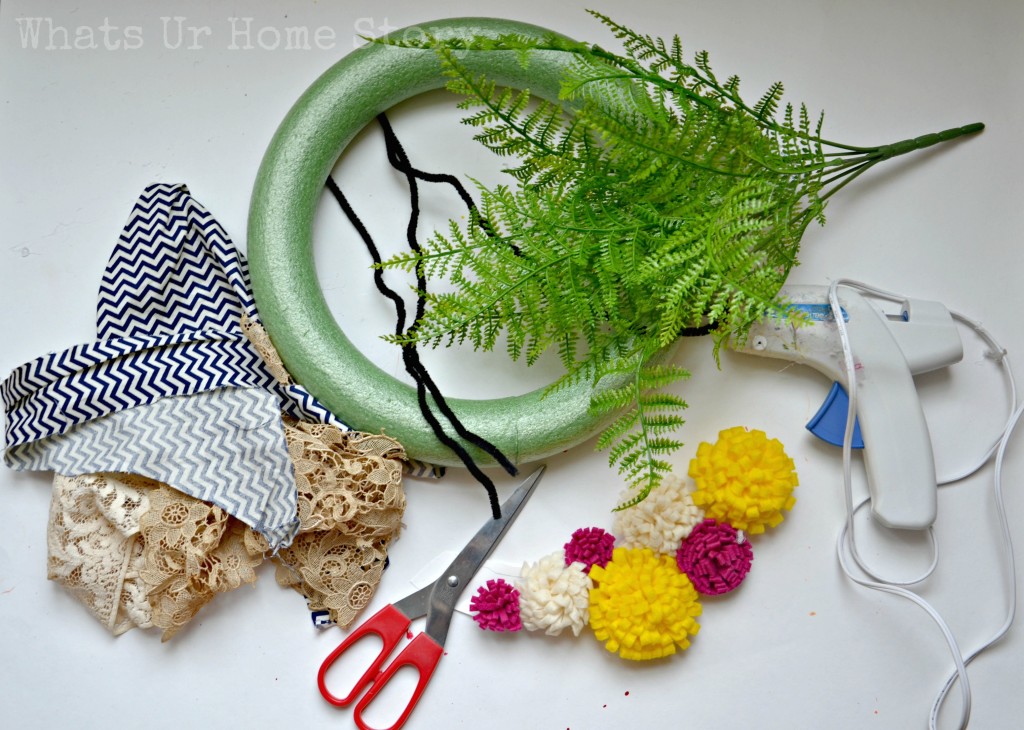
Other than buying a fake fern sprig from Micheals I didn’t spend a penny to make this beauty. The chevron fabric scraps are from a chair makeover while the vintage lace I salvaged from a neighbor’s trash. The yellow felt strips for the flowers are leftovers from my felt circles pillow, †the other pieces of felt from my handmade Christmas ornament project. The wreath frame is the same one I used to make my Magnolia wreath.

Materials

Foam Wreath form
Fake Greenery
Fabric Scraps
Felt flowers (I made them using this tutorial.)
Hot Glue Gun
Scissors
A small pieces of poster board
2 Pipe cleaners


fabric scraps wreath, spring wreath, felt flower wreath

Tutorial

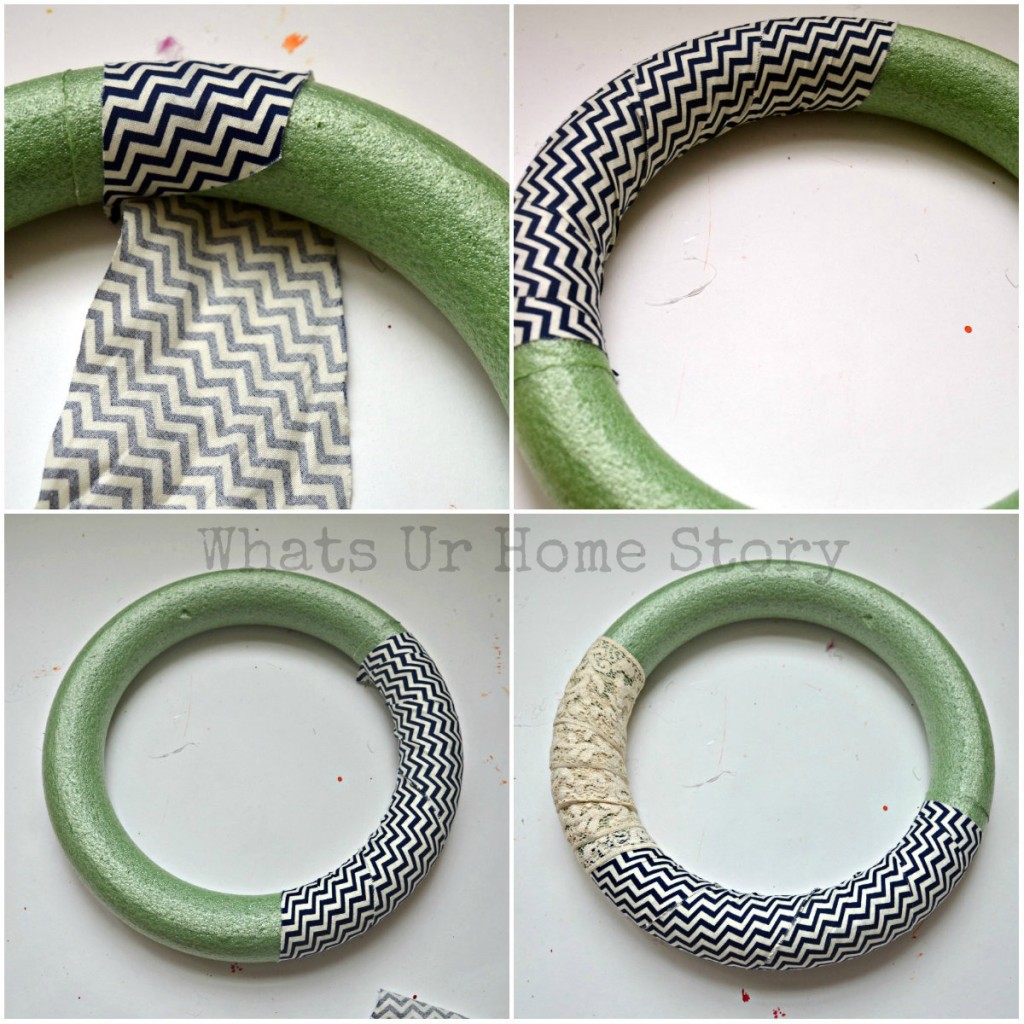
  • Before you start try wrapping the fabric scraps around the wreath form to see if you have the required length to cover the form. Nothing fancy just some slopping wrapping would do. All you are trying to gauge is how much fabric you need. Also place your flowers on the wreath to get an idea of their layout.

fabric scraps wreath, spring wreath, felt flower wreath

  • Now that you have your pattern figured out start by hot gluing one end of your fabric scrap to the underside of the foam and wrap tightly as you go. If your scrap is not long enough just end it on the back of the foam and start with a new piece. Hot glue the other end. Start with the next scrap in this case, the vintage lace.†I liked the look of the lace over the chevron fabric so I made sure that I started the 2nd chevron wrapping before I hot glued the other end of the lace.

fabric scraps wreath, spring wreath, felt flower wreath

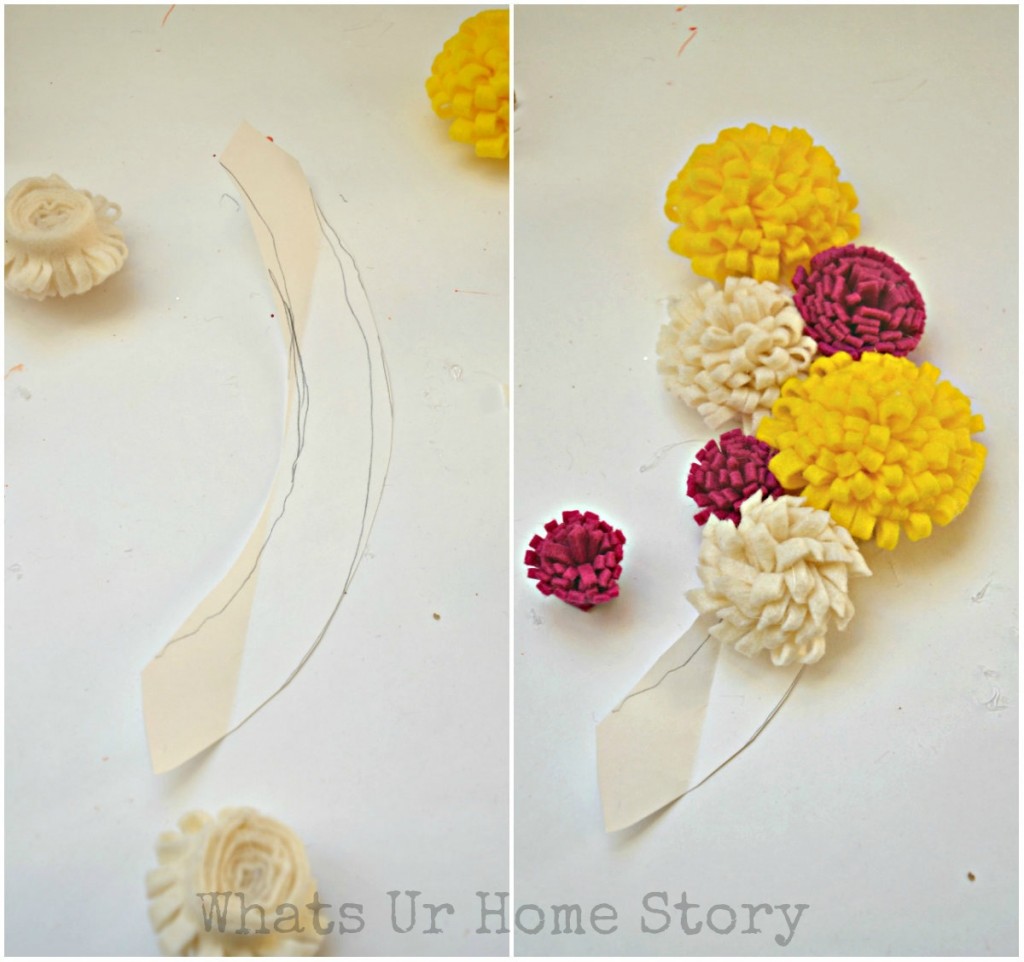
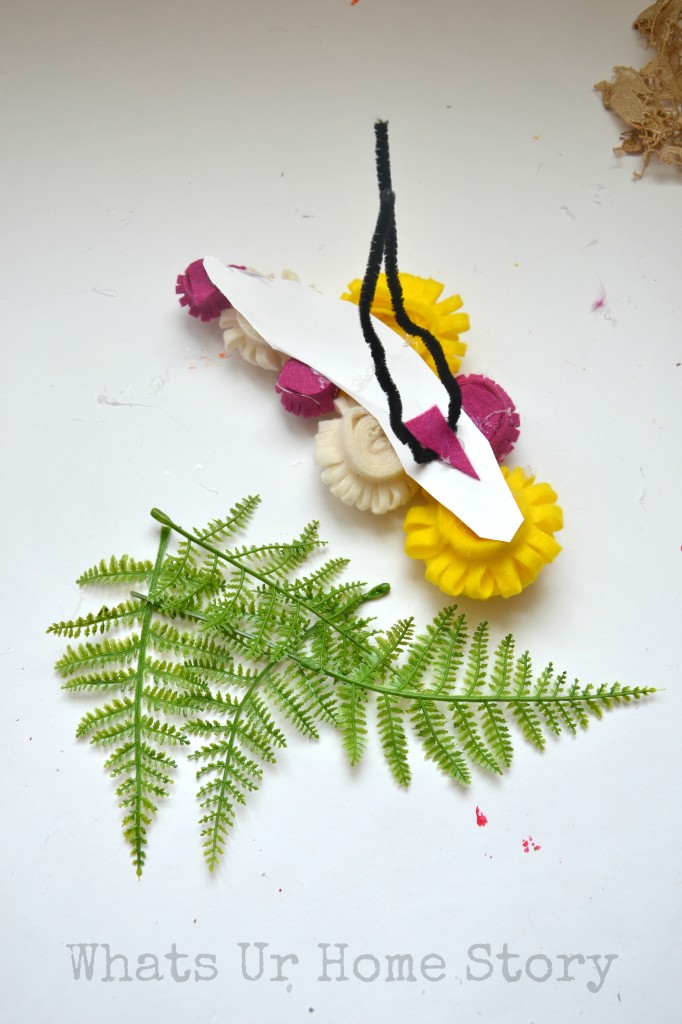
  • For the flowers, trace the wreath form (where the flowers are supposed to go) onto a piece of poster board, cut out, and glue the flowers in the layout that you liked from Step 1.

fabric scraps wreath, spring wreath, felt flower wreath

  • Hot glue the pipe cleaners to the back of the poster board at places where the weight of the flowers would be the most. Ideally you should use pipe cleaners that would match your fabric but black is all I had on hand.

fabric scraps wreath, spring wreath, felt flower wreath

  • Glue the fake leaves to your poster board too. Now attach the poster board ‘flower piece’ to the wreath by tightening the pipe cleaners. And there you have it, your fabric scraps Spring wreath.

[pinit]

fabric scraps wreath, spring wreath, felt flower wreath

[pinit]

Are you ready for Spring too? do you usually make Spring Wreaths?

For more easy DIY ideas stop by†Whats Ur Home Story†or follow me via†Facebook,†Pinterest,†Twitter, G+ or†Instagram.

Easy Side Table from Wooden Crate

[pinit]Make a side table that doubles as storage from a crate in this easy upcycle DIY @savedbyloves[pinit]

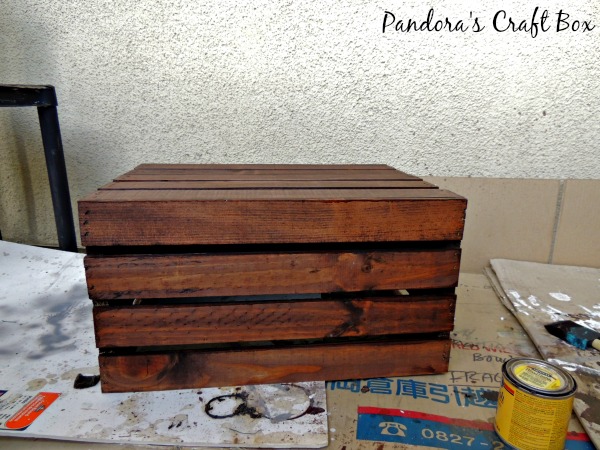
Hi, I am Loren from Pandora’s Craft Box and I don’t know about you but I hate having my magazine lying around everywhere in my home. All of us have subscription that my wonderful mother in-law has gotten us, so I really needed to find a place for our magazine where they could be displayed nicely. I like to keep my magazine at hand because I love using them as inspiration.

mud-room-storage-out-of-crates

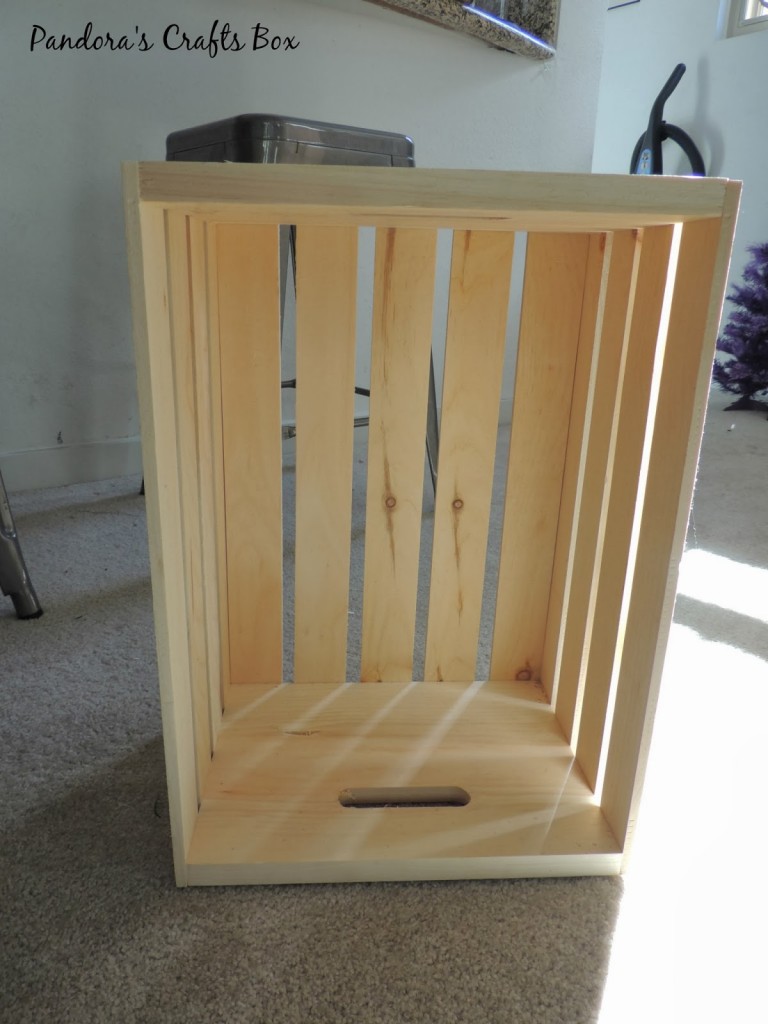
The first thing that came to mind was using a crate that I had lying around the apartment.

Repurpose a crate into rolling end table and storage with this easy DIY @savedbyloves

I love the color of dark wood and decided to stain the crate a dark mahogany. The funny thing about staining is it has to be perfect weather. It can’t be too humid or cold because it will take that much longer for the stain to dry. I used a brush to apply the stain to the crate.

Remember to wipe any extra stain off the crate as you stain. The crate will dry faster if you do.

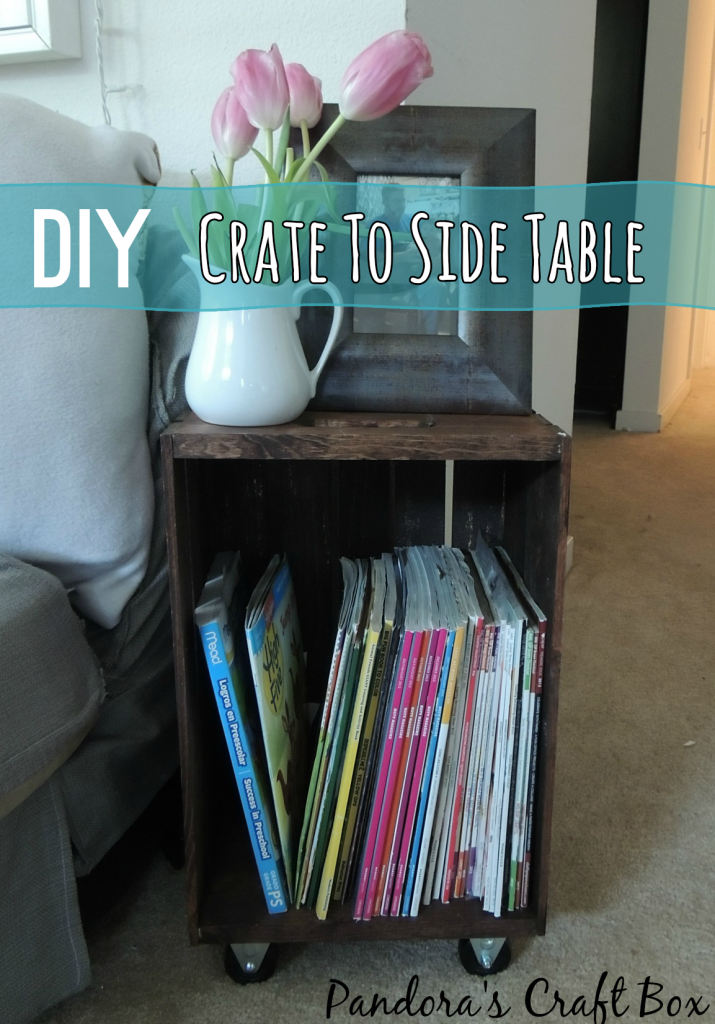
After the crate has dried overnight, I took a little trip to the hardware store and got wheels to attach to the bottom of the crate. Now I am able to move the crate with ease anywhere I wanted to go in my home.
Now the crate can be used as a side table and magazine storage to keep all of my HGTV magazines ready at hand for when I need inspiration!

What will you be using your crate side table for?

Stay Crafty!

Loren

Don’t miss our 50+ Repurposed Crates for more creative upcycle ideas!

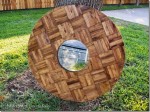
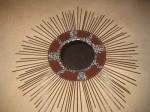
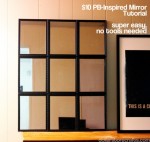
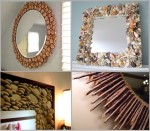
The 50 Best DIY Mirror Projects Ever Made

[pinit]

50 Best DIY Mirros Upcycled Recycled and Eco Friendly Decor with Mirrors @savedbyloves[pinit]

Have you ever been to a house with no mirrors? Yep, we all use them. Today I am sharing my favorite DIY mirrors, upcycles, hacks and revamps from the most creative people gracing the blog world.  You will be amazed.  It helps you look good, so help it do the same.  If breaking it brings bad luck, maybe beautifying it will land you that winning lottery ticket!  If not, you are left with a cool mirror that you made.  Everyone wins.  Enjoy!


DIY Wood Slice Chalkboard Art

Hello friends, it’s Barbara from Chase the Star, and I’m so excited to be back here to share some more crafty goodness!

Chalkboard paint is one of my favorite crafting mediums, it’s so versatile, and works with just about every decor style. I have it all over my house; on walls, furniture, everywhere! Most recently I used chalkboard paint on a wood slice for a new and fun art piece..

Chalkboard Wood Slice Art

Wood Slice Chalkboard Art via #ChaseTheStar for Saved By Love Creations #chalkboard #valentinesgift #diy #craft

Talk about easy DIY art! This would make a great gift; here’s how you can make one:

Materials:

7-9″ Wood slice

Chalkboard craft paint (I used Americana)

Chalk

White painter’s pen

Stencil of your choice (I used a set by American Crafts)

Brush (foam or bristle)

Chalkboard Paint on a Wood Slice! Easy Wall Art! Wood Slice Chalkboard Art via #ChaseTheStar for Saved By Love Creations #chalkboard #valentinesgift #diy #craft

Directions:

Step 1:

Make sure your wood slice is free of dust and add a coat of the chalkboard paint to one side. Allow it to dry a few minutes.

Handmade art Wood Slice Chalkboard Art via #ChaseTheStar for Saved By Love Creations #chalkboard #valentinesgift #diy #craft

Step 2:

Go over the chalkboard paint with a light coat of chalk. Then wipe it off.

Chalkboard Art Wood Slice Chalkboard Art via #ChaseTheStar for Saved By Love Creations #chalkboard #valentinesgift #diy #craft

I just wiped it down dry so that the wood grain stands out but you can choose to remove the chalk with a damp cloth if you rather the grain not show.

Step 3:

Using the painting pen and your stencil add the message you like! I went with the phrase “U & Me” but you can put your family’s initial, or other cute and fun wording!

Easy Wall Art! Wood Slice Chalkboard Art via #ChaseTheStar for Saved By Love Creations #chalkboard #valentinesgift #diy #craft

You can add a sawtooth hanger on the back to put it up on a wall. Or just lean it on a mantel, or even lay it flat on a nightstand or entry table!

DIY Gift Easy Wall Art! Wood Slice Chalkboard Art via #ChaseTheStar for Saved By Love Creations #chalkboard #valentinesgift #diy #craft 550x

I can’t wait to put this up on my bedroom wall!

Do you love chalkboard paint as much as I do? How do you use it to decorate or craft?

For more creative DIY ideas stop by Chase the Star, and follow me on Facebook, Google+, Pinterest, and Instagram!

See you next time!

signature

How to Print on Burlap with Free Spring Printable and DIY

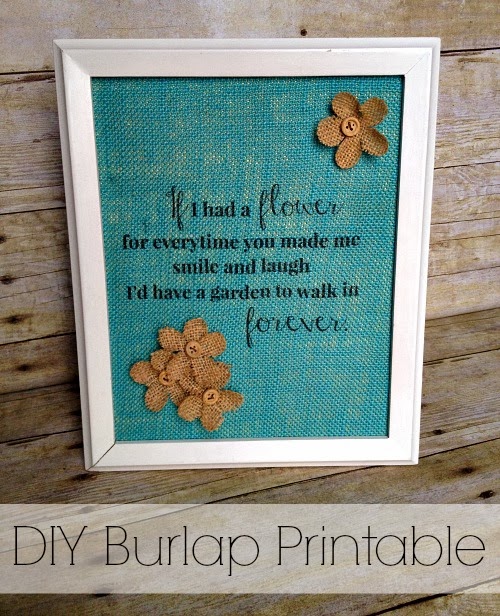
[pinit]DIY how to print on Burlap with free Printable wall art @savedbyloves[pinit]

Hi there everyone!
I’m so happy to be back chattin’ with you!
Do you love the look of burlap prints?
If you do, this is your lucky day because I’m going to teach you how
to make your very own right in the comfort of your home!
Honestly, this whole project took me less than 15 minutes to make
and I absolutely adore it!

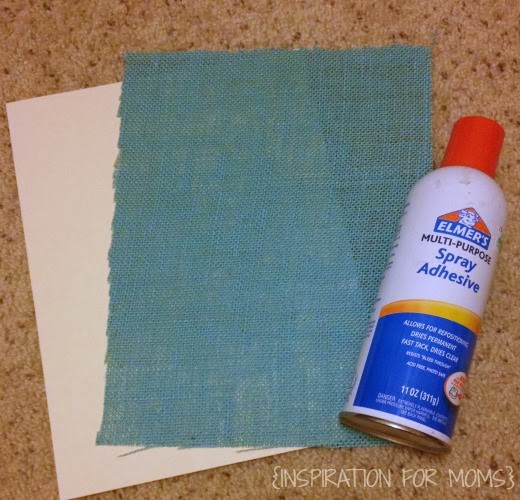
SUPPLIES:

-burlap
-card stock
-scissors
-home printer
-spray adhesive

TUTORIAL:

DIY Burlap Printable-Supplies Needed

You first step is to cut your burlap to the same size as your card stock.
Spray the card stock with your adhesive and then apply your burlap on top.
 Press down and make sure that there are no lose ends.
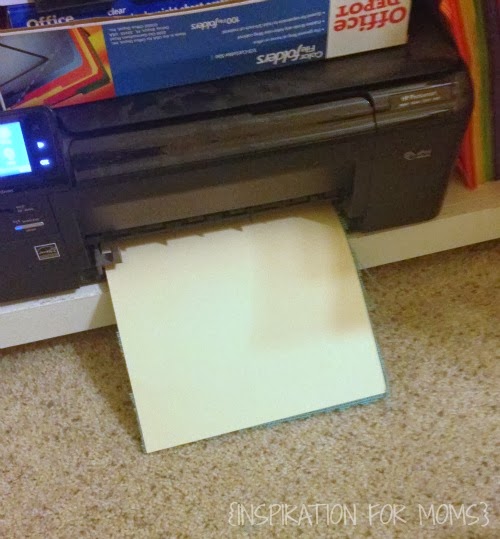
How to print on burlap
Now it’s time to insert the burlap into the printer.
You want to make sure the burlap in on the side that will be printed on.
For my printer, I placed it in upside down.
(Please ignore the dust on my printer. Dusting is not my favorite activity!)
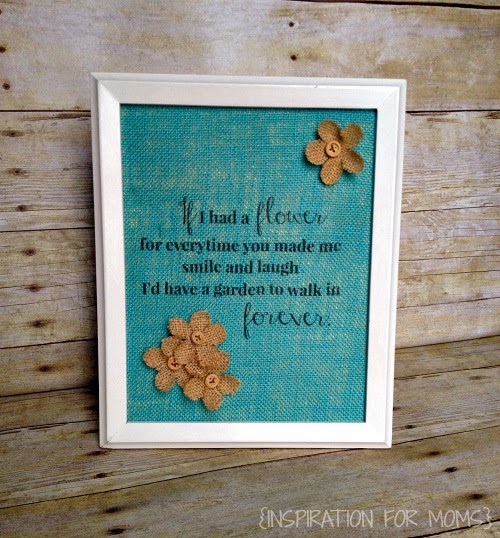
if I had a flower

If you would like to print my quote, 
just right click on the image below and save to your computer.
Printing on burlap at home
Then it’s time to print your design or quote.
 I chose this quote because I thought it was beautiful
and I knew I had the perfect burlap accessory to go along with it. 🙂
Now sit back and watch your fabulous art appear.
Burlap home decor
Once it’s done printing some tutorials may tell you to remove the card stock.
But I won’t. Nope.
I am going to use the card stock to give my burlap some support for when I frame it.
I didn’t want my printable behind glass because I wanted to accessorize
with some pretty burlap flowers.
So I placed the burlap print in the frame first and placed the glass behind.
To add my flowers, I simply used my glue gun.
And that was it.
Can you believe how easy that is?
I know right. I better go stock up on ink because I am going to be
a burlap printing fool!  🙂
 Are you addicted to burlap like I am?

I hope you enjoyed this easy burlap craft. 
If you would like to see more of my projects or keep up with my latest updates,
follow me on FacebookPinterestTwitterGoogle+ or Instagram.
 

Want more?  Check out 50+ Burlap Crafts and Decor Ideas!

Burlap DIY Decor

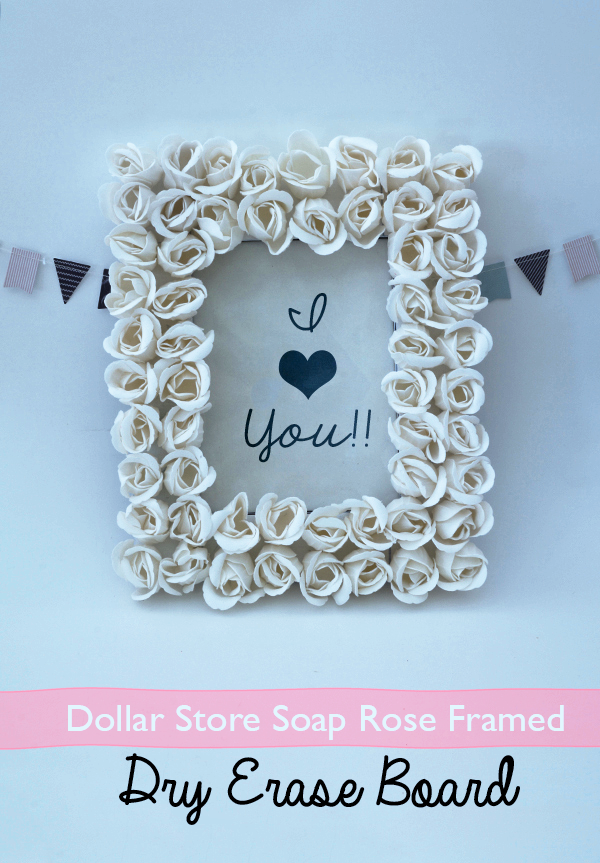
Easy Dollar Store Craft – Rosette Framed Dry Erase Board

[pinit]Easy Dollar Store Rose Soap Framed DIY @savedbyloves
[pinit]

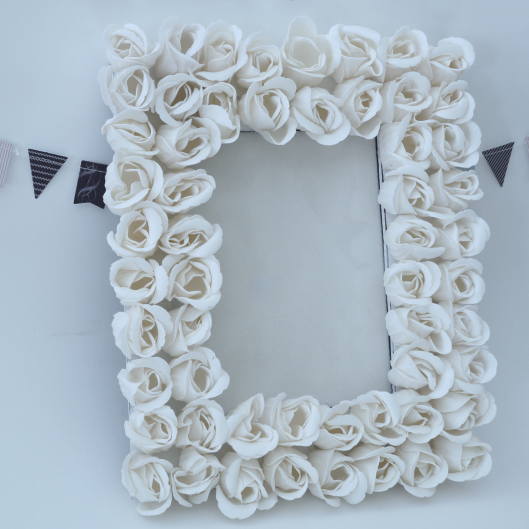
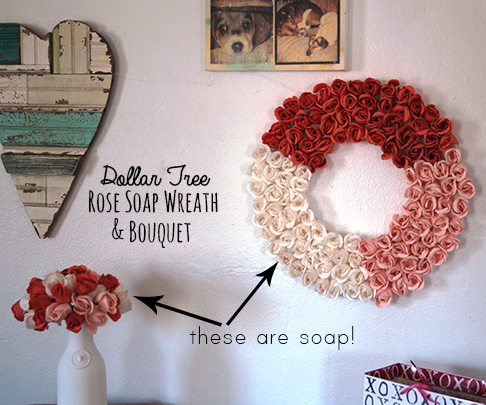
Last week I showed you a wreath and bouquet made from these pretty Dollar Tree rose soaps.  You get 9 in a package, and at the store where I live the packs are 2 for $1!  I am having a blast gluing these soaps to various things.  Today I will show you how I made this rosette framed dry erase board with them and a few basic supplies.  Wake up your sweetheart with a personalized message and breakfast in bed this Valentine’s Day!

How to Make a Dollar Store Rose Frame

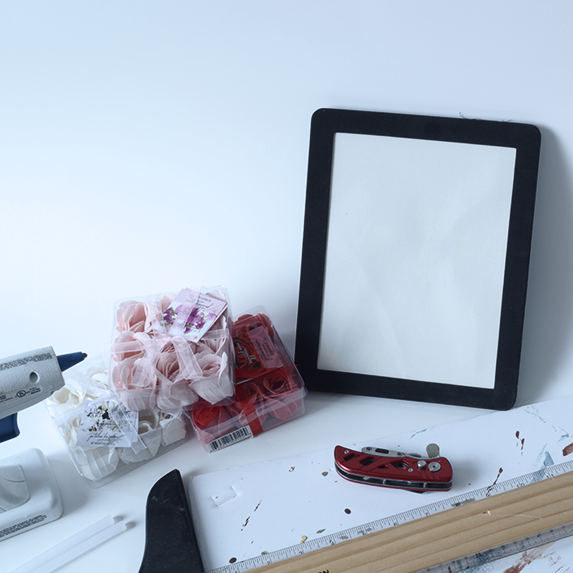
SUPPLIES:

Dollar Store Craft Idea

Dry Erase Board from Dollar Store

Scrap foam board or cardboard large enough to frame the dry erase board

Utility knife

Straight edge and marker

Glue Gun

Dollar Tree rose soaps

TUTORIAL:

DIY Dry Erase Board

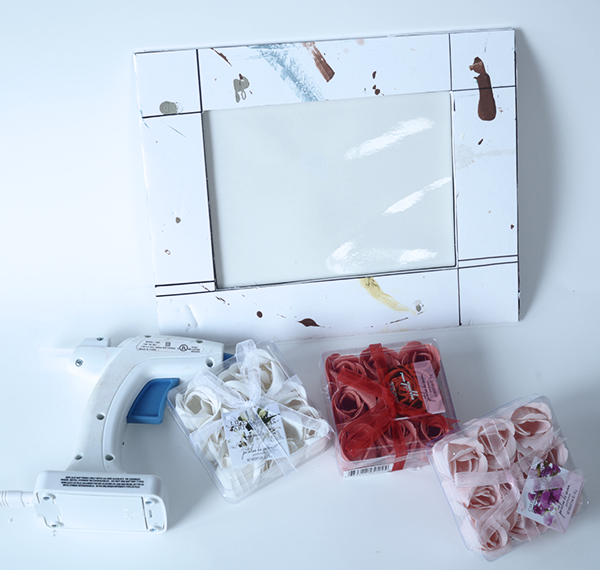
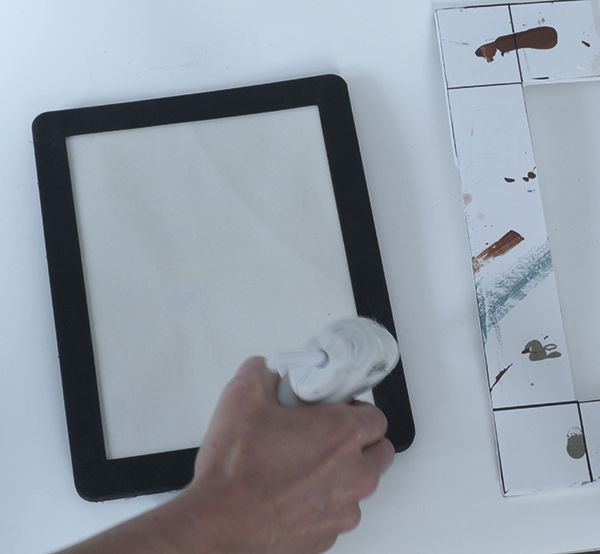
Measure and and mark frame dimensions on foam board using straight edge and marker.  I made mine 2 inches wide and the opening to fit the dry erase board (in this case 6×8 inches).  Cut out with utility knife.

DIY Dollar Store Craft

Apply a thin strip of hot glue around the dry erase board foam frame and place your new frame on top of that.

Make a Rosette Frame From Dollar Store Soaps

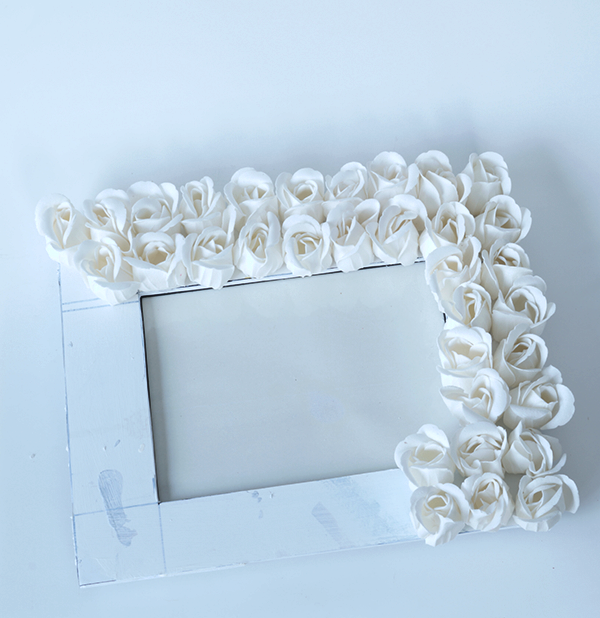
Simply glue the rosettes in place with a dot of hot glue.  I went with all white this time.  That way I can use it all year round, not just on Valentine’s Day.

How to Make a Dry Erase Board

The roses made the piece to heavy to hang on the fridge with the 2 magnets that came on the back.  I didn’t really mind since I plan to display mine on a shelf.  If you want to have it on your fridge, add more magnet strips to the back.  You can get rolls of adhesive backed magnet at most craft stores.

Make a Dollar Store Valentine's Day Dry Erase Board

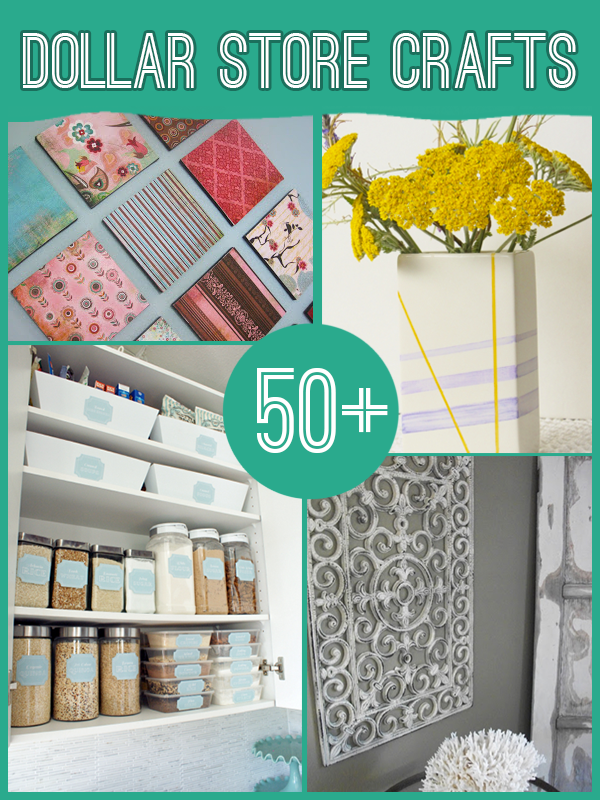
If you want more Dollar Store Craft Ideas, visit our 50+ Dollar Store Craft Round-up:

50+ Dollar Store Crafts to Make @savedbyloves

DIY Wreath & Bouquet from Dollar Store Soaps

[pinit]
Super easy and cheap DIY; Dollar Tree Soap Rose Wreath and bouquet tutorial @savedbyloves[pinit]

Dollar Store Wreath Tutorial


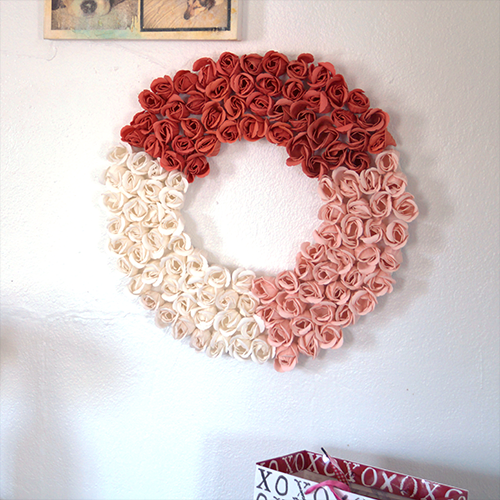
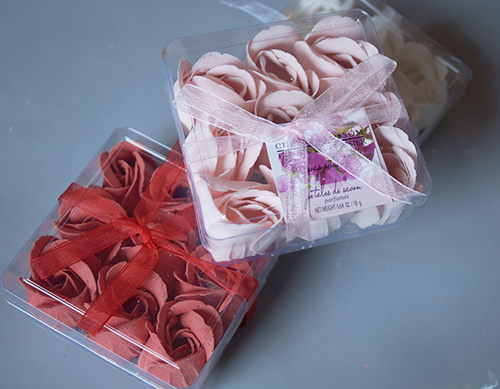
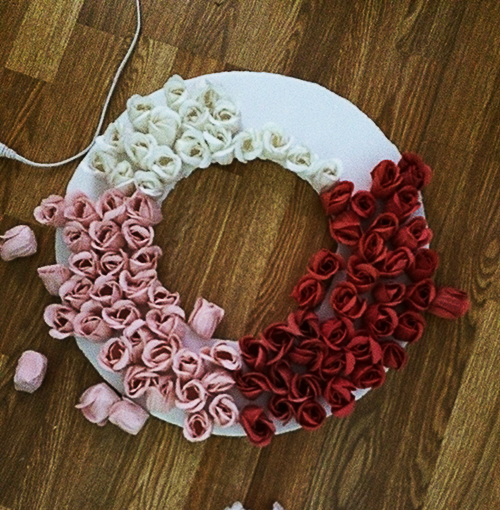
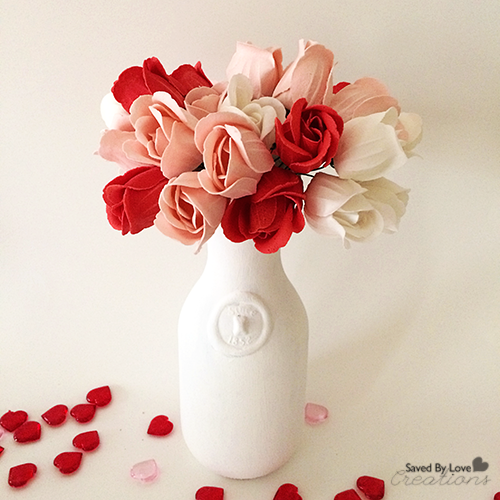
Ok, I will admit, I am pretty proud of this Dollar Store Craft.  I made the rose bouquet and wreath from rose soaps I found at Dollar Tree!  You get 9 in a package and at one of the Dollar Tree stores near me, I found them 2/$1.  It took 12 packages for the wreath and 4 for the bouquet.  Not only are these gorgeous, but they smell good too.  Just don’t put them outdoors.  Rain is not this project’s friend!

Dollar Store Valentine's Day Craft

The soaps come in white, pink and red, perfect for Valentine’s Day!  I plan on making an all white one for year round, since it is just so beautiful!

SUPPLIES:

Wreath Form or foam board and circular objects to trace and cut out a wreath form of your own

Scissors

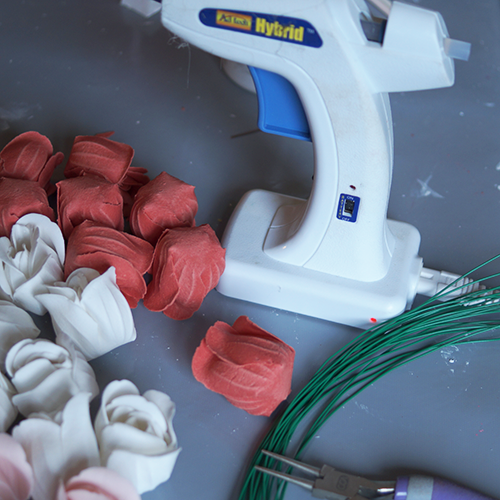
Hot Glue Gun and sticks

Rose soaps

Additional Supplies for bouquet:

How to Make a Bouquet

Floral Wire

Round nose pliers

Vase

TUTORIAL:

Wreath form DIY

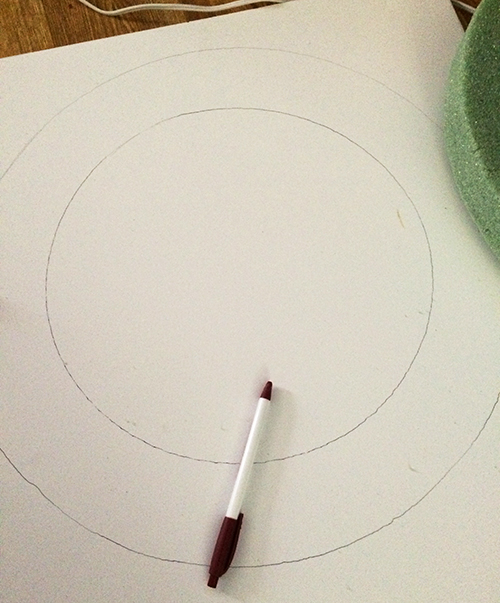
For the wreath, cut out your wreath form if you are making one.  If you have one, skip this step!  I traced a wreath form onto foam board.  I wanted a flat surface instead of the dimensional wreath form.  Cut out with scissors.

DIY Rose Wreath

I decided to go in color block sections.  Lay out your design then glue roses onto wreath form with hot glue gun.

Dollar Store Wreath Tutorial

Hot glue a loop of string on the back and your wreath is ready to hang.

Now for the Bouquet:

How to make a Valentines Day Rose Bouquet

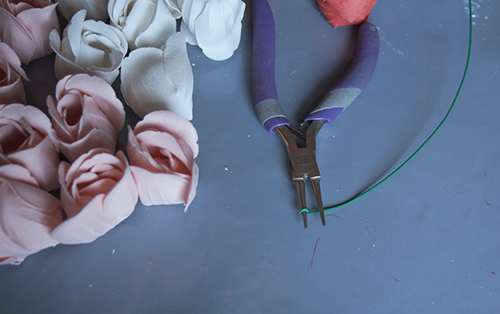
Cut wire 8-10 inches or your preferred stem length.  Start a loop at one end with your pliers.

How to Make a rose Bouquet

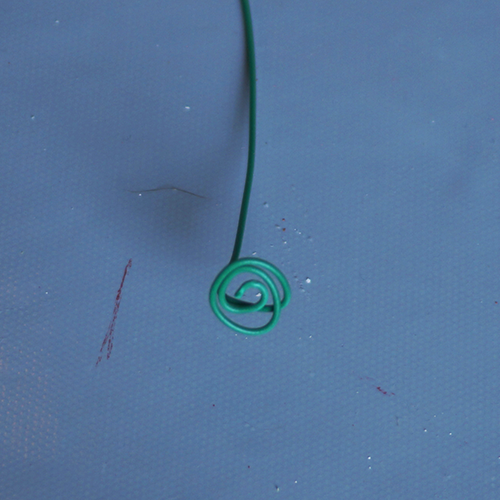
Remove wire from pliers and use fingers to continue spiraling as until you get something like the above shot.

DIY Rose Bouquet

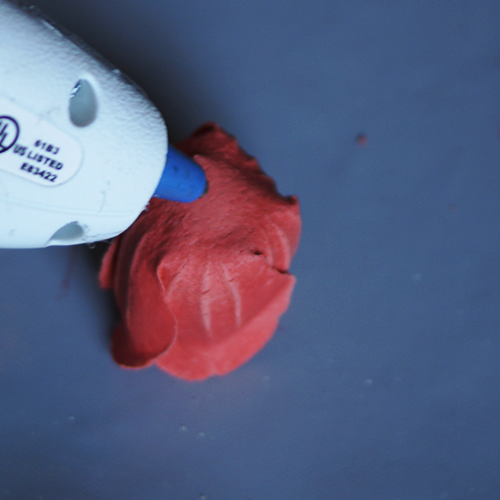
Add a dab of hot glue to the base of the flower.

DIY Valentines Day Gift Idea

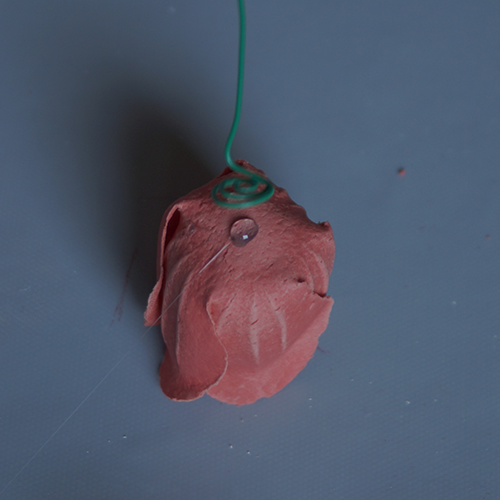
Glue wire spiral onto flower base.

How to make DIY Rose Bouquet

When you have enough flowers, place in a vase and you are set!

Dollar Tree Soap Rose Wreath @savedbyloves

DIY Chalky Glitter Heart Mason Jar Votive Holders

[pinit]DIY Chalkboard paint Mason Jar Valentines Day Lanterns @savedbyloves [pinit]

Today I am sharing how to make these fun chalk and glitter paint mason jar lanterns.  They are super simple to make, and will compliment your Valentine’s Day decor perfectly.  Let’s get started!

Valentine's Day Mason Jars

SUPPLIES:

Mason Jars

Deco Art Chalky Finish Paint in Everlasting

Deco Art Crystal Glitter Glass Pain in Red

One inch paintbrush or foam brush

Adhesive Jewels

Heart Stickers or Cut out hearts from Foil tape with paper punch or Sizzix Heart Die

Rubbing alcohol

Lint free towel

TUTORIAL:

Mason Jar Lanters

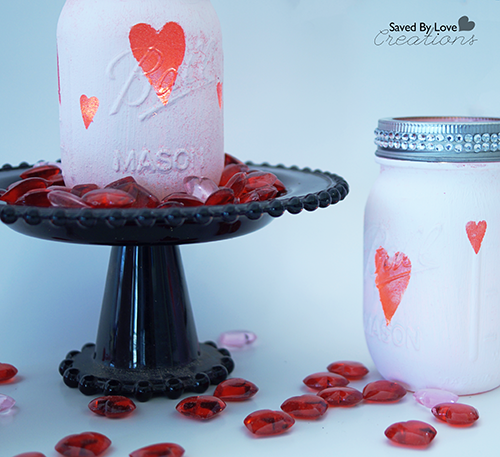
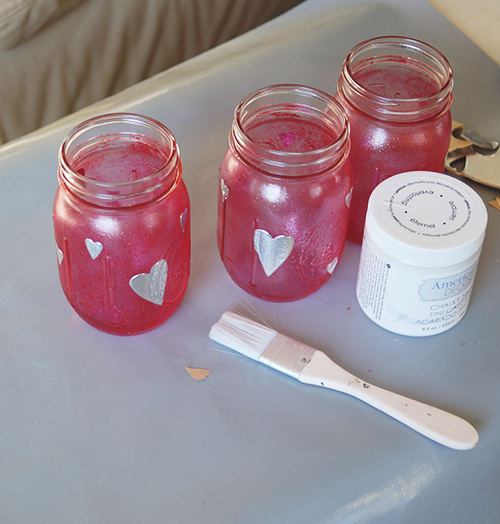
Clean mason jars with alcohol and lint free cloth, then paint with red glitter glass paint by DecoArt.  Let dry completely then place heart stickers where you want your hearts to be.  I used foil tape and my sizzix heart die because The foil sticks well and the paint won’t seep under in the next step.

How to Paint Mason Jars Chalkboard

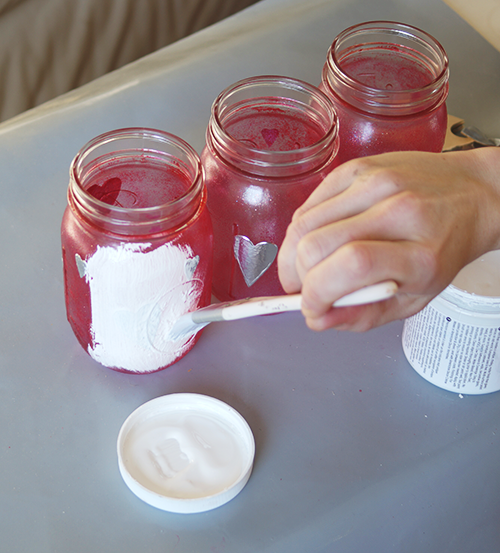
Use a soft brush to paint on chalky finish paint.  I liked the look of the red showing through a little, so I just did one coat, but you can let dry for 30 min and add another coat of you want a whiter look.  When you have painted on your final coat, use tweezers to carefully remove heart stickers after about 10 minutes.  You don’t want to let your project dry completely with the stencils still adhered.  If you do, you run the risk of peeling away adjacent paint when you remove them.

Mason Jar Valentine's Day Craft DIY

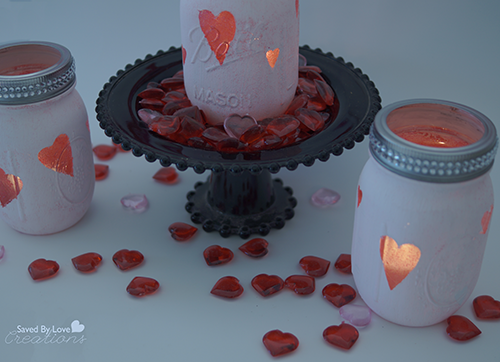
Apply adhesive rhinestones to jar lid as shown in pics, insert candle and that is the end!

DIY Winter Felt Tree

Hi, I’m Vidya from Whats Ur Home Story. Very excited to be a monthly contributor at SBLC. I blog about how our family of 4 is turning a cookie cutter into a unique and interesting home that tells our story. I believe that no project is too small to try be it home decor, DIY, crafts, gardening, sewing, or organizing.

Today I would like to share with you an easy winter craft, a winter felt tree.

[pinit]

Winter felt tree, diy paper cone trees tutorial, paper cone Christmas tree @savedbyloves

[pinit]

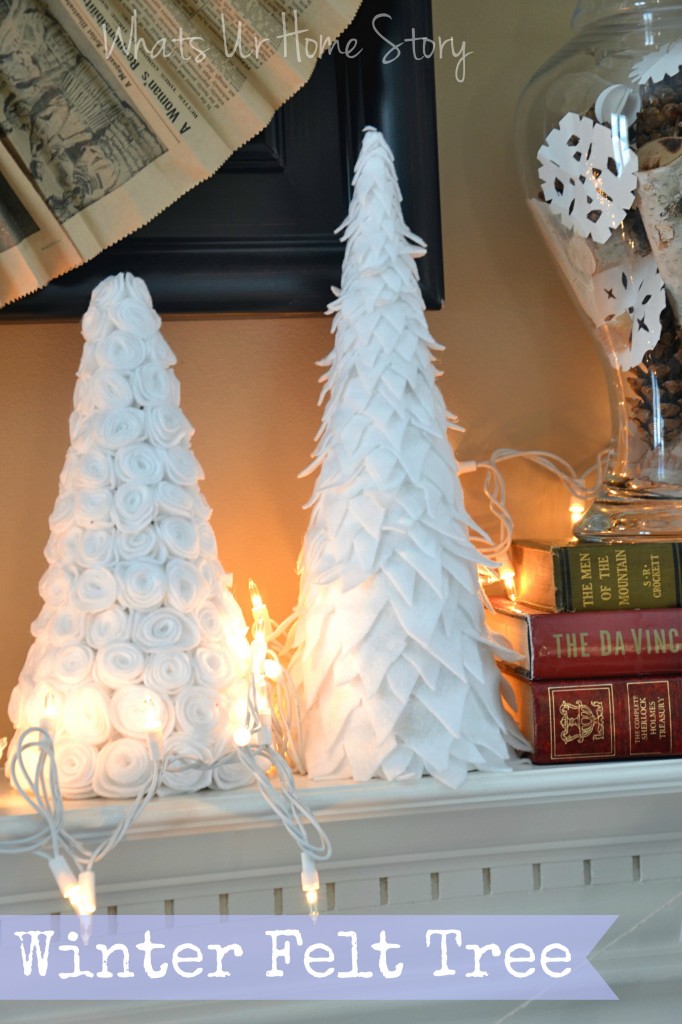
I made both the trees myself but the one on the right is by far the easiest and most forgiving project I’ve done.

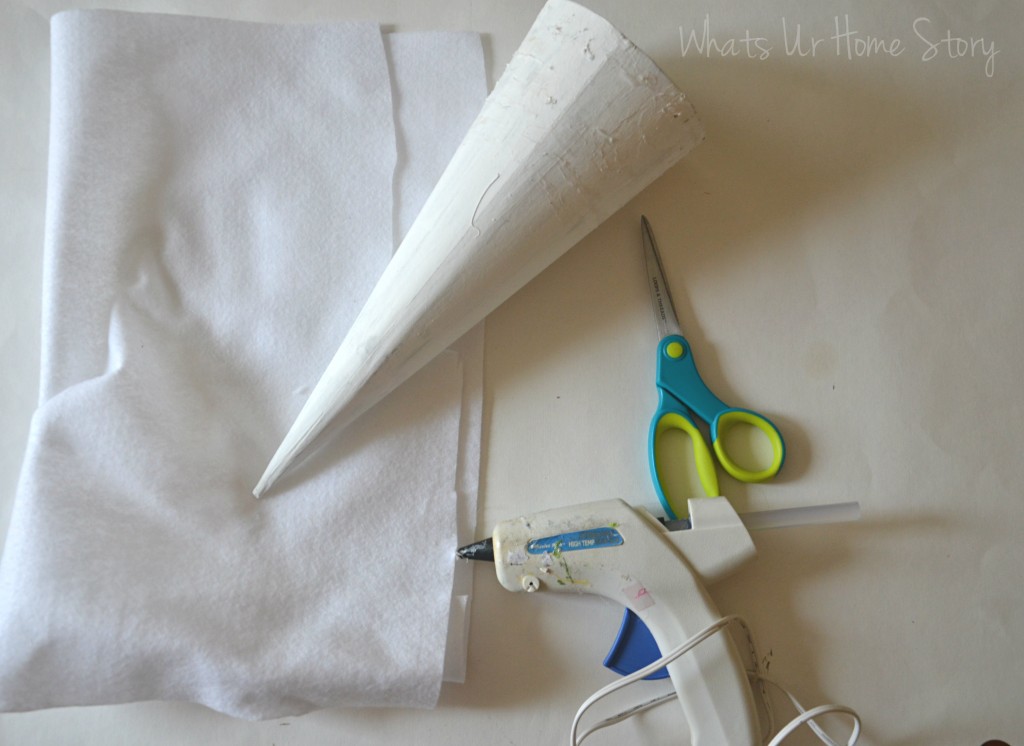
Materials

 
White Felt
Paper mache cone or you could make a cone out of poster board
Scissors
Glue gun
White craft paint and brush – not necessary but if you are a sloppy crafter like me you’ll need it.

Winter felt tree, diy paper cone trees tutorial

Tutorial

 
  • Start by painting your brown paper mache cone white with the acrylic craft paint. This way the brown base will not show through any hot glue misses later on.††If you are using a poster board cone, skip this step.
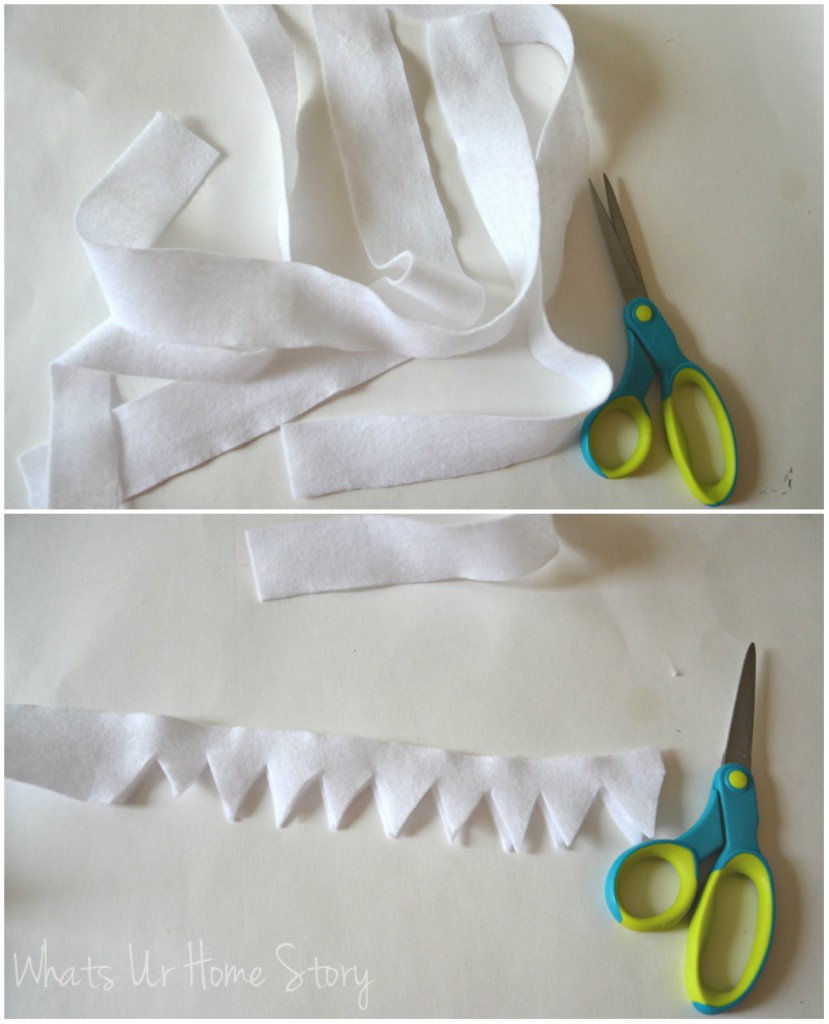
  • Cut felt strips in varying widths. My cone was 14″ tall. So I ended up using four 1 inch strips, two 3/4″ strips, two 1/2″ strips, and a small 1/4″ strip. It is important to lower the width of the strip as you go up the tree to simulate the look of smaller leaves on the top and wider leaves on the bottom. These are not exact measurements, I just eyeballed them.
  • Cut out triangles on one side of the strip as shown below. Take care not to cut all the way through. Again no need to be precise here, just free hand.

Winter felt tree, diy paper cone trees tutorial

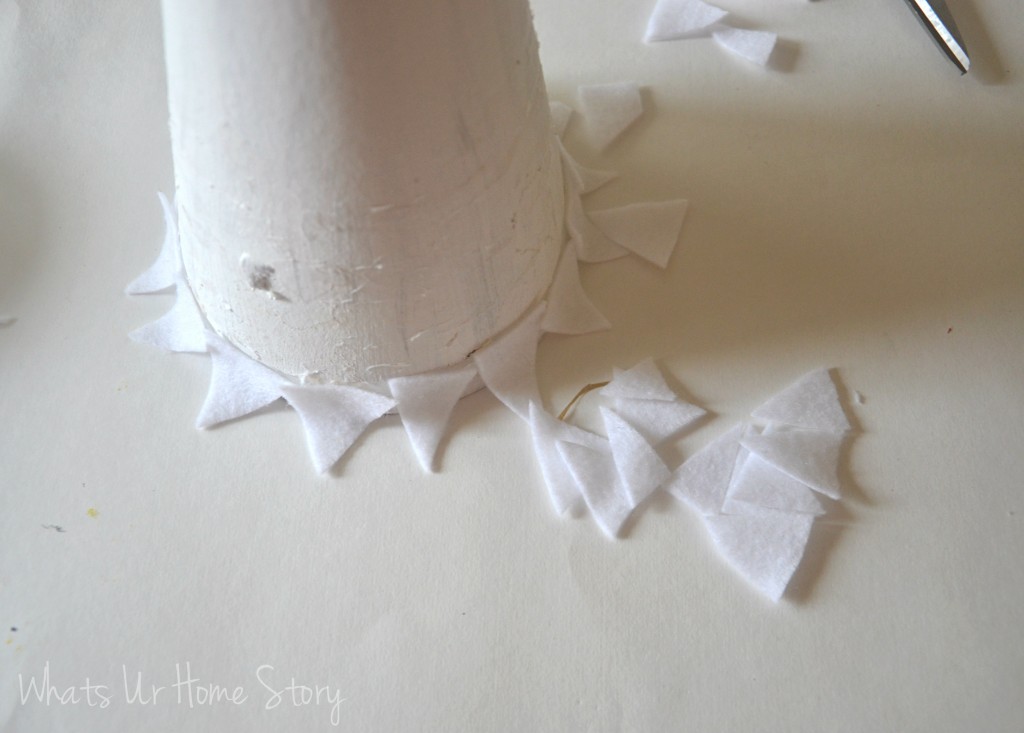
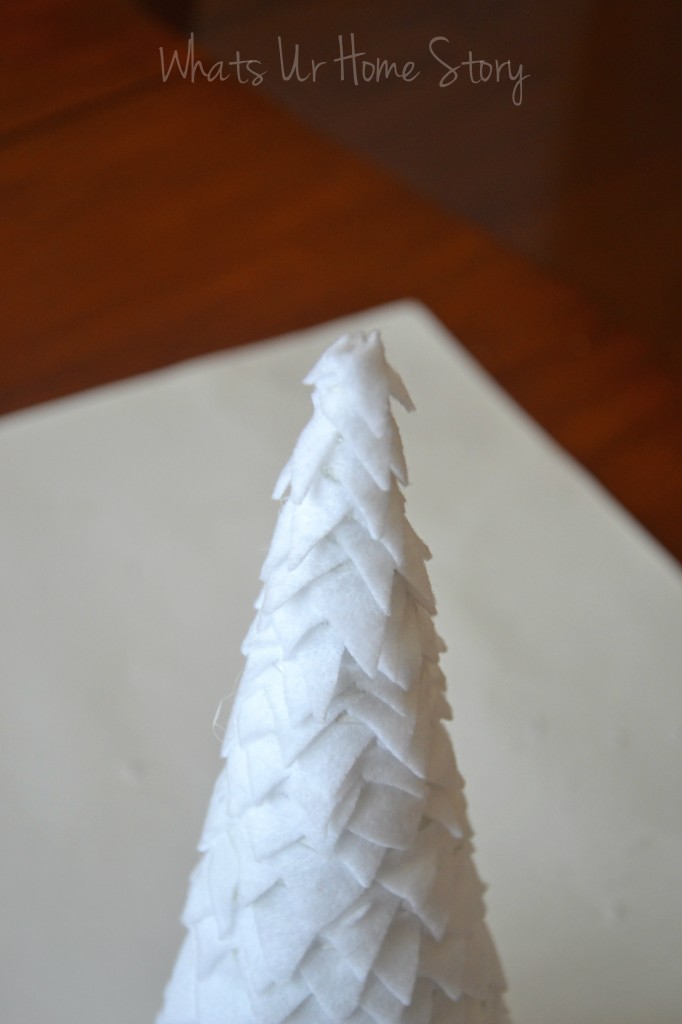
  • When you make these you will end up with a lot of felt triangles (the parts that you remove from your strip). I didn’t want to waste these so for my first layer on the tree I hot glued each of these to the base. If you are not a fan of gluing each petal down you can start with the strip instead.

Winter felt tree, diy paper cone trees tutorial

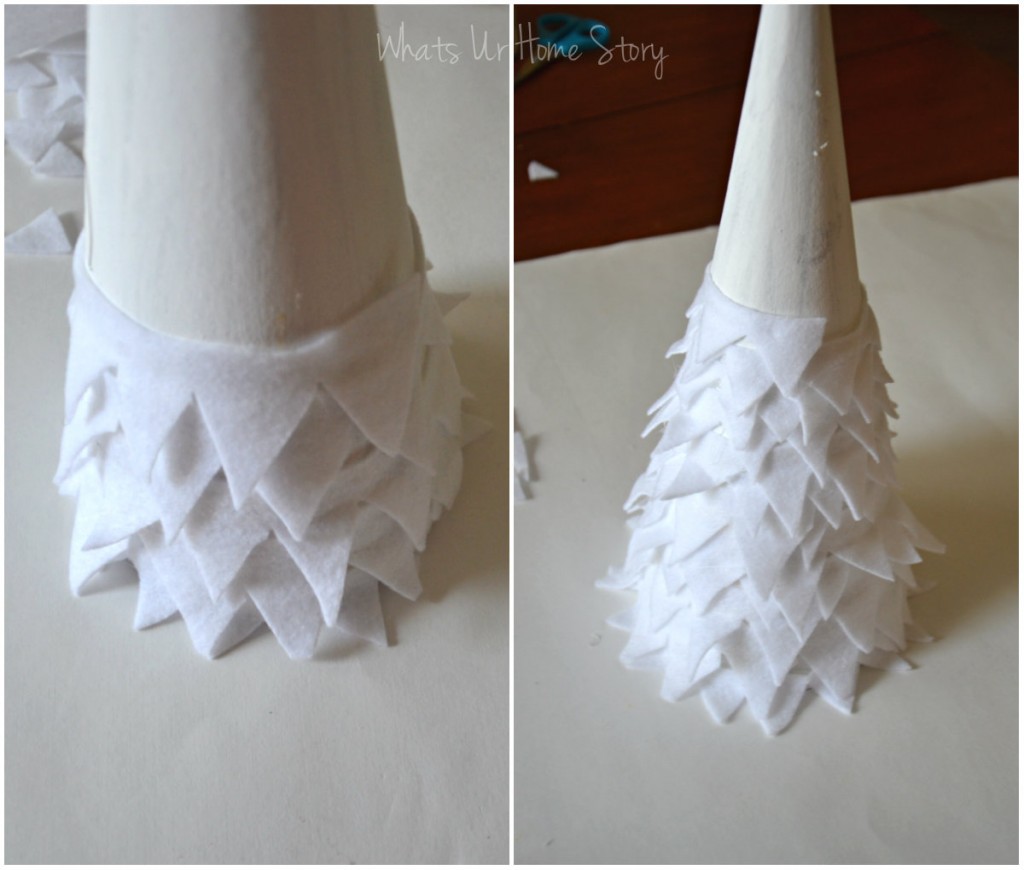
  • From then on hot glue each strip around the tree making sure there is some overlap between the layers.

Winter felt tree, diy paper cone trees tutorial, paper cone Christmas tree

  • Remember to switch to the thinner strips as you go up the tree. When you reach the top cut the extra felt off and carefully hot glue the felt to cover the pointy top.

Winter felt tree, diy paper cone trees tutorial, paper cone Christmas tree

  • No worries if there are any empty spots where the paper cone base is visible. You can use the extra triangles that you removed when you made the strip intially to cover up these spots.

Winter felt tree, diy paper cone trees tutorial, paper cone Christmas tree

  • Gently fluff up the ‘leaves’ and you are done!

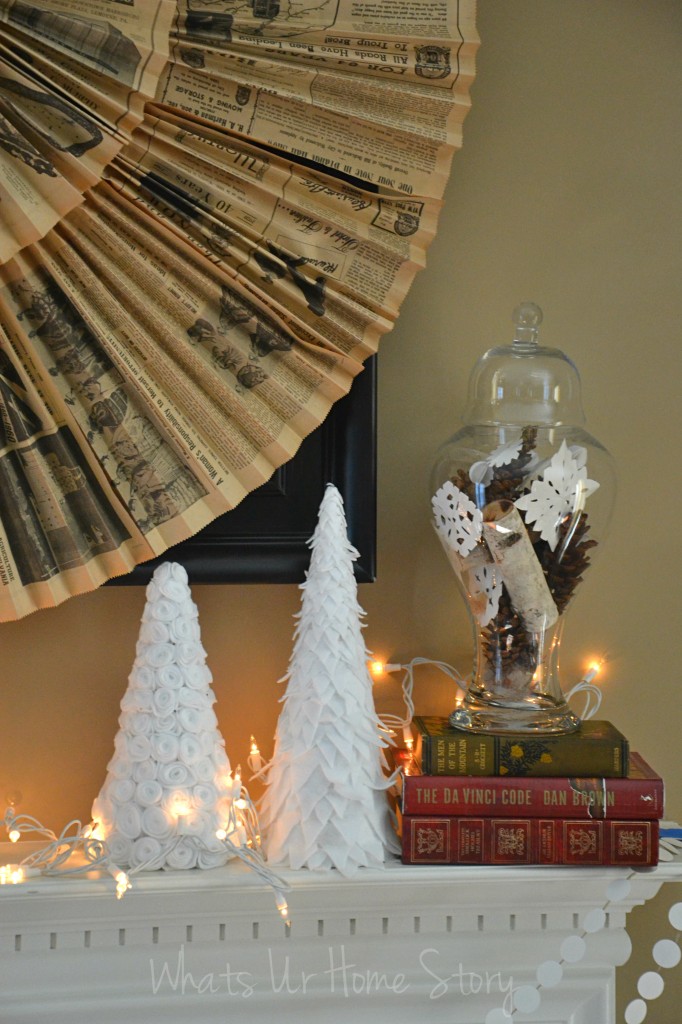
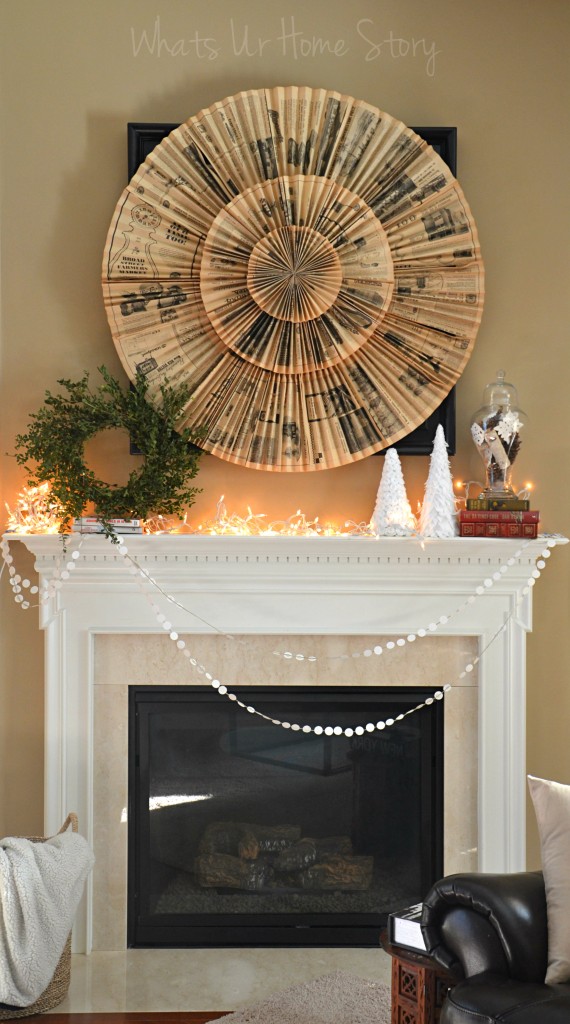
Here’s it is adding glam to my rustic winter mantel.

Winter felt tree, diy paper cone trees tutorial, paper cone Christmas tree, rustic winter mantel

Hope y’all enjoyed this fun wintery craft. For more easy DIY ideas stop by Whats Ur Home Story or follow me via Facebook, Pinterest, Twitter, or Instagram.
DIY Handpainted Sign + Free Printable Template

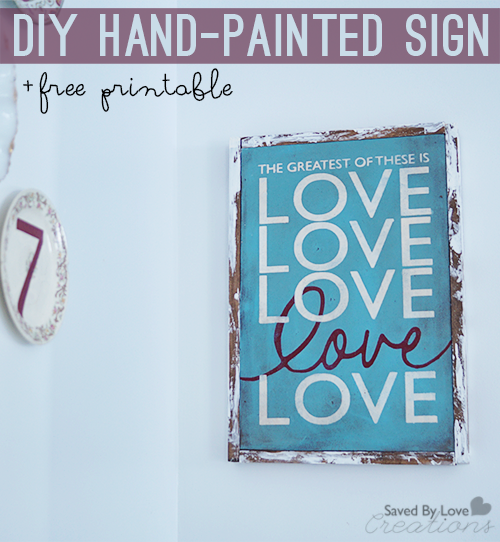
[pinit]DIY Hand-painted #reclaimed Wood Sign tutorial and printable cut file or traceable template @savedbyloves #verseprintable #Love #valentinesday [pinit]

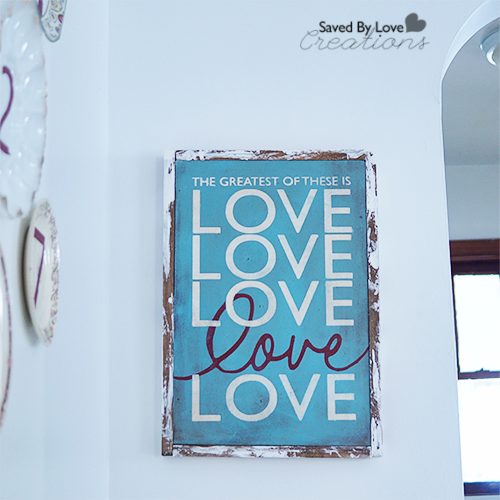
I am loving making signs these days.  With Valentine’s Day coming up, I decided to go with this love Corinthians verse, which is great all year round, but particularly so now.  For the detailed tutorial on how to make this sign, see our Rustic DIY Wooden Sign Tutorial.   Below you will find the Photoshop file I used.  The tutorial just linked  shows how to transfer the file to wood and hand paint it.  I used my cricut with the file below to make a stencil.  You can do either with the download.
Corinthians love verse printable template from @savedbyloves

Click the image to bring up the full size version and either print to transfer like I showed you in the tutorial linked above, or use as a cut file.  I use Sure Cuts A Lot for this.  Not sure if that is still available, but I do know that it doesn’t work with newer Cricut machines.  Good luck!

Corinthians Love Verse Sign DIY

Privacy Policy