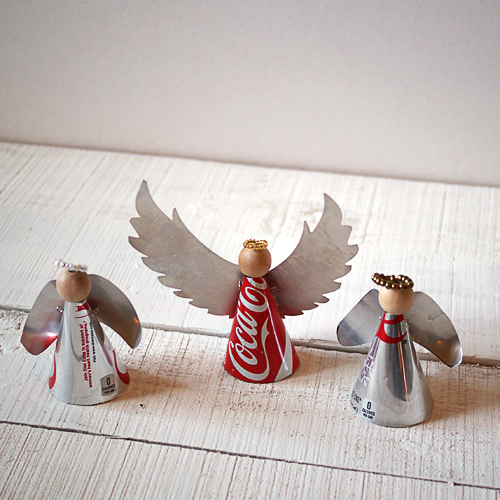
DIY Handpainted Signs With New Americana Decor Chalky Finish Paint

[pinit]DecoArt Chalky Finish Paint Tutorial[pinit]

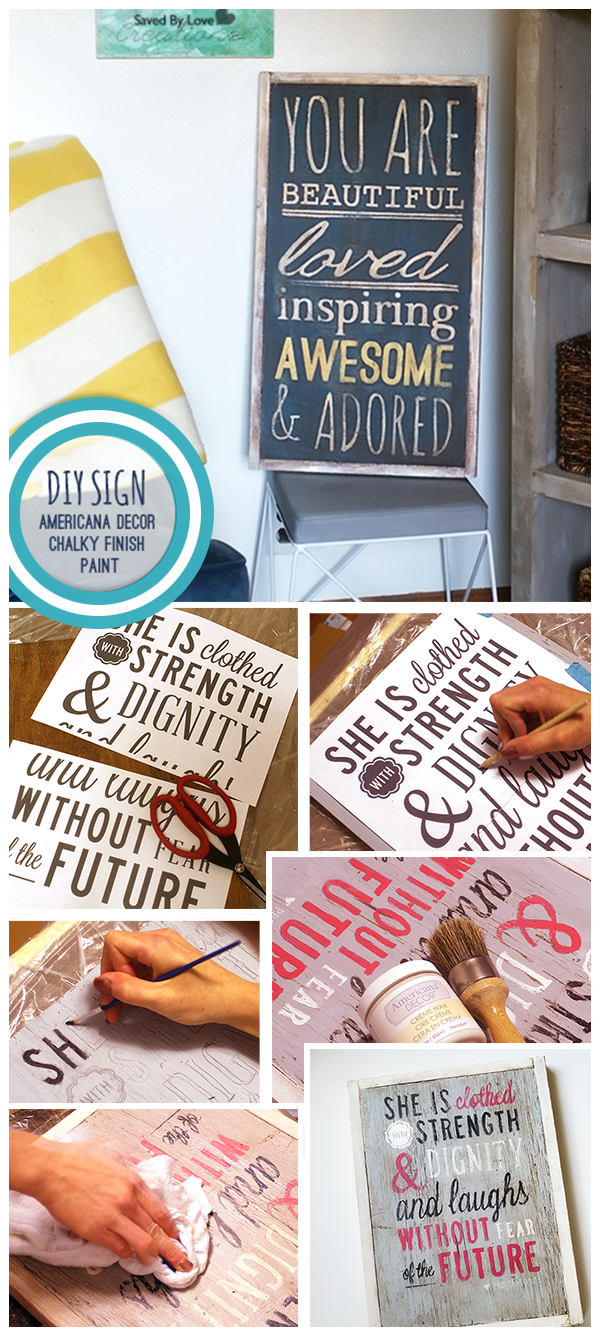
I had the wonderful opportunity to try out the new Americana Decor Chalky Finish paint, available online at Home Depot.  You can have it shipped to your home, or to your local Home Depot for free pick-up!  This product is perfect for creating distressed signs, which is what I am sharing with you today.  I am most impressed by the huge color palette, the high quality of the paint, the ease of distressing and the variety of mediums and finishing options.  There are so many things I plan to do with this stuff, but for now…

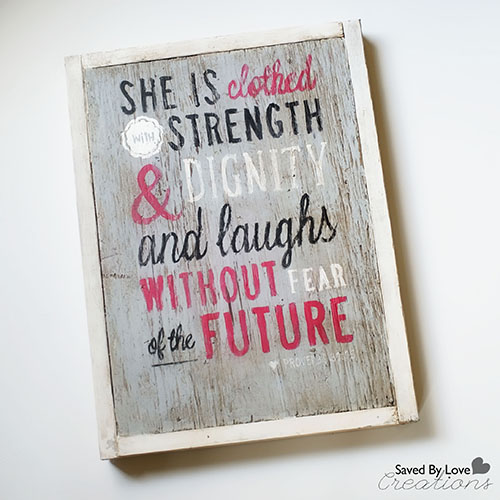
Diy Rustic Sign tutorial at saved by love creations

The technique is the same as this rustic sign DIY from guest artist Pam of The Little Red Porch, using the chalky finish paint.  I also added a video illustrating how to use Photoshop to print sections of your sign for taping together and transferring onto the wood.  We had several questions on that part in the first post, so hopefully things will be clearer, at least for those of you who use Photoshop.

DIY Chalk Painted Sign

Begin with a piece of scrap wood in the size you want your sign.  I have tons of the stuff lying around here.  The 2 signs I am using for this tutorial are on very different wood.  The Proverbs verse is on rough MDF, and the other is on smooth ply wood.  Both have their place, depending on the look you are trying to achieve.  I prefer the smoother, I discovered.

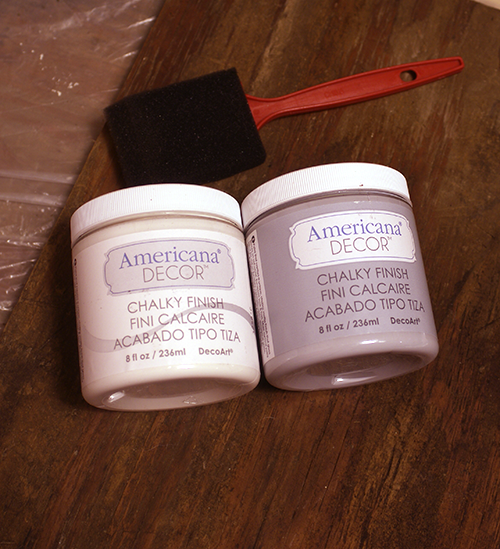
Chalky Finish Paint Primitive

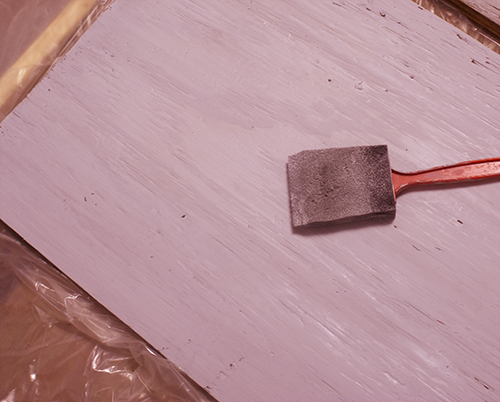
My cheap foam brush worked great for the background.  I used the chalky finish paint in “Primitive” for my background.  Great coverage, especially on this chippy, rough surface!  While that is drying…

DIY Tutorial Signs

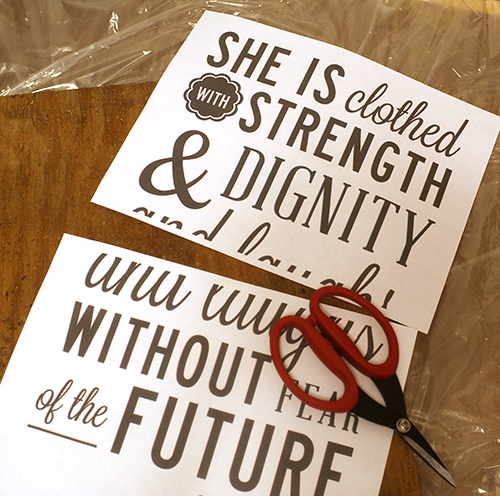
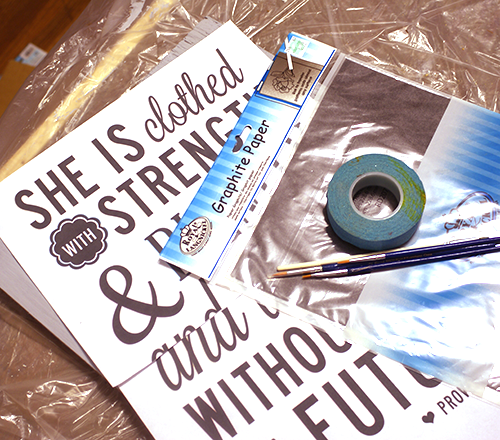
Create your text using your favorite software.  Print your artwork in sections if your sign is larger than your printer will print.  Here is how to do that with Photoshop:

DIY sign with chalky paint


Tape image sections together.  You may need to cut off any border your printer added where the sections meet.

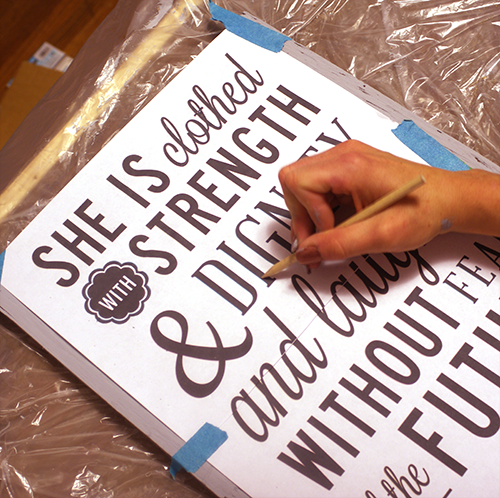
Transferring image to wood

Place transfer paper between text and wood and trace letters with stylus or pen.

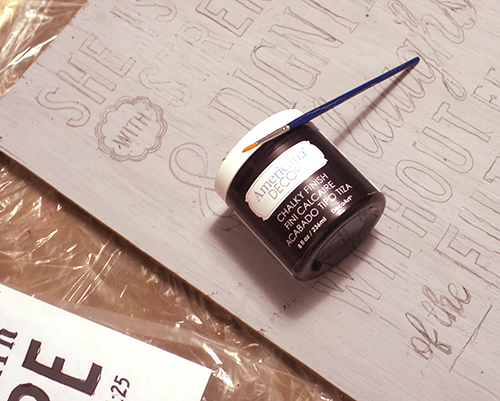
DIY tutorial using chalk paint

Once your text is transferred, fill it in with your color of choice.  I used Carbon for the black, Everlasting for the white, and a mixture of Romance and Innocence for the pink color.

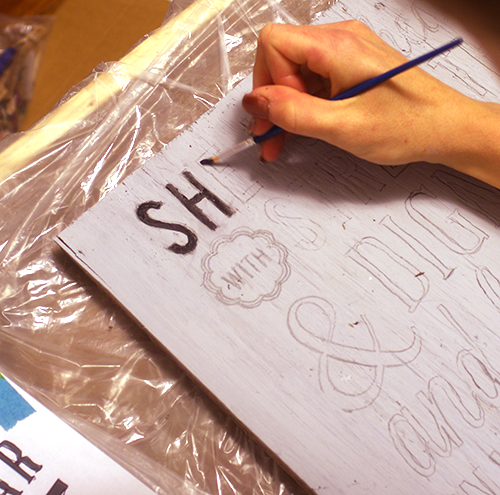
DIY painting letters

Just use a small round paintbrush.  I like to use watercolor brushes for hand lettering with paint.  I wet them first and it seems to help the flow.  Play around until you figure out what works best for you.
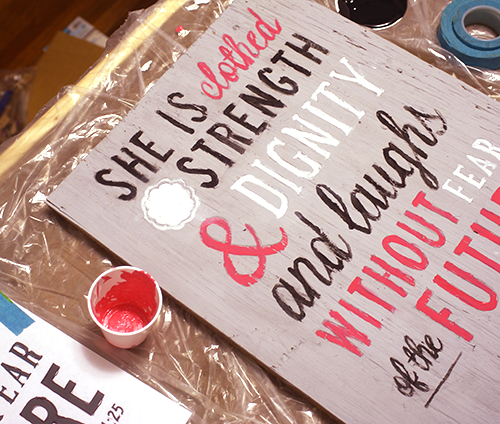
DIY how to make wood signs

Once you are happy with your lettering, you may want to sand distress the piece, and frame your sign like we showed you in Pam’s DIY sign tutorial previously.

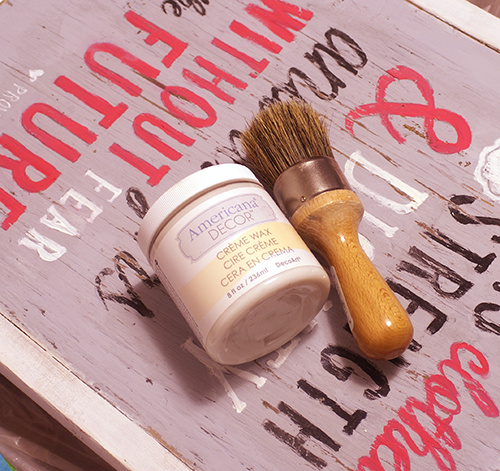
Clear wax for chalky finish paint

I applied clear wax and let that dry for about one hour.
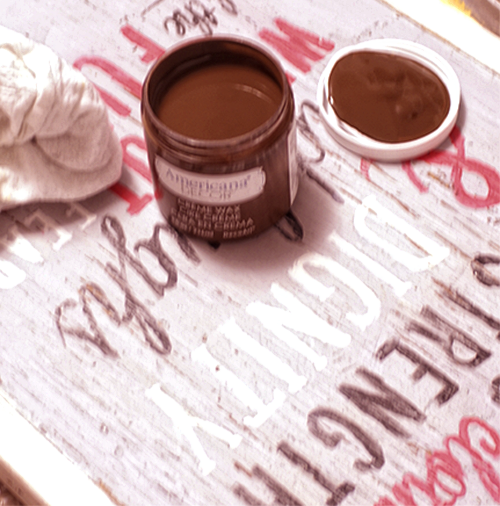
Dark aging waxI applied the dark brown creme wax over the top of the clear creme wax, with a lint free cloth.  Wipe back to remove excess, working in a few inch sections at a time.  If you find you have overdone it with the dark and can’t wipe away enough, you can use the clear wax to pull it up.  Just dip a clean cloth in the clear and wipe the area that is too dark.

SONY DSC

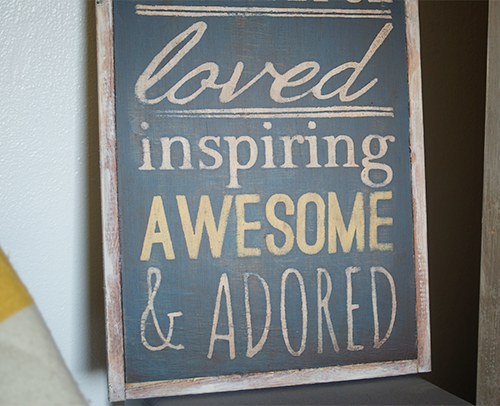
For the “Awesome” sign, I cut the text out and made a stencil with my Cricut.  Also, I painted it on smooth ply sheets.  I used the soft varnish finish instead of wax, and it is velvety fabulousness.

I heart it so much I want to make a thousand more.

DIY subway art on wood

Decoart chalky finish Awesome sign

Visit DecoArt for more chalky finish project ideas.

Stay tuned as I am planning projects using the Americana Chalky finish image transfer and crackle mediums.@DecoArt_IncChalky finish handpainted rustic sign DIY with video tutorial on printing sections of large artwork with Photoshop
DIY Dollar Tree Halloween Door Bats & $100 Giveaway

[pinit]Printable Bats[pinit]

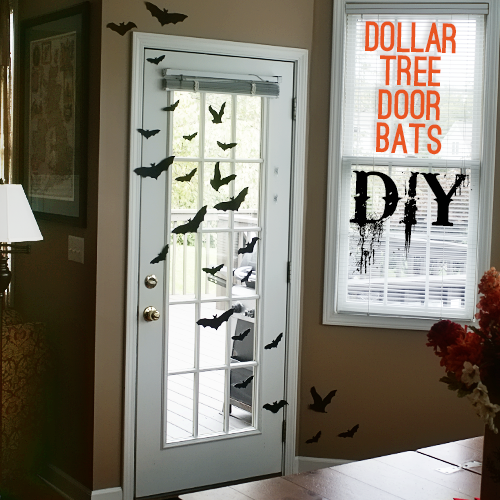
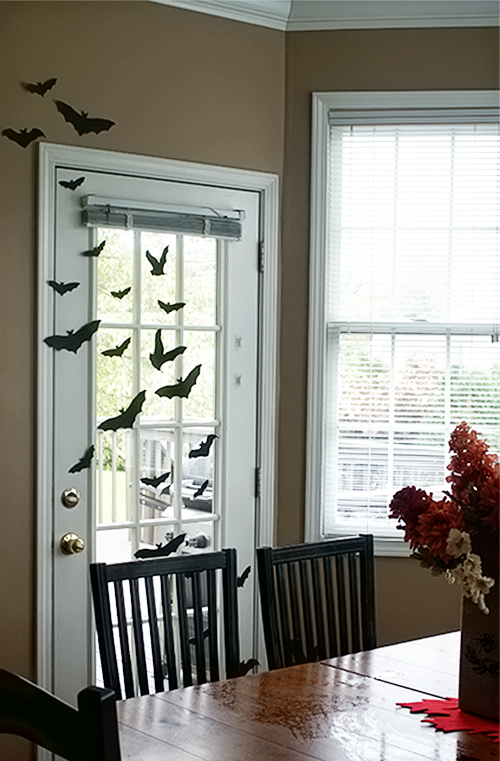
As you may know, Dollar Tree is one of my favorite places to go for creative project supplies.  I love wandering through the aisles letting my imagination run wild with ideas.  Just recently, I discovered Dollar Tree Value Seekers Club, which is packed with crafts, recipes, décor, tips, contests, insider information, frugal fun ideas, and other awesomeness.   You can join too, for free, and get a chance to win a $20 Dollar Tree gift card!   You will never run out of seasonal inspiration, as the creative content changes each month.  Just pick out a project, print the project sheet or save it to your phone, and then use it as your shopping list in the store!  Today I am sharing how I created this bat door using Dollar Tree supplies and a bat template I found while browsing the fun Halloween projects.  It is super simple and it cost just $3.
***I received compensation for this post.  All opinions are mine and honest!

DOLLAR STORE SUPPLIES:

Dollar Tree Craft Halloween

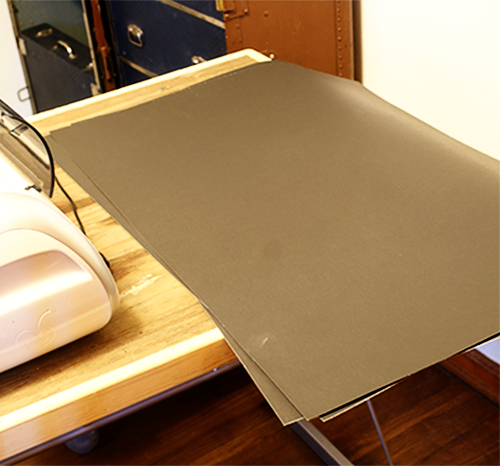
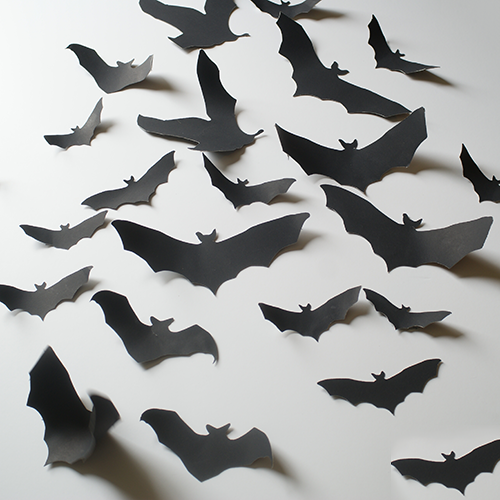
You can use Dollar Tree black poster board, construction paper or foam sheets for your bats; For the number of bats I made, I used 2 sheets of poster board

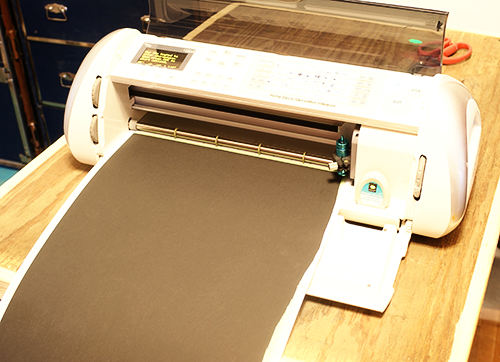
Scissors or Die cut machine with software you can use to cut imported images

Bat Template Available at Dollar Tree Value Seekers Club

Printer unless you are using die cut machine

Clear tape


TUTORIAL:

Dollar Tree Crafts

Download and print the bat template from Dollar Tree Value Seekers Club “Front Door Bat Printable” project, or download and open in your die cut machine’s software.  I used Sure Cuts A Lot (which I don’t think is available anymore) and my Cricut machine.

DIY Dollar Store Bat Silhouettes

If not using die cut machine, cut out the bats on the free template with scissors,tape to your black poster board and cut around them to create your bats.

How to Decorate for Halloween

Tape your bats to the door and enjoy!

I love the look and the simplicity of this project.  Join Dollar Tree Value Seekers Club for it, and tons more inspiration!

$100 Dollar Tree gift card giveaway

Want to win $100 from Dollar Tree?  Sign up for Dollar Tree Value Seekers Club and leave me a comment below this post telling me which project you want to try if you win!  Good luck.

Here are some other great projects inspired by Dollar Tree Value Seekers Club:


Chalkboard Tray To Do List With Printable

How to make a chalkboard tray to do list

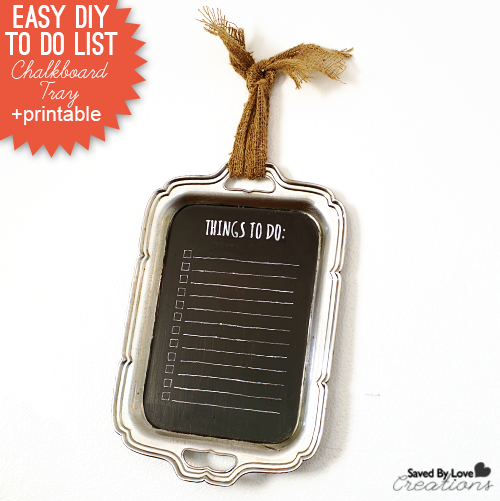
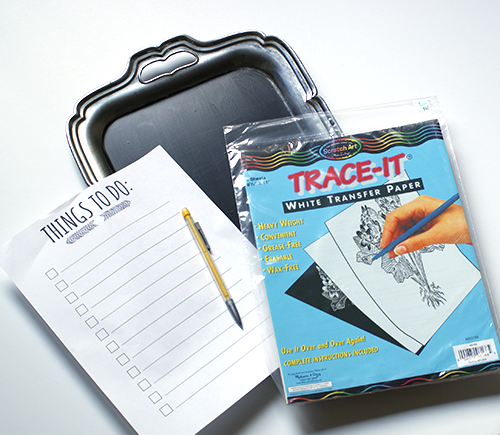
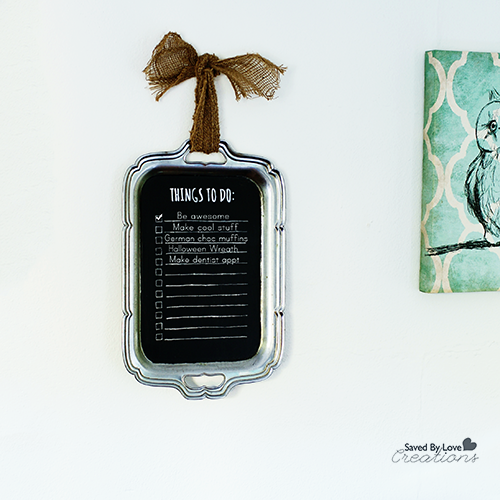
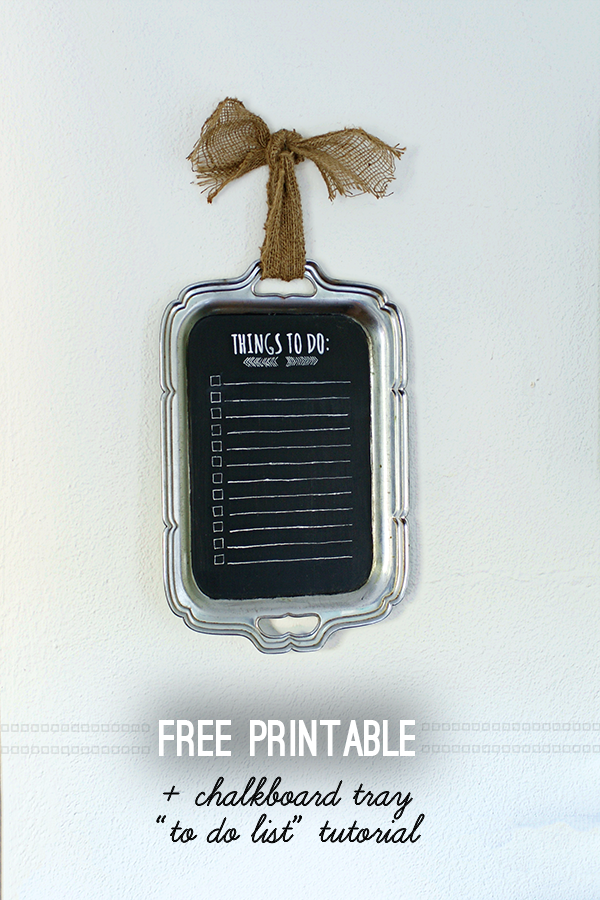
If you are like me, to do lists are a vital part of keeping it together!  They are just necessary, so why not incorporate some chalkboard paint and burlap into creating a pretty one?  Today I am sharing a quick, easy DIY chalkboard tray “To Do List”, complete with a free  printable template for you to transfer onto your painted tray using transfer paper.  I can’t promise your productivity and punctuality will skyrocket, but I can guarantee you will have a pretty list.  That’s something, right?

SUPPLIES:

Transfer Paper Tutorial

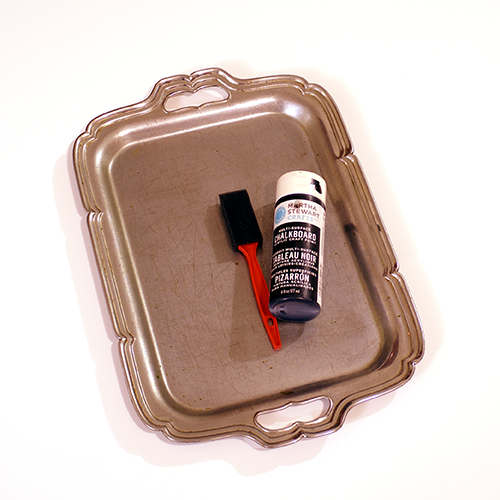
Old Tray – I got mine for $2 at a thrift store

Martha Stewart Chalkboard Paint – Black

White transfer paper

One inch foam brush

Burlap or other ribbon

White opaque gel pen

White acrylic paint

Tiny detail paintbrush

ThingsToDo

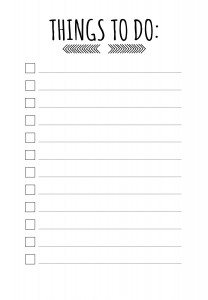
Printable “To Do List” – click the link or the thumbnail above to bring up the full resolution file, then print

Painter’s Tape

Stylus or other pointed object to trace printable through transfer paper (I used a mechanical pencil with no lead)

TUTORIAL:

Martha Stewart Chalkboard Paint Tray DIY

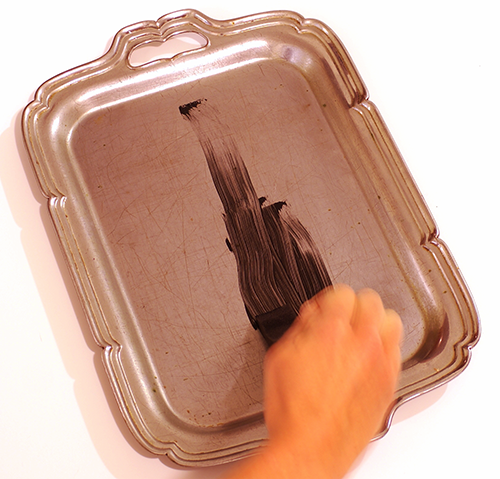
Clean tray off with rubbing alcohol or soap and water.  Let dry then paint with chalkboard paint.

How to make a Chalkboard Tray

I did three thin layers, allowing complete drying between.

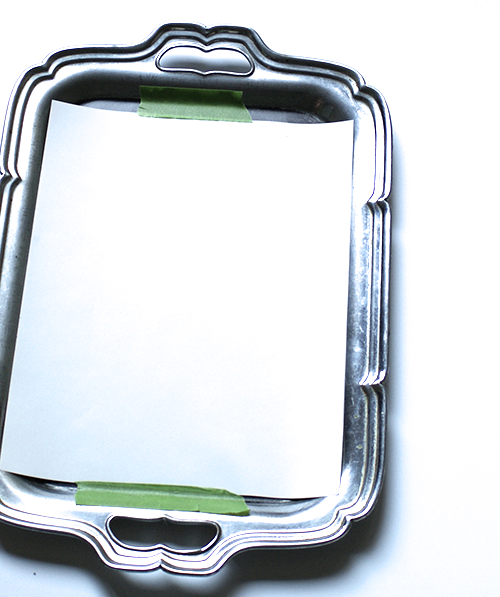
Tape Transfer Paper In Place

Once the chalkboard paint was dry, I taped the transfer paper in place.

How to Transfer Text to Painted Background

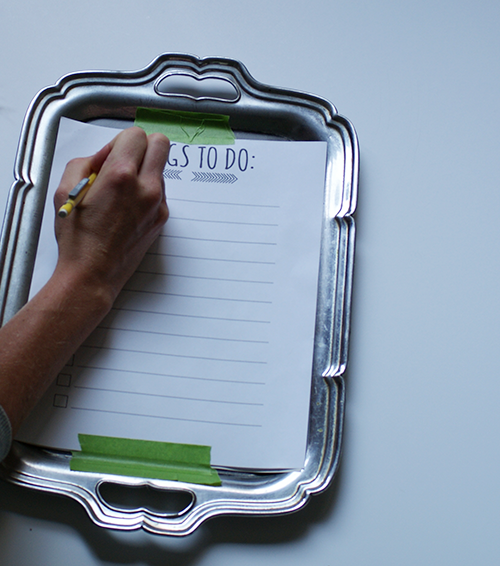
Then I taped the printable list template on top of the transfer paper and began tracing it, making sure to use enough pressure to transfer the design through to the chalkboard background.  You can lift the papers to make sure the transfer is happening and tape them back down, being careful not to let them shift in the process.

How to transfer text to background

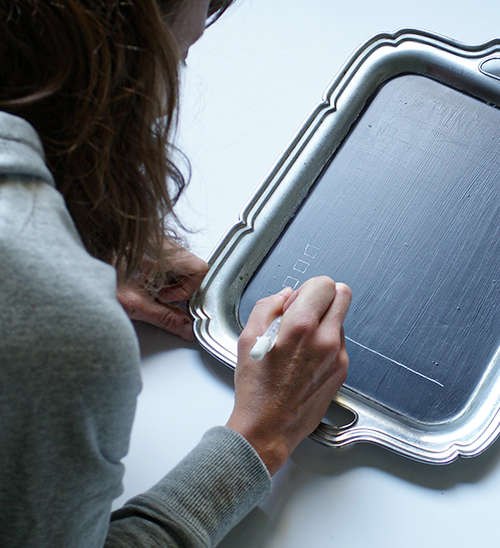
I removed the papers and was left with a faint outline of the list, which i went over with my white opaque gel pen.  I had to shake the pen often to keep the ink running, and I took some of the chalkboard paint off in a couple of places by pressing to hard.  Don’t do that.

How to make a handpainted sign

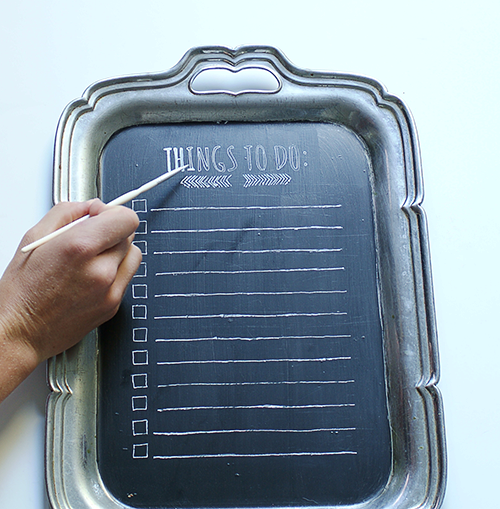
I used white acrylic paint and a fine detail brush to go fill in the title text, and to touch up here and there.  I ended up painting over the <<<>>> under “Things to Do”.  I just liked it better without, but I left it in the printable so you have the option of using it.

How to Transfer Text to a sign

Once dry, your sweet new to do list is ready to go.  Hang with a burlap ribbon or embellish as you wish!

Free Printable Chalkboard To Do List


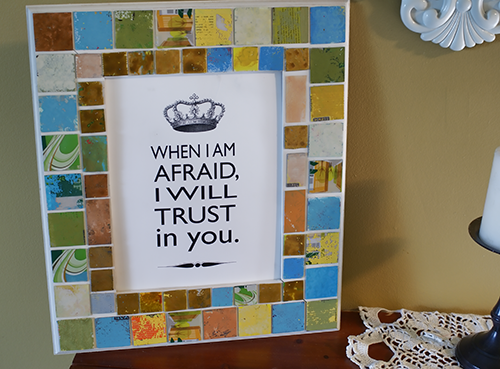
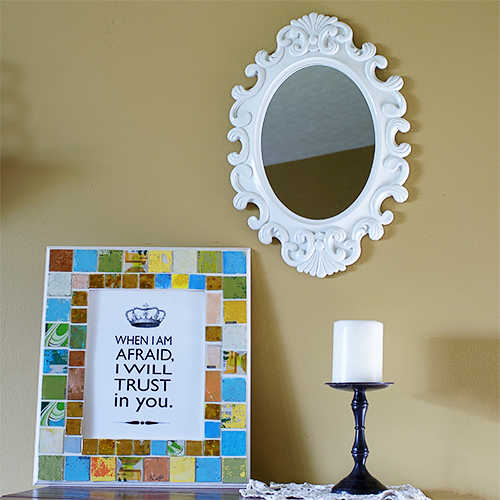
Mosaic Frame From Recycled Gift Cards + Free Printable

[pinit]
How to Make a recycled gift card Mosaic frame, + cool free Psalm 56:3 scripture verse printable from @savedbyloves

[pinit]

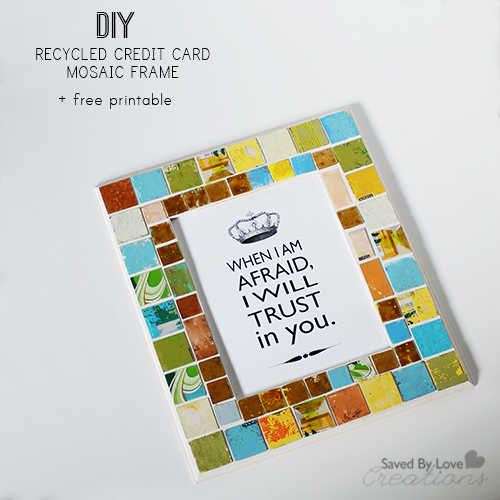
Hi Saved By Lovies!  Today I am sharing with you a fun project you can make for next to nothing using recycled gift cards/credit cards.  It has all my favorite components, and if I know you at all, yours too.  It is a great upcycled craft project, lending to a unique piece of home decor that will leave your friends saying “You made that from what?”.  Oh yeah, and since I created a printable to go inside of my new frame, you get that too.

Are you ready?  Let’s do this.

Recycled gift card mosaic picture frame tutorial #upcycled #recycledcrafts

Supplies:

Sizzix home decor project #Sizzix #recycled

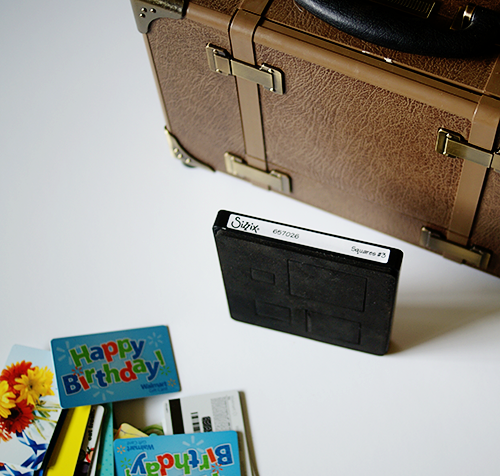
Old Gift/Credit Cards (I have had everyone under the sun keeping these for me for months and months)

I used my Sizzix machine and the Squares #3 Die (which is on sale over there for $8.79), but you can use cut squares from your credit cards with hefty scissors, like Tonic Studios Tim Holts Scissors

Craft Glue like Crafter’s Pick, which I use for just about everything.  It is non toxic, strong as can be and is great for metal, paper and more

Frame to mosaic

Acrylic paint for tiles if you don’t want to use them as they are (I used Tim Holtz Distress Paint because I am head over heels in love with it)

Free Scripture verse Printable Psalm 56:3

If you want to use the printable I created from Psalm 56:3, just right click the above thumbnail and the full res version will magically appear.  Save it and have it printed your preferred way, or print from your computer.

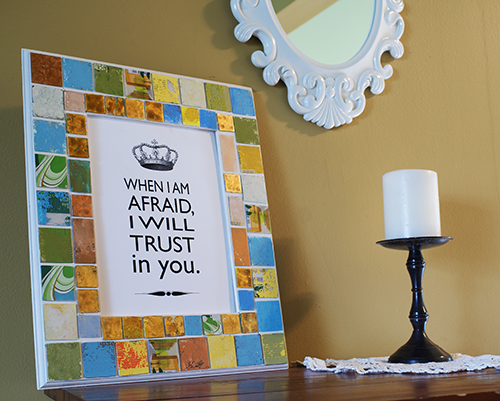
This verse is coming up all over the place for me, and I use it whenever life hits to remind me that I am held.  I created the printable in Photoshop specifically for this frame, so I went simple black and white since the credit cards have lots of color.  I used Gill Sans, one of my go to fonts.  The lovely crown and design element at the bottom come from Karen at The Graphics Fairy.  What would I do without her library of images??!

Find them at the following links to use in your own creations:

Free Vintage Crown Graphic

Free Ornamental Graphic Separators

TUTORIAL:

CreditCardFrame2

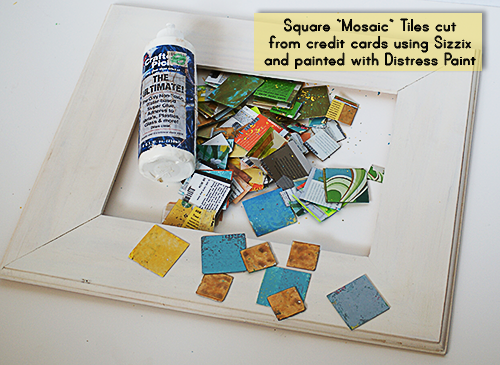
Cut and paint squares from gift cards into the size you want for your mosaic surface.  I used the small and next up size from the Sizzix Square Die.

How to Mosaic a Frame

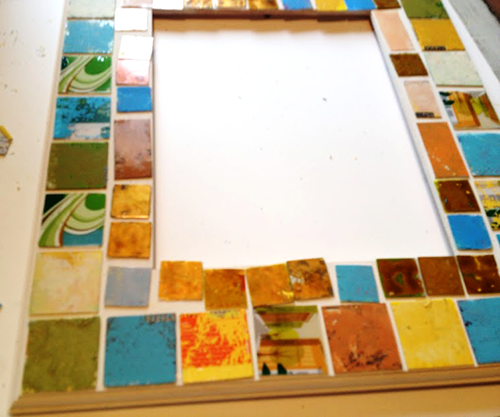
Lay out your “tiles” to get the design you want before you begin gluing.  Trust me.  Do that.

How to glue on Mosaic Tiles

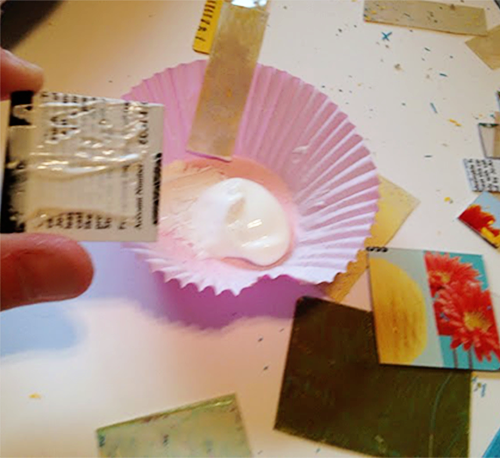
Once your tiles are dry, adhere them to the surface of your frame using craft glue.  I put some craft glue in a cupcake wrapper and applied it to my tiles with a scrap piece of plastic.  You can use a popsicle stick, paintbrush or whatever.  Use a thin layer of glue so that if you move your nudge your tiles to get the spacing you want, you won’t have bleeding out from the edges.

How to make upcycled home decor; DIY mosaic picture frame from recycled credit cards

Let the glue dry so the tiles are secure and add a photo, mirror, or even leave empty as a design element all in itself!

Upcycled gift card home decor; How to Make a Faux Mosaic Picture frame

If you like this project, check out the 20+ Gift Card Projects to Make at Totally Green Crafts

20 Ways to Upcycle Gift Cards

DIY Easy Barnwood Frame and Free Printables

[pinit]
DIY Barnwood Frames from Ana White Plan + free inspirational printables by @savedbyloves

[pinit]

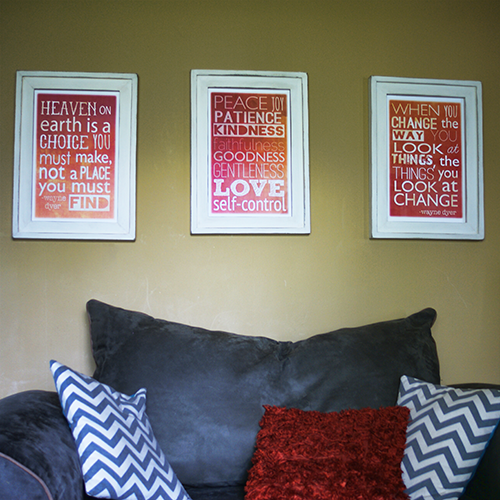
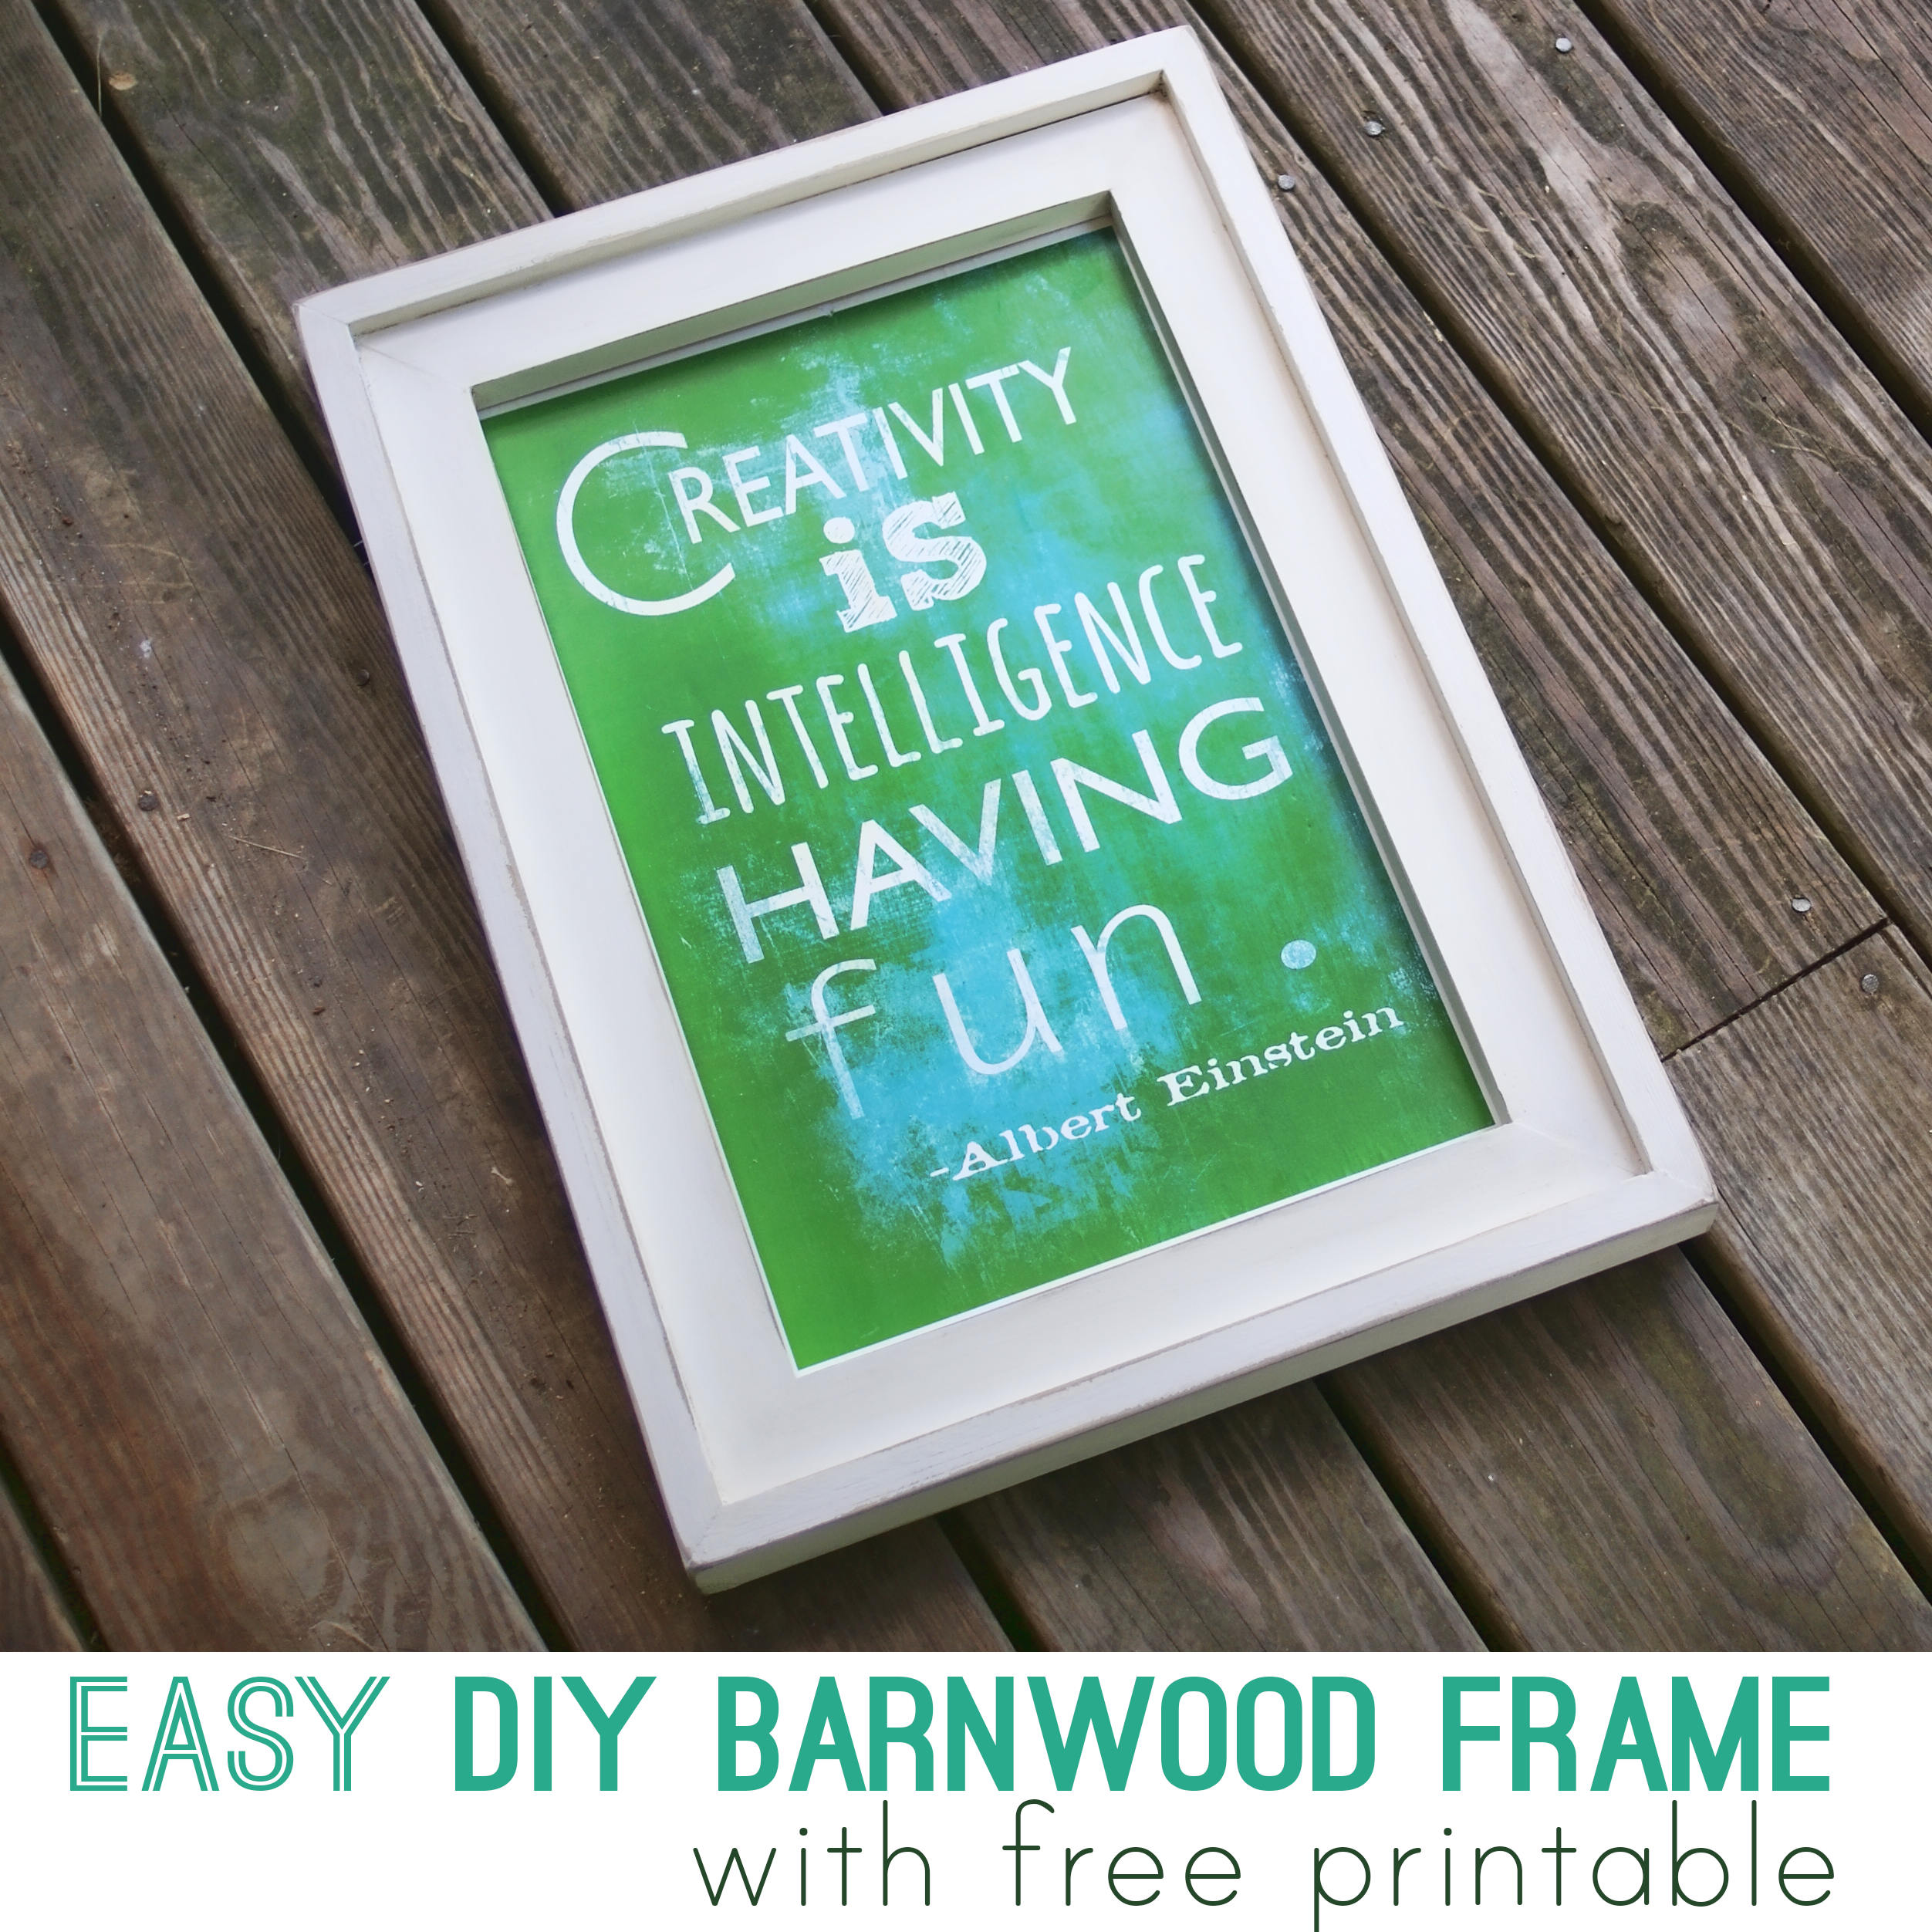
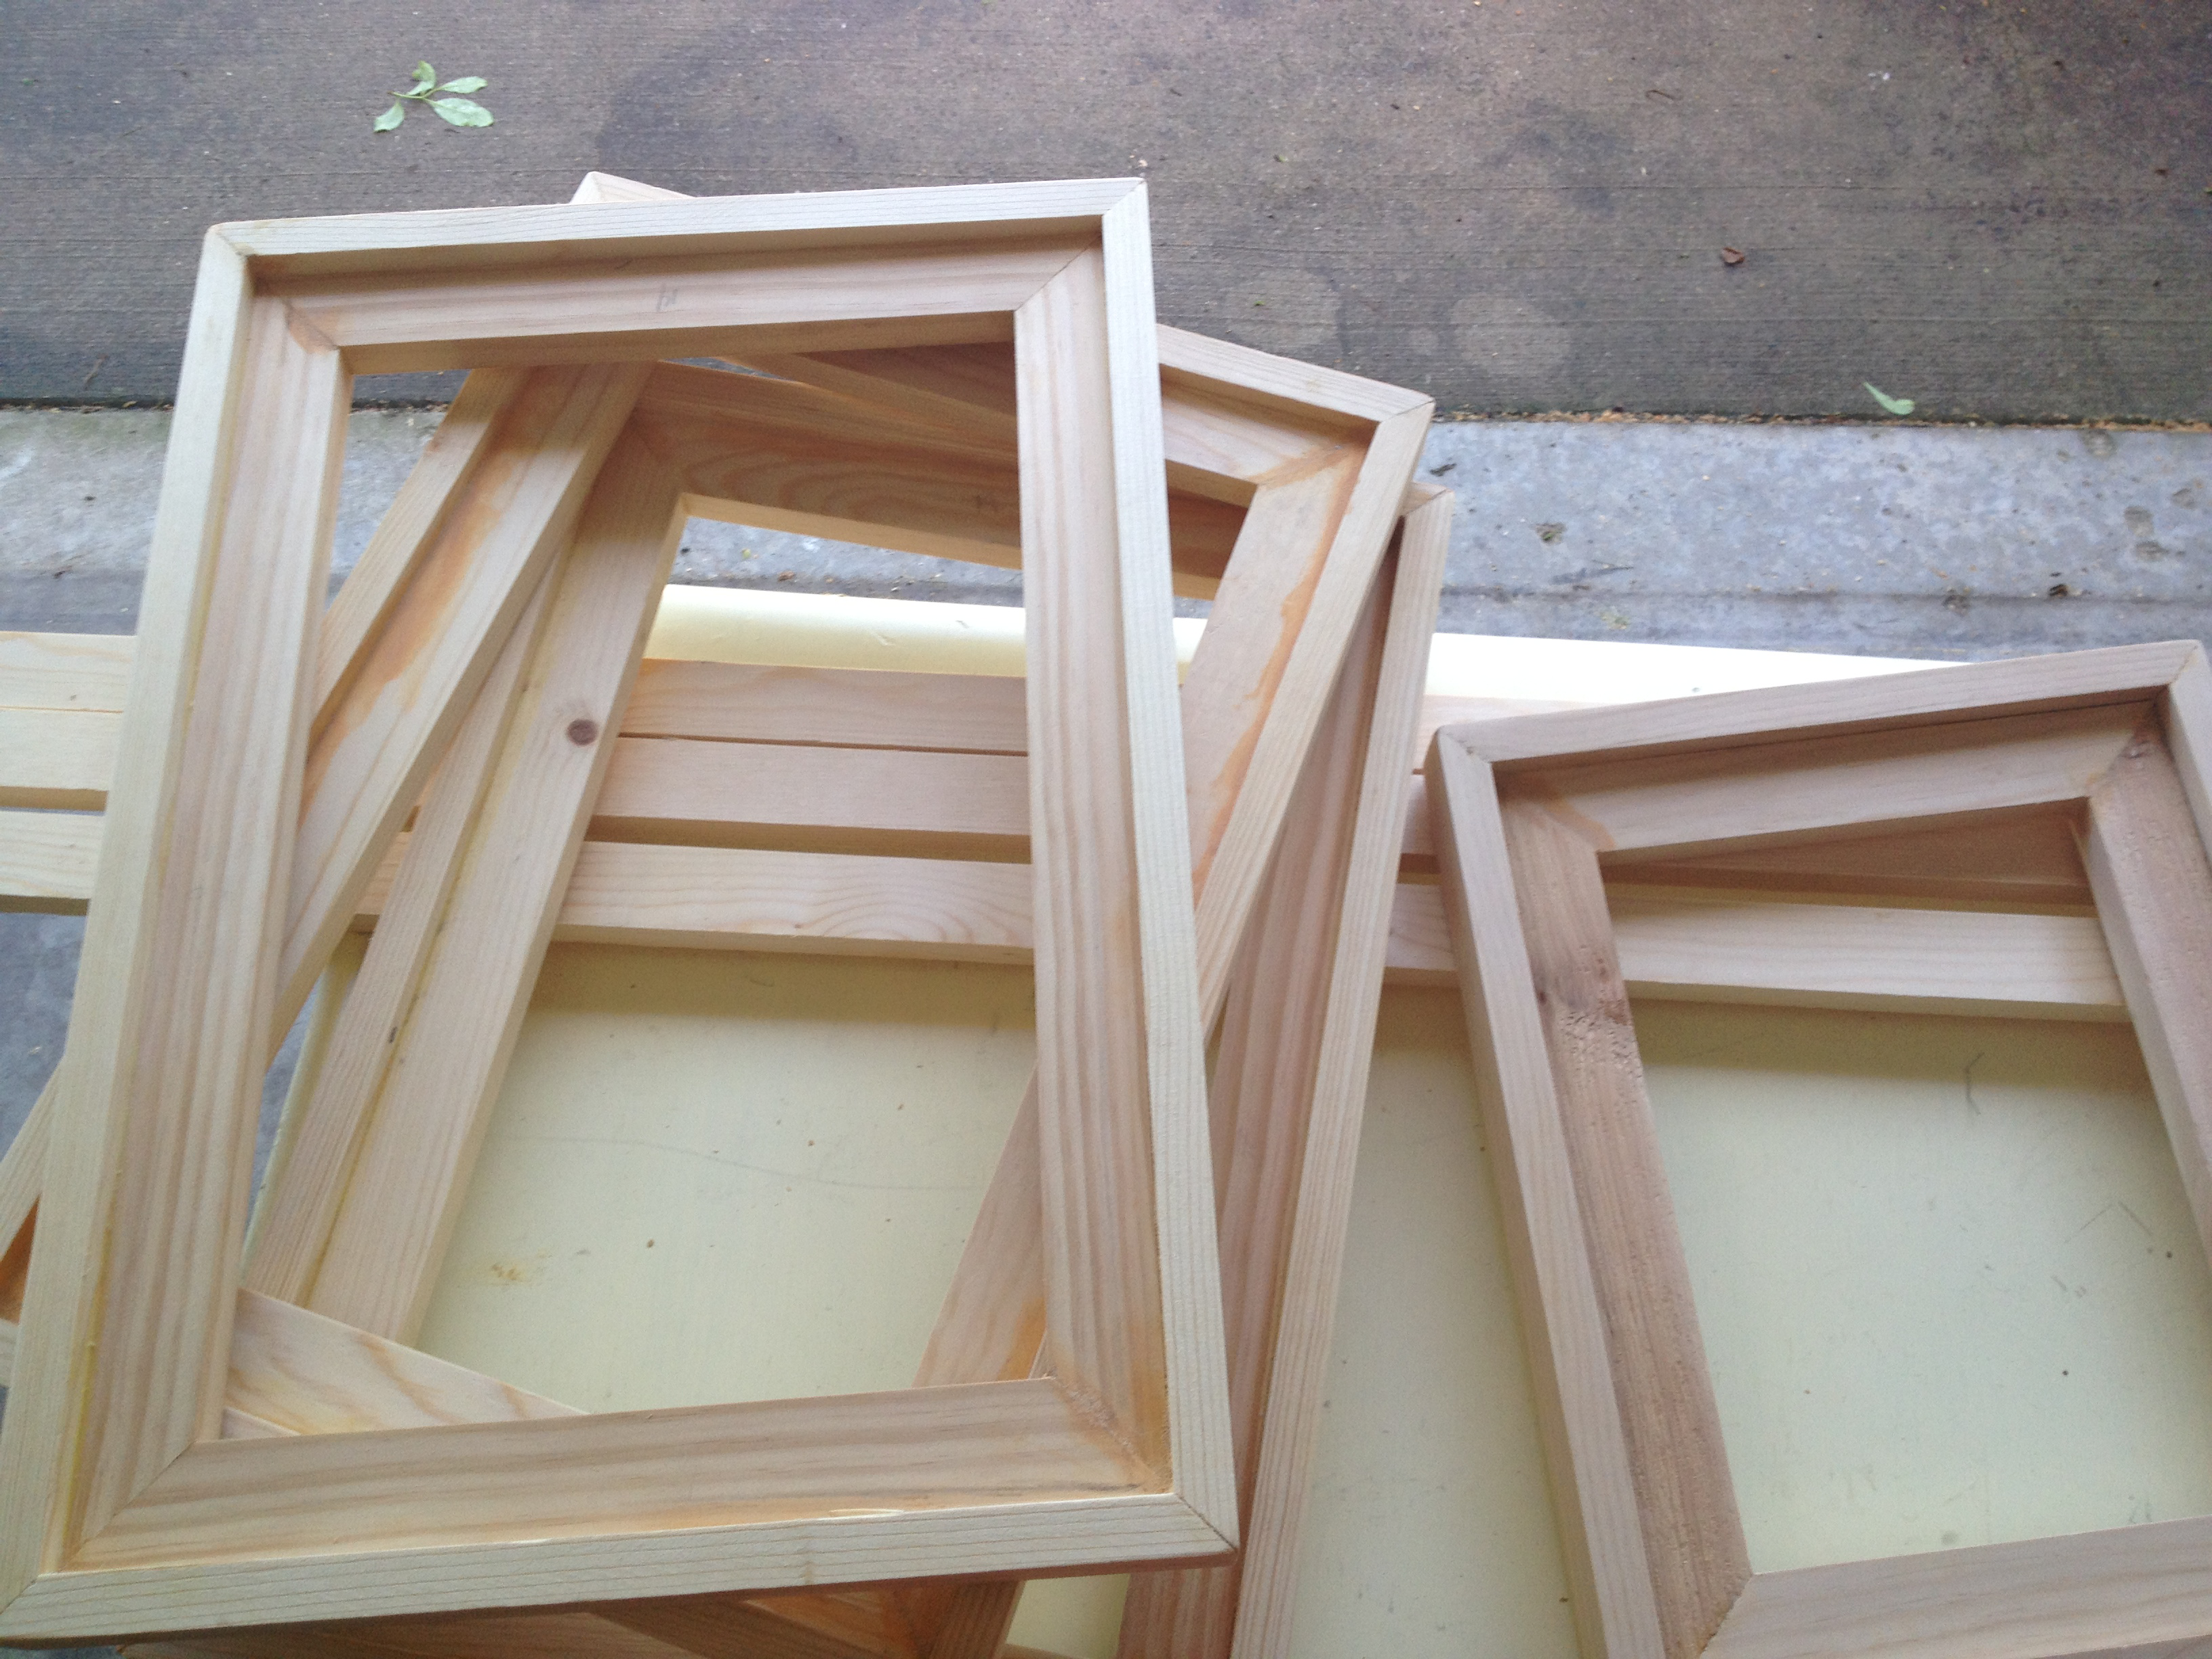
 I have always wanted to make my own frames.  It was time for some new printables so I finally gave it a go, using this Barnwood Frame plan from Ana White as my starting point.  You can read on to see how I tweaked Ana’s plan to get 11×17 inch frames and to download your free Wayne Dyer and fruit of the spirit printables.


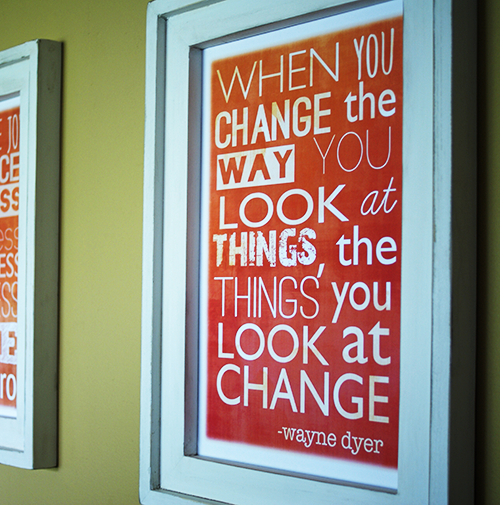
Free Printable Wayne Dyer Quote


wayneDyerPrintables2

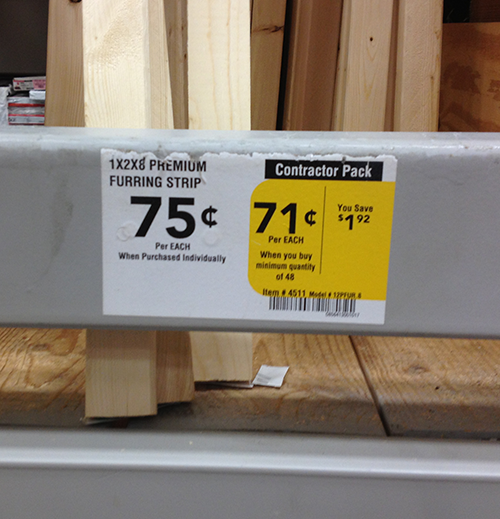
This project is fantastic because the frames look awesome, and are super cheap.  I found 1×2 in 8′ strips for $0.75 at Lowes.

Follow Ana’s Plan linked above, but change your cut list as follows to get 11×17 frame openings:

2– 1x2s @ 14, 1 1/2″ flat side mitered so the shortest length is 11″

2– 1x2s @ 20, 1 1/2″ flat side mitered so the shortest length is 17″

2 – 1x2s @ 15 1/2″, edge side mitered so the shortest length is 14″

2 – 1x2s @ 21 1/2″, edge side mitered so the shortest length is 20″

wayneDyerPrintables4

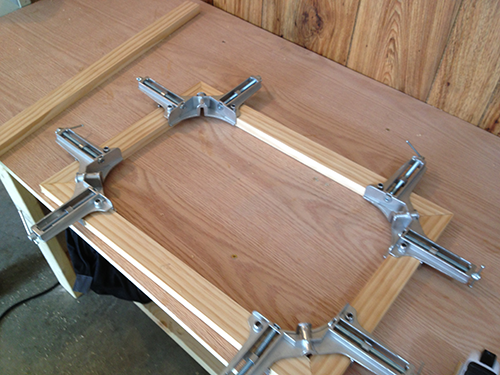
Corner clamps are super helpful!

EinsteinPrintable1

Here is an Albert Einstein Printable in a different color scheme that you can also download below…

wayneDyerPrintables3

I made a smaller frame for print in 8×10.  I finished with homemade chalk finish paint I made from this chalk finish paint DIY.

Download and print:

Wayne Dyer Heaven Quote

Fruit of the Spirit Printable

Wayne Dyer Change Quote

Albert Einstein Quote

I printed my 11×17 prints on regular copy paper and mounted them to white foam board with spray mount.  I cut the foam to fit the frame opening and secured the mounted image to the frame with thumbtacks.

I hope you enjoy the printables, and give making your own frames a go.  It is super rewarding!

Easy May Day Gift

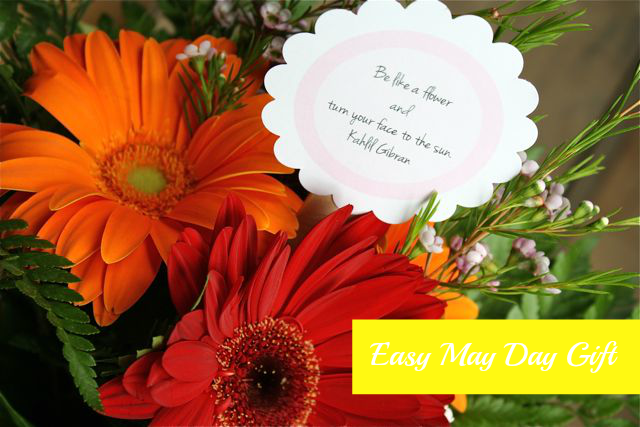
Hi Friends! My name is Malia and I blog over at Yesterday on Tuesday where I love creating crafts and recipes. Thank you Johnnie for having me over. I am a big fan! Today I want to share a super simple May Day project… you know that day where you get to spread the love by leaving flowers for people?

[pinit]

Easy-May-Day-Gift

[pinit]

All you really need are some flowers and quick feet so you can leave them on your neighbor’s doorstep and DASH away!

MayDay2

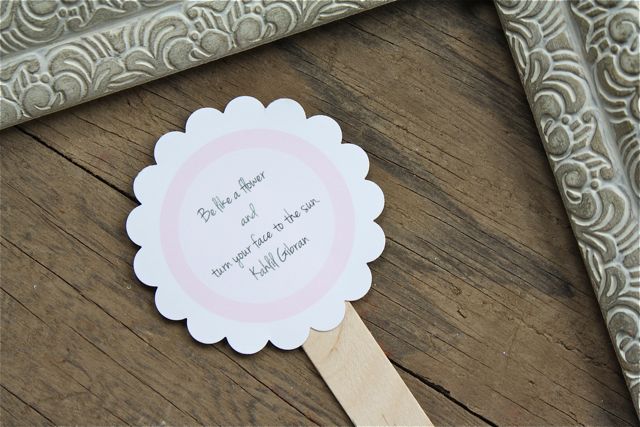
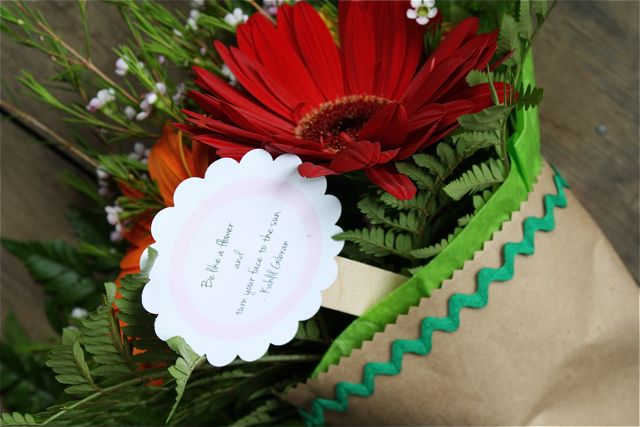
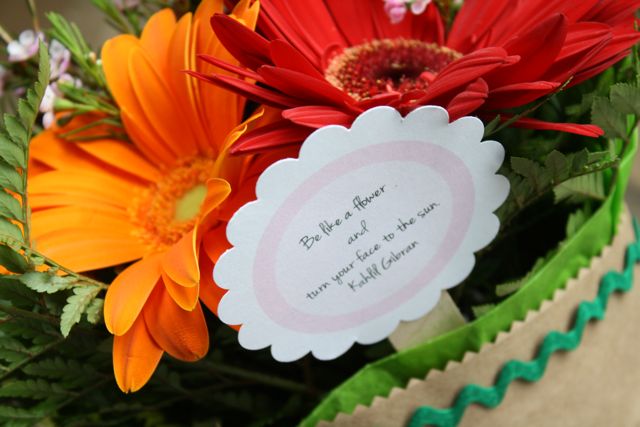
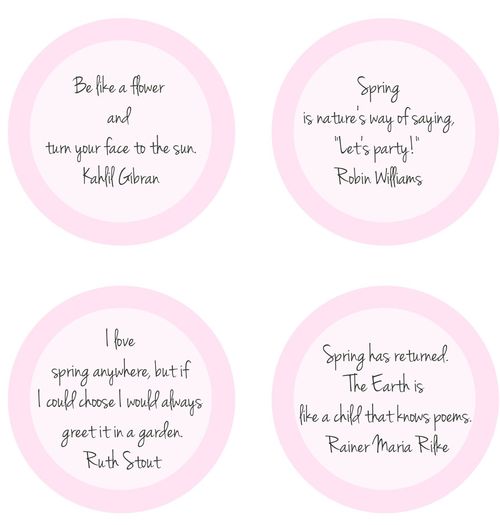
But these printable circles can will make your flowers extra special. Keren from FPTFY created them to use as tags for your May Day surprises. Just download, print and cut out or punch (I used a 3′ scallop circle punch)… and you can stick them on a popsicle stick or coffee strirrer to tuck them in your bundles.

MayDay3

Blooms from the grocery store are prettied up with some craft paper and rik rak.

MayDay4

There are four different flower/spring quotes to choose from:

MayDayWebEx

Simple Download Instructions

1. Click this link for the May Day Tags

2. Click actions, then view all sizes, then select “original,” save to your computer and print.

Enjoy and Have Fun! Thanks again Johnnie.

YOT sig 3

Spring Printable Chevron Bunting

Chevron Printable #SpringDecor #Garland @savedbyloves

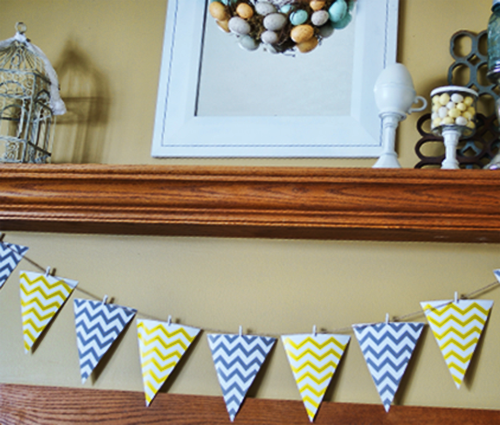
Are you as anxious for warm weather to arrive as I am?  It is time to update that winter decor to bring in the spring!  Someone needs to tell the snow that its time is up around here.  I went for some quick, easy printable chevron garland this year.  I found the perfect gray and yellow chevron printable bunting flags from Detail Oriented Diva!

I just uploaded them to Snapfish and ordered them for 1 hour pickup at my local Walmart.  The cost was $15.  I got 5 8×10 prints.  In retrospect, I should have just thrown them on a flashdrive and had them printed at my local Office Depot or Staples on cardstock for about half that price, but there is always next time.

How to Make #Easter #Bunting

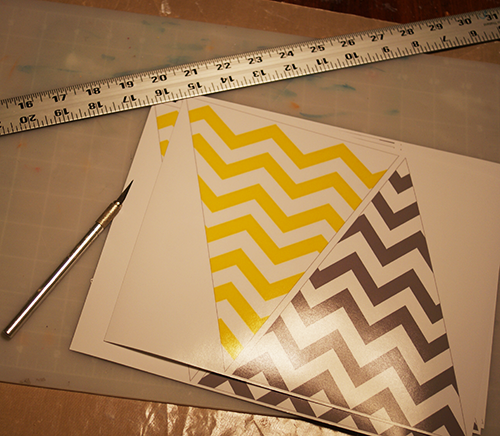
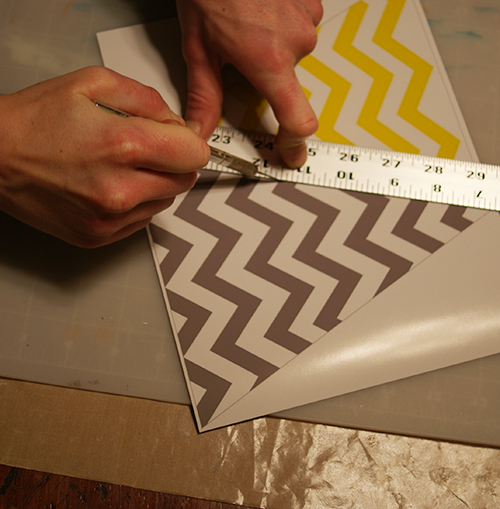
This is what the prints looked like.  I just cut them out with a straight edge and craft knife.

Printable Easter Garland

Detail Oriented Diva shows you how to use bias tape and sew your bunting.  I went for jute twine and white tiny clothespins.  Super lazy, it’s true, but I love the look.  I also like that I can change the distance between the flags to fit whatever space I am using the bunting to decorate.

How to decorate for spring

What do you think?  Have you started decorating for spring yet?

For more garland and bunting ideas, check out our roundup!

Over 50 bunting and garland projects to make


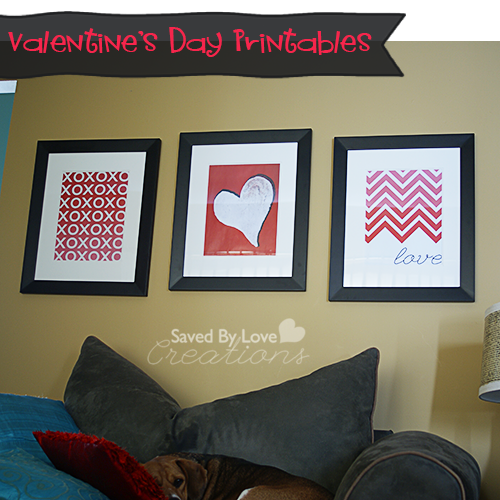
New Printable Love Trio

#Valentine's Day #Printable Set from @savedbyloves #Freebie

[pinit]

#Valentine's Day #Printable Set from @savedbyloves #Freebie

[pinit]

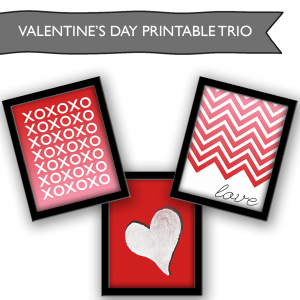
It was time to update my 11×14 frame trio that gets switched out to correspond with the holidays.  I created this red/pink/white ombre Valentine’s love themed printable set to share with you.  I love how it came out!  For just $1 a print at my local Office Depot, updating the decor can be done without breaking the bank.  Just right click the thumbnail to pull up the full res version.  Save to your computer or flash drive to print.  I have mine done at Office Depot on regular printer paper.  The image is 11×14 inches, which they will print on 11z17 in paper.  Just cut off the excess for your 11×14 frame.  You could have them crop it to 8×10 if that is your preferred frame size as well.

XOXO ombre free printable

Heart free printable

Love chevron free printable

Don’t have frames?  Mount it to MDF or scrapwood like I showed you in this faux canvas art DIY.

Don’t want red and pink?  Check out last year’s printable Valentine’s Day trio I shared with you:


New Christmas Printable Trio

[pinit]

#Christmas Snowflake #Printable Trio #DIY #decorating

[pinit]

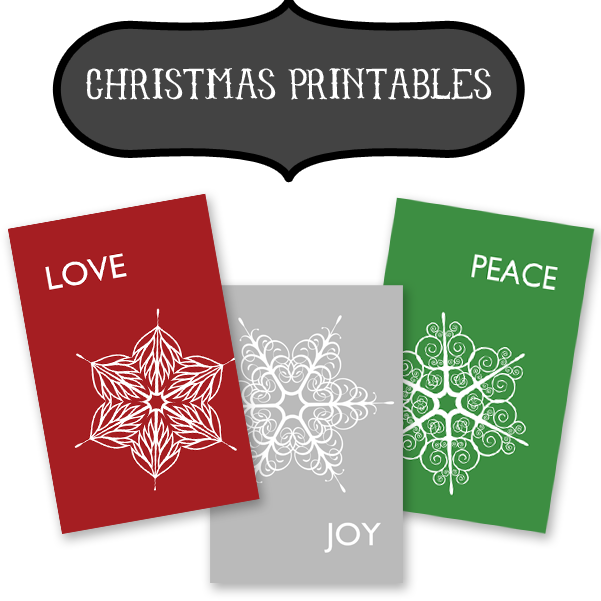
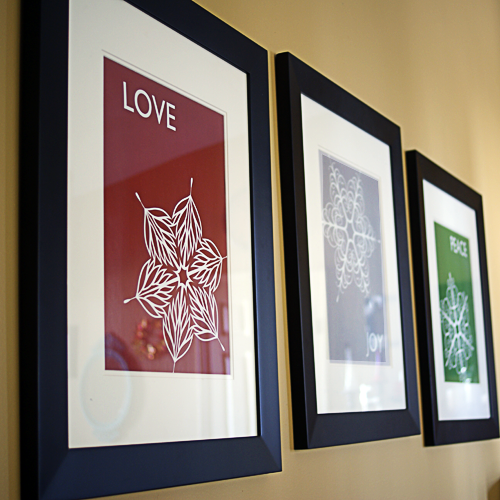
Thanksgiving is behind us, so let’s get our Christmas decor on!  At Printable Decor, you can download the new Christmas printable set I created for my seasonal frame trio.  The Love, Joy, Peace snowflake set is sized at 11×17 inches, but crops to a 11×14 matted frame well.  You can have these printed at your local office supply store for around $1-2 per print.  Head over for more pics, more Christmas printables and ideas for display!

Make Aluminum Can Angel Ornaments

[pinit]

AluminumCanAngels61

[pinit]

Make #Recycled Aluminum Can Angel Ornaments #ChristmasDecor #Upcycle @savedbyloves

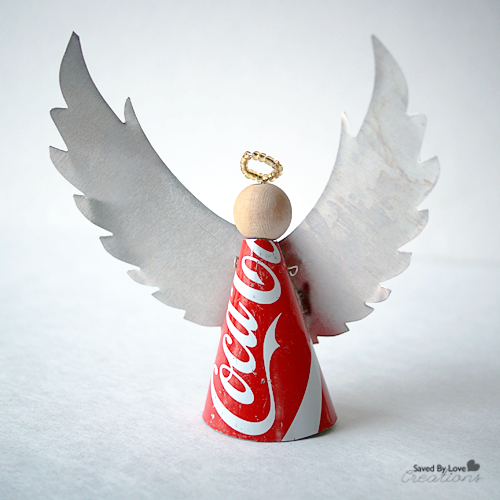
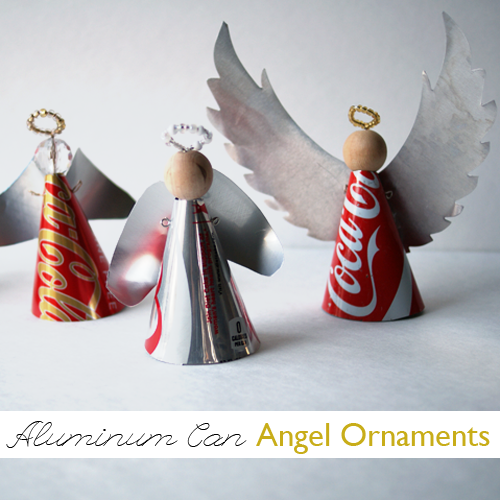
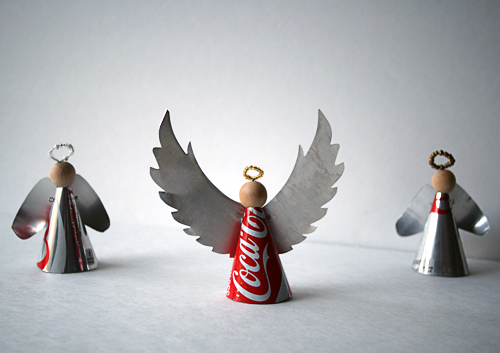
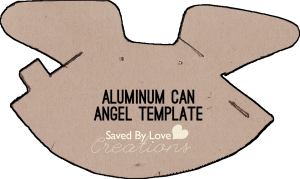
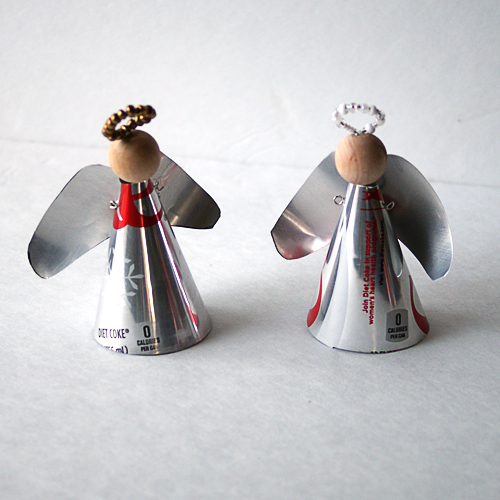
 Need some great handmade Christmas gifts that won’t break the bank?  Today’s project is an adorable, virtually free Christmas ornament made from an aluminum can.  I was recently gifted a cute coke can angel, and of course had to hack it.  I came up with a template, which you can download and cut out to trace onto a can.  The smaller winged angel takes only one can, no glue, and is easy to make!  The version with the larger wings takes 2 cans, this Sizzix Angel Wings die, and super glue.

Make #Recycled Aluminum Can Angel Ornaments #ChristmasDecor #Upcycle @savedbyloves

SUPPLIES:

12 oz Soda Can
Large Beads for head
Seed Beads for Halo
Craft Wire 20 Gauge
Wire Cutter
Jewelry Pliers
Scissors for cutting Aluminum
Angel template
Sharpie
Craft knife
Needle Tool or Bead Reamer
Masking Tape (optional)

Tutorial:

Make #Recycled Aluminum Can Angel Ornaments #ChristmasDecor #Upcycle @savedbyloves

For the larger wings, Cut out the template without the wings, fold can into cone shape then super glue larger wings onto back of angel.

Make #Recycled Aluminum Can Angel Ornaments #ChristmasDecor #Upcycle @savedbyloves

To string your ornament for hanging on your tree, loop a piece of string through the halo and you are all set!

***As always, when cutting aluminum cans, be very careful.  They are not as sharp as I thought they would be when I first began working with them, but obviously they are sharper than paper.

Make #Recycled Aluminum Can Angel Ornaments #ChristmasDecor #Upcycle @savedbyloves

Make #Recycled Aluminum Can Angel Ornaments #ChristmasDecor #Upcycle @savedbyloves

For more projects to make from recycled cans, make sure you check out our 60+ Recycled Can projects roundup!  It will leave your recycling bin devoid of cans, and add to your upcycled handmade crafts for Christmas and year round gift giving.

Privacy Policy