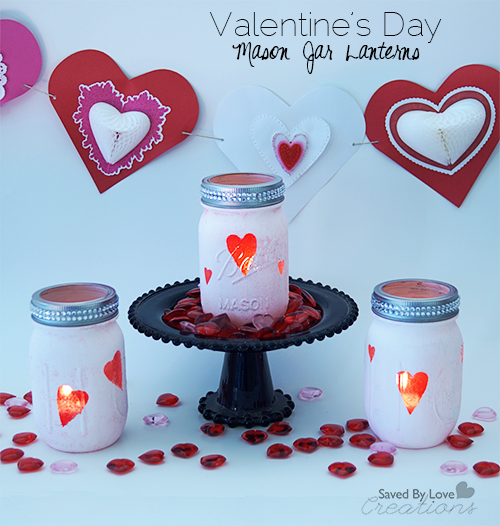
DIY Chalky Glitter Heart Mason Jar Votive Holders

[pinit]DIY Chalkboard paint Mason Jar Valentines Day Lanterns @savedbyloves [pinit]

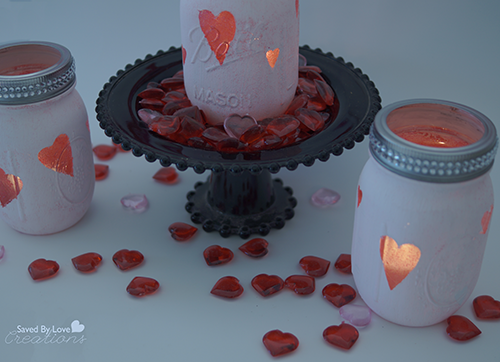
Today I am sharing how to make these fun chalk and glitter paint mason jar lanterns.  They are super simple to make, and will compliment your Valentine’s Day decor perfectly.  Let’s get started!

Valentine's Day Mason Jars

SUPPLIES:

Mason Jars

Deco Art Chalky Finish Paint in Everlasting

Deco Art Crystal Glitter Glass Pain in Red

One inch paintbrush or foam brush

Adhesive Jewels

Heart Stickers or Cut out hearts from Foil tape with paper punch or Sizzix Heart Die

Rubbing alcohol

Lint free towel

TUTORIAL:

Mason Jar Lanters

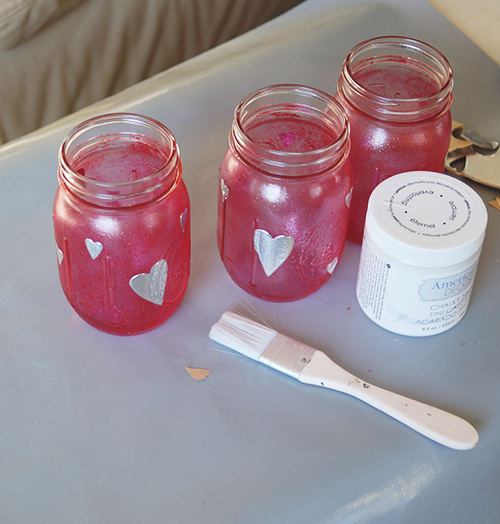
Clean mason jars with alcohol and lint free cloth, then paint with red glitter glass paint by DecoArt.  Let dry completely then place heart stickers where you want your hearts to be.  I used foil tape and my sizzix heart die because The foil sticks well and the paint won’t seep under in the next step.

How to Paint Mason Jars Chalkboard

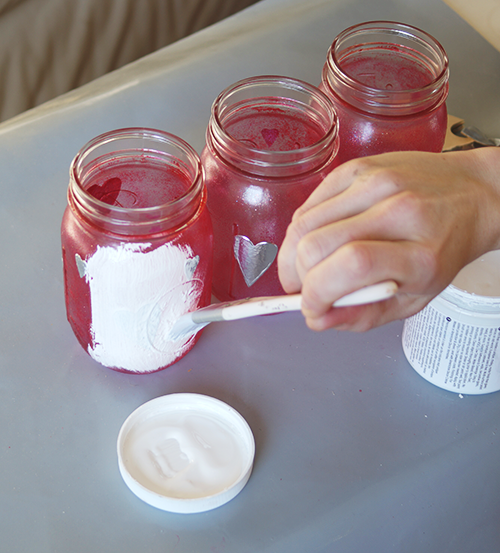
Use a soft brush to paint on chalky finish paint.  I liked the look of the red showing through a little, so I just did one coat, but you can let dry for 30 min and add another coat of you want a whiter look.  When you have painted on your final coat, use tweezers to carefully remove heart stickers after about 10 minutes.  You don’t want to let your project dry completely with the stencils still adhered.  If you do, you run the risk of peeling away adjacent paint when you remove them.

Mason Jar Valentine's Day Craft DIY

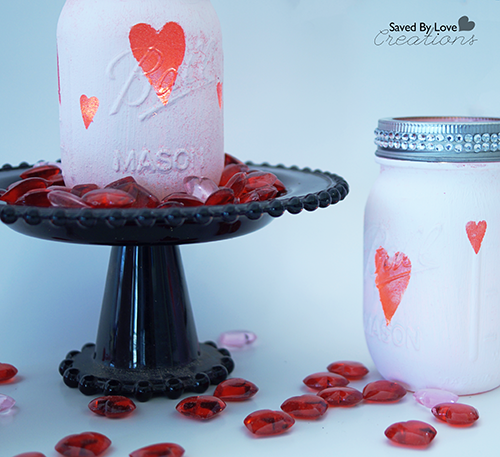
Apply adhesive rhinestones to jar lid as shown in pics, insert candle and that is the end!

Polymer Clay Valentine’s Angel

[pinit]

Polymer Clay Tutorial Valentine's Day Angel[pinit]

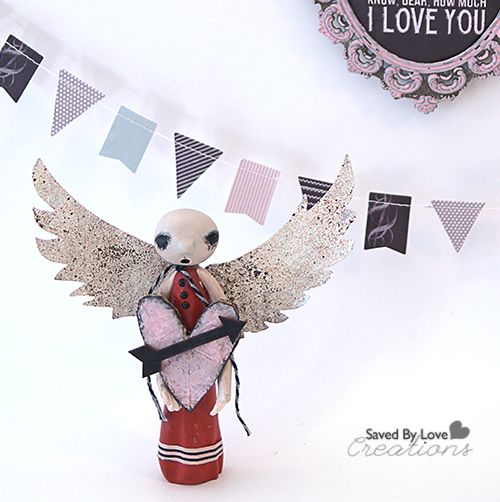
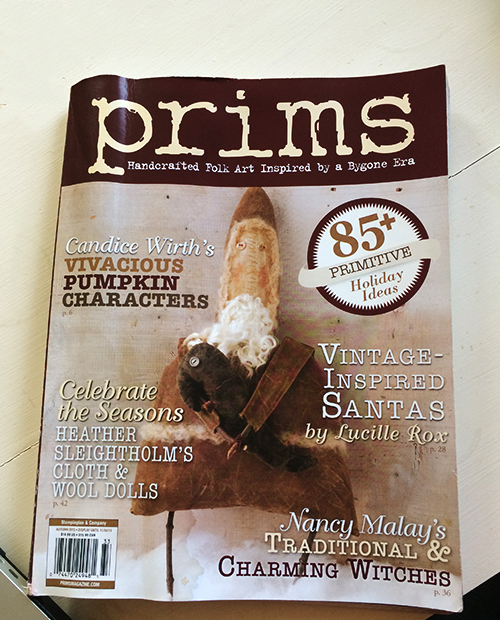
It has been awhile since I brought you a polymer clay project, and today’s is a sweet Valentine’s Day angel for you to love!  The inspiration for this project came from Prims, a publication I recently started enjoying.  It is a simple process that requires just a few basic supplies.  Most of the shaping of the clay is done by hand.  Other than the clay, all you need is acrylic paint, and some paper crafting embellishments to create your own whimsical figure!

Prims Magazine

Here is the publication that gave me the idea; Prims Holiday Edition .

Prims

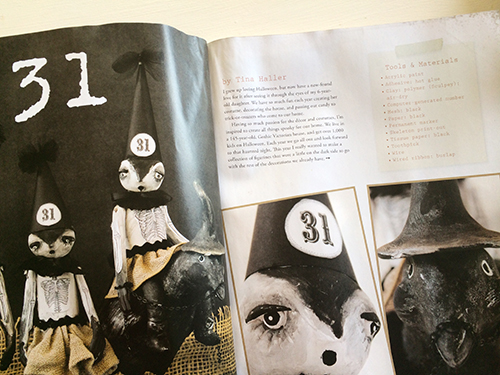
Tina Haller made these adorable Halloween clay dolls.  I went with a Valentine’s Day version!

TUTORIAL:

Polymer clay doll tutorial

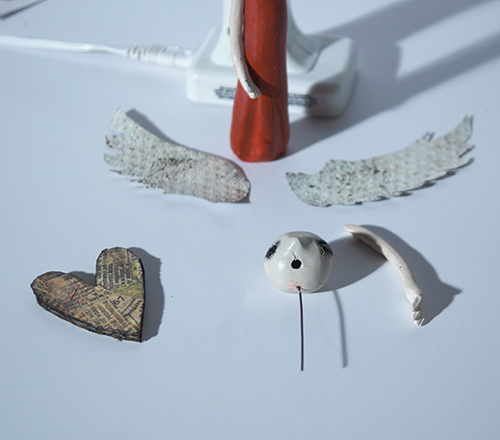
Create the head, arms and body in separate parts with conditioned polymer clay.  I used scrap clay for this part.  I wasn’t sure what color I wanted in the end, but it didn’t matter since I knew I could paint the doll whatever color I wanted with acrylic paint.

The arms are long and skinny, which lends to the creepy Tim Burton kind of feel.  I used scissors to cut the fingers.  For the red gown, I used a marker to shape the rolls.  Just use what you have on hand.  The most useful sculpting tools you have are your fingers.

For the eyes and lashes and mouth, use a toothpick or needle tool to etch the lines.  Pinch with fingers to make the nose.   Bake each piece with wire inserted where it will attach.   I bake at 250° for 1 hour.


Polymer Clay Tutorial DIY Valentine's Day Angel mixed media @savedbyloves

Paint the pieces as desired.  Attach together with super glue, which works great for polymer clay.

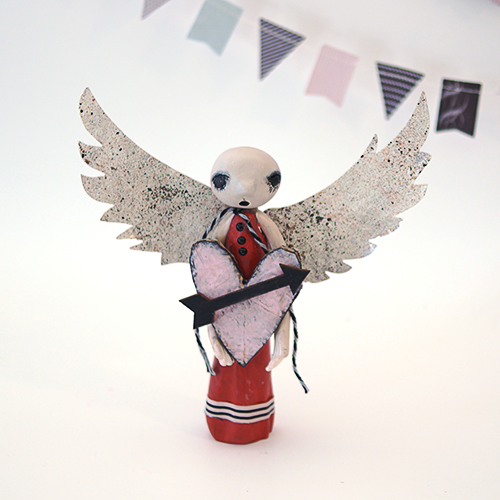
For the wings, I used aluminum cans and cut them with the Sizzix Angel Wings Die.  I embossed with a dots folder and used ICE enamels by Susan Kazmer.

The heart I cut from corrugated cardboard and covered with washi tape, which I then painted with Distress paint pink.  I outlined the edges with my Black Soot Distress marker.

Polymer Clay Valentine's Day Angel DIY

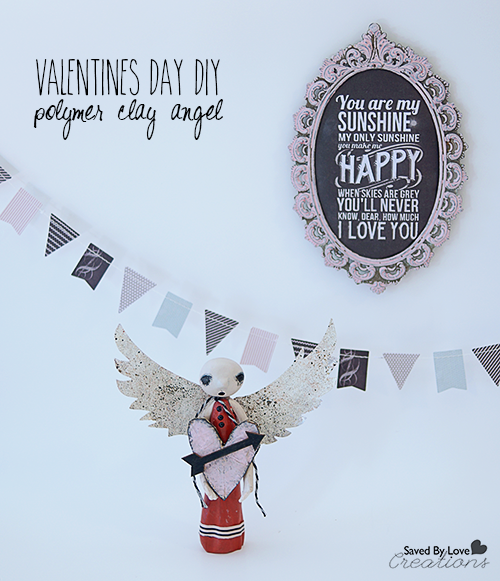
The sign, bunting, washi tape and bakers twine are all from Rhonna Farrer’s Chalk Studio Collection with My Mind’s Eye.  This is my new obsession.  I love all of the paper, embellishments and washi tape in this fantastic line!  I found it at Joann Fabrics.

That is it.  I hope you enjoyed this little angel!


New Alcohol Ink Colors from Ranger & Video Tips from Tim Holtz CHA 2014

[pinit]New Ranger Ink Alcohol ink colors and DIY Flower with CHA 2014 Tim Holtz Video @savedbyloves[pinit]

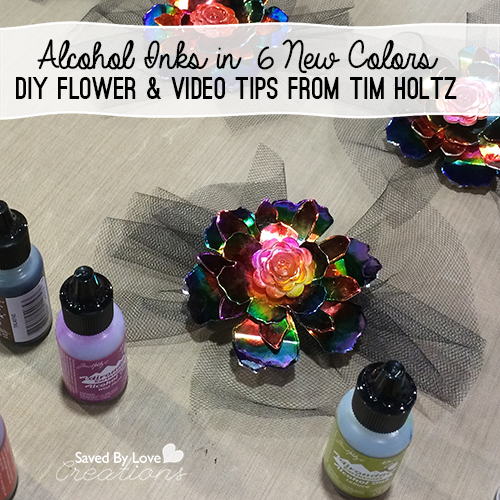
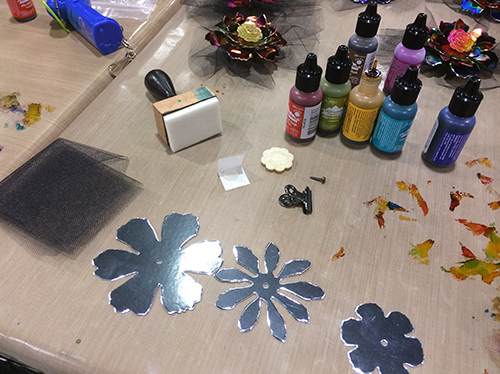
I am so excited about the new alcohol ink colors from Ranger that I had the chance to demo at CHA 2014.  We used them making these beautiful flowers from the Tim Holtz Tattered Florals Die from foil card stock.  They were quick and easy to make, and can be used as barrettes, corsages and more!

New Ranger Ink Alcohol ink colors and DIY Flower with CHA 2014 Tim Holtz Video 2

Here are the supplies we used.  Make stripes of various ink colors on the blending tool.  Drag across the flower layers and the flower button for the center.  Once dry, shape flower layers and attach wiht brad through accordion folded organza rectangle.  Use glue dot or hot glue to attach flower button to center of flower.  The end!

Check out the following video where Tim Holtz talks about the new colors in the Ranger alcohol ink line, and gives really cool tips on how to use the alcohol blender pen to color with the inks!

DIY Vintage Holiday Centerpiece With @Floracraft Foam Trees

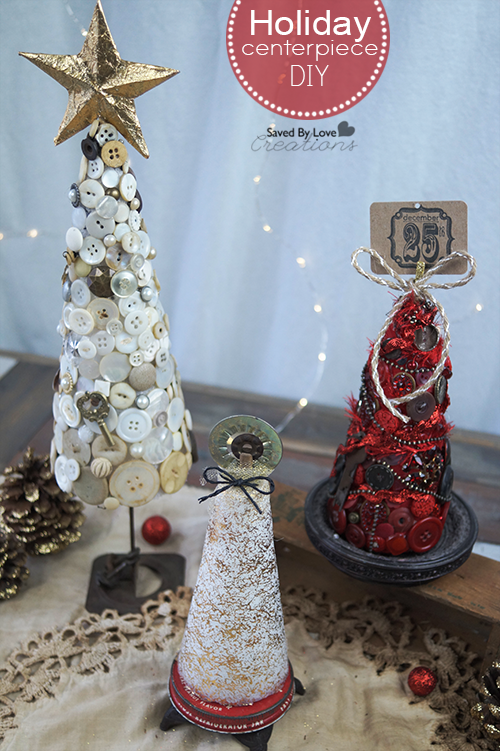
[pinit]Holiday Centerpiece using found objects and vintage buttons on @floracraft Styrofoam trees @savedbyloves[pinit]

Styrofoam Christmas Tree Centerpiece Vintage Buttons DIY

The holidays are here, and many of you are busy planning decorations and meals.  Today I am sharing with you an easy DIY holiday centerpiece using vintage buttons, found objects and Styrofoam™ cones.  This is the perfect project for using up those antique embellishments I can’t resist buying every chance I get!

This post is sponsored by Make it Fun: Crafts and Crafts ‘n Coffee!  All opinions are mine.

SUPPLIES:

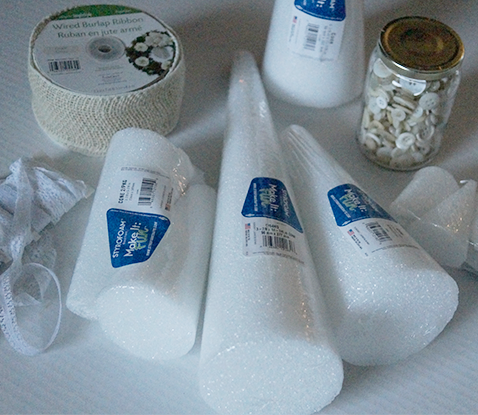
Floracraft Christmas Centerpiece Using Stryrofoam

Styrofoam™ cones in 3 sizes

Hot glue gun

Vintage buttons, twine, lace, ribbon, doilies, hardware

Decorative eyelets, pearl and jewel stickers in creams, whites, golds and reds

Gold and white tissue paper

Mod Podge

TUTORIAL:

how to make a vintage button christmas tree

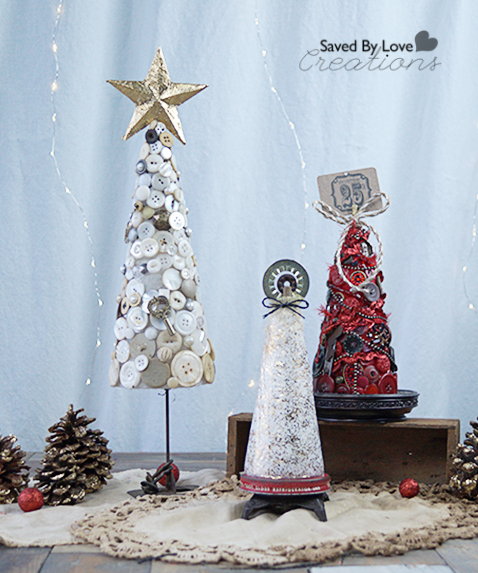
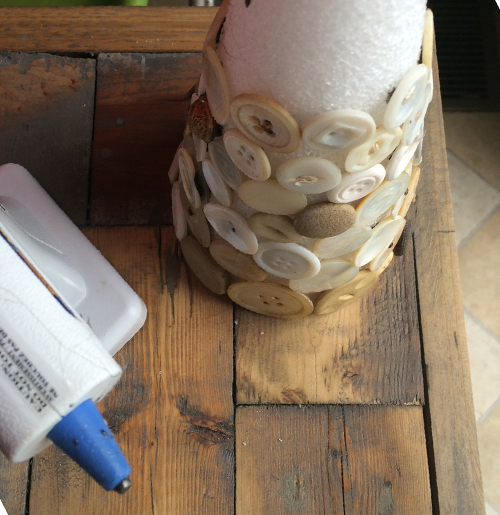
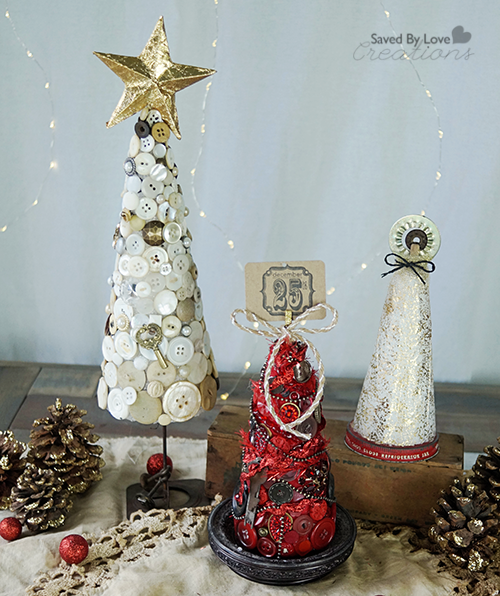
For the white button tree, I randomly hot glued buttons from the bottom to the top.  I made a paper foil star with my Tim Holtz 3D star die  and attached it to the top of the tree with a bamboo skewer.  The end.

Vintage button crafts

For the red tree, I did the same thing, but wrapped the tree in red organza before attaching the buttons and hardware.  This was to prevent the white foam from showing.

I placed it on a candle holder as the stand.  Using a gold sparkly mini clothespin, I attached a Christmas tag to the top and tied a bow around that with twine.

DIY christmas centerpiece ideas

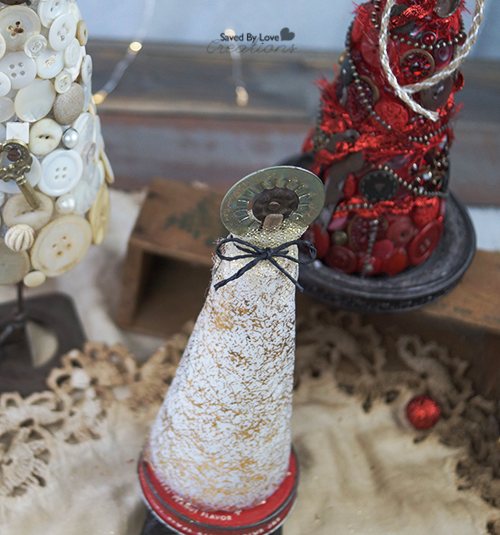
For the white and gold tree, I decoupaged gold and white tissue paper onto the cone using Mod Podge.  I added a random piece of hardware with a vintage clothespin, and wrapped that with gold organza and black twine.  It sits on an old jar lid (same jar that use to hold all those vintage buttons)!

Led mini lights strands

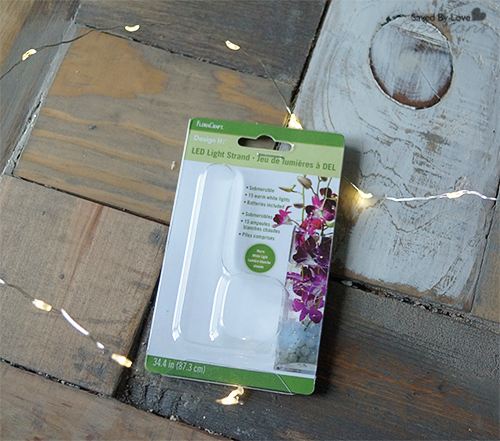
Those pretty, warm lights you see in the background are Design it:® LED Light Strands, which I love because they are light weight and ready to go out of the package.  No outlet needed or batteries to buy is always a plus in my book!

Vintage Styrofoam Centerpiece Holiday @floracraft

I hope you enjoyed this project as much as I did, and are inspired to make the old new again!

DIY Reclaimed Wood Christmas Tree and Advent Artist Blocks

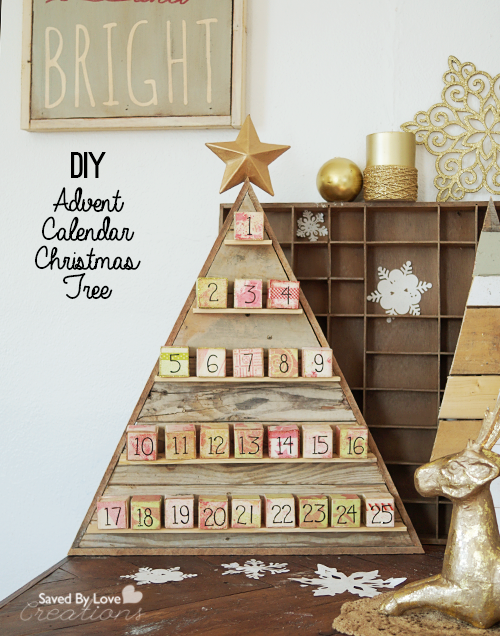
[pinit]DIY Advent Calendar Reclaimed Wood Tree #stencilGirl #Christmas with @eileenhull @artistsontheblock @Sizzix_US @savedbyloves[pinit]
Make a Reclaimed Wood Advent Calendar Christmas Tree

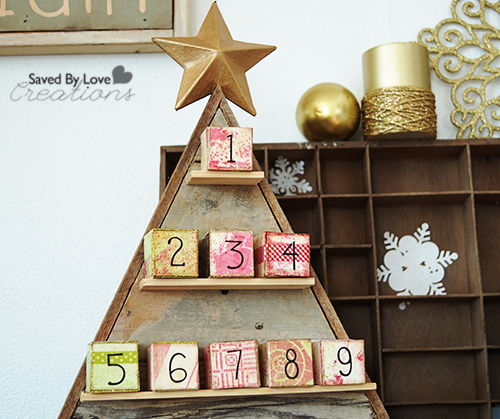
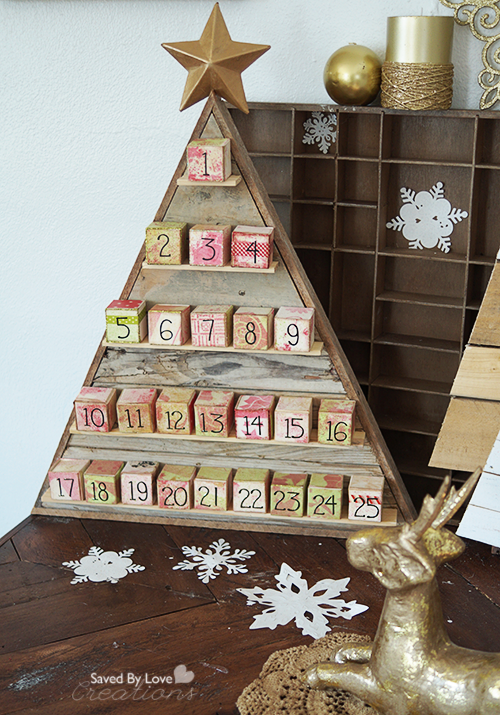
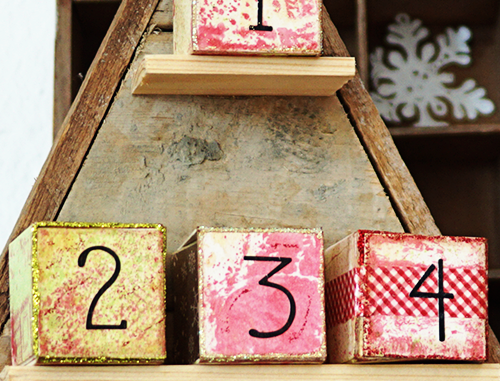
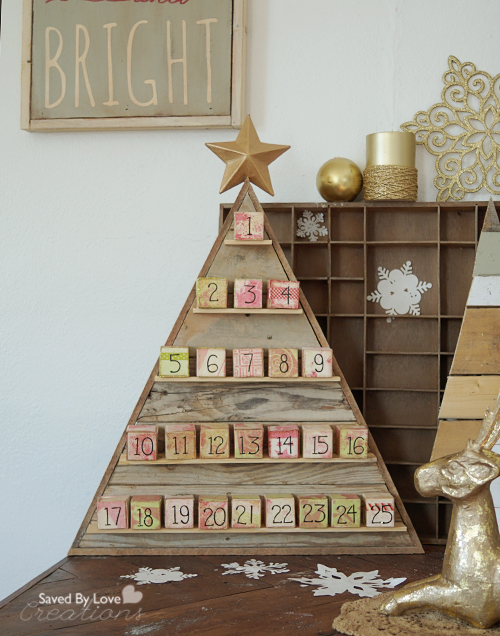
Today’s project is a rustic, reclaimed wood Christmas tree advent calendar that you can make for little to no cost!  Building from salvaged wood and paper crafting all in one project! I created the blocks using Eileen Hull’s (soon to be released) Scoreboards Block dies.  The die makes blocks in three sizes, for tons of creative potential.  Think about artist trading cards, but 3-D!  Last Christmas I showed you how to make an advent calendar from wooden blocks, and that is the first thing I thought of when I saw this die.  Read on to see how I used stencils from Stencil Girl, spray ink, number stickers and washi tape to decorate my mat board cubes.  Watch the video to make your own tree, or display your blocks freestanding.  These would make great Christmas gifts and decor for your holiday get togethers.

How to Make a Reclaimed Wood Advent Calendar

SUPPLIES:

For the Blocks

Mat Board

Heidi Swapp Spray ink Gold, Green, Red

Stickles in red, green, gold

Washi Tape in Christmas Patterns

Stencils (I used Stencil Girl)

Mod Podge Antique

For the Tree

Scrap wood

Mitre Saw

Nailer or hammer and nails

Wood Glue

E6000

5 gallon paint stirrers

TUTORIAL:

ADVENT BLOCKS

You may want to decorate your cubes before assembling them into the 3D shape.  First I will show you assembly, then how I decorated my cubes.

Artists on the Block


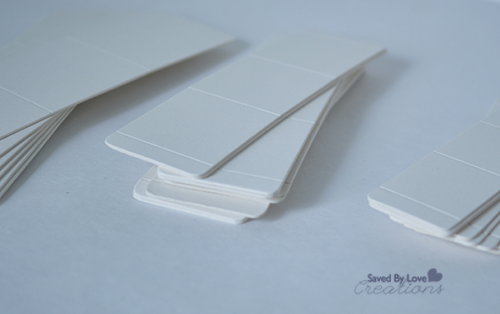
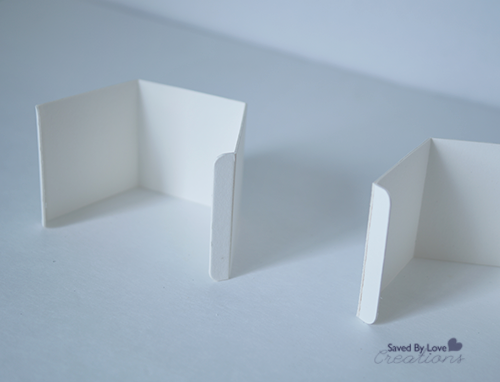
I chose the smallest of the three cubes for my calendar.  This is what the mat board looks like after it is cut with Eileen’s awesome new die!

Paper Craft DIY Christmas

Fold cubes along score lines.  Two of the scored rectangles are needed for each cube.  Place them together to form the cube.  You can glue the tabs in place if you would like, but I didn’t find it necessary with the mat board.  I haven’t tried other paper.

Stencil Girl Stencils

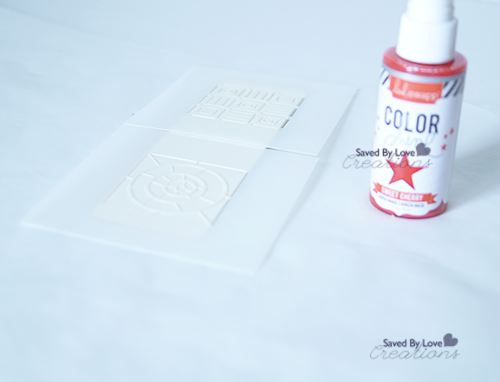
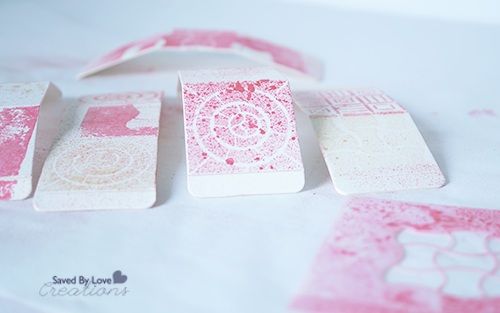
Place stencils over blocks and spray.

How to Make an Advent Calendar

Clean up excess ink that’s on the stencils for a reverse image on the blocks, and you waste less ink!

How to make Paper Advent Calendar

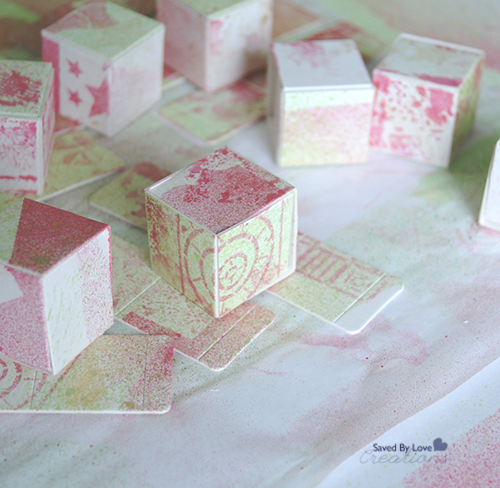
I used red, gold and green sprays, allowing about 10 minutes dry time between each color.

Mixed media Artist Blocks

Once that dried, I adhered washi tape to some blocks, the black sticker numbers and coated with the front surface with Mod Podge Antique for an aged look.  I thought it needed some sparkle, so I added stickles in red, green and gold.

RECLAIMED WOOD CHRISTMAS TREE

I made the tree like I showed you in this  DIY wood pallet Christmas Tree post, and in the video at the end of this post.  The only difference is I used chippy, weathered 2×4 scrap wood I found at a demolition site.  I determined the dimensions of my tree based on the 1.5 inch advent cubes.  The base is 19 inches, and the height is 20 inches without the frame.

I made the five shelves from paint stirrers, cutting them with the mitre saw to lengths that allowed 2 inches for each block.  So the first one is 2 inches, then 6 inches and so on, 10 inches, 14 inches and finally 18 inches for the bottom shelf.  I laid the tree flat and added a thin line of E6000 to the back of the paint stirrer and placed them on the tree where I wanted the shelves.

DIY Advent Blocks Pallet Christmas Tree

I decided to use scrap wood strips to frame the tree, just cutting to length with my mitre saw and using my Ryobi nailer to attach.

I hope you enjoyed the project and the blocks as much as I did!  Visit Artists on the Block for more news, updates and projects as artist trading blocks take over the mixed media community!

Be sure and visit other projects using the blocks in the Stencil Girl and Sizzix Artist Trading Blocks Hop

Blog Hop Order

SGSIZZIXBLOGHOP

GreenCraft Magazine Featured Project

[pinit]

Saved By Love Creations featured in GreenCraft Magazine using @sizzix_US and @rangerink @savedbyloves

[pinit]

This is a joyous moment for me.  The Fall Aluminum Can Leaf Wreath DIY I shared with you was featured in GreenCraft Magazine!  When i got the email expressing interest in my project for this issue, I literally squealed from my bed, where I lay with the then current issue of GreenCraft on my nightstand.  It is my go to publication for creative upcycling inspiration, and I am delighted to have my project amongst its beautiful pages.

Check out the issue, and be sure and visit our Recycled Projects Gallery for tons more project ideas using recycled materials!

RecycledProjects

Privacy Policy