

This week’s roundup will give you plenty of holiday decor inspiration, with over 50 of the best garland, bunting, pennant, banner projects out there. I remember when I first started making this kind of decor, and how confused I was about what to call my final piece. Now I am not much more educated on the terminology, and I just use the words interchangeably! Whether you use garland or bunting or pennant or banner, you will find some great ideas here.
Make a Halloween Bouquet
by
[pinit]

[pinit]

This project involves four of my favorite things; Sizzix, Halloween decor, paper flowers and upcycling! Learn how to make these poofy pom-pom flowers from tissue paper and book pages. I used Sizzix 3D flower #2 to cut my petals, but you can easily do this project with a scalloped circle paper punch, or with good ol’ scissors and a scalloped circle template. Each “petal” is a scalloped circle folded in half and then in half again.

SUPPLIES:
Tissue paper in orange and black
Old book pages
Green floral wire
Sizzix 3D Flowers #2, or scallop circle punch, or scallop circle template and scissors
Vase or other container for your flowers
Ribbon
TUTORIAL:
Cut your circles using the Sizzix 3D Flowers #2 die. Here is a quick video showing the die and the various flowers you can make. For the bouquet shown here, I used both the large and small scallops for 2 different pom pom variations.


Quick, Easy Fall Candle Upcycles
by

Do you change out your decor for the seasons? Buying candles and other accessories in summer, fall, winter and spring colors can get expensive. That is why I usually end up buying neutral colors and updating them to coordinate with the time of year. There are several ways to do this on the cheap.
I love how Jaime at Crafty Scrappy Happy used Martha Stewart glass paint to bring her candles into fall. Her upcycled candle DIY is a must see.

For my Halloween mantel this year (o.k., it is a piano top, but whatever), I used black crepe paper and card stock to tie my candles into the Halloween theme. Cut a decorative edge, or just make stripes, wrap around the candle and tape in place in the back. Super easy and cheap.


Scroll Saw Pumkin Decor
by

I have been busting at the seams to talk about this scroll saw. We scored it on Craigslist a few weeks ago for a steal of a price. This was after months of contemplation and research on which saw to buy, whether to buy new, and all that fun stuff. We went used, got a drill press thrown in, and spent a total of $100! The saw and the press both work great. This is the first project I have completed with my new toys. It was super simple. If you don’t have a scroll saw, just pick up 3 wooden ovals at your local craft store, and you will be making this cute pumpkin decor in no time.

SUPPLIES:
1/4 in plywood
Oval template
Chevron print
Surface to Mod Podge Chevron print onto
Acrylic paint
Paint brush
Paper leaves
Green craft wire
Craft glue
Med grit sandpaper
TUTORIAL:

*NOTE: After Mod Podge dried, I sanded edges of chevron background and applied 2 coats of Mod Podge over entire surface. To adhere pumpkin to background, I used velcro strips. That way I can change it out for the different holidays.


How to Make Fall Flowers
by

I am happy to have Amy from Plucking Daisies back today. She has a knack for turning trash into treasure, and this project is a fantastic example of that. Be ready to create this gorgeous fall flower bouquet from things you probably have at home already. This would make a great centerpiece for the Thanksgiving table. Who is ready for a great fall upcycle?
Hi all! Last time I was here at Saved by Love Creations I showed you how to make Paper flowers using punches. Today, I have an even easier method for making Fall Flowers to share with you. Remember the tissue paper flowers you made as a kid? We are going to use the same technique for making tissue flowers (pipe cleaners and all) to create beautiful fall flowers using items you probably have lying around the house.

Are you wondering what these fall flowers are made of? You may be surprised. To vary the color and texture (much like the color and texture found in nature at this time of year) I combined Dryer Sheets, Shower Curtain, Sheet Music, and Kraft Glassine to create the flowers for this arrangement.

If you haven’t used Kraft Glassine yet I urge you to try it. It’s available at most craft stores in the Tim Holtz section for only a few dollars. The great thing about Kraft Glassine is its durability and resistance to creative abuse. The more you beat it up the better it looks!

Kraft Glassine Flowers
1) Grab a few pieces of Kraft Glassine and ink them up with Alcohol Ink. *If you add some metallic mixative to your blending tool you will get a lovely gilded look. 2) Once the ink is dry crumple it up and then smooth it flat. 3) Cut pieces of Kraft Glassine in half (You will need at least 3 squares to form a flower). 4) Fold squares together accordion style. 5) Secure in center by wrapping the end of a pipe cleaner around. 6) Cut a rounded edge on both sides. (Tonic Scissors cut best). 7) Gently peel each layer up to form flower.
* Repeat Steps 3-7 for each style of flower

Dryer Sheet Flowers
Don’t throw those dryer sheets away! Harvest them to make these fun flowers. I sprayed my Dryer sheets with a fall inspired blend of Dylusions Spray inks to color them. Our Friend Laura from the Shed has another unique way to create Dryer Sheet Flowers here. The best part about these flowers is their laundry fresh scent 🙂
* Repeat Steps 3-7 (Above)

Sheet Music Flowers
The sheet music flowers can be a bit tricky. Especially when working with vintage sheet music since it tends to tear easily. *Repeat the above steps from the previous flowers. When you have your ends cut apply Distress Ink (Vintage photo) to all the edges. To make the paper more pliable mist with Perfect Pearls Heirloom Gold. This will help to wick the Distress ink and age your flowers to perfection!

Shower Curtain Flowers
I had an epiphany when changing out my shower curtain to cut a piece off and save it to “make something”. This resulted in some fun fall leaves and now Shower curtain flowers. You can also get this look by using a clear tablecloth. Check out my Shower Curtain Leaves tutorial for all the details on selecting Alcohol Inks in a fall color palette. *I gave my flowers a spritz of glitter spray for a touch of sparkle.
* Repeat Steps 3-7 (above)

The flowers looked great but they needed a little something…like a center. It was bothering me that you could see the pipe cleaner in the center. To fix this problem I consulted my vintage button collection. (Do you ever really NEED an excuse to play with vintage buttons? ) Selecting buttons for your flower centers is half the fun. Try a few on for size, shape and texture. When you are satisfied grab your glue gun to adhere them.
*If you don’t have a stash of vintage buttons you can find an assortment called “Grandma’s Grab bag” in the sewing section at Michael’s. Just look for a bag with lots of brown to complement the fall colors.

Now you will need a container to arrange all the lovely fall flowers you’ve created. I’m sure you may have one of these generic glass vases left over from a fresh flower arrangement. Not even a run through the dishwasher and a good scrubbing could remove the schmutz from the rim of this vase so it was time to up cycle it into something new!
After a coat of Krylon Glitterblast (Diamond Dust) it looks better than ever! *If you don’t have one of these vases lying around they can usually be found at the thrift store for $1 or $2. You could also use a large jar from the recycling bin.

The freshly painted vase is lovely but it needs something to “Tie it all together.” I saved this gold grosgrain ribbon (probably from a Christmas gift from last year) and thought it was the perfect complement for the Fall Flower arrangement . To add a bit of whimsy and tie in with the sheet music flowers I stamped the ribbon with a sheet music stamp and Ranger Archival ink.

Move over 1-800-flowers! If you have a dryer full of laundry, a shower curtain that needs replacing, and a plain glass vase in your home you can create a beautiful Fall Flower arrangement that will last for seasons to come. All with flower making skills you learned in Kindergarten.
Hope your creativity is blossoming today!
Amy*
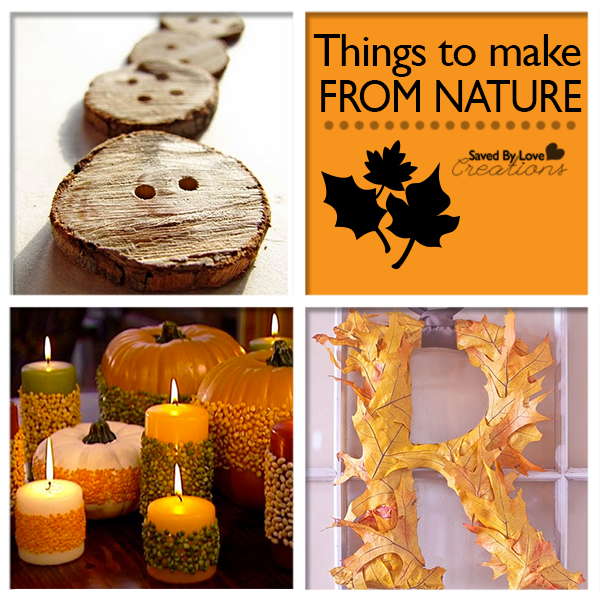
50+ Projects to Make From the Outdoors
by
[pinit]
[pinit]
Upcycled Aluminum Can Fall Wreath DIY
by


This is one of my favorite projects ever. I cost pennies to create, I absolutely love fall decorating and crafting, and upcycling is my thing. To make this wreath, I used my Sizzix and Tim Holtz leaf die, but if you don’t have a die cutter, you could do this part by hand with a leaf template, or use leaf shaped paper punches. They work great on aluminum cans. Let’s get started on this vibrant, eco-friendly autumn leaf wreath!

SUPPLIES:
Tim Holtz Tattered Leaves die
Sizzix
Ranger Alcohol Inks in your fave fall colors; Check out my friend Amy’s awesome color palate for fall, and how she used the inks on a shower curtain cut with the leaf die
Felt applicator for alcohol inks
Straw
Aluminum cans
Metal snips
Cardboard
Circle shapes to trace for inner and outer diameter of wreath
Pen
Scissors
3D Foam Mounts
Duct tape (optional, but recommended if you are putting your wreath outside)
Non stick craft mat

TUTORIAL:
Rinse out your cans with soapy water and cut them into sheets like my aluminum can rose video:


60+ Fall Decor Projects to Make
by


It’s time for fall, and with that comes my favorite DIY decor projects. This round-up is full of ways to bring autumn into your decorating, from Halloween pumpkin crafts to Thanksgiving themed printables, and everything in between. I hope you enjoy beautifying your space with inspiration from these amazing projects!
