Reclaimed Wood Display Shelf For Upcycled Old Book Letters

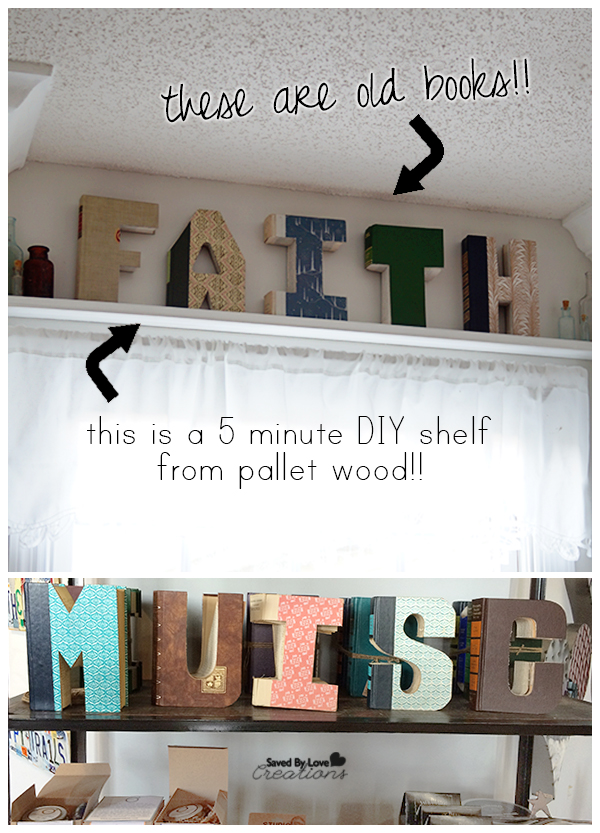
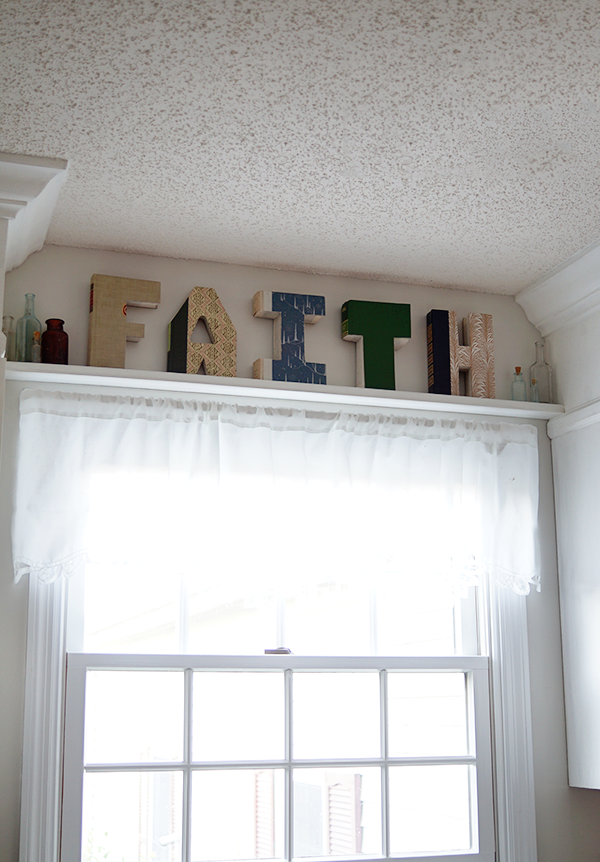
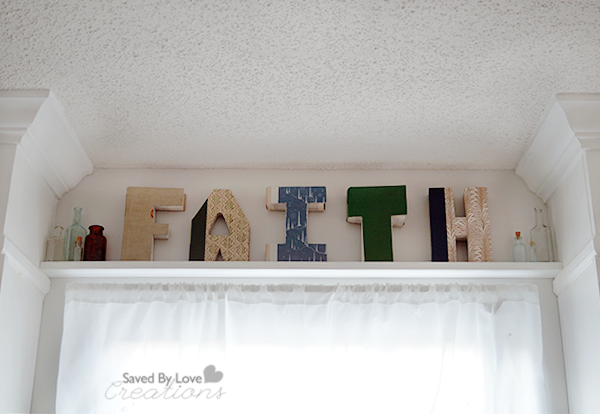
[pinit]5 minute DIY shelf from Pallet Wood @kregtoolcompany to display "FAITH" letters cut out from old books @savedbyloves.png[pinit]

I am obsessed with old books, well old things in general, but when I saw these words from old book letters I was sold!  There is a cute store in Nashville called Island Cowgirl that we stumbled upon while looking for Archeology Antiques.  The couple just opened the store 12 days before we wondered in, and they know how to do it!  Such rusty, wonderful upcycled home decor and jewelry filled the industrial space.  The prices were what got me.  See, I don’t usually buy handmade things because of the whole “I can make that for like 1/100th of the price tag” thing that happens in my brain.  Not so in this shop.  I left with my arms full, contemplating where I would display my new found treasures when I got home.

Things to make from old books

Did you happen to see my recent DIY Kitchen Cabinet Upgrade with Crown Molding and Chalky Paint post?  It was quite the transformation if I do say so myself.  The kitchen is coming along great, but there was this sad space between the regal cabinets above the window.  It has been begging me to decorate it.  Enter words made up of letters cut from old books.  Yes please!  I bought “Faith”.  Now, where would I put such a special accent?  That is when I decided to attach a narrow display shelf to those cabinets to fill the desolate space above the windows.  How to make a shelf using Kreg Jig
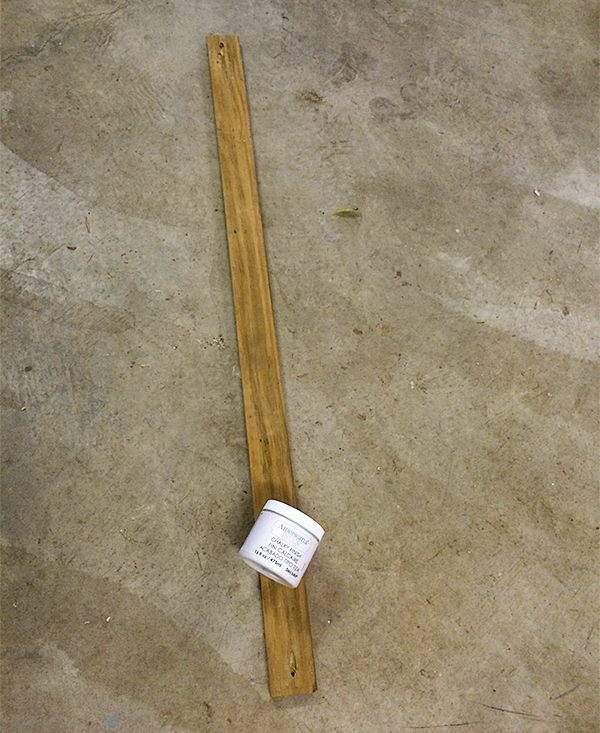
First, I ripped the pallet wood to about 2.5 inches with the table saw.  I used the miter saw to cut the wood to length for the space in between the cabinets.  I used my Kreg Jig to drill a pocket hole on each end for attaching to the cabinets.  If you haven’t used this tool, you are in for a treat.  I use it in nearly every woodworking project for joining pieces together.  The joins are super strong, and the jig takes out all of the guesswork.  I showed you how to use a Kreg Jig in this Easy DIY Pallet Sign Tutorial. Next I painted it using two coats of Deco Art Chalky Finish Paint in “Everlasting”, the same color I used on the cabinets.  A coat of wax sealed the deal, then I attached the shelf with 1.25 inch pocket hole screws.

Old Book Crafts

Wanna have a little fun?  

Guess how much I paid for “FAITH” from old books.  Leave your anser in the comments.  If you are right, I will send you an andvanced copy of my upcoming ebook, with 5 upcycled wine bottle home decor project tutorials you are going to love!

*By the way, if you want to make some yourself, check out this great tutorial from The Merry Thought; DIY Book Letters.  Pretty easy to do with a printer and a scroll saw. 

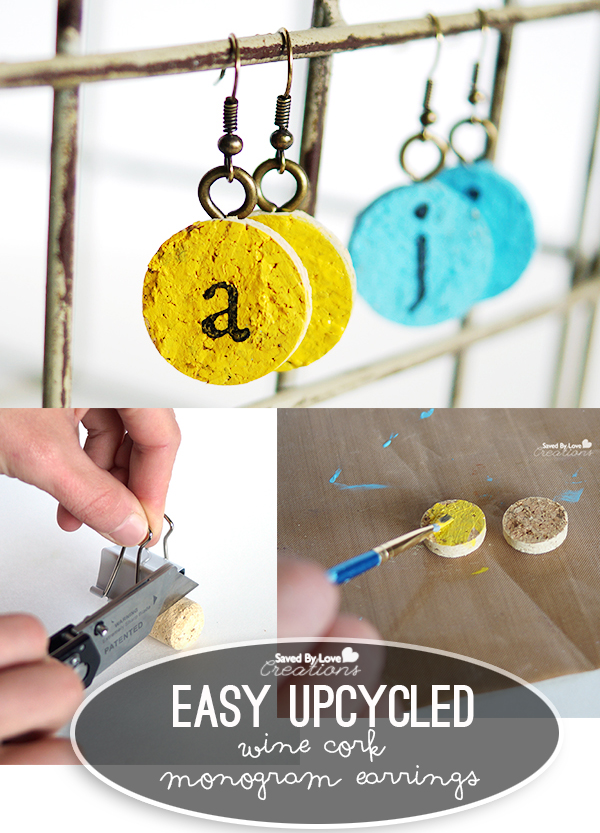
DIY Easy Cork Monogram Earrings

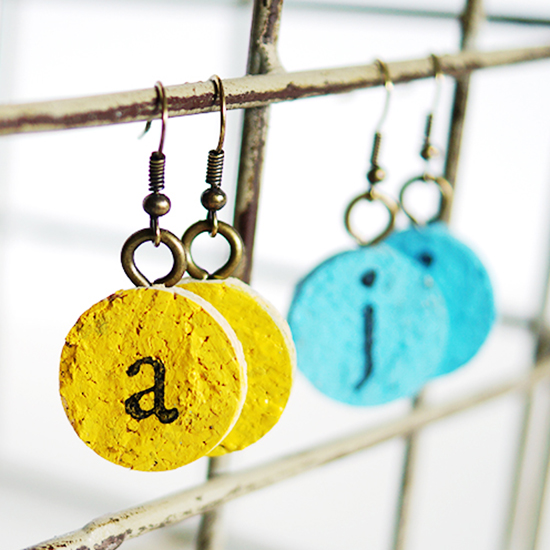
[pinit]Mongram Cork Earrings[pinit]

 Did you know that wine corks can be sliced into disks, painted, inked and stamped to create beautiful custom jewelry.  Not only are these monogram stamped earrings stylish and eco friendly, but they are light as a feather.  The customization possibilities are infinite!  Follow the steps below to make your own, or use the same process to make pendants, charm bracelets and wine glass tags!

Monogram Wine Cork Earrings DIY Upcycled Jewelry from @savedbyloves

CLICK HERE FOR MATERIALS LIST AND TUTORIAL


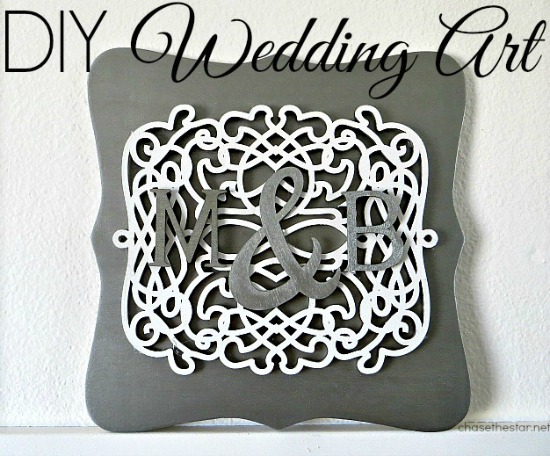
DIY Wedding Gift Art

Hello friends! It’s Barbara from Chase the Star, as always elated to be here!

It’s wedding season! Whether you’re planning a wedding or going as a guest, you can’t deny that new nuptials are all around us.

[pinit]

DIY-Wedding-Art-via-Chase-the-Star-for-Saved-By-Love-Creations-wedding-diyArt-DIYcraft-silver

[pinit]

Although I’m already happily married, I am about to celebrate a milestone anniversary, 10 wonderful years! So many weddings are DIY these days, and they look amazing! For all of the brides to be, I have a pretty and easy to make craft for your wedding decor, that can even be used in your home later on!

DIY Wedding Art

Here’s what you’ll need:

Wood plaque

Wood applique

Wood letters and ampersand

{I picked all of these up at Michael’s}

Glue gun/glue stick

Silver and white craft paint {or any color combination you like}

Make DIY Wedding Art or Gift 550px

DIY Wedding Art 550px

How to Make DIY Wedding Art:

Step 1:

Paint the wood pieces. I used silver on the plaque and letters, and white on the applique.

550px DIY Wedding Art

Step 2:

After all of the pieces have dried, glue the applique to the plaque with the glue gun. Then, glue the letters to the applique in the pattern you like.

Step 3 {Optional}:

Glue a 2 inch strand of jute or heavy string to the back of the plaque, or a saw-tooth hanger for easy hanging!

I bet this would be gorgeous in gold too! Any combination of colors to go with your wedding or home decor makes sense. I also love this idea to use as a family crest, or to give as a gift, there are tons of possibilities.

DIY Wedding Art via Chase the Star for Saved By Love Creations #wedding #diyArt #DIYcraft #silver

This will be up on my bedroom wall just in time for our big anniversary!

Check out my DIY Wedding round up for more ideas. For more crafts, recipes and home decor visit me at Chase the Star, and on Facebook, Google+, Pinterest, and Instagram!

Until next time friends!

New Signature

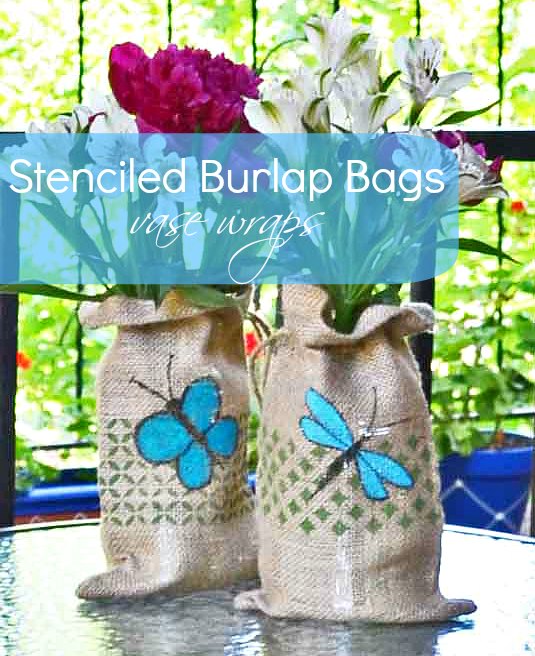
Stenciled Burlap Bags Vase Wraps

[pinit]Stenciled-Burlap-Bags-DIY @savedbyloves[pinit]

Hello! It’s Colleen and I’m back with a fun paint craft today. Are you a fan of burlap like I am? I saw these little burlap bags in that store that starts with Wal and ends with Mart and couldn’t resist them. A set of 3 for under $3? Oh yeah. I would’ve bought more but I had no idea what I was going to do with them.

They’re not quite large enough for wine bottles so that was out. They’d make cute party favors but I’m not throwing any parties. And I simply couldn’t wait for the holidays – although I did buy another set so I’d have them for Christmas presents.

They are the perfect size for canning jars. But who wants to cover up Mason jars, even with burlap? I just grabbed some regular ol’ jars, filled them with water, slipped them inside the burlap bags and made a cute burlap vase!

However the only thing cuter than burlap is painted burlap so let’s paint!

Stenciled-Burlap-Bags

Supplies:

  • Burlap Bags (available at Walmart and craft stores)
  • Mod Podge peel ‘n stick stencils
  • Sharpie marker
  • Stencil Pouncer or foam brush
  • #8 paint brush
  • piece of cardboard to fit inside the bag
  • painter’s tape (optional)
  • wax paper (optional)

Paint:

  • Folk Art Calypso Sky (for the dragonfly)
  • Folk Art Fresh Cut Grass
  • Folk Art Aqua (for the butterfly)

Stenciled-Burlap-Bags

We’re going to start with stenciling the bags. Usually stenciling burlap is tricky because of the weave and the nubbiness. But Mod Podge just came out with a line of stencils that are self-adhesive that I just love.

Stenciled-Burlap-Bags

These stencils adhere pretty well to the burlap but I found if you lay a piece of wax paper underneath the bag, when you lay the stencil over it, the edges will grab the wax paper and anchor the stencil so it won’t move. I also put some painter’s tape on both sides but that was to protect the burlap from over-stenciling.

Stenciled-Burlap-Bags

After your stencil is placed, load your pouncer or foam brush with the green paint. Then tap it a few times on a paper towel or on your palette plate to ‘off-load’ some of the excess paint. This helps to prevent bleed-thru under the stencil.

Stenciled-Burlap-Bags

Pounce in an up and down motion, making sure you have full coverage with the paint. Rather than pressing hard, tap lightly and repeat the application as needed. I found the coverage to be really good and only had to touch up a couple of areas with one application.

Stenciled-Burlap-Bags

While the paint is still wet, carefully lift the stencil off, place it on the wax paper and wipe the paint off of both sides with a damp paper towel. Even though these stencils are self-adhesive, you can reuse them over and over again. Once the stencil is clean, place it back onto the mylar strip it comes with.

Stenciled-Burlap-Bags

If you’re stenciling more than one bag, toss your foam pouncer (or brush) into a plastic baggy to keep it moist while you’re cleaning the stencil. If you put the foam into water, even with wringing it out thoroughly, you’ll still get an excess of air bubbles in the paint.

Stenciled Burlap Bags

Let the paint dry thoroughly and keep the cardboard inside the bag.

Now we’re going to draw a little dragonfly. If you don’t trust your freehand skills, you can grab a dragonfly pattern here that I drew. There is a butterfly pattern in there too. Since I draw a lot, I make quite a few patterns for my readers. But you can always find clip art on Google too or practice drawing your own. Yes! You can only get better, the more you practice!
draw dragonfly

Okay, to draw a simple dragonfly, start with a dot and a long oblong shape. That would be his head and his body.

Then draw two more elongated ovals, and then under those two more that are a little shorter.

Add a couple of antennae and you’ve just drawn a dragonfly!

Stenciled-Burlap-Bags

Fill in the wings with Calypso Sky using the #8 brush, or any other brush you have on hand.

Allow the paint to dry and then go back over the outline with the Sharpie.

Stenciled-Burlap-Bags

Next, go grab one of your clean jars and fill it with water.

Stenciled-Burlap-Bags

Now I’m gonna share a top secret florist trick! Just kidding. I was a florist but I used floral tape, not scotch tape. (works about the same though, ha!) Criss cross some tape over the mouth of the jar, creating a gridwork. Then gather your flowers in one hand and when you have them arranged how you want, wrap a twisty-tie around the stems. Place the stems thru the centermost opening in the tape grid.

Ta da! You can arrange flowers now!

Stenciled-Burlap-Bags

Then slip the jar with the flowers into your stenciled burlap bag.

Stenciled-Burlap-Bags

Isn’t this a cute way to use some plain ol’ jars? They’d make a pretty gift too!

What else would you use these bags for? I’d love to hear your ideas too!

Thanks so much for hanging out with me today! I hope you’ll come visit me at Just Paint It too. You can also find me on Facebook, Google+, Pinterest and Instagram. And of course, I’d love for you to drop by my Etsy and Zazzle stores.

I’ll see you next month!

signature

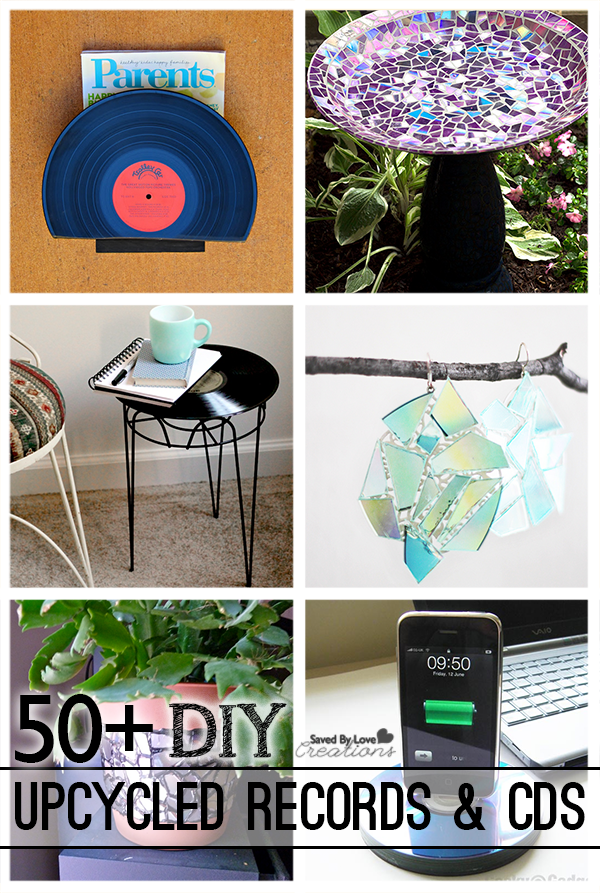
50+ Ways to Upcycle CDs and Vinyl Records

[pinit]50 Plus Best DIY Upcycle Vinyl Records and CD projects to make @savedbyloves[pinit]

Since most of us no longer listen to CDs or records, our planet is left with a ton of these seemingly useless items. Today I am sharing with you 50+ upcycle projects that solve this dilemma using some outside of the box creativity. You will think twice before considering old records and CDs to be useless!


50 Plus Awesome Ways to Upcycle Clothing

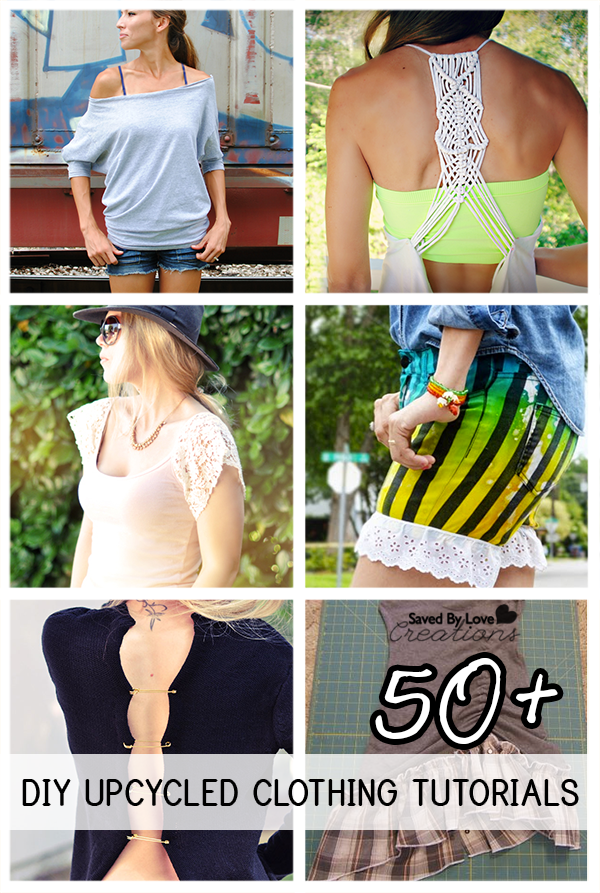
[pinit]50 Plus Best DIY Upcycled Clothing Tutorials to make @savedbyloves[pinit]

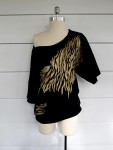
Before you haul that pile of old clothes off to Goodwill, you may want to check out this collection of 50+ awesome upcycled clothing tutorials! Up the style of your wardrobe with some simple and inexpensive creative ideas to refashion those old clothes. Did we miss your favorite? Let us know. We love a good clothing upcycle!

Printable Father’s Day Cards Freebie

[pinit]

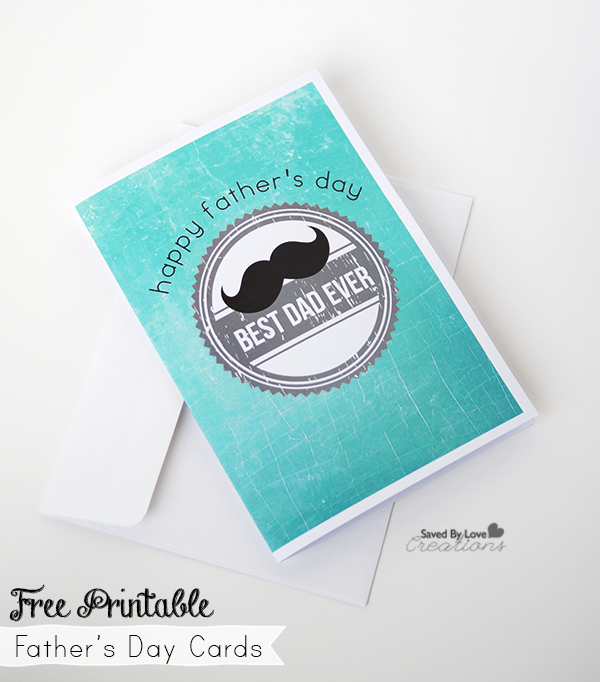
Free Printable Father's Day Card

Free Printable Father's Day Cards 2014 @savedbyloves[pinit]

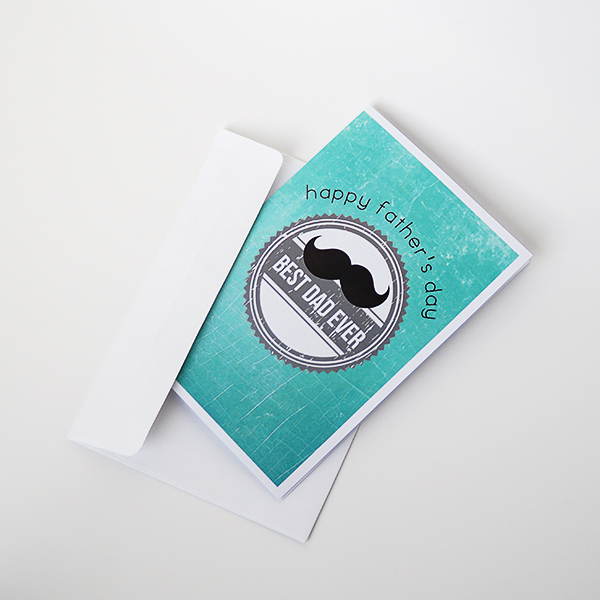
I am excited to share with you these fun vintage Father’s Day Card Printables!  Show your dad he is the best ever.  These are sized 5×7 and can be printed on photo paper or card stock, and folded in half as shown.  There are two version.  I hope you enjoy!

Version 1

*Just right click the thumbnail to pull up the full size version and save to your computer, print, or send to your favorite online photo printer.  I used Walmart one hour photo for this and my card with envelope was $0.97!

FathersDay2

Version 2

Fathers Day Printable Card from @savedbyloves

Easy Silkscreen Polymer Clay Jewelry Tutorial #ScupleyProjects

[pinit]

How to Make Polymer Clay Jewelry[pinit]

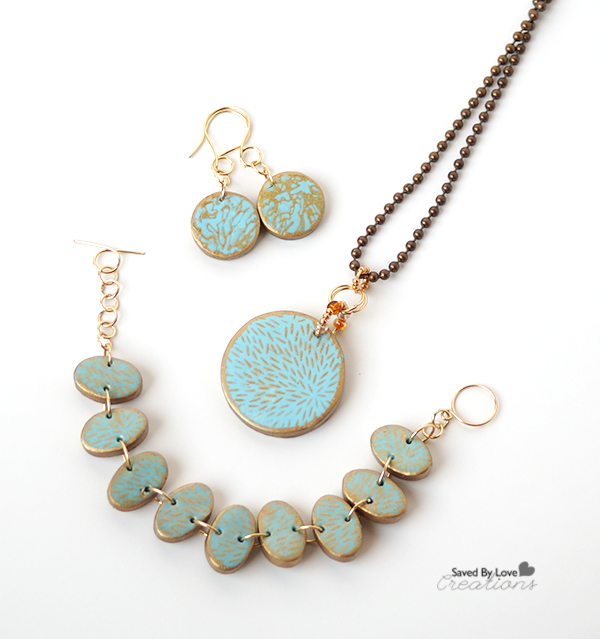
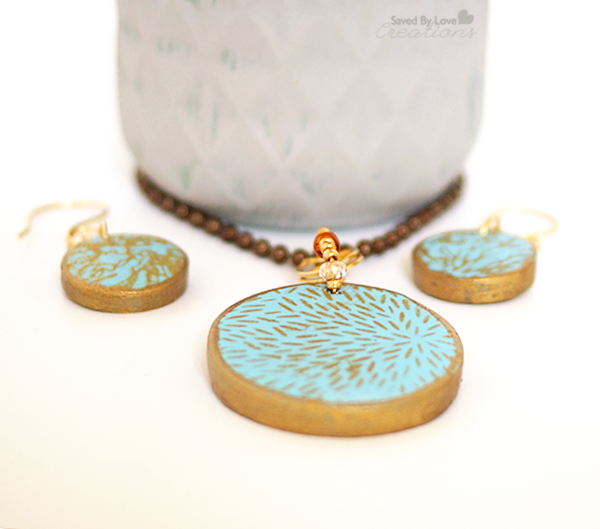
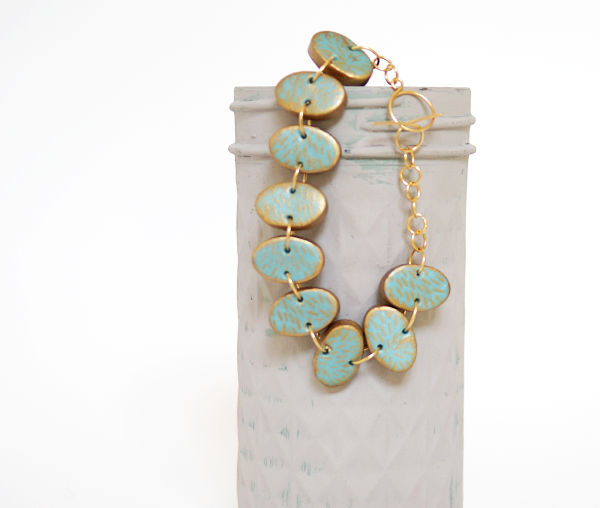
I haven’t had my hands on clay for way too long.  The new Silkscreen Kit from Premo Clay was the perfect way to jump back into the medium.  If you haven’t experimented with polymer clay, stop reading this and go find some.  You will be amazed at the gorgeous pieces you can make right off the bat, from jewelry to home decor and more.  It is a medium that is very forgiving, versatile, and doesn’t require a bunch of expensive tools and equipment to get started.  Today I will show you how I made a lovely necklace, bracelet and pair of earrings that I kinda love a bunch.  You can make your own art jewelry with just a few simple supplies.  Let’s get started!

Premo Clay Jewelry Tutorial

SUPPLIES:

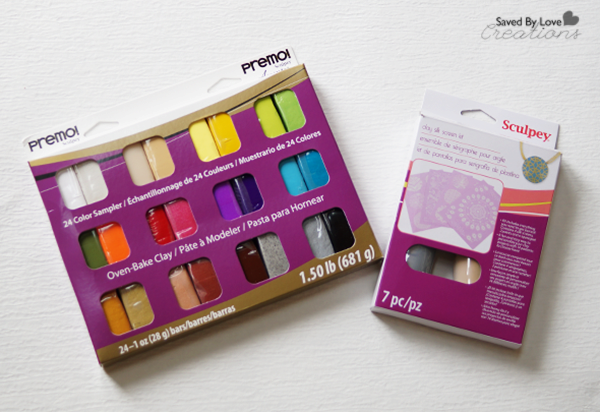
Polymer Clay Silkscreen Kit #SculpeyProjects

Premo Clay and Silkscreen Kit

Jump rings

2 Pairs of flat nose jewelry pliers

Toggle clasp

Earring findings

Necklace chain

Gold paint marker

Cookie cutters in circles and ovals

Bead reamer or toothpicks

Oven

Ceramic tile or flat baking pan dedicated to clay

Rolling pin or smooth bottle or glass

Protective gloves (these are optional but great for keeping clay fingerprint free)

TUTORIAL:

How to mix polymer clay colors

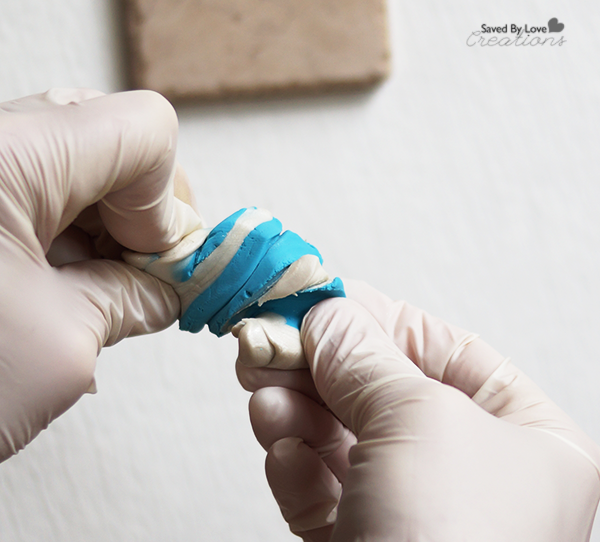
I began by mixing blue clay with pearly white to get my desired color.  Just twist the colors together as shown.  Continue twisting and kneading clay in your hands to mix the colors and warm/condition the clay.  Conditioning is essential when beginning any clay project.  It ensures the components of the clay are evenly distributed and the clay is soft and shapable.  This clay was super easy to condition.  I have worked with clay that is hard and brittle and takes forever to warm up, but this Premo was great!  Continue until the clay is the color and shade you want.

How to condition polymer clay

I used my Sculpey Clay Conditioning Machine to get a flat even sheet.  This costs about $20 and is well worth the investment if you are going to create with clay more than a couple of times.  You can also use a smooth glass, rolling pin or bottle to smooth the clay out on a bake-able surface.  I like to use tiles I pick up at Habitat Restore for a dime.  I have tons of them on hand for just this purpose.  Once the clay is rolled out, you don’t want to have to move it, as it will become distorted and uneven until it is baked and therefore hardened.  Having it on a surface you can just stick in the oven is super handy.

Premo Polymer Clay Silkscreen Kit #SculpeyProjects

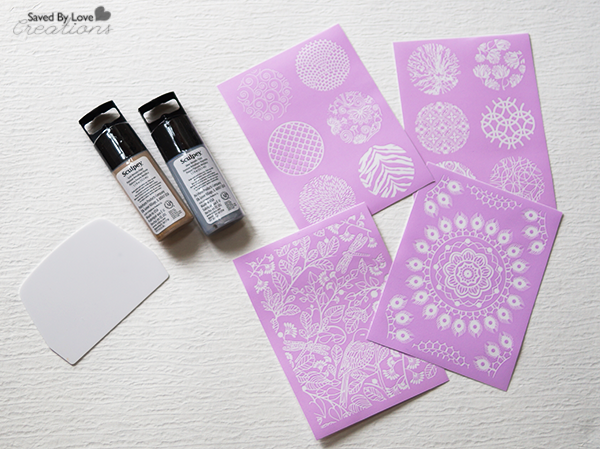
The kit comes with silver metallic paint, gold metallic paint, 4 reusable screens (totaling 2 large single patterns and 12 mini patterns) and a squeegee.  Aren’t the designs so fun?!

How to silkscreen

Premo Polymer Clay Silkscreen Kit Jewelry Tutorial #SculpeyProjects

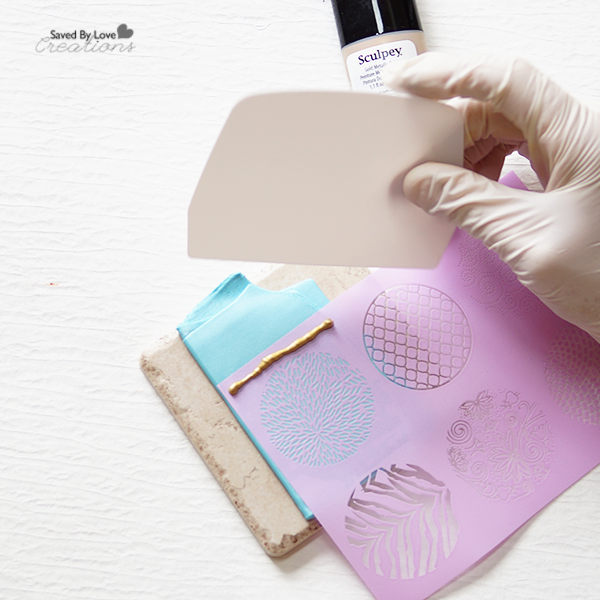
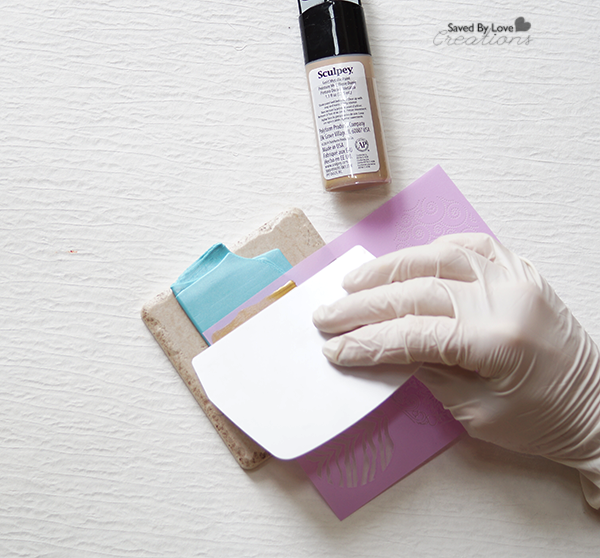
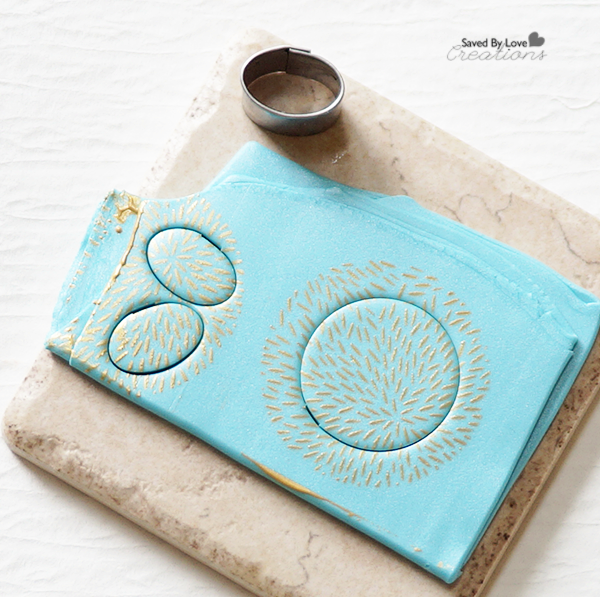
I choose my design, placed a thin line of gold paint, and used the squeegee to pull the color across the screen, lightly so as not to indent the clay.

How to Make Polymer Clay Silkscreen Jewelry

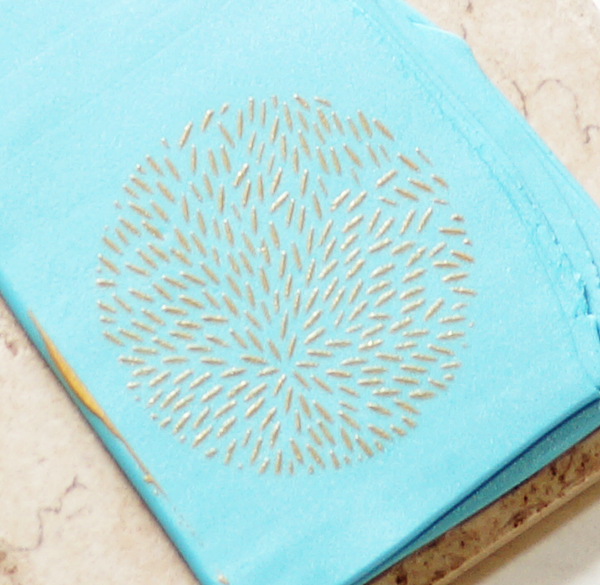
Here is what it looked like after the first try!  So easy and pretty.

TIP:  Make sure to immediately was the screen and squeegee so the paint doesn’t dry on them.  You want to reuse them for as long as possible!

How to Cut Shapes in Clay

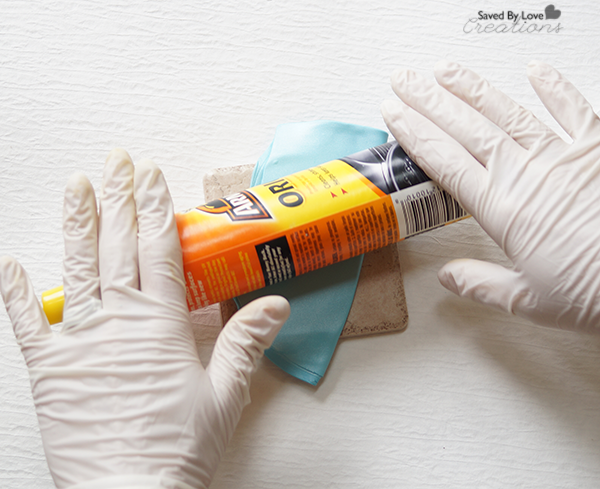
TIP:  Spray armor-all onto the cookie cutter inner and outer edge so that the clay won’t stick to it and come up off the surface when you lift the cutter away after cutting.

Easy Free Polymer Clay Jewelry Tutorials

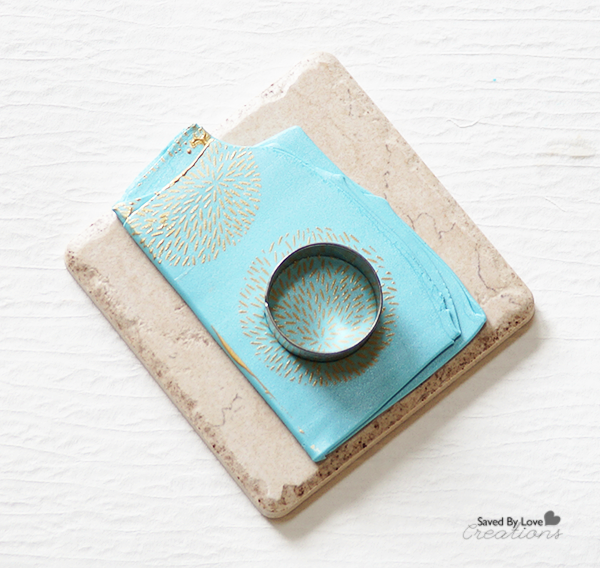
Choose an area and a cookie cutter and press it into the clay to cut shapes.  I used circles large and medium for the pendant an earrings.  For the bracelet I used a small oval cutter.

Pull the “scrap clay” away from the cut shapes and set aside.  You can recondition it and reuse it, even if it has paint on it.  Just mix it in by conditioning it with your hands or pasta machine.

How to attach clay pieces

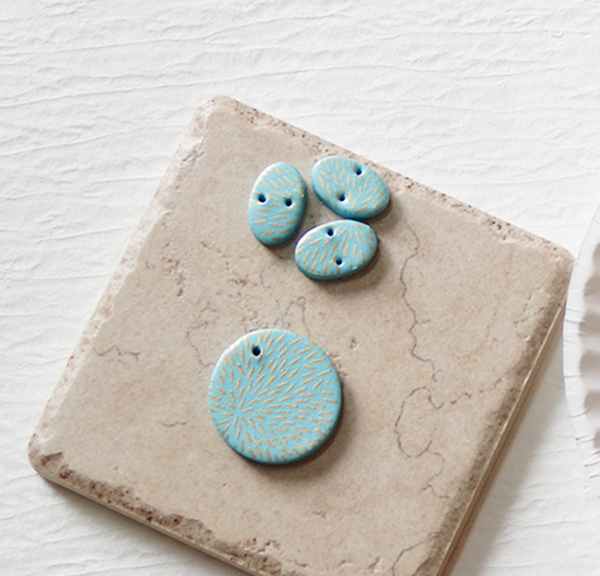
To create holes for jump rings in your pieces, you can use a toothpick while the clay is still raw, or use a bead reamer or drill after baking the clay.  Manipulating the clay while raw always carries the risk of distorting it, so I usually wait until it is baked before creating holes.  For this project I went ahead and made the holes while the clay was raw since I was going for an organic, imperfect feel.

How to seal polymer clay

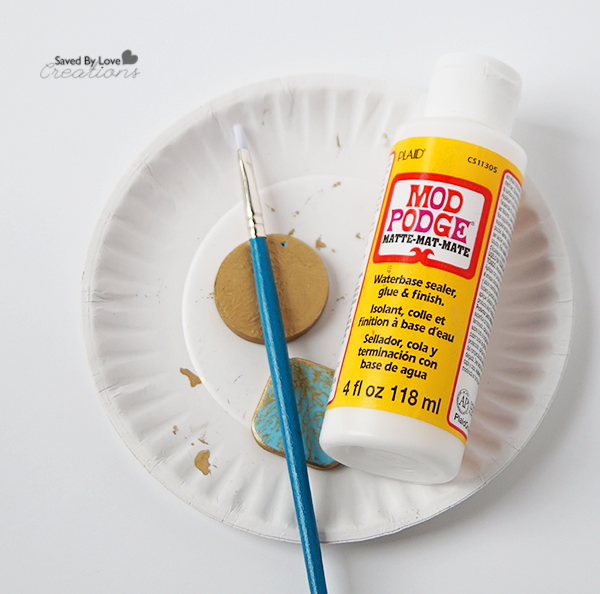
I baked my pieces at 260 for 45 minutes and let them cool.  I painted the edges and back with a gold paint marker and sealed the pieces with Matte Mod Podge after the paint dried.Polymer Clay Silkscreen Earrings DIY

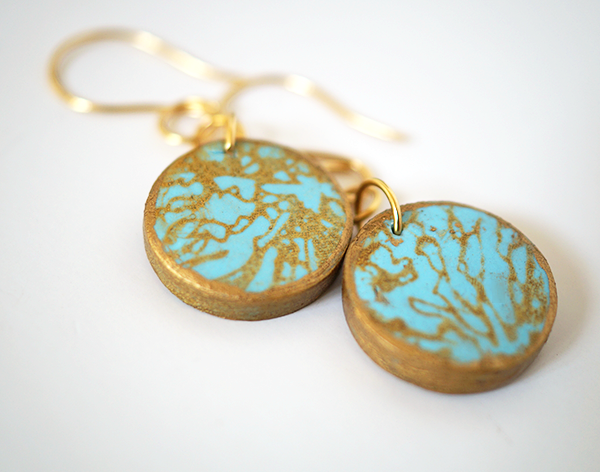
I used 2o gauge gold wire to create jump rings, earring findings and a toggle clasp for my finished pieces.  You can save money and get a unique look to your pieces by making your own findings, or purchase pre made findings.

DIY Polymer Clay Easy Bracelet Tutorial

This new kit from Premo has ignited my clay jewelry flame once again!  I have made several more pieces that you will be seeing in the future.  I hope you are inspired to try some clay projects.  It is so easy, inexpensive and you will be amazed at the gorgeous projects you can make from the get go.

For more clay inspiration and product updates, follow Premo Clay on FacebookTwitterPinterest, and Instagram!


Disclosure: I received product and compensation from Polyform and Blueprint Social in exchange for my campaign.  All opinions are honest and mine, as always!

Check out what other bloggers have been up to using Premo Clay Jewelry Products!

DIY Paper Hydrangeas

[pinit]

how to make paper hydrangeas[pinit]

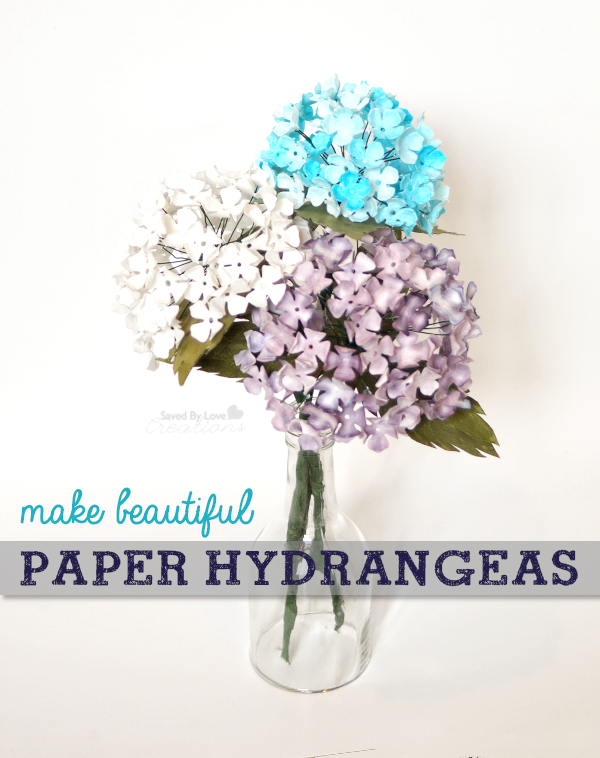
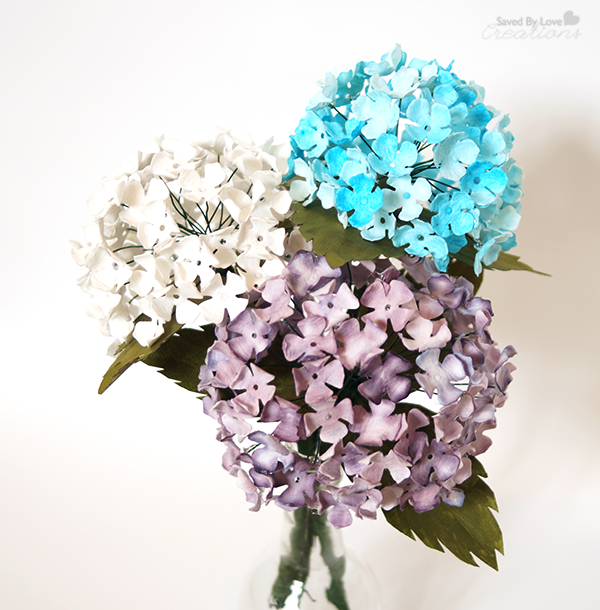
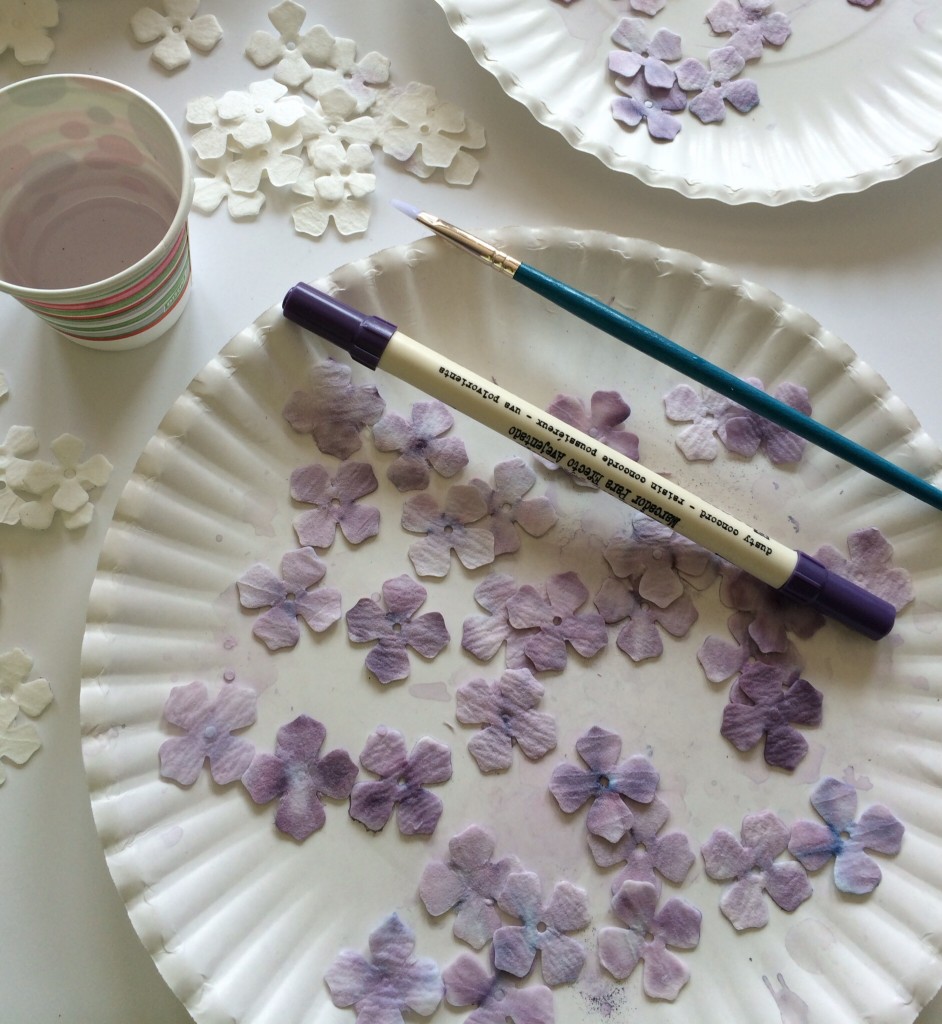
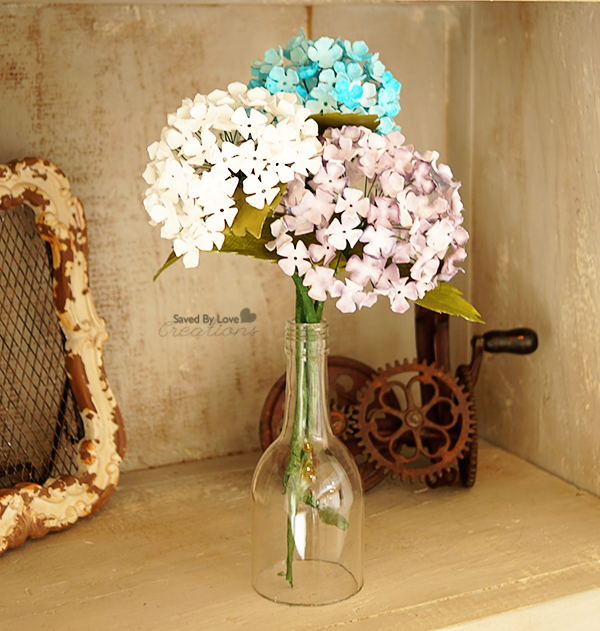
What is better than a bouquet of fresh hydrangeas?  A bouquet of paper hydrangeas that don’t ever wilt!  Today I am sharing with you this easy, however time consuming, paper hydrangea tutorial.  I am going to be upfront here… this project to me way longer than I expected.  That said, it is a perfect way to keep creative while chilling in front of your favorite t.v. series.  I used a Sizzix die for my project, but Lia Griffith has a great Paper Hydrangea Printable Template and DIY that I featured at Printable Decor recently.

How to make paper flower bouquet

I used wonderful filter paper that I got from Materials for the Arts in Bloomington.  If you are a crafter/artist and don’t have a relationship with your local recycling center, you could be missing out big time!

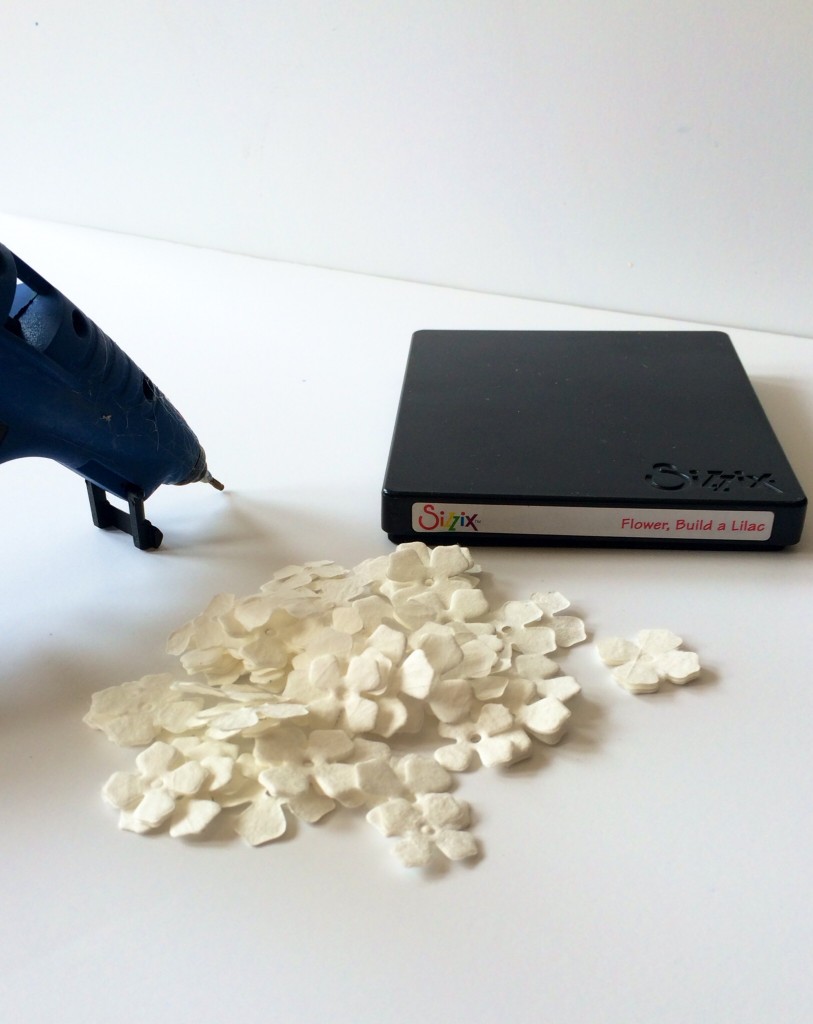
imageI die cut the petals with my Sizzix Lilac Die and colored them with distress markers. For a watercolor effect I painted over the marker with a wet paintbrush. You could use watercolor or acrylics too.

image

I followed Lia’s tutorial linked above to assemble my flowers. Holy ninjas, that took forever. It was totally worth it though.
Papercrafting tutorial paper hydrangeas

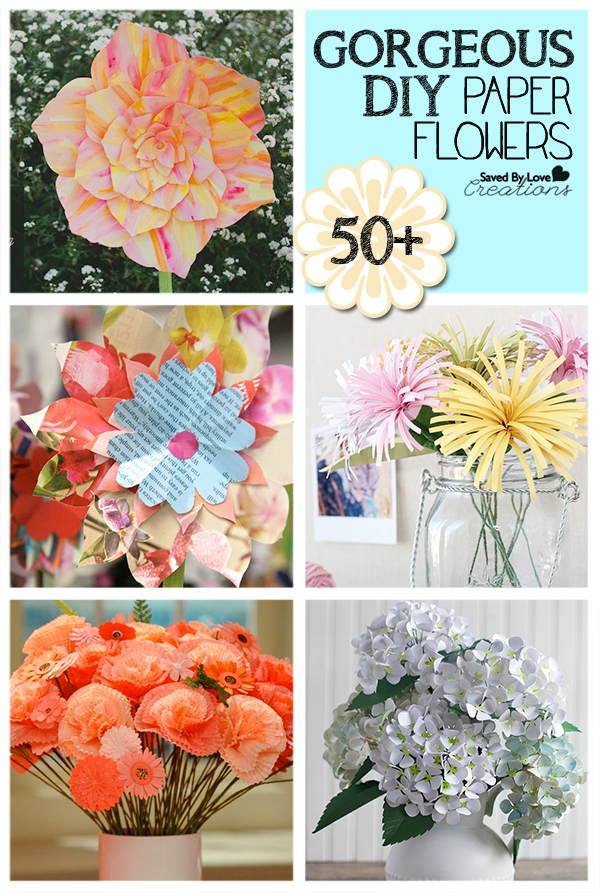
For more paper flower tutorials and awesomeness, visit our 50+ DIY Paper Flowers Roundup;

Washi Tape Coasters

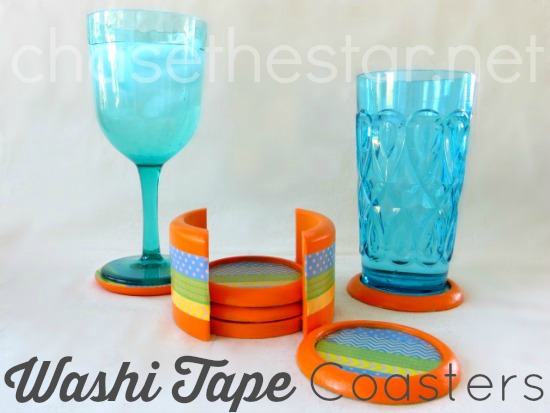
Hello everyone! It’s Barbara from Chase the Star! In the warmer months I like to decorate in fun vibrant shades especially when entertaining, so I dug up an old set of inexpensive coasters and updated them with paint and washi tape to give them a new look for summer!

Washi Tape Coasters

[pinit]

https://savedbylovecreations.com/wp-content/uploads/2014/05/Washi-Tape-Coasters-via-Chase-the-Star-for-Saved-By-Love-Creations.jpg

[pinit]

This basic set of coasters have been with us for a few years, they’ve worked very well!

In order to give them a new look I gathered my materials:

Washi Tape (I used 4 rolls)

Acrylic paint

2 Foam applicator brushes

Exacto knife

Mod Podge (I used the “Dishwasher Safe” formula)

Paint, Mod Podge and Washi Tape to update coasters via Chase the Star for Saved By Love Creations

Step 1:

First things first, always start with a clean surface! I wiped the coasters and holder clean. Using one of the applicator brushes I gave the coasters a few coats of the paint. I went with ‘Vivid Orange’ by Folkart, it’s so bright–I love it!

Painting Coasters via Chase the Star for Saved By Love Creations

Step 2:

Next, I applied the washi tape in a repetetive pattern to the top and bottom of each coaster, and trimmed the excess off with the exacto knife.

Washi Tape Coasters for a new look via Chase the Star for Saved By Love Creations

Use paint and washi tape to update old coasters via Chase the Star for Saved By Love Creations

Step 3:

Lastly I added a couple of coats of Mod Podge to seal the Washi Tape in. I chose the ‘Dishwasher Safe’ formula because although I doubt I’ll run the coasters through the dishwasher, I’m sure they will get their fair share of moisture, after all, that’s their job!

I used the same process for the coaster holder.

Old Coaster set gets a new look via Chase the Star for Savved By Love Creations

I think this will make a great addition to my outdoor parties this summer!

Do you have an old set of coasters that can use a little love? If you don’t, you can pick some up at the thrift store, or any other discount store!

For more craft and DIY ideas stop by Chase the Star, and follow me on Facebook, Google+, Pinterest, and Instagram!

Have a great summer!

For more washi tape ideas, visit our 50+ Washi Tape Crafts to Make

New Signature

Privacy Policy