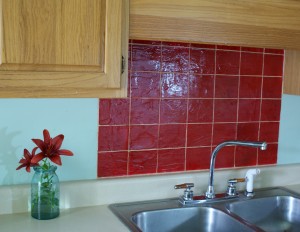
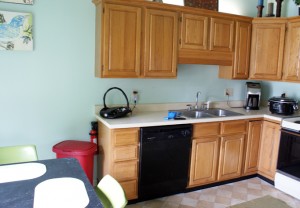
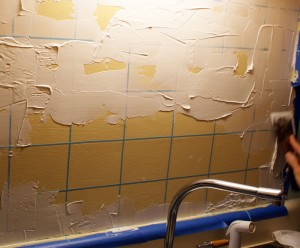
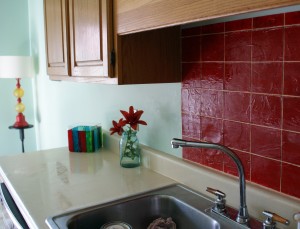
Look at this textured faux tile backsplash I made for $5. So excited to tell you about this. It made a huge difference in my kitchen. Here it is before…
I have been wanting to spruce up my kitchen for some time. I ran across this faux tile backsplash tutorial at DIY Network, that uses drywall compound as texture paste to create the look of tile. The stuff is cheap. I picked it up at Lowe’s for $4.54 and just found it on Amazon for $3.10. Not only that, but it is far less work than adhering tiles and grouting (this I know from my mosaic box project, here). Most importantly, you get to use drywall compound, which grants you automatic status as a hardcore DIYer.
I added a twist to the DIY Network tutorial and used texture paste, which makes the process even easier, as you will see later. Grab that dry wall trowel and come with me…
Supplies:
- Drywall Compound or Texture Magic colored texture paste
- Painters tape; 1 inch or greater and 1/8 inch
- Gloss enamel paint in color you want grout lines to be and a contrasting color or colors for tiles
- Paint brushes; one 2 inch for painting backsplash area and one tiny for touching up at the end
- Q tips
- Minwax polycrylic or other finish (I LOVE this stuff. It is durable, creates great shine and cleans up super easily)
- Putty knife or drywall trowel for applying drywall compound
- Pencil and ruler for marking grout lines to guide tape placement
Instructions:
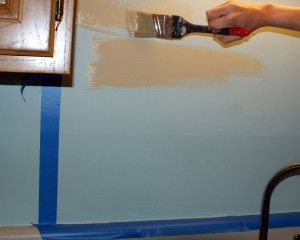
- Tape off backsplash area with blue painters tape. We went with the area behind the sink. Using grout paint color, paint the entire area and let dry. You may need to do more than one coat, or even primer depending on your situation. I painted 2 coats, drying in between.
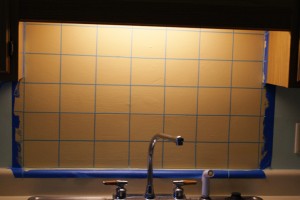
- Now you will tape off your grid using the 1/8 inch tape. I looked for this at Lowe’s, but they don’t carry tape less than 1 inch. I ended up using my artist tape I had in my stash from Michael’s. I don’t remember how much I paid for it, but you can pick it up on Amazon for just over $2 for 10 yards. I used 3 rolls for this area that is about 6 square feet. If you are doing a large area, you may want to get this 6 pack for just $10.47. This step may require a little math. I know, right. I measured my space to be 34 inches wide. I decided to have 8 grout lines going horizontally, so one inch of my 34 would be accounted for by the tape. That left me 33 inches to be divide over 7 tiles, which made each tile 4.71 inches wide. For the height, I just picked 3 inches and marked from the bottom up, since the top row of tiles wouldn’t really be seen all the way up, I didn’t care if they were exactly 3 inches (avoiding more calculations, YAY). I just used a ruler to mark and straight edge to draw lines with a pencil for tape placement. Tip: Remember the order you placed the tape (horizontal on bottom vertical on top, or vice versa). This is important later when removing the tape after texture agent is applied. You want to remove it in the same order (going back the way you came), otherwise you will find yourself pulling tape off in all directions and creating smudges in the wet drywall compound. This will make you angry. Guess how i know.
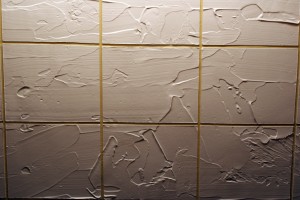
- Next, apply the drywall compound over the taped area. This is where I learned something that would have been way easier than the original tutorial. They had you apply the drywall compound, remove the grout line masking tape while compound was still wet. Then you sand the drywall or smooth with sponge, reapply the grout line tape and paint each individual tile. I started out following those steps. I found that putting the 1/8 inch tape back into place was a pain. It kept buckling and not wanting to stick and I was bumping up against the “tiles” creating dents and imperfections. No good. It occurred to me that I should have just used Texture magic instead of the drywall compound to begin with. It comes in many colors, and eliminates the need to paint, so once you remove the grout line tape, you are set. Way easier. I had all sorts of red paint seeping into the beige grout line area and had to do a lot of touching up at the end. Yes, the texture magic is more expensive than drywall compound in most cases, but for whatever reason, Michael’s had it in their clearance section just last week for around $2 for the 4 oz bottle (originally $6.99). I picked up the Country Red for another project and ended up using it here once I realized how horribly the painting of the tiles was going. The package says it covers 4-6 square feet, obviously depending on how thickly you apply it. My area is close to 6 feet, and I used essentially the entire bottle. It may have taken more if it weren’t for the thickness of the drywall layer. SO worth it, even if it hadn’t been on sale. I highly recommend grabbing this, or another already tinted texture agent and avoiding the drywall/paint tile steps entirely (say goodbye to the hardcore DIYer status granted you by the use of drywall compound. It’s ok… really).
- While the drywall compound or texture magic is still wet, remove the grout line tape, beginning with the last one placed. Use one hand to pull land one hand to support the tape as it is coming off the wall, otherwise it will sag and cause impressions in the wet compound. (Not shown here, as I needed one of my two hands to snap the photo).
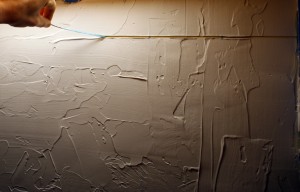 Here it is after all the tape is removed. Now you sand it down or smooth it with a damp grouting sponge. When that dries for a couple of hours (won’t be completely dry for a day or so if using drywall compound), re-tape grout lines and paint tiles as discussed above. Good luck with that 🙂
- Here it is after I gave up on painting and went over the whole thing with red texture magic. I didn’t sand or smooth the tiles because I liked the texture created in the application of the medium with the putty knife.
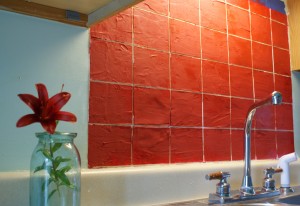 The last step… seal with Minwax Polycrylic. This will give a glossy sheen and make cleaning your new backsplash much easier. I applied 3 coats of polycrylic, drying for 30 min between.
I am absolutely loving it. I keep standing in my kitchen just admiring it. Such a dramatic effect for so little cost. Decorating does not have to be expensive. It is so much more gratifying to put some labor and creativity into it than to just shell out the cash. There is noting a little imagination and paint can’t fix. What is your most satisfying budget decor endeavor?

