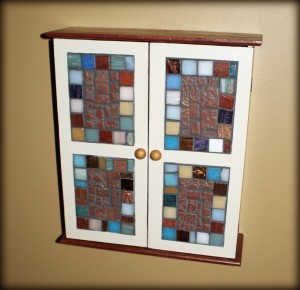
 Of all the things I enjoy about winter melting into spring, the return of garage sales is one of my favorites. Check out this jewelry box I snatched up for a measly $2 and transformed with some paint and mosaic tiles. This tutorial will cover the basic mosaic process as well as making tiles out of polymer clay.
Supplies:
- Surface to mosaic – box, picture frame, vase, end table, pretty much anything without a pulse works.
- Polymer clay for tiles and knob covering
- Cookie cutters in the shapes you want your clay tiles, or craft knife to cut the tiles freehand
- Glass tiles (I used both glass and clay tiles, but this is optional)
- Glass nipper or two wheeled mosaic glass cutter, or hammer and pillowcase to smash glass
- Mosaic adhesive and wooden craft sticks
- Grout and grout spreader
- Sponge for wiping away excess grout
To begin, I lightly sanded the box and wiped away the dust with a damp cloth. You can plan your mosaic and draw an outline with marker on your surface, or you can just go free form. I did the latter. All I knew was the four depressed panes on the doors were begging me to tile them. I gathered coordinating glass tiles from my stash and began arranging them on the surface, smooth side up.
I ended up with this sheet of clay.
Time to bake the clay per instructions (275 degrees for 20-30 min).
Spread a big globe of grout all over the surface using the spatula like grout tool (in retrospect, gloves would have been a nice addition at this point). You can see that I taped off the painted areas of the box before grouting, which was pointless. It will get everywhere, and that is ok. It washes off.
When you are confident you have filled every space between your tiles, let the grout sit for 10-20 minutes, then with a damp sponge, begin wiping away the grout. You will think for awhile that it is never going to go away. Rinse and wring out your sponge frequently so you aren’t just spreading around the grout.


