
HOW TO MAKE DISTRESSED HAND PAINTED SIGNS
Start with 1/4 inch plywood the size you want your sign. Pam gets these at Lowes in 8×4 ft sheets for around $13 and also at Habitat Restore. She likes the Restore ones better because of the dings and bumps, which add to the distressed look.
*Disclaimer – It gets a little fuzzy at this point. My husband is an amazing chemical engineer, which is his job, so that is a good thing. Using my DSLR in manual mode is not his job. I will leave it at that. (Thanks for your help, dear husband)!
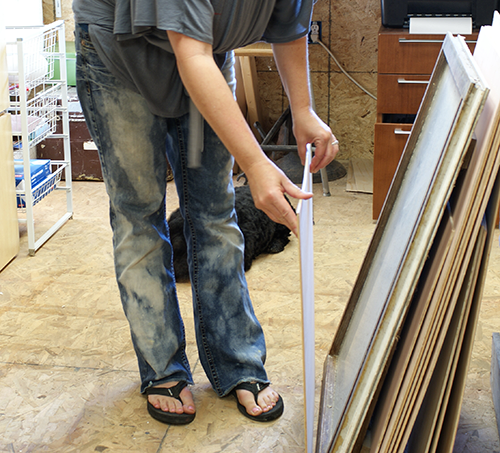
Pam cuts her plywood to whatever size she plans to make her sign. You can do this with a table saw, circular saw, or have it cut for free at many hardware stores when you purchase it there.
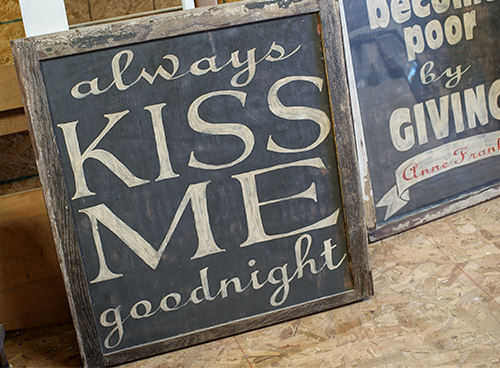
The above sign is framed with an old window, so she cut the plywood to fit that frame. The customization options are endless.
*Kids, use a tripod when in low light with slow shutter speed.*
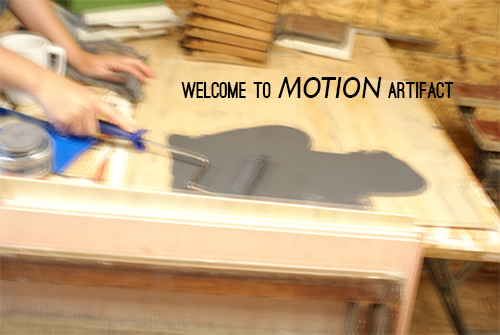
Pam uses a roller to paint her background color onto the plywood. Ummm… why have I been doing this with a paintbrush? It was so fast (can’t you tell) and even with the roller.
TIP: I learned that she wraps the rollers in plastic bags like you get at the grocery to keep them wet until next time she uses that color. NO CLEAN UP?! Whaaaat? Yes please.
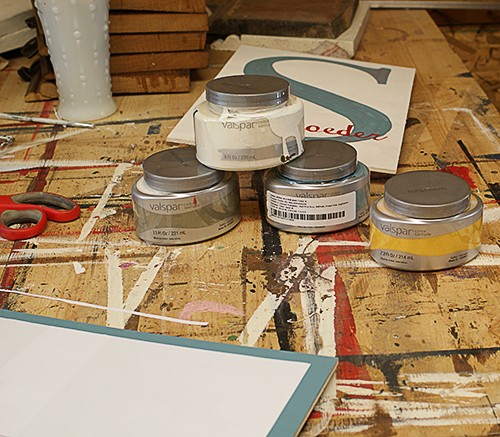
This is the paint Pam prefers to use for her signs. I believe she gets it at Lowe’s, at least I know I have gotten it there and that they carry it. She digs the color palate available.
UPDATE: I made a PHOTSHOP VIDEO TUTORIAL showing you how to print your sign in sections small enough for your printer. Find it at the link!
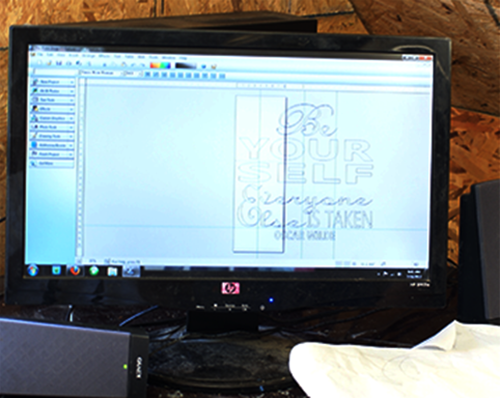
Pam creates her text with Print Shop 23 Deluxe, which you can buy for $1.23 at my Amazon affiliate link. SOLD OUT AT THAT PRICE, but still pretty cheap, especially compared to Photoshop. I have never used this program, but she swears she is not tech savvy and that this software is very user friendly. She makes the text to fit the sign, then prints sections of it and tapes it together to transfer to the wood with transfer paper.
The text over the white rectangle (which represents 2 pieces of 8.5×11 inch copy paper) is what will print. She prints that part, then moves the entire text box over so that the area adjacent to what she just printed is now over the rectangle, prints that and so on until she has all of the text printed out in “puzzle pieces”.
