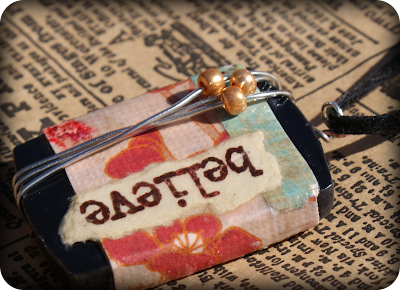
Polymer Clay Day 87: Paper Embellished Wire Wrap "BELIEVE" Pendant


This is a piece I did for Sarah! She wanted me to incorporate “Believe” into a pendant, and wanted it a similar style to the “Imagine” pendant from a couple of posts ago. I placed three beads and three wire wraps in symbolism of the trinity. Ok, now some things on belief…

John 20:27-29 “Then he said to Thomas, ‘Put your finger here and see my hands. Put your hand into the wound in my side. Don’t be faithless any longer. Believe!’ ‘My Lord and my God!’ Thomas exclaimed. Then Jesus told him, ‘You believe because you have seen me. Blessed are those who haven’t seen me and believe anyway.'” NLT

Ephesians 2:8 God saved you by his grace when you believed. And you can’t take credit for this; it is a gift from God. -This one is a favorite of mine. It was huge in my coming to Christ, as it was the first time I realized I couldn’t earn eternal life through my own good works. In other words, that being a good person, while nice, wouldn’t save me. Christ’s death on the cross was the missing piece. I don’t have to earn it (in fact I can’t earn it), and I can’t lose it.

I get like this on Sundays when I have been to an excellent worship service. Found my new church home today! Sherwood Oaks in Bloomington.

Polymer Clay Day 86: Paper Embellished Wire Wrap Pendant


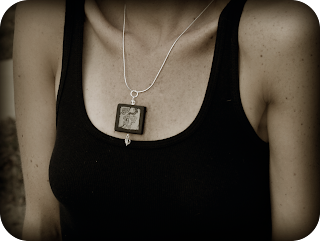
More clay wrapped in paper! Loving this. Gotta go. More to come. Creation mode, not much for describing at this moment 🙂 You know I will share my techniques freely with joy. Have a wonderful Friday…

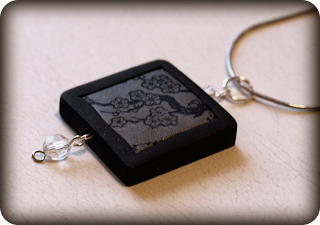
Polymer Clay Day 82: Swarovski Crystal Cherry Blossom Pendant


Here is today’s piece. Some cherry blossom crystal action. I used acrylic stamp and a solvent ink pad for the image. ARRRGGH! This day is frustrating. I must refer myself to a reading that helps when I am angry at a person, place or situation…


Acceptance is the answer to all my problems today. When I am disturbed, it is because I find some person, place, thing or situation – some fact of my life – unacceptable to me, and I can find no serenity until I accept that person, place, thing or situation as being exactly the way it is at this moment.

I need to concentrate not so much on what needs to be changed in the world as on what needs to be changed in me and in my attitudes.

Acceptance has taught me that there is a bit of good in the worst of us and a bit of bad in the best of us; that we each have a right to be here.

When I focus on what’s good today, I have a good day, and when I focus on what’s bad, I have a bad day. If I focus on a problem, the problem increases; if I focus on the answer, the answer increases. When I focus on people’s bad qualities, they multiply; when I focus on people’s good qualities, they seem to grow and grow.

Perhaps the best thing of all for me is to remember that my serenity is inversely proportional to my expectations. The higher my expectations of other people are, the lower is my serenity. I can watch my serenity level rise when I discard my expectations. I have to discard my ‘rights’, as well as my expectations, by asking myself, “How important is it, really? How important is it compared to my serenity, my emotional sobriety?”

I do whatever is in front of me to be done, and let go of the results.

I must keep my magic magnifying mind on my level of acceptance. When I remember this, I can see I’ve never had it so good.

Adapted from “Doctor, Addict, Alcoholic” by Dr. Paul O. in Alcoholics Anonymous (The Big Book)


I don’t know if that was good for you, but I feel little better. Thanks.

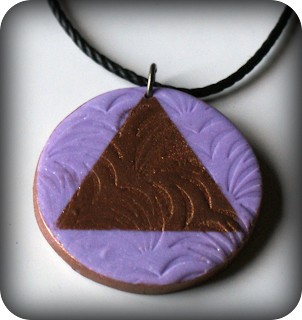
Polymer Clay Day 80: Bronze n Purple Circle Triangle Pendant

This piece was fun because it incorporated cricut, stamping and clay. I made a triangle stencil using cricut to cut vinyl. The clay is Fimo glitter mixed with fimo soft purple. I am stocking up on circle triangles for an AA conference later this month. The triangle is Pearl Ex mica powder in antique bronze. I LOVE this stuff. A very tiny bit goes a long way, and it is fantastically shimmery. You can create some wonderful faux metal effects, and the powder comes in tons of vivid colors. Disclaimer: I am not being paid in any way to promote this product, not that I would be opposed to that 🙂

Tutorial coming soon on the retro square cane. Blessings…

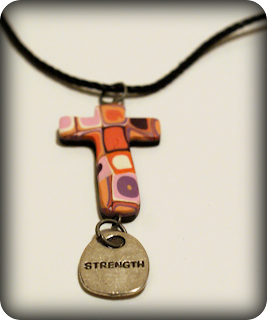
Polymer Clay Day 79: Strength Charm Retro Cross Pendant

It is Sunday, my favorite day. I am struck with the strength that comes from fellowship with others who have overcome difficulties and temptations. I use to think (when I was athiest – a whole other story altogether) that Christians were just good, so they obviously didn’t know what it was like to have urges and desires to struggle against. I was way off. Here I was feeling sorry for myself, when I was actually the one who didn’t understand the extent of temptation. I always just gave in to it, so I never got experience what it was like to stand firm, therefore I had no concept of its power. Now that I am trying to be a conduit for Christ’s life through me, I realize how big the giants are, and that I desperately need a savior. Any strength I manage to muster is from Him. So that is what inspired this piece. Blessings…
Monday blog hops…

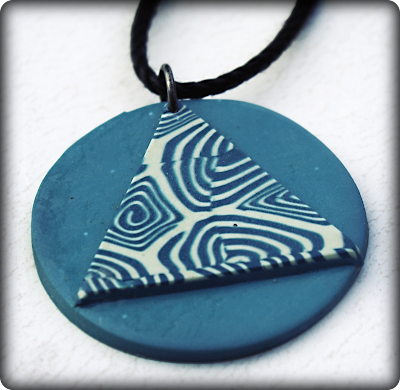
Polymer Clay Day 78: Turquoise n’ Cream AA Circle Triangle Love Pendant


Another tile cane pendant. Amazingly simple. Check out the tutorial I posted on this technique by clicking the Tutorials tab above. A note on colors; polymer clays come in beautiful colors and can be used right out of the package with great effect. However, you will find yourself with a lot of scrap clay from your projects, which you can mix together to create gorgeous tones and hues. I like to mix my own colors, as they tend to be softer than the colors straight out of the package. I just roll in the palm of my hands, a ball or two of each color I want to mix and knead them together. When mixing a color with white for a lighter version of that hue, a little color goes a long way. Start out with less than you think, you can always add more.

Here are the Friday blog hops I am linking…

badge

Let's Just Give It Away

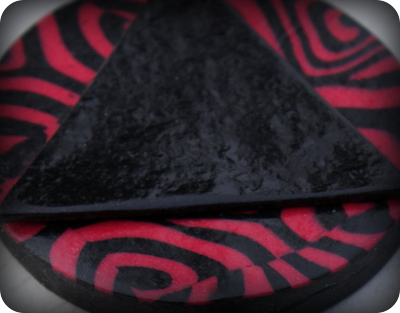
Polymer Clay Day 77: Hot Pink n’ Black AA Circle Triangle Love Pendant


This is one of the pieces I made using the cane in this tutorial. Fun and easy. Off to put some new things in my Etsy and Artfire stores. If you are visiting for the first time, leave me a comment so I can get to know you! Comments make me glow.

Thursday blog hops…
Obviously MARvelous
Bassgiraffe's Thoughts Thursday Blog Hop

Polymer Clay Day 75: Tile Cane Tutorial and Cross Pendant

I made the above cross using a cane I made from a simple jelly roll, cut and pieced together to form a complex design. Tutorial follows…

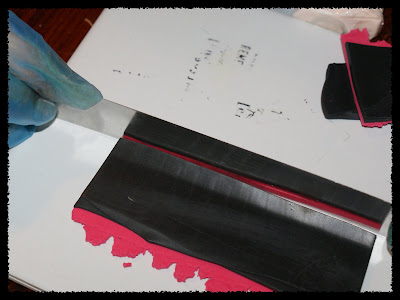
*You will need two contrasting colors of clay. I used a pink that I made from combining the light and red clays pictured, and black I had left over from an earlier project. You will also need a pasta machine, acrylic roller or brayer and a tissue blade.

*Condition your two clay colors in your pasta machine on setting 2 (second thickest), and lie flat in rectangle shape.
*Place one color on top of the other and cut the excess edges to make a rectangle.
*Run the rectangle through the pasta machine on the same setting (2), and you will be left with a long rectangle of the two colors stacked. Fold in half lengthwise (doesn’t matter which color is on top).
*Press down the folded edge to get rid of any air bubbles.
*Cut the other edge at a 45 degree angle (this will help blend the edge into the roll).
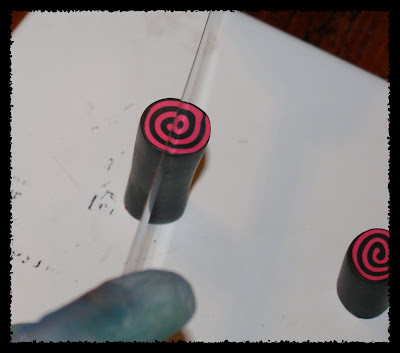
*Roll, starting with the folded edge, pressing as you go along to get rid of any spaces.

*Reduce the jelly roll by rolling and pressing evenly to increase the length and trim off the distorted ends to reveal the clean swirl.

*Measure the length of your roll, and cut off one quarter and set aside…
*Stand the other 3/4 upright and cut in half, then in quarters…

*Reduce the set aside piece from earlier to the same length as the quarter pieces, or until the diameter of the log is about the same as the radius of each quarter. Press the four quarters around the log as pictured…
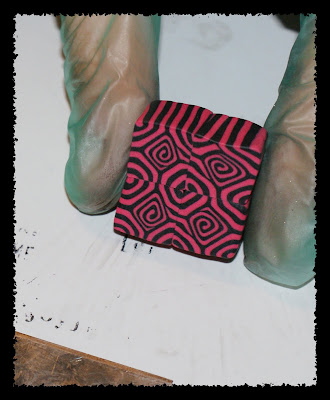
*Roll each side of the now cube with the brayer to fill spaces and even out the cube.
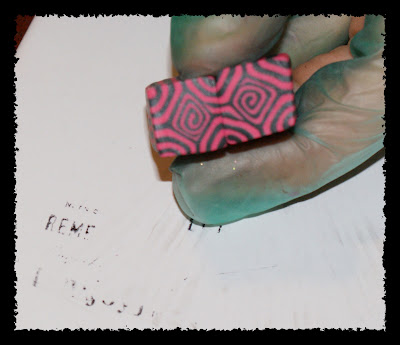
*Now cut the cube in half and place each half side by side.
*Then cut this in half and place one half on top of the other. Smooth with brayer and Viola! You have your cane. If you are like me when I made my first cane, you are thinking “Great, now what do I do with it.” Read on, my friend…
*Take very thin slices and place on conditioned scrap clay rolled into a sheet. Lie them next to one another as close as possible without overlapping, and roll smooth with roller or brayer. Then cut out whatever shape you want, or you could place the thin sheets on clay spheres to make beads. I cut out a cross in this example.

*** TIP: When you are slicing pieces from your cane, you want to slice straight down. The best way to keep your blade straight is to stand over your work area and look down at the top while you are slicing. This makes it easier to be sure you are keeping the blade perpendicular.

Tuesday Blog Hops…


Tuesday Tag-Along

Polymer Clay Day 74: Love Kaleidoscope Pendant


It is Sunday, my favorite day. To me, God isn’t just at church on Sunday, but it is so engrained in me that Sunday = time with God. I love going and worshiping through song with fellow believers. Today, the sermon was extremely academic. I’m not real sure what was going on, but the music was awesome. I posted this on facebook, so if you have already seen it… oh, just watch it again. It rocks.

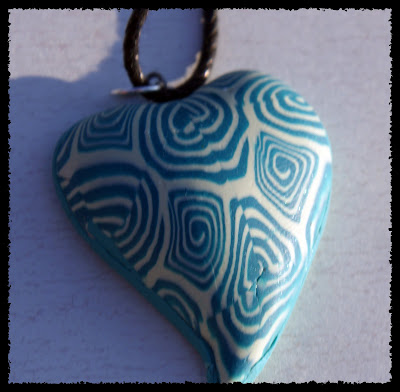
Polymer Clay Day 73: Retro Square Cane Heart Pendant


This project was super easy. I have tried to get this look a couple of other ways that were not only more complicated, but didn’t come out as nice as this one. I love the retro square print. I got the project from Donna Kato’s millefiori cane book:

This book has a lot of good information, especially on cane work. It could have better step by step pics in my opinion, but still quite useful. You can get it on Amazon for $12 used!
Happy claying…

Privacy Policy