Hello Saved By Love Readers I’m Shannon.
While Johnnie is off at SNAP! I am here to share a quicky craft with you from Fox Hollow Cottage.
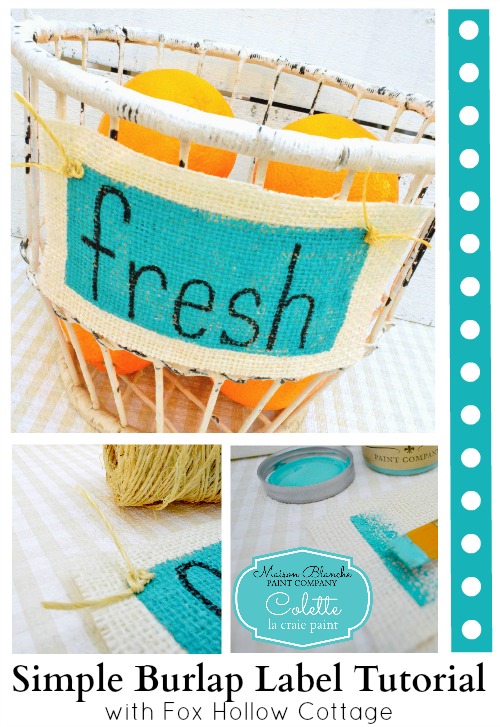
I recently completed a Linen Closet Makeover and made some fun burlap label/tags for the baskets that I used to help contain the clutter! I thought you might like to make some for you home too so I am sharing a simple tutorial. They are really easy to personalize so you could use then in a bathroom, kids room, a pantry… or like I did here, to for citrus in the kitchen.
How To Make a Painted Burlap Label/Tag

To make label/tags like mine, you will need;
-burlap
-felt (for backing)
-paint color(s) of choice
-paint pen
-paint brush; med and small/fine size
-twine
-glue gun
-Elmer’s craft bond spray adhesive
Step One
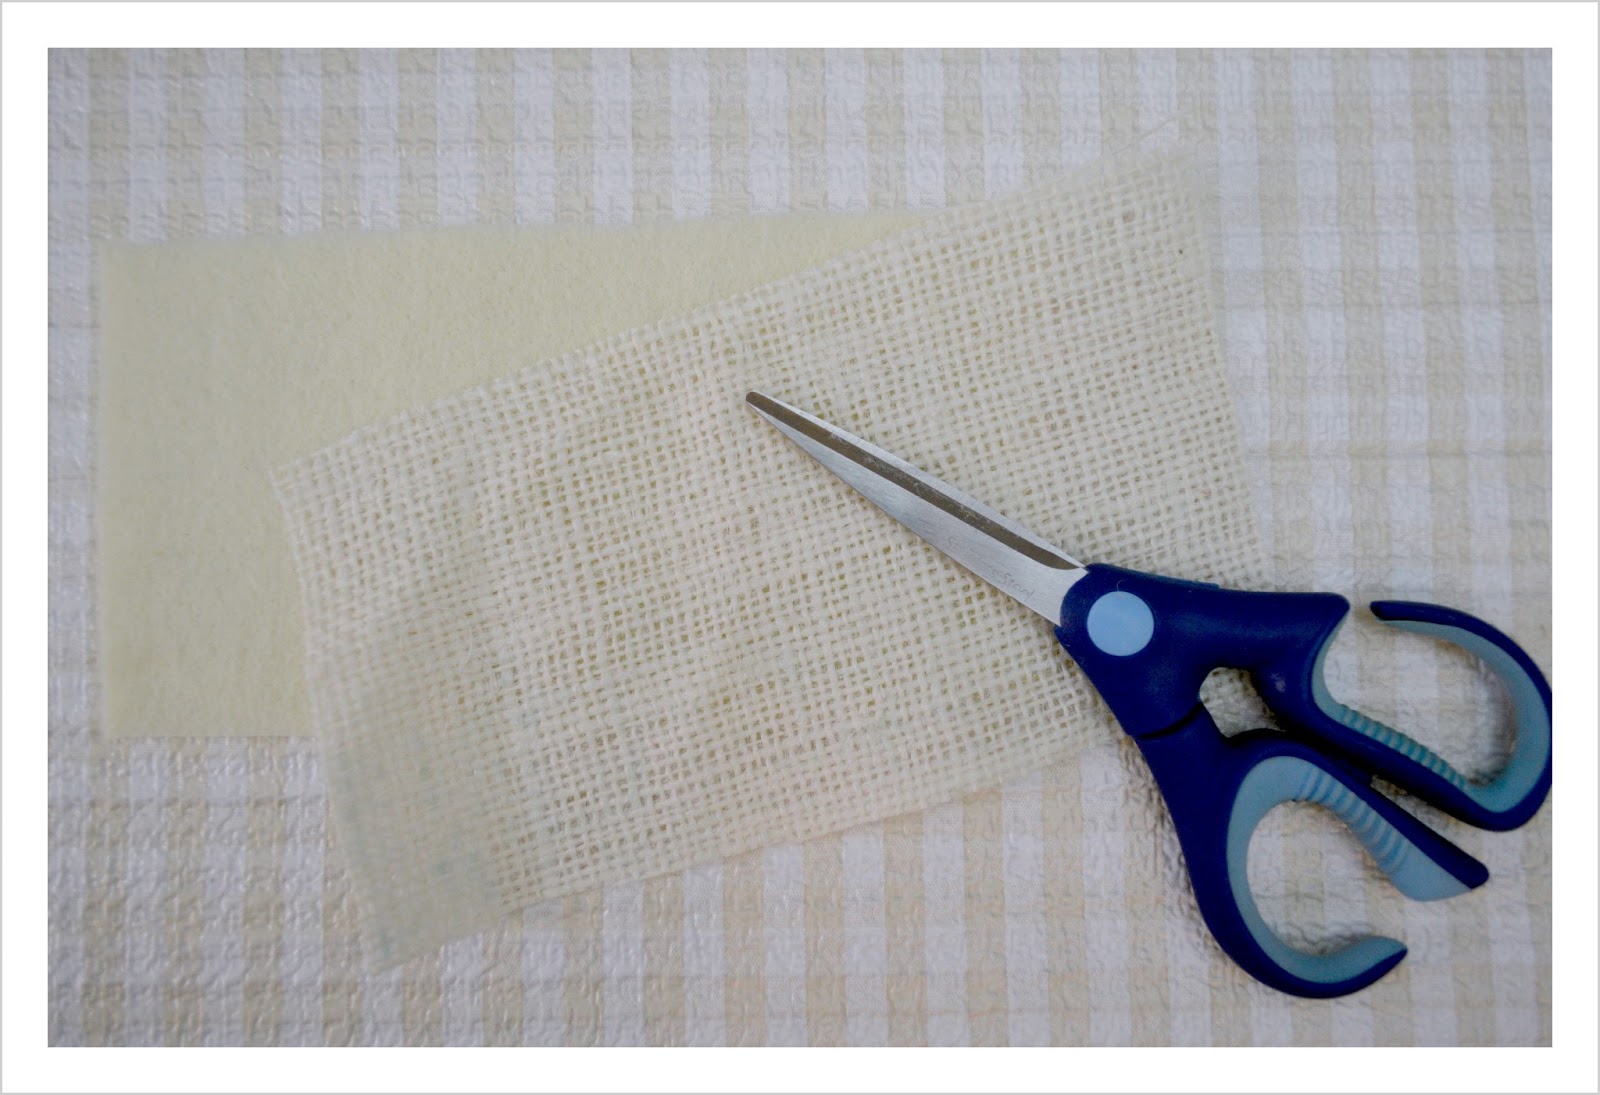
Cut your burlap to desired size. Next, cut your felt a pinch smaller then your burlap so it fits nicely behind it. You will back the burlap with a pc. of felt.
Step Two
Lightly spray your felt with the Elmer’s craft bond and place the felt and burlap together.
Press firmly and smooth.
(Tip; I sprayed my felt piece right over my trash can to avoid worrying about over spray messiness.)

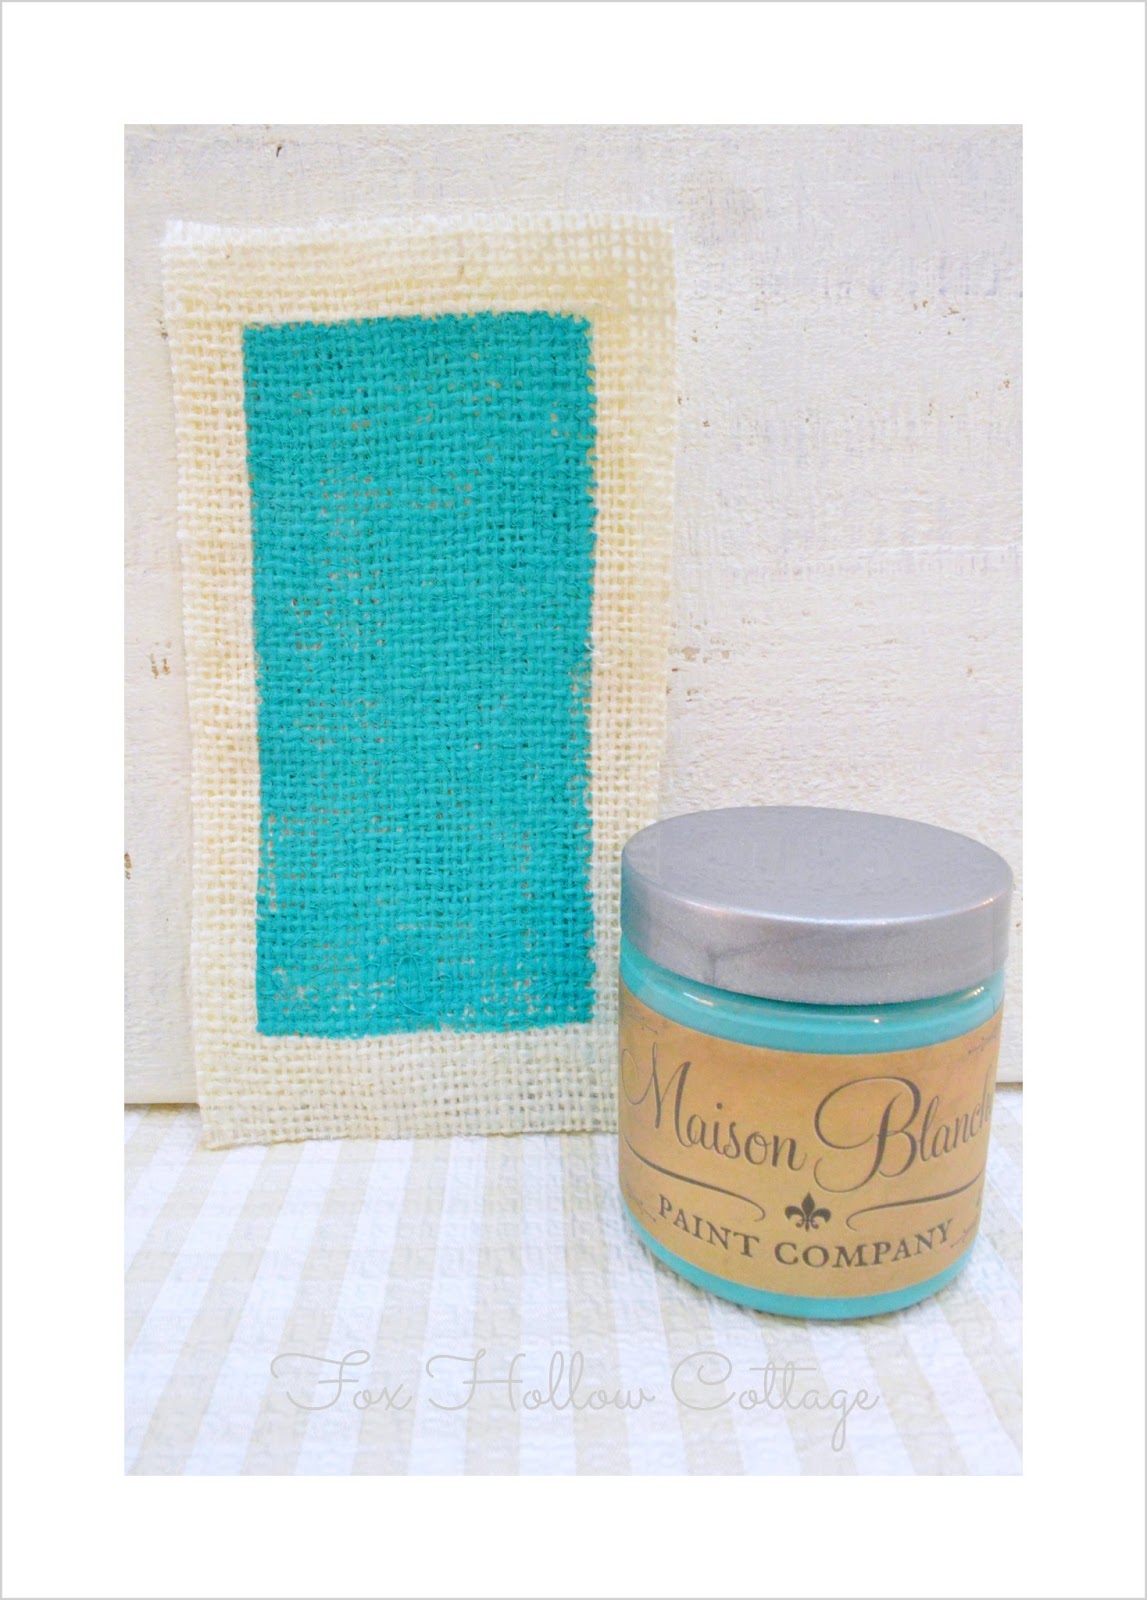
Step Three
Place your paint color of choice on the burlap surface and paint away! I used the new Maison Blanche Paint La Craie shade in “Colette” because it’s aqua. If you have ever read Fox Hollow Cottage, or follow me on facebook, you’ll know I am a total aquaholic so this was a given for me!
(If not… Hello, my name is Shannon and I am a total aquaholic!)

(tip; You can get nice straight lines if you follow the texture of the burlap weave as you cut. The Lines are sort of built-in.)
Step Four
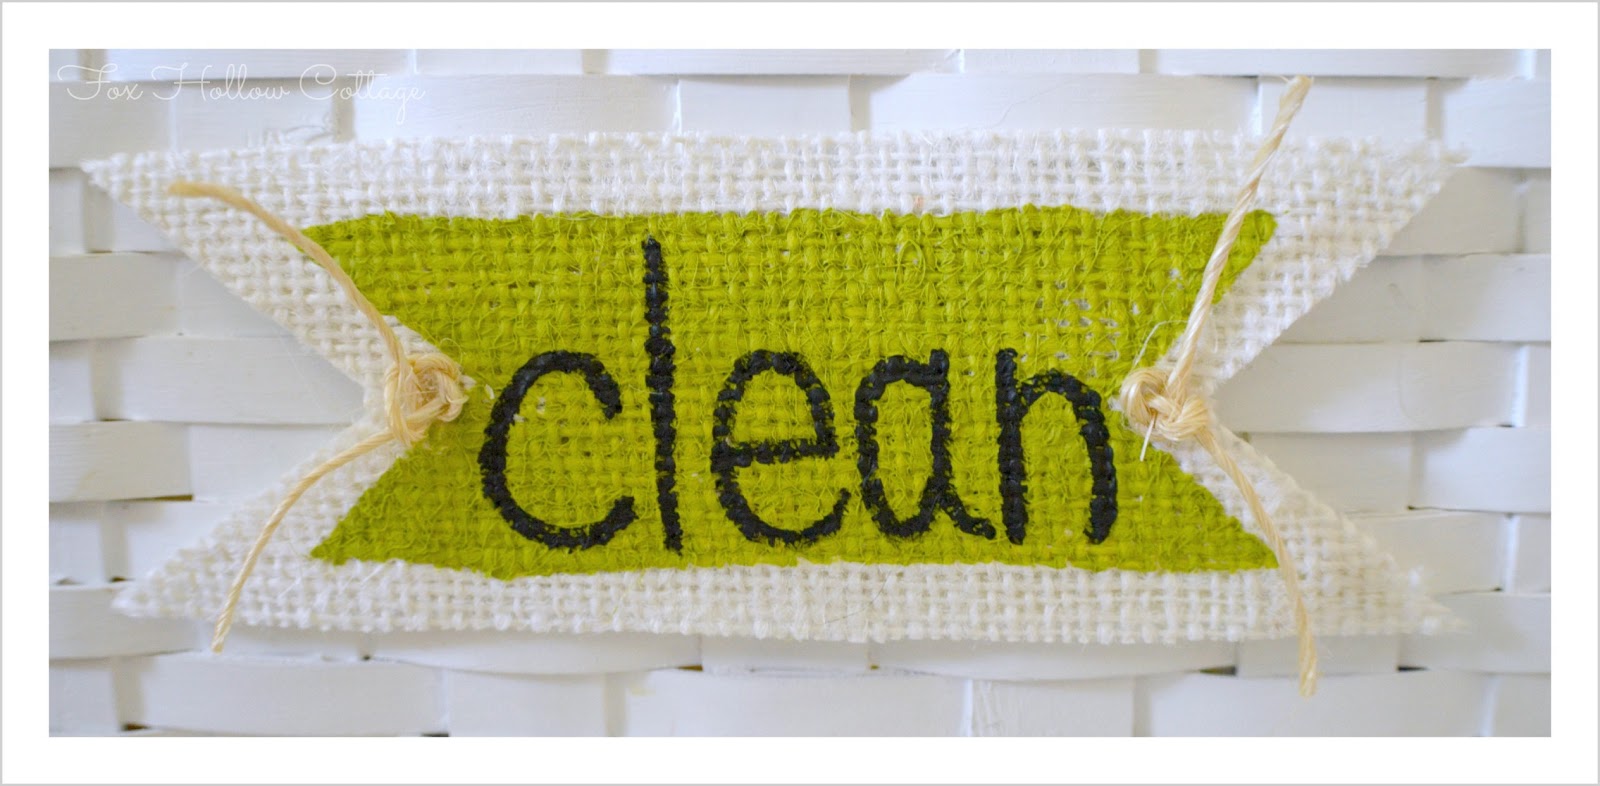
Place your text of choice on the burlap with a Elmer’s paint pen. The paint pen offers more control then a paint brush, and I find it easier to use my regular hand writing to put the text on the burlap this way.

Step Five (optional)
If you like, you can go over the paint pen text with a fine brush and black craft paint to bulk it up a bit and fill in.

Step Six
Tie your twine in a knot, then knot again. Snip ends to desired length. Affix with glue gun to corners or the desired location on your project.

Note: You can also attach a small piece of twine
as a hanger (shown below) to the back of the label/tag

or you can glue/affix it directly on your basket or surface of choice, like this…

These are the tags I made for the baskets I used when I organized my linen closet.
The makeover needed a little oomph and they sure did the trick!

Don’t you love it when the little things just make a space really come together? I do!
And I love them lots more when they don’t take a lot of skill or time to achieve.
That’s It.
Cute. Cheap. Easy.
Have fun if you make some!!
Thanks for having me today Johnnie! Hope you are having a BLAST at SNAP!