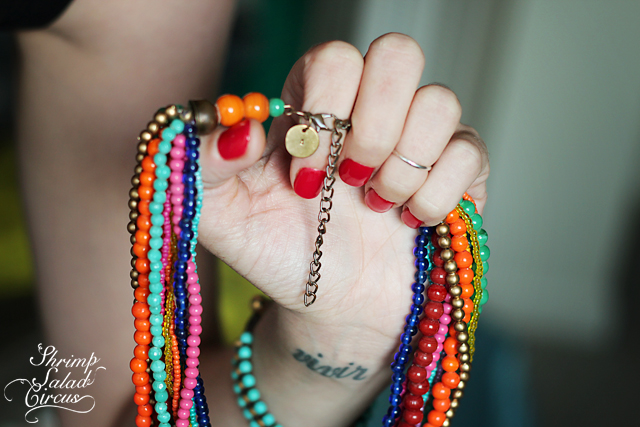
Today, Lindsay for the adorable, funky, fun blog Shrimp Salad Circus is here to show you how to add a personalized metal tag to any necklace! This is a fantastic way to customize that cool piece you scored at the flea market, into a one of a kind gift. I love the tips and tricks Lindsay shares in this metal stamped tag DIY. Go visit her blog for some beautiful tutorials, free printables and all kinds of DIY and craft inspiration. Thanks for stepping in today, Lindsay!
Hello, and happy Thursday, Saved by Love Creations readers! I’m Lindsay of Shrimp Salad Circus, a pretty little piece of the internet where I blog a steady stream of DIY, inspiration, and other tidbits to make every day happier! I’m so excited to share a little project with you guys while Johnnie’s away and am thrilled that she invited me to be a part of SBLC!
I know it seems early to be thinking of holidays, but this tutorial will be perfect for any gifting occasion, so use it for the next birthday gal in your life, okay? I don’t know about you, but I’m a big fan of the little things – the small details that make some more wonderful. When life gets busy, you don’t always have time to make everybody’s gifts from scratch, but you still want them to feel special and valued, right?
With just one little extra detail that costs very little in terms of time or supplies, you can add a handmade, personalized touch to any gift to show somebody that you really care. Plus, it’ll totally look more expensive with this little finishing touch! Read on, and I’ll teach you how to make and add a little metal initial tag to the clasp of any store-bought necklace or bracelet.
What You Need:
- Metal Disc – I used 10mm brass blanks.
- Metal Letter Stamp – I used 1.5mm.
- Metal Hole Punch
- Hammer
- Bench Block
- Black Acrylic Paint
- Jump Ring
- Necklace or Bracelet
1. First, you’ll need to punch a hole in your metal disc so that you can attach it to your necklace later. If you bought discs with the holes already in them, then you can skip this step. I like to get them without the holes so that I can use them for lots of different purposes.
2. Place your disc onto the bench block. The bench block is important because it absorbs the shock of the hammer and keeps the stamp and disc from bouncing so that you can get a nice, deep impression with the stamp. Take your letter stamp, and make sure it’s facing the right way!* You don’t want an upside down ‘a’ going on your pretty gift, do you?
Place it in the very center of the disc, holding it low and firmly. Hit it right on top with the hammer with three solid smacks – hard, but not too much.
*Read down to the very end of this post for my little secret for never stamping upside down!
3. You should have a little letter engraved into your disc now. It’s pretty, but you’ll notice that it’s a bit hard to see. We’re going to use paint to cheat a patina to make the letter really pop.
Dip the corner of a paper towel or rag into the top from the paint bottle so that you have a little smudge of paint. Wipe it into the letter, rubbing the towel across the disc to get it into all the grooves in the letter. Now, using a clean corner on the towel, lightly wipe the excess paint from the top of the disc so that the only paint left is inside the letter. Leave it to dry for a few minutes.
*Note: Alternately, you could use a permanent marker to get the patina finish. That process is explained here.
4. Use a jump ring threaded through the hole in the disc and the clasp on the necklace to attach them together.
*Bonus: I promised to share my secret for never stamping upside down, right? This is a much bigger stamp (6mm) than the one from the tutorial, but I wanted to be sure you guys could see what I’m talking about. When you get a box of stamps, lay them all out on a table so that the bottom of the letter is pointing at the table. Use a white pencil to write that letter on the top side, like the ‘r’ in this photo. Voila. Never stamp until the side with your letter written on it is facing up, and you’ll never stamp the wrong way again!


