Archives for May 2010

Wooden Box Makeover: "Forgiveness"

ForgiveBoxCollage

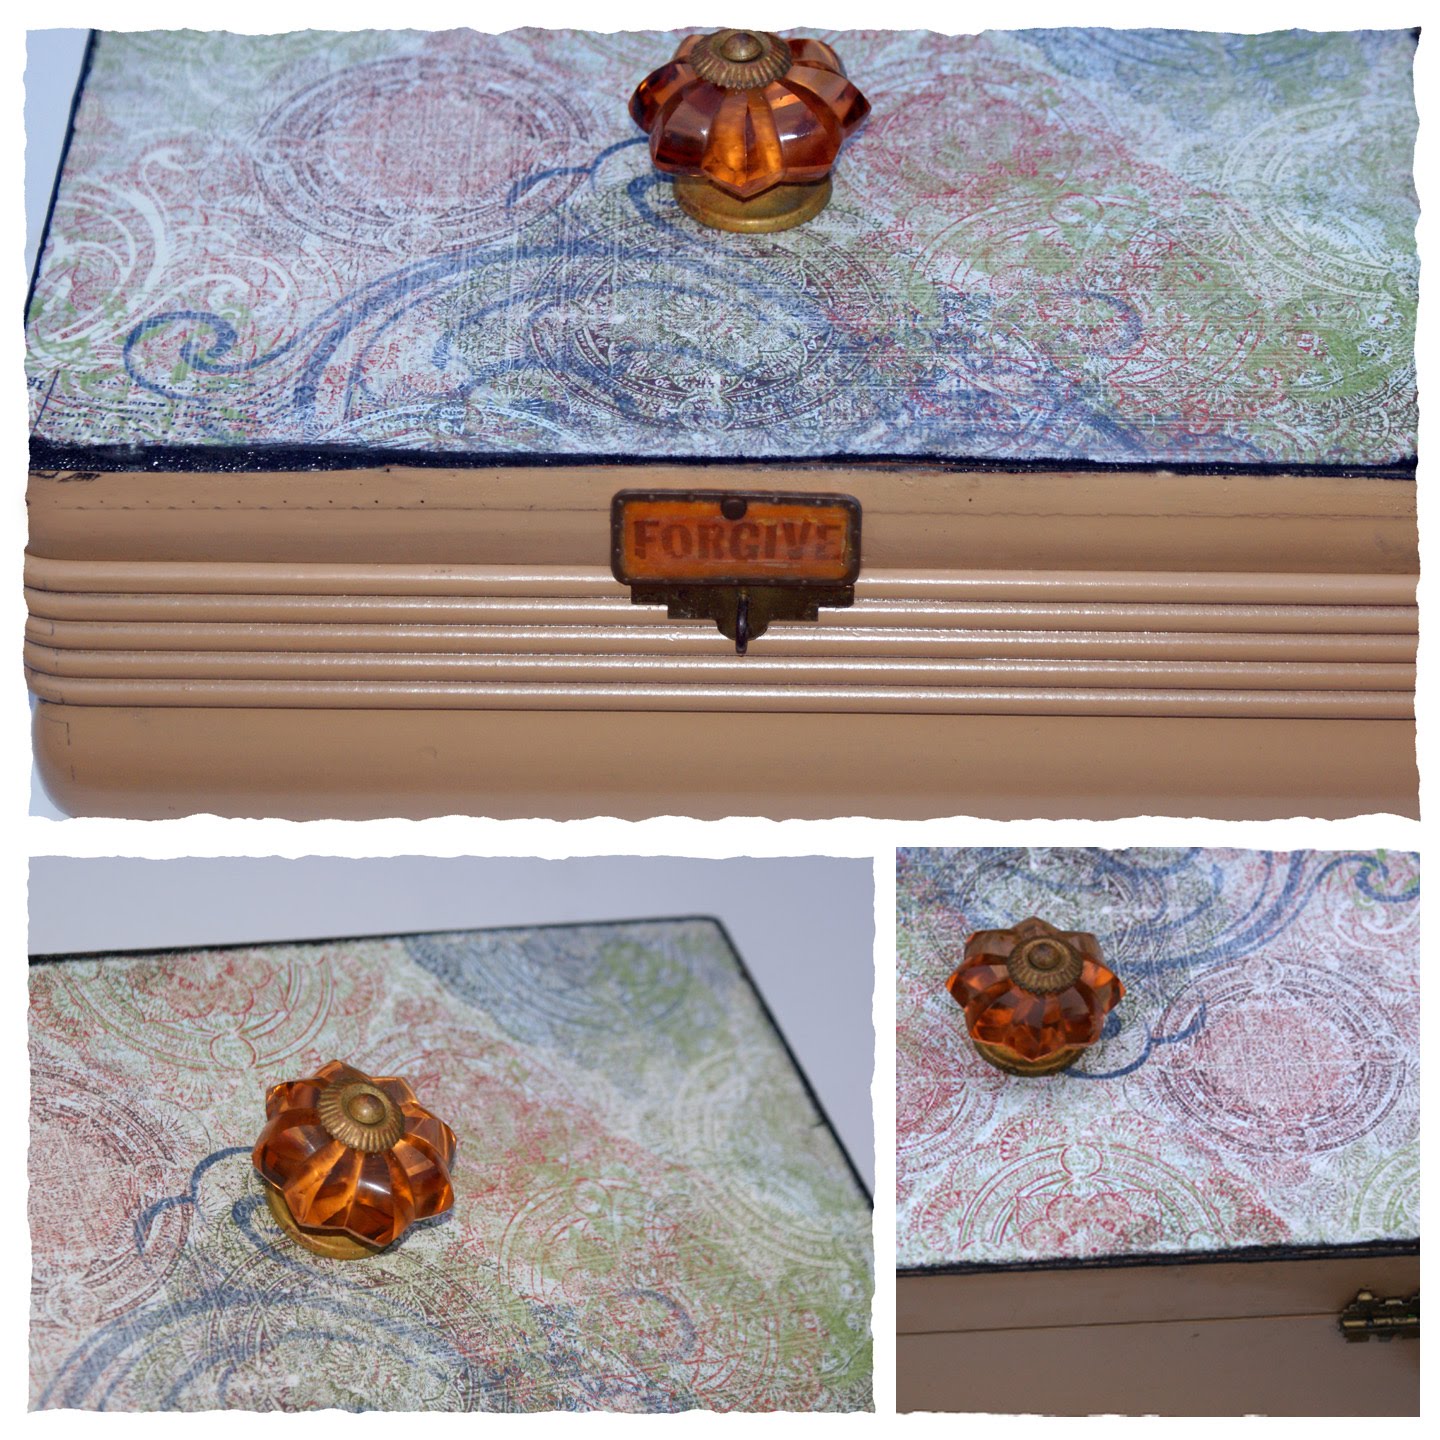
I searched my mom’s basement and found this old wooden box (thanks, mom). If you have read my blog, you know these are one of my favorite things to redo.
This project was particularly gratifying because I got to use this polymer clay “Forgiveness” tag I made awhile back and set aside, awaiting the perfect piece for it to embellish. I hadn’t planned on using it for this box. I removed the hardware and sanded the box. I then spray painted it beige. I cut scrapbook paper to size, adhering with matte gel medium. I inked the edges with Ranger Distress Ink pad (black soot), then embossed with black embossing powder. I drilled a hole in the top for the knob and attached it. Sprayed on sealant and went to put hardware back on when I realized I was missing one piece. The front top latch part. Oh no. I scoured my supply and it was nowhere to be found. That is when I came across the dog tag “forgiveness” I had made. PERFECT. I love such serendipity. A God box. What better word than that for its top?! The timing is unbelievable, as I have been praying to be able to forgive pretty frequently as of late. This one is for me. I keep making God boxes I plan to keep, but they end up going home with someone else. Now I know it is because I was waiting for this one. Time to write some things down on paper, and feed my newest treasure!

Faux Abalone Circle Triangle Pendant From Polymer Clay

FauxAlbalone1

New adventures in polymer clay. My goal is to have these on my etsy store within 24 hours! A friend asked me if I ever worked with abalone. He wanted me to make him a sobriety necklace circle triangle with the triangle made of abalone. Instead, I found an amazing tutorial (here) on faux abalone from polymer clay. Loving the exploration of new effects with my medium of the month! What do you think?

Handmade Polymer Clay Heart Necklace

80'sShelf1Here is the purple heart I made from clay, with my niece in mind. She is full of love, and purple is her favorite color. She also runs fast for her high school track team, but I will save that for a post on my new running blog (click here)!

Polymer clay makes me happy. For some beautiful project ideas, visit here – the Sculpey project page. I really want to try out the Friendship Vase. It combines stamping and clay. I can hardly take it 🙂

Iron on Recovery Gift T-shirt

MySponsorHeartsMeThis was today’s project, along with some rockin’ jewelry that I will share with you in the future.

I can’t take credit for the saying on the t-shirt, just for the design and the handiwork. My friend Judy asked me to put this on a shirt for her. It was easy to make, and it stirred up some t-shirt ideas in my noggin. For the record, Judy and I have the same sponsor. I am pretty sure I am the favorite. Therefore I cannot vouch for the accuracy of the message depicted. I didn’t have enough letters to add “besides Johnnie” at the end. That would be more in line with the truth. Haha. Love you, Judy!

Dumpster Delights: Headboard Turned Shabby Chic Shelf

This is my first roadside find. Pretty sure it was a headboard before I got ahold of it. I was inspired by Infarrantly Creative’s “Roadkill Rescued” posts (here) to spy people’s “trash”. This headboard called my name. I thought I would be a little embarassed, but quite the contrary. I was empowered. I just knew something lovely was going to come of this abandoned treasure to be.

I sanded lightly, then sprayed 2 coats rustoleum gloss black spray paint (dry in between 1 hour). I removed the plywood backing, sanded and wiped with damp cloth, then adhered scrapbook paper (4 12×12 in sheets, making sure to line up the stripes). I used matte gel medium applied with sponge brush to the back of the paper, smoothing out air bubbles with my AWESOME new brayer (again, thanks to Infarrantly Creative’s tip, here). Thank you bunches, Beckie. This thing is fantastic applying scrapbook paper to wood, something I do often. I can’t believe I went so long without it. Mod Podge would work here too, but I prefer the matte gel. The adhesion is seamless, and it is not as messy, for me anyway. I stamped speckles onto the scrapbook paper with Ranger Distress Fire Brick Red, and inked around the edges using Ranger Distressed Vintage Photo. I nailed the back into place and sprayed 2 coats of Mod Podge clear acrylic sealer, with 15 min dry time in between. That is it. Keep your eyes peeled on trash day!

Goodwill Coasters Turned Grungy Inspiring with Scrapbook Paper

I get great satisfaction from coaster makeovers. Not sure what that is all about. Anyway… I sprayed these with walnut ink, then embossed them using black embossing powder from stampendous.

I measured the circle diameter, then cut 2.8 inch circles from coordinating scrapbook paper using cricut. I also used cricut to write “Love” and “Joy”. I adhered the circles to the coasters using the wonderful matte gel medium, then coated with modpodge to seal. Once this was dry, I used Envirotex Lite resin. This is a first for me. I took the pictures about 5 minutes after pouring the resin, so they are obviously not dry yet. I am hoping the pinkish color on the perimeter of the “joy” coaster will disappear with drying.
I got my inspiration to try envirotex from Infarrantly Creative’s tray makeover tutorial, found here. If you haven’t been to this site, check it out. You are sure to be inspired!

Thrift Store Jewelry Box Scrapbook Paper DIY

CopperGODBOXI worked on organizing my craft space for as long as I could and alas, I broke. Had to make something not related to storage of embellishments for a bit!

I grab boxes from yard sales and thrift stores whenever I see them. No before pics. Sorry. I couldn’t be bothered. Had to get craftin’. Scrapbook paper, metallic paint, Hobby Lobby drawer knob, Ranger ink pad for distressing. This is one of my favorite projects to do. I am going to venture into Etsy with these treasures soon.
I hope you are inspired to tackle your own trinket box redo. They are frugal, easy, and make wonderful gifts. Be LoVE!
Privacy Policy