
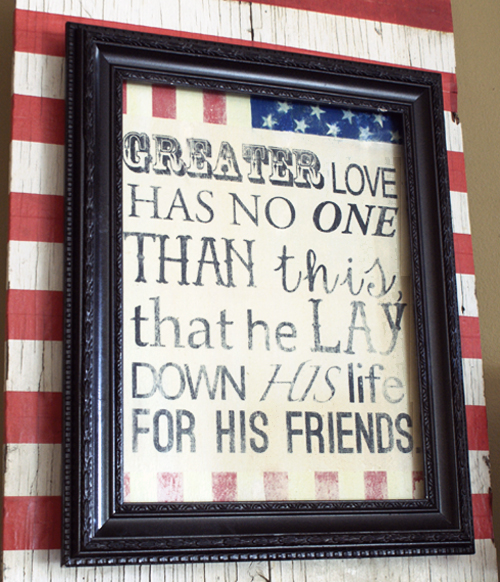
Today I am sharing a technique using Mod Podge to transfer a laser printed image to canvas. I have been playing with this method a lot lately. There are several of tutorials about it on the web with several variations in the Mod Podge finish used, how long to let the image dry, and other steps. I will show you what worked for me. You can download the patriotic printable I made for this project at Printable Decor.
You will need:
Laser jet image (the one I used is linked above) – reversed if there is text
Mod Podge Glossy Finish
Foam brush or other paint brush
Canvas to fit your print (the print used here is 11×14)
Bowl of water
Dry towel
Instructions:


TIP: To create an aged effect even greater than the one produced by the transfer process, I used Mod Podge Antique instead of regular Mod Podge. This stuff is new from Plaid Crafts, and I am completely in love. I have gone through almost the entire bottle in 2 weeks! It gives your project an antique tone, either subtle or profound depending on how many coats you apply. For this transfer I applied 2 coats, drying 30 minutes between. It is great for transfers because it makes parts where the image came off less obvious. I use acrylic washes or glaze to get that result when doing layered mixed media pieces. It is so cool to have a finish that does it for me, while coating and protecting the piece. I love you, Mod Podge.


To see how I made the striped backing, you are going to have to come on back. Just know that it was free, and it took 5 minutes!


I have been doing something with a gel medium, which is more expensive than Mod Podge. Your instructions sound exactly like what I am doing, so I can’t wait to try it out. More money for other crafts! Thanks!
So pretty Johnnie!! I shared on the Mod Podge Rocks Pinterest board. Let me know if you want to join – I can’t remember if you are a member, but you always do amazing stuff!
WOW this turned out great! I can’t wait to try this new medium out!
This is awesome! You did a fantastic job. I hope you will link this up to my Patriotic Project Parade and some of your other red, white and blue ideas too.
http://www.itsybitsypaperblog.com/2012/06/patriotic-project-parade-linky-party.html
Can you speed up the process using a hair dryer
[…] mail and will show you a round up at the end of this post. Today’s project uses the same image transfer to canvas I showed you last week, using Mod Podge Glossy for the transfer and Mod Podge Antique for the finish coat, with a couple […]
[…] another quick DIY Mod Podge Transfer. I have some word art clusters that would work well with […]