[pinit]
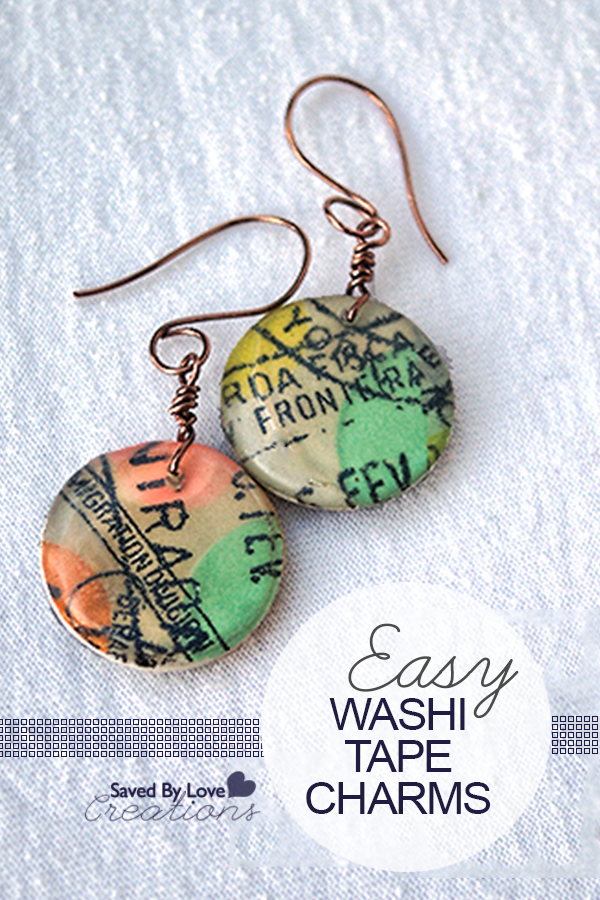
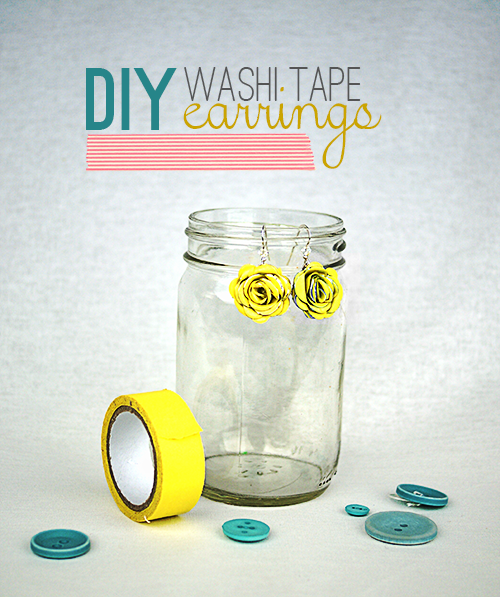
Today’s project is a fun, inexpensive earring tutorial using washi tape, wire and Dimensional Magic by Mod Podge. I am in love with these. I wore them on a recent getaway and got so many compliments. A random lady in a boutique ordered a pair when I told her I made them! Think about all the washi tape prints and colors. You could make a pair for every outfit or occasion. You can use them as charms for embellishing paper crafts, cards, and jewelry projects of all kinds.
Let’s get started!
SUPPLIES:
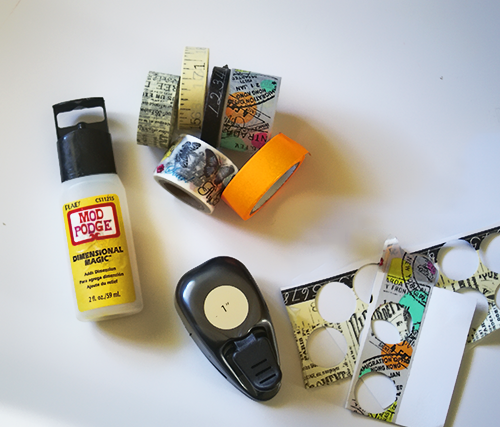
Circle punch or other shape you want for your charms (you could also cut by hand)
Washi Tape
White Card Stock
Dremel for creating hole or glue on bail (hanging mechanism)
Jewelry Wire – I used 20 gauge copper artistic wire and 20 gauge artistic wire silver coated
Round nose and flat nose pliers
TUTORIAL:
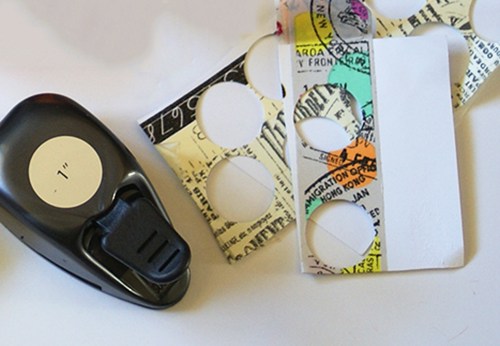
Apply tape to front and back or card stock. Line strips of tape up so that there is no space between them. Line up patterns for seamless look if your hole punch is bigger than the width of the tape. Punch out shapes.
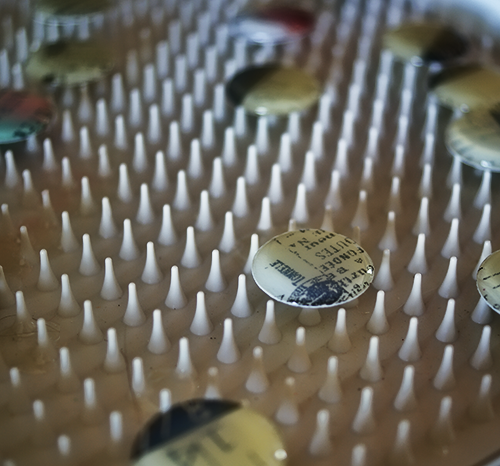
Lay shapes on flat, protect surface. I like to use this spikey tray I got at Michaels (pretty sure it is Martha Stewart). That way if I put too much Dimensional Magic on, it will runs off the side and collect in the bottom of the tray, sparing my piece from becoming a big blob. Apply Dimensional Magic starting in the center, then pulling out to the edge of the shape with the tip of the bottle. Let sit for about 20 minutes, then come back and remove any air bubbles with a toothpick or with your fingernail. Then let dry overnight, flip them over and do the other side. If you want a flat side, you can just brush on Mod Podge with a brush to seal instead of doming both sides.
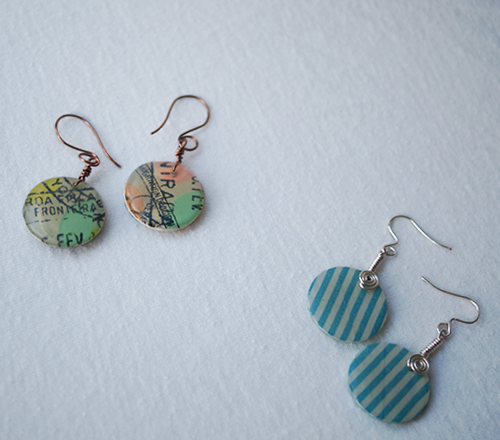
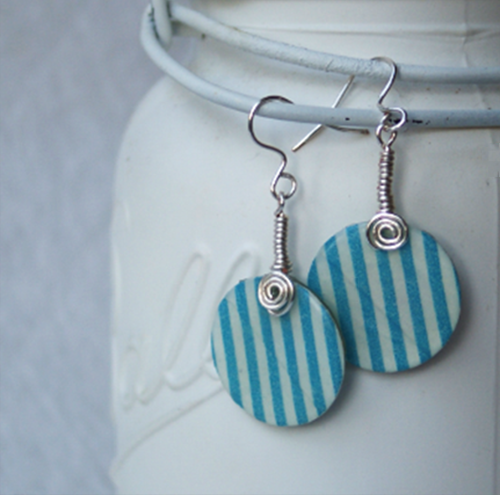
Use as charms, make earrings, magnets, embellish your paper crafts and more.
I played with wire using a jig from Bead Landing. I plan on sharing a tutorial on making your own earring findings like I did for these.
Check out some more things to make with washi tape by clicking the thumbnails below:
Washi Tape Rosette Earring Tutorial


Great earrings and tutorial. Thanks!
Thank you, Lynn! Glad you like them.
These are adorable. I love the added detailing of the wire. Pinned so I can make some.
wheres the part u punch small hole? is it before applying modpudge or after?
What dremel bit do you use to make the hole? I have a metal stamping tool that makes the hole, but cracks the mod podge. I’m trying to make a pair now with my new dremel.
Thanks for the help,
Natasha
Great tutorial! I also like the drying tray you used; do you know who makes it?
Many thanks, Janet
Janet, thank you! The tray is from Martha Stewart.
Wonderful use of Washi tape. Love the Washi designs, but never know how to use them.
The earrings are the best idea I’ve seen yet.
Great tutorial.
Awww, thanks, Charlotte! I am glad you like them. xoxo
[…] Washi tape earrings at Saved by Love Creations […]
[…] Make a cool pair of DIY washi tape earrings as seen HERE. […]
[…] Make a cool pair of DIY washi tape earrings as seen HERE. […]