
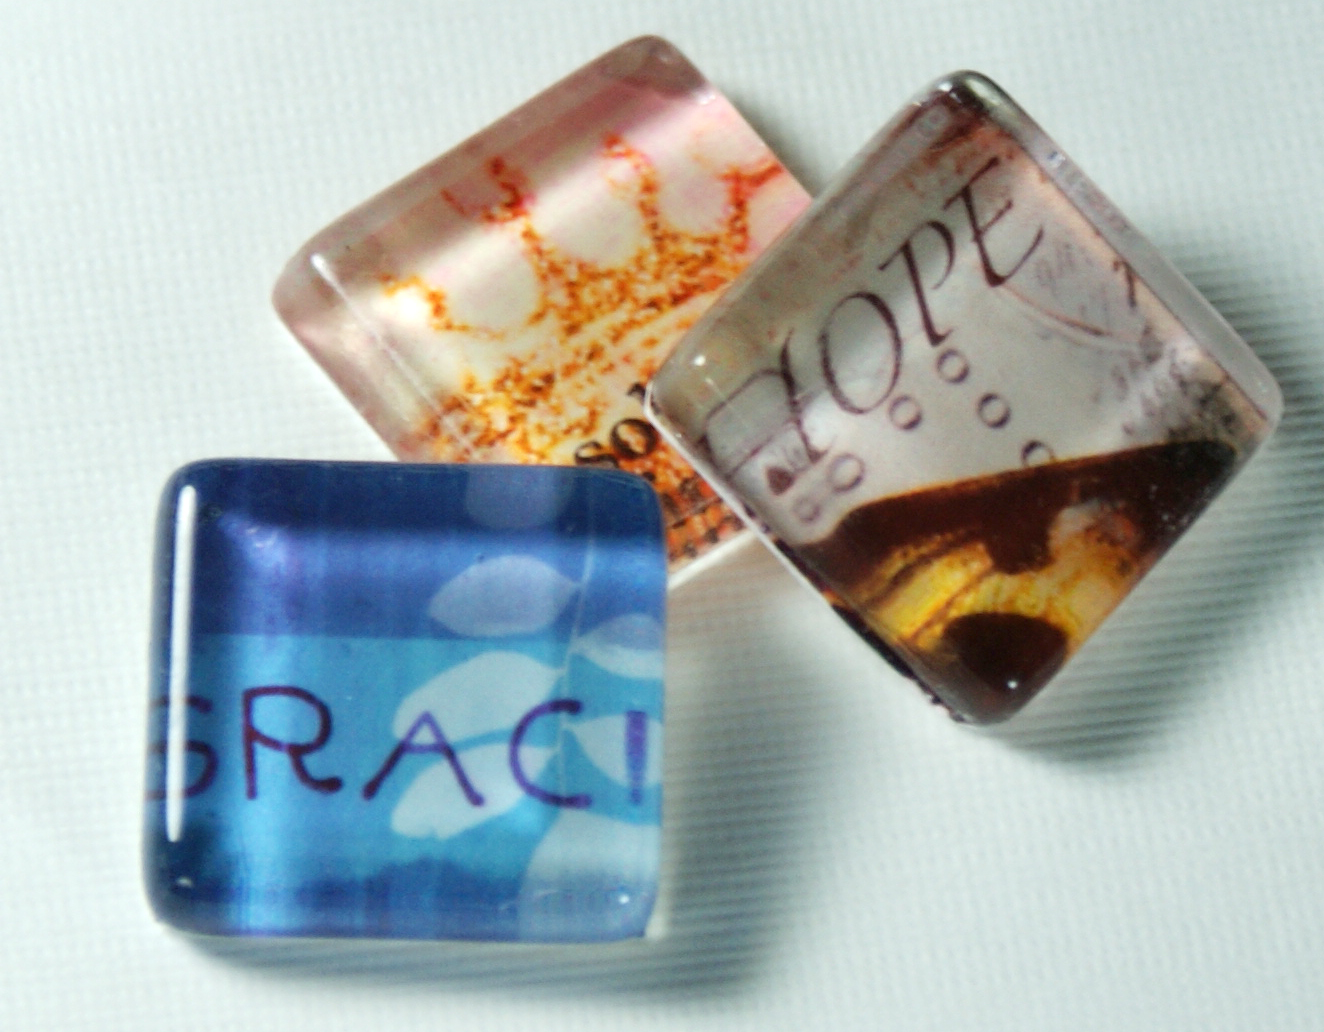
Of all the image transfer techniques out there, this simple method is my favorite for it’s ease and effectiveness. Make your own beautiful keepsake pendants, charms, ornaments, home decor and more in just a few steps anyone can follow. You don’t need to be a clay expert for this process. Grab your favorite images, clay and a water mister, and you are ready to get going with this tutorial.
Supplies:
- Polymer clay in a light enough color to make your transfer visible. I used premo ecru color for an antiqued look. I have used white and pearlescent in the past for different looks.
- Laser jet images of your choice. I have no idea where I got this image. Probably Graphics Fairy if I had to guess!
- Glaze or other sealer/finisher
- Mister bottle with water
- Jewelry findings of your choice to finish
Instructions:
- Condition your clay and lay out a sheet bigger than the finshed piece you want. I rolled this in my pasta machine at a thickness of 2, then folded it over to double the thickness.

- Cut out your image and lay it face down on the surface of your clay. Burnish the image onto the clay carefully by running your finger across the back of the paper to remove any air between the image and the surface of the clay.


- Spray the back of the image with the mister, making sure you wet the entire surface of the image. Let this sit for a few minutes.

- With your finger, gently rub off the paper backing. You don’t want to apply pressure in this step as you can damage your image. The motion of your finger moving back and forth parallel to the plane of the clay will pull the paper off in clumps. Keep doing this until you are satisfied with the quality of the image. You can spray more water on there if you need to. It won’t hurt the image.


- Cut your clay piece into the desired shape with a sharp clay blade.


 I stick a bead pin in the soft clay before baking so I can put a wire hanging mechanism in later. Some people drill a hole after baking, or use a glue on pendant bail. The problem with poking a needle through raw clay is you can distort it, but with practice you will be able to do this without damage.

- Bake your clay per package instructions. Remove from oven and let cool before applying glaze or finish. That’s all there is to it!


Great tutorial! I love the look of this method! ~Val
Love this!!! I just liked it on Stumble Upon and I’m pinning it right now. Beautiful work and great tutorial; thanks!
This is just beautiful. You have such talent and it is so nice that you are so eager to share this talent. Thank you.
What a great tutorial, thank you so much for sharing it! When Pinterest is back up and running, I’m going to pin it to my Tutorial board. Thanks so much, Deb
This is probably the best image transfer process I have seen. Beats any I ‘ve seen at other craft sites. YOU”RE the BEST !
Thanks, dear!
So cool! And so easy! I’m going to try doing a few of these for Christmas presents. Thank you!
This is awesome! Its so chic and charming. I love this project and am excited to try it. Thank you so much for sharing and inspiring.
This is really pretty. Good job!! Thanks for sharing it with us 🙂
Lovely and do-able project. Thanks!
Of all the years that I have been doing polymer clay, I have never tried this.
I have alot of graphics I adore and would love to make one of these.
Your necklace is very pretty!
magique
bravo
md
Johnnie…..this is so pretty! I am always amazed by the number of creative ideas that you have! 🙂
Adorable! Stumbled, pinned and tweeted this! 🙂
LOVE this! Such a cool project.
Holy moly! Can you say Christmas gifts?
Hmm, I tried this today and only the top ‘layer’ of the paper came off. i kept trying and the layer with the image on it just pulled right off, image and all. I am going to try it again but I was hoping you have some extra tips?
I must have tried this at least a dozen times and had the same problem. I just now noticed that the supplies call for a laser jet image. I had been using an ink jet image. Trial number thirteen will be happening tomorrow….
Darn, if thats the issue, theres nothing I can do about it then huh? Or do places like staples use laser jet?
Hey guys! Sorry I am just now getting to this. It has to be laser jet or a photocopy. Inkjet is a no go. Having it printed at Staples or any of those places will work great for me. They use laserjet. Try that and let us know how you do! xoxo
Success! I have access to a laser jet photocopier and copied my image with it. I really need to read directions better….
haha, me too on the reading part!
Ha! Great to hear, Linda. Maybe I should bold the laserjet part, huh?!
What kind of paper did you print the image on? Also what kind of mister bottle did you use? I’m guessing its not a regular spray bottle, but something that produces a finer mist. Thanks for your post.
Mister bottle is not a must! You can just as well moist the paper by wetting it with your fingers!
Good luck!
Can you use a photo that may have a glossy finish? Also a colored print?
[…] For the round pendant with no bezel, I folded the clay sheet in half to double its thickness, then cut out my image with a circle cookie cutter (don’t forget to spray the cutter with armor all so it won’t stick to the clay). Bake the clay per package instructions. You will have to glue a pendant bail to the finished piece to attach it to a necklace, or you could poke a hole through the pendant for wiring, like I show here. […]
[…] For the round pendant with no bezel, I folded the clay sheet in half to double its thickness, then cut out my image with a circle cookie cutter (don’t forget to spray the cutter with armor all so it won’t stick to the clay). Bake the clay per package instructions. You will have to glue a pendant bail to the finished piece to attach it to a necklace, or you could poke a hole through the pendant for wiring, like I show here. […]
[…] Original Source : https://savedbylovecreations.com/2011/08/easy-clay-image-transfer.html […]