[pinit]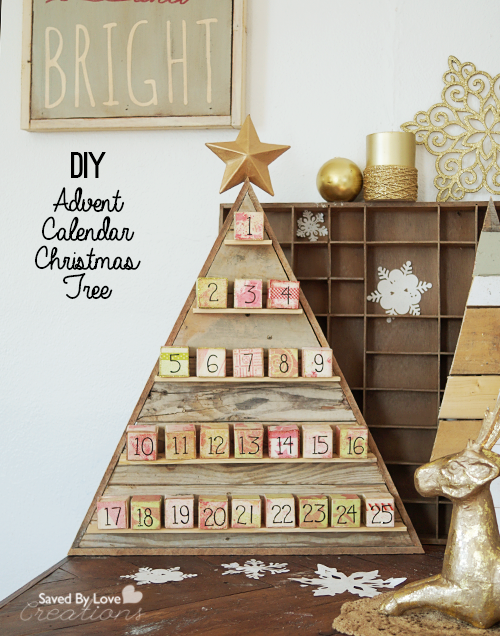 [pinit]

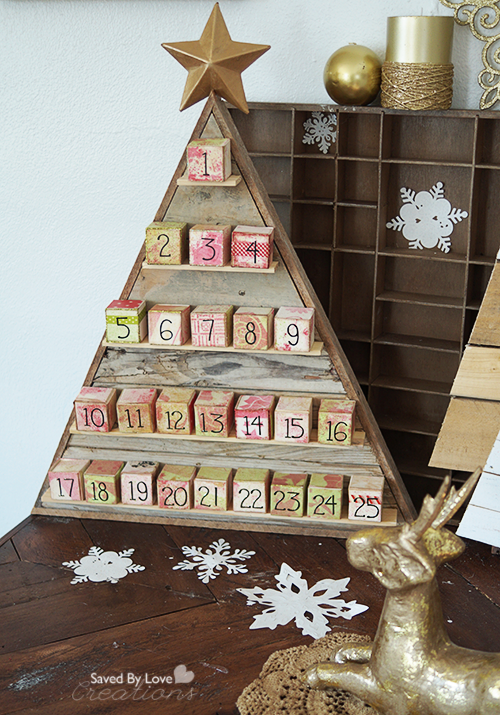
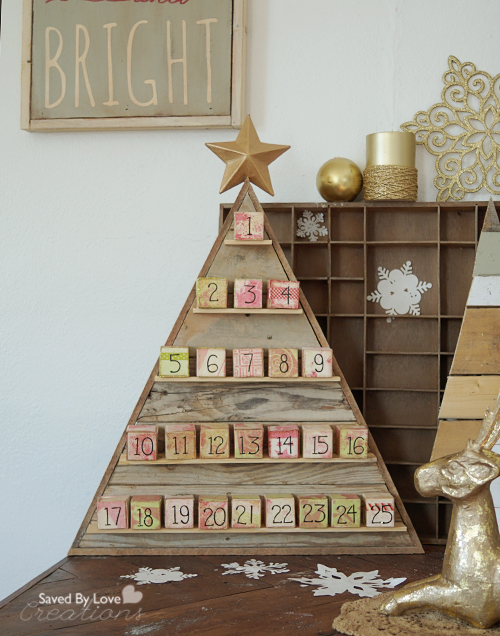
Today’s project is a rustic, reclaimed wood Christmas tree advent calendar that you can make for little to no cost! Building from salvaged wood and paper crafting all in one project! I created the blocks using Eileen Hull’s (soon to be released) Scoreboards Block dies. The die makes blocks in three sizes, for tons of creative potential. Think about artist trading cards, but 3-D! Last Christmas I showed you how to make an advent calendar from wooden blocks, and that is the first thing I thought of when I saw this die. Read on to see how I used stencils from Stencil Girl, spray ink, number stickers and washi tape to decorate my mat board cubes. Watch the video to make your own tree, or display your blocks freestanding. These would make great Christmas gifts and decor for your holiday get togethers.
SUPPLIES:
For the Blocks
Heidi Swapp Spray ink Gold, Green, Red
Stickles in red, green, gold
Washi Tape in Christmas Patterns
Stencils (I used Stencil Girl)
For the Tree
Scrap wood
Mitre Saw
Nailer or hammer and nails
Wood Glue
5 gallon paint stirrers
TUTORIAL:
ADVENT BLOCKS
You may want to decorate your cubes before assembling them into the 3D shape. First I will show you assembly, then how I decorated my cubes.
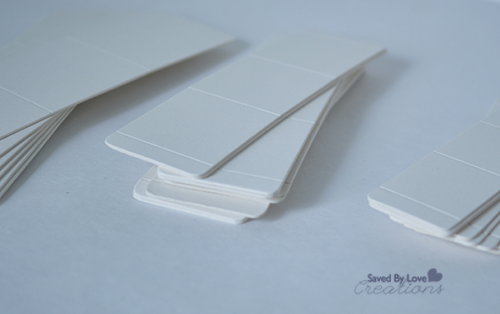
I chose the smallest of the three cubes for my calendar. This is what the mat board looks like after it is cut with Eileen’s awesome new die!
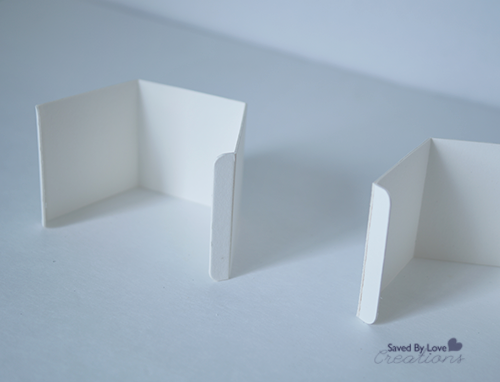
Fold cubes along score lines. Two of the scored rectangles are needed for each cube. Place them together to form the cube. You can glue the tabs in place if you would like, but I didn’t find it necessary with the mat board. I haven’t tried other paper.
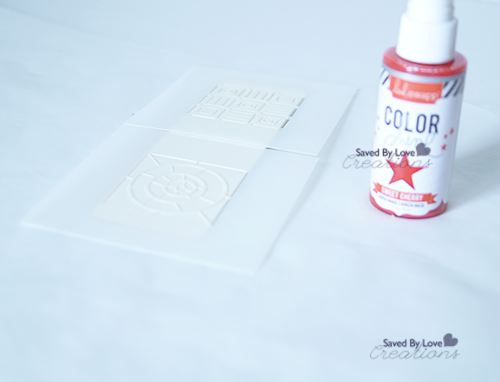
Place stencils over blocks and spray.
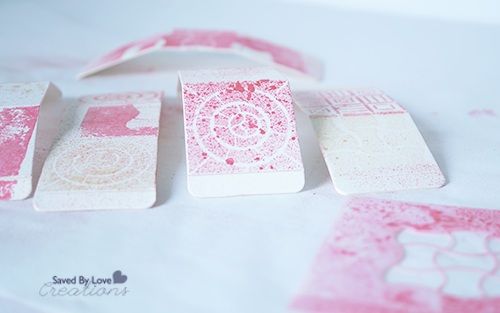
Clean up excess ink that’s on the stencils for a reverse image on the blocks, and you waste less ink!
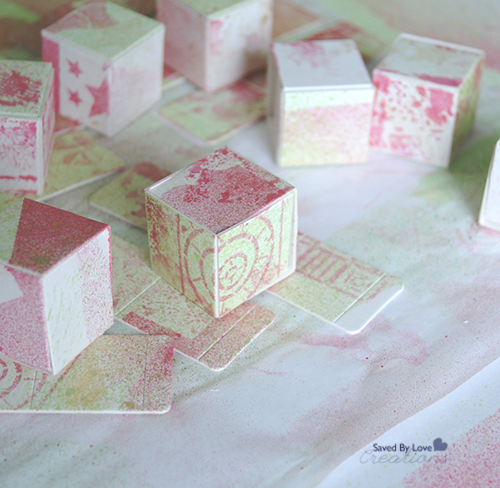
I used red, gold and green sprays, allowing about 10 minutes dry time between each color.
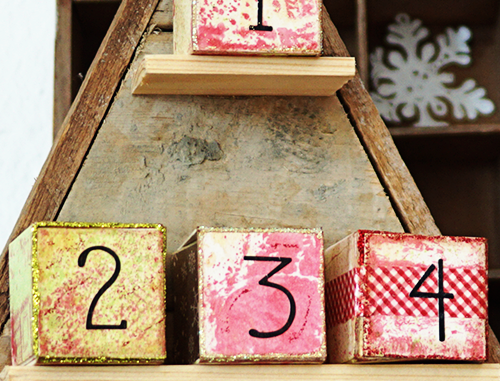
Once that dried, I adhered washi tape to some blocks, the black sticker numbers and coated with the front surface with Mod Podge Antique for an aged look. I thought it needed some sparkle, so I added stickles in red, green and gold.
RECLAIMED WOOD CHRISTMAS TREE
I made the tree like I showed you in this DIY wood pallet Christmas Tree post, and in the video at the end of this post. The only difference is I used chippy, weathered 2×4 scrap wood I found at a demolition site. I determined the dimensions of my tree based on the 1.5 inch advent cubes. The base is 19 inches, and the height is 20 inches without the frame.
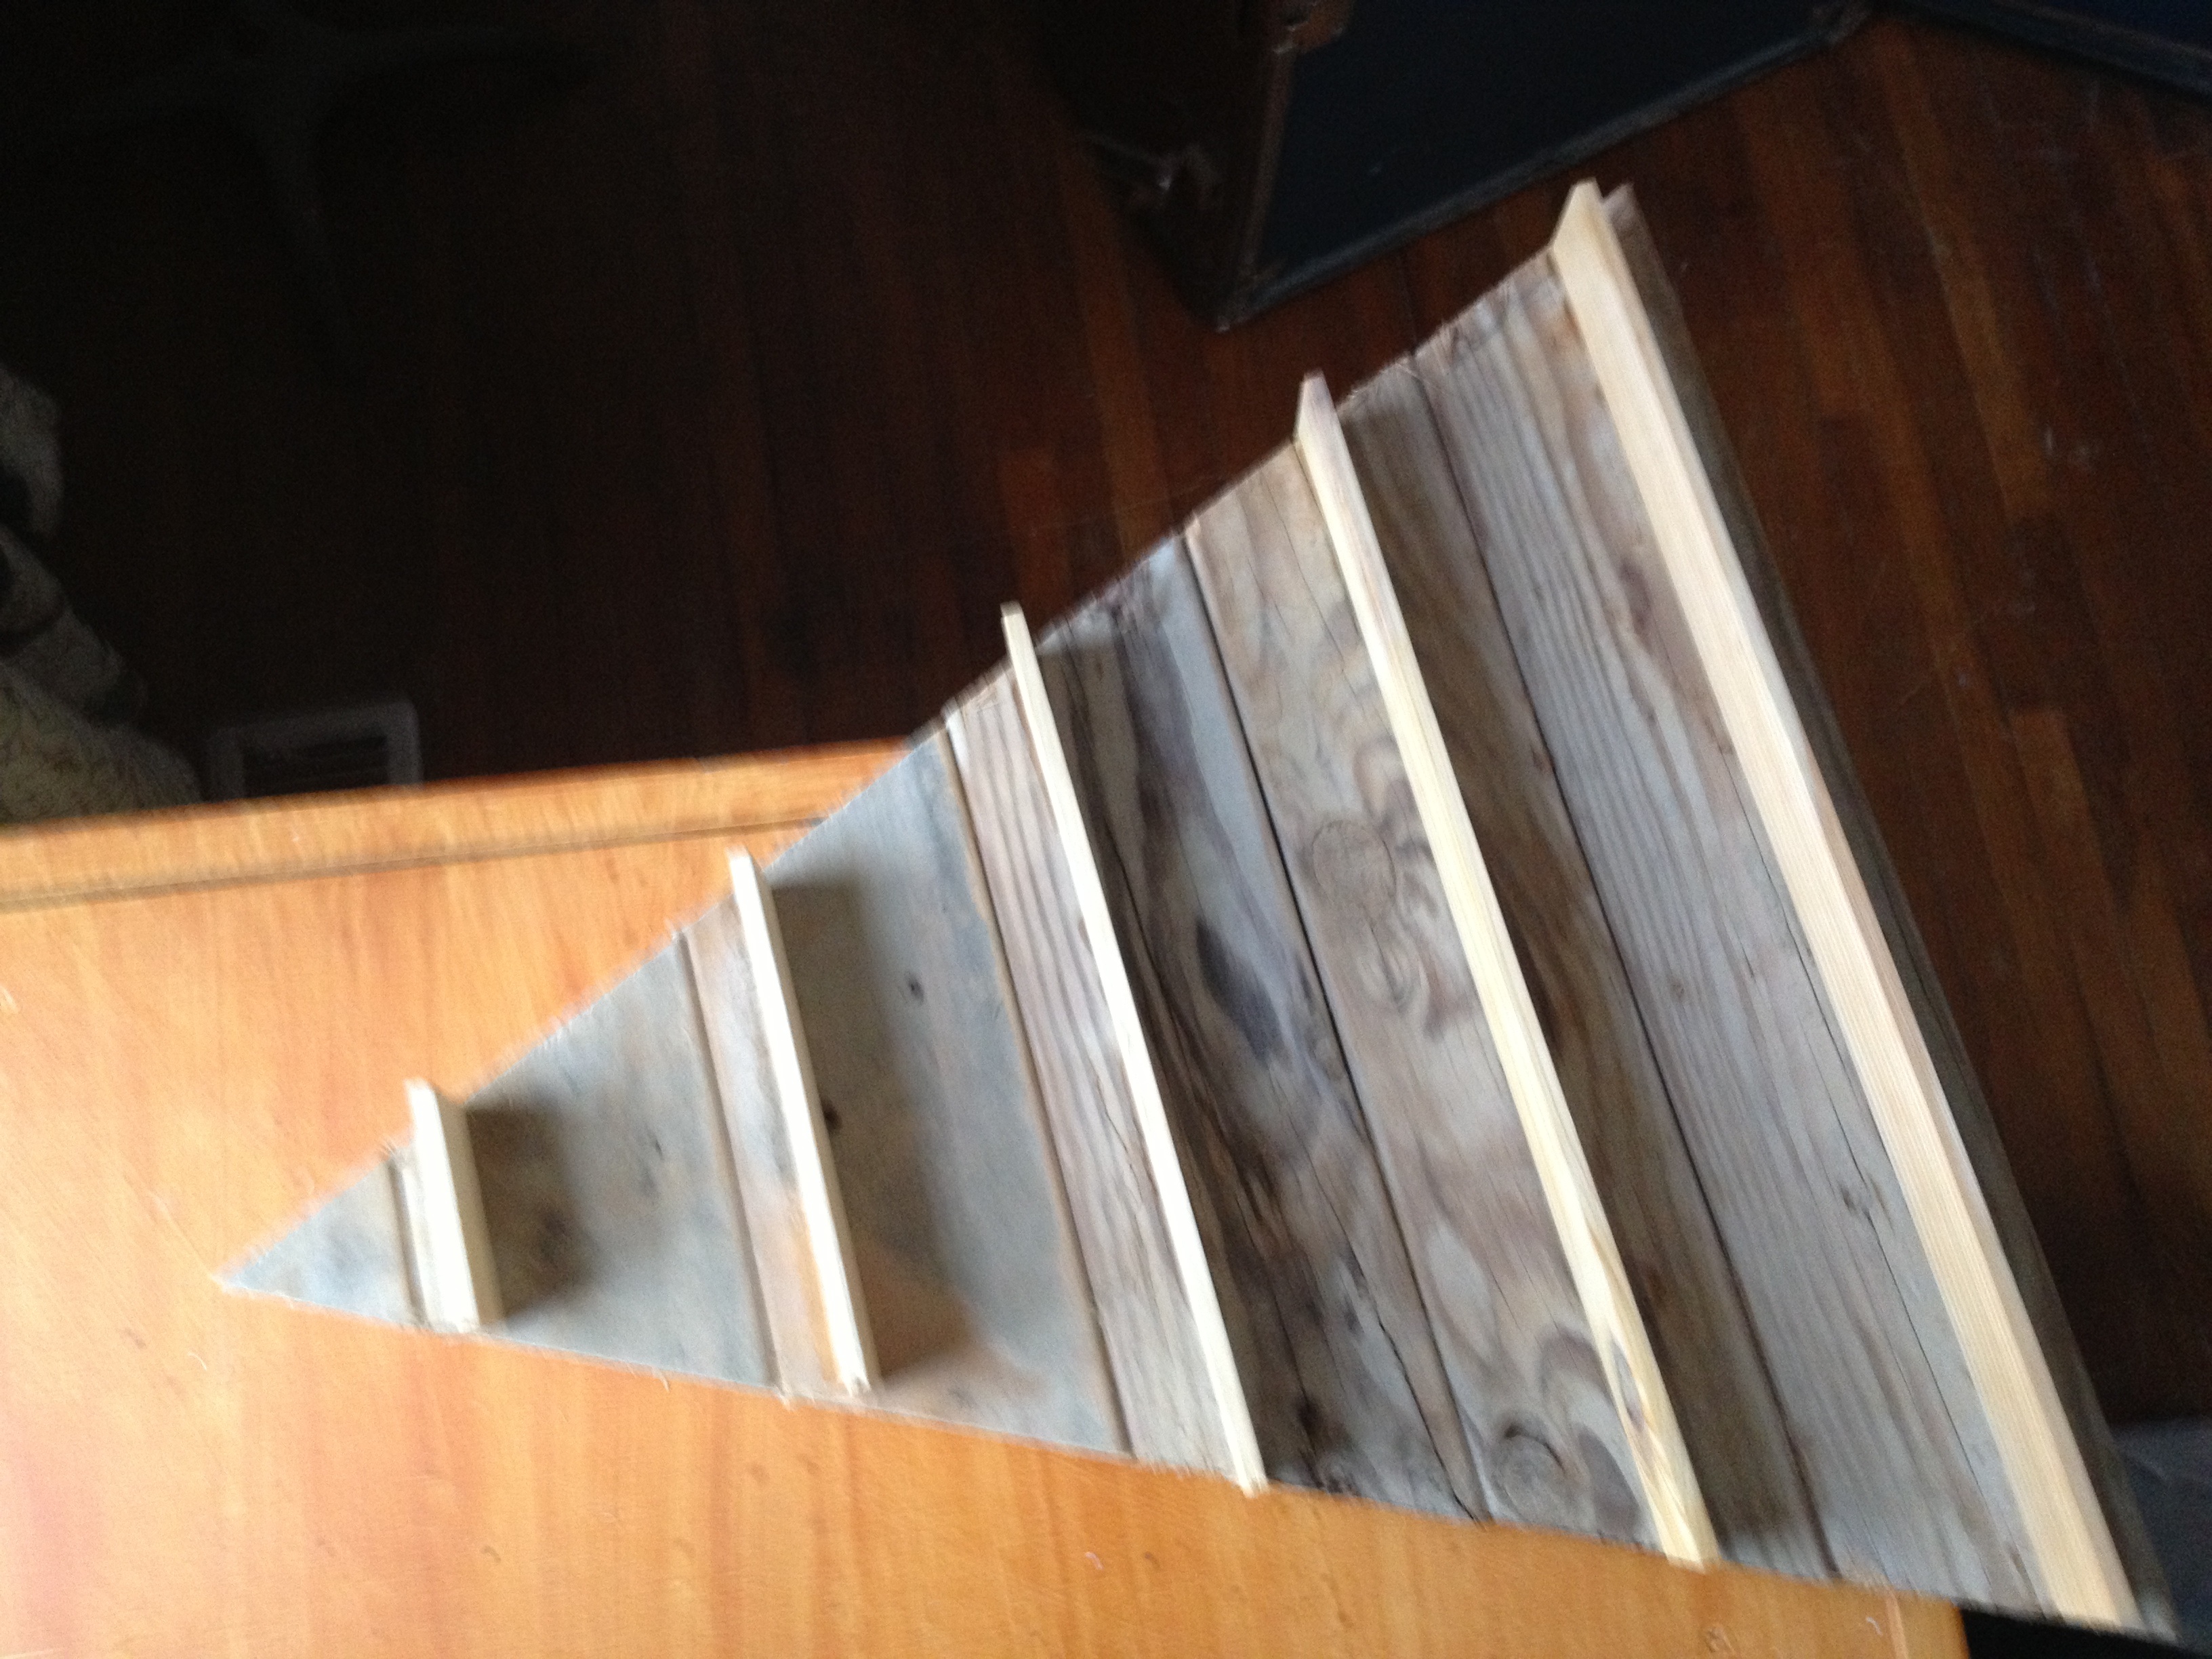
I made the five shelves from paint stirrers, cutting them with the mitre saw to lengths that allowed 2 inches for each block. So the first one is 2 inches, then 6 inches and so on, 10 inches, 14 inches and finally 18 inches for the bottom shelf. I laid the tree flat and added a thin line of E6000 to the back of the paint stirrer and placed them on the tree where I wanted the shelves.
I decided to use scrap wood strips to frame the tree, just cutting to length with my mitre saw and using my Ryobi nailer to attach.
I hope you enjoyed the project and the blocks as much as I did! Visit Artists on the Block for more news, updates and projects as artist trading blocks take over the mixed media community!
Be sure and visit other projects using the blocks in the Stencil Girl and Sizzix Artist Trading Blocks Hop
Blog Hop Order


Johnnie wow! An Advent calendar is such a great idea! I could see kids going crazy to see what little treat is stored in the box each day of Advent. I had no idea you were so handy with the saw- watch your video of the trees the other day. 🙂 Thanks so much for all of your help and for rocking the block!
Great idea! I love the reverse stencil technique.
Amazing Advent calendar, such a creative idea!
What a fabulous idea! I love it.
Oh my days I am so thrilled to be looking at this delightful advent tree – I am inspired, it is amazing and who would have thought that a die block and stencils would be the way to go THANK YOU for sharing
Outstanding idea to make an advent tree with the ATB’s!
stamping sue
http://stampingsueinconnecticut.blogspot.com/
So so very merry and fun! It’s amazing how perfectly the 25 tiny blocks make a tree! ;). Bob Vila better watch out This old house” is going to be Johhnies “New House”. Fantastic creation my friend!
Amy*
amazing – this is simply wonderful!
Just love the rustic look Johnnie! PERFECT project to bring out year after year!!! Thanks so much for hopping with StencilGirl!
What a great advent calendar you’ve created!
Gorgeous use of the ATBs, and I love the delicate spritzed colours. So cool that you created that tree from recycled pallets – thank you so much for the video!
Alison x
Complete utter genius! Lovelovelove!!!
Love your inspiring and innovative way of using ATBs for the Advent Season!
Wonderful!
I have no room for a regular tree, but ummmm
love your page,thank you for the chance to win! love your page..
WOW! This is the coolest tree ever! You made using those small sized sizzix ATB cubes so easy and FUN!! I think I love the thought of using that size the best now that I have seen your project! Thank you so much for all the time you put into this one, your fanbase appreciates it!
absolutely love what you did and re-claim is the best.
Advent calendars are one of my favorite holiday crafts, and your tree using Eileen’s blocks makes it so easy to hide any size surprise inside. Cool idea!
Love your advent tree and how you decorated the boxes. Thanks for sharing your talent.
Wow Johnnie! This project is a little advanced for me. I can’t see me sawing anything without a trip to the ER 😉 However, I’m sure I can salvage something simular at my local thrift store & give it a new makeover. Thanks for the inspiration.
So very cool every year I want to make an advent ca lander but I have not found a good one this one looks great! I’ll try it for next year. Thanks 🙂 hopping along…
Johnnie- what an awesome idea!! I love your reclaimed tree and the blocks go perfect!!!! On the opposite sides you could paint happy winter for after the holidays!! Very cool- thanks for hopping along!
Great project – just imagine opening all those boxes filled with lovely treasures!
Clever and pretty!
Love this idea. Your site is fabulous
I really like this idea….one could perhaps leave one “tab” unglued and put a treat in the box? Would that be possible?
Anyway AMAZING project!!
I just love how you used the block die to create that fantastic Advent Tree!!! I absolutely love how you completed it also!!!
What a great use of the boxes! I love the sprayed stencil designs.
This was a really cool way to use the blocks!
Wow what a great project you have made.
how did you make/where did you get the star and how was it applied?
It is a paper mache star from Michaels and it is hot glued to the top.
[…] će od dasaka načiniti bor policu, poput ovog adventskog kalendara kakvog su načinili na stranici Saved by Love Creations. Umjesto kocaka s danima odbrojavanja do Božića, posložite božićne figurice, a kasnije […]
[…] an art doll with hers and added arms, legs and head! Love it- who would have thought? Johnnie Lanier used lots of the smallest size blocks and built a custom Advent tree to hold each tiny box of […]
[…] Download Plan More @ savedbylovecreations.com […]
[…] Credit: Saved By Love Creations […]
[…] Download Plan More @ savedbylovecreations.com […]
[…] Credit: Saved By Love Creations […]