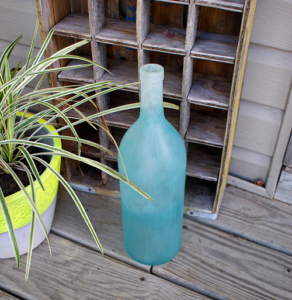
Painted Glass Vase Tutorial

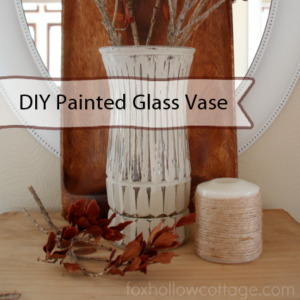
 Distressed Painted Glass Vase at savedbylovecreations.com by Fox Hollow Cottage

Give a warm welcome to today’s guest poster, Shannon!  Thanks for being here today to share this great, quick fall decor painted vase project.

Hi there SBLC readers!

My name is 
and I blog at

Today I’m going to share a super… 
(and I mean super)
simple craft that will result in a pretty decor accent, perfect for anytime of year!

-Make a Painted, Distressed Vase-

Grab yourself a vase.
You might have a few on hand already. 
The more cut work, (nooks&crannies) the better!
I got mine at Goodwill for 99 cents.

Make sure it’s clean & dry.

Next, you’ll want to use a paint that is suitable for glass surfaces. 
I used a (new to the USA) paint called 
La Craie.
It’s a chalk based paint and it worked beautifully on the glass. 
I decided on Cobblestone.
It’s a perfect neutral and I thought I could get lots of use out of my vase in this shade.

I like to move stuff around. A lot!

After my paint was dry. I grabbed  a sanding sponge and just knocked-off the paint until I liked the look!

Done
Decorate
 
Enjoy
This idea can be utilized to make centerpieces for parties, showers or casual weddings too. Any paint color can be used and embellishments can be added to make them really personal too! 

For Fall… I liked the simple, unadorned vase dressed in paint only. I can really enjoy the texture and cuts in the vase and I liked it paired with the branches, leaves and the natural elements of the wood and jute twine.
If you would like to view some more ideas for dressing up simple items… I have a some fun, 
tin-can crafts you might want to peek at.


Thanks so much for having me today!!
It was a real pleasure 🙂
Photobucket

Ombre Frosted Wine Bottle Tutorial

Frosted glass paint ombre wine bottle DIY at savedbylovecreations.com #decoartglass

The fun with Deco Art glass paint is nowhere near finished.  Check out how you can create this ombre frosted glass look on an empty wine bottle.  The frost paint is super fun to work with, and I am loving the look.

Supplies:

Empty wine bottle

Rubbing alcohol

Lint free cloth

Frosted glass paint in Turquoise and white

Cosmetic sponge

Tutorial:

Frosted glass paint ombre wine bottle DIY at savedbylovecreations.com #decoartglass

Start at the bottom of the glass with turquoise and apply lightly with cosmetic sponge.  At the point you want to shift to a lighter shade of turquoise, mix white frost with turquoise and continue up the glass.  Use white on the top segment.  Let that dry for 30 minutes or more.

Frosted glass paint ombre wine bottle DIY at savedbylovecreations.com #decoartglass

Go over entire bottle with light layer of white frost.  This ties the layers in together better, making for a more subtle gradient effect.

Frosted glass paint ombre wine bottle DIY at savedbylovecreations.com #decoartglass

Frosted glass paint ombre wine bottle DIY at savedbylovecreations.com #decoartglass 5

For another quick, easy wine bottle upcycle with Deco Art glass paint visit the link and check out my new site, Totally Green Crafts!!  This is my first mention of it, but you will be hearing more in the coming days.  Take a look around and hook up with us on FB and Twitter.  Stay tuned for Totally Green Craft Contests and more!

DIY Moroccan Luminaries

Painted Glass Jars

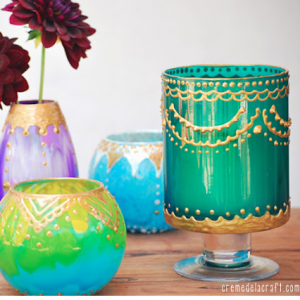
At Cremedelacraft, learn to make these cheap, gorgeous, Moroccan style candle holders.  They look like something I would drool over at Pier One.  All you need to create your own is some glass containers and paint.  I am all over this project.

DIY Neon Planters

After last weeks 50+ neon projects, I have Day Glo on the brain.  I picked up these planters for super cheap, and went at them with some Krylon Dual and Rustoleum Fluorescent.  I am loving them to pieces.  This project could not be simpler.  Check out the process below…

Supplies:

Planters

Painter’s Tape

Krylon Dual Ivory

Neon spray paint

My porch is way funner than it was before this quick project!

Polka Dot Jar Vase/Luminary

Mason Jar Luminary or Vase

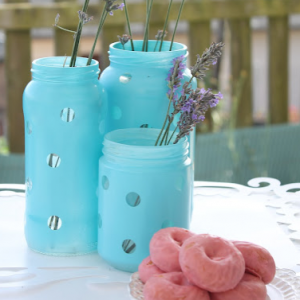
Need a great upcycle project for a centerpiece?  This polka dot mason jar vase from Bolevard Pink will add a splash of color and style to any occassion.  Head over for the simple DIY involving a masking techique.  Most will have everything on hand to make one of these.  Put a candle or LED votive instead of flowers for a quick luminary.

50+ Recycled Glass Bottle Projects to Make

50+ Glass Bottle Projects
From soda to wine to juice to Frappuccino, glass bottles are abundant. This week’s 50+ will get your wheels spinning on creative ways to upcycle all that glass. Enjoy!!


Guest Post: Wine Bottle Upcycle

DIY Upcycle Bottles to VasesI was so excited I was contacted by Jessi Snow.  She wanted to know if she could share this cute wine bottle upcycle here at SBLC.  It is like she knew what this week’s 50+ round-up theme.  Now you do too!  Her project is as great as her timing.  Take it away Jessi…


We drink a whole lot of beverages out of glass bottles in our house. We’re wine with dinner kind of people, I love Perrier and let’s be honest – glass bottles are just so much prettier. I’ve always been really good about bringing our empties to the local recycling depot, and every once in a while I would put one to use as an impromptu home for a flower or two, but it wasn’t until recently that I decided to try upcycling them into something I would really use. We recently moved into a new house and I had a whole lot more surface area to decorate, so I decided to create some pretty vases out of empty glass bottles to help spice up some space. Here is how I did it!

Supplies:

  • Empty glass bottles – any kind will do!
  • Rubbing alcohol
  • Quick dry spray-paint – a primer and your color of choice
  • Acrylic paint (for letters and pictures)
  • Small paintbrush (for letters)

Steps:

  • The day before I planned to actually paint the bottles I collected up a handful of and gave them a good soak in warm soapy water before scraping off the labels. If you have trouble removing the labels, pour a bit of rubbing alcohol directly on them and allow it to soak in for a few minutes before trying again.
  • I let the bottles dry for a full 24 hours – you don’t need to wait this long, especially if you have a bottle drying rack, but I wanted to be sure all the moisture was gone from the inside of the bottle before I got to work.
  • Once they were dry inside and out began by priming the outside of each bottle with a quick-dry white spray-paint primer. This step isn’t really necessary but a lot of my bottles were green and I wanted to be sure that the color wouldn’t show through on the ones I wanted to paint white. It also gives the paint a better surface to adhere to and reduces the chances that the paint will chip off.
  • Next I liberally sprayed the colors I had chosen onto each bottle – I went with navy and white for this first batch to match the bedspread in my spare bedroom. I applied a couple coats to make sure everything was even and because I used quick-dry spray-paint I didn’t have to wait long before the second round which was great!
  • Once the bottles were dry to the touch I started painting on the writing. I had chosen a handful of quotes ahead of time and put two on each bottle – one on each side – so that I could change things up if I wanted to.
  • I let the bottles sit outside in a warm, dry spot for a couple hours before bringing them in and putting them to good use!


Wine Bottle Upcycle
Suggestions:

  • I realized pretty quickly that I wasn’t blessed with steady painters hands – those letters were tough work! If you’re anything like me, you might want to consider using stickers or stencils to give your bottles a more polished look.
  • I sprayed the outside of my bottles but you don’t have to go this route. You can also spray the inside instead to maintain the glass look while adding a pop of color.
  • Work outside! No matter how hard you try, spray paint has a tendency to go everywhere. I’d definitely recommend tackling this project somewhere rogue paint splatters won’t be an issue.

Some projects look a whole lot easier than they actually are, but I can assure you that this isn’t one of them! The second half of the process (aka. the fun stuff) took me less than 45 minutes and was as easy as pie. If you’re looking for a quick way to brighten up a room or a sweet little gift for a friend, these are definitely the way to go. Thanks so much to Johnnie for the opportunity to come share my tutorial with you guys today, I can’t wait to get some new ideas on how to upcycle glass bottles from a couple of you too!

Jessi is a crafter with a big thing for DIY. When she isn’t dreaming up a new project, she spends her time trying to encourage others to embrace the do-it-yourselfer lifestyle as a Community Coordinator at PartSelect.com.

Tissue Transfer Bird Vase

Image Transfer Vase
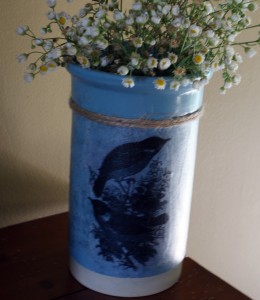
I’ve had this blue vase sitting around for awhile now, begging to be decorated.  It ended up in storage until I found inspiration to revamp it from none other than the beloved Graphics Fairy!  Follow along for another image transfer project using tissue paper, an ink jet printer and a plain vase as the substrate for the transfer.

[Read more…]

Painted From the Inside Out; Thrift Store Vases

I am so inspired by all you thrifty DIYers out there.  Here is my most recent creative venture set into motion by my new blogland friend,  Vanessa at Nifty Thrifty Things.  You may have seen her featured on last week’s Thrifty Thursday.  She recently posted a painted vase project (here) that I just had to incorporate into my decor.   To keep my illusion alive that winter is gone and spring is here, I chose a shades of pink.  I love how they turned out, and they go great with my kitchen color palate.

Here are the vases I bought Saturday at Goodwill; Originally $0.99, but only $0.50 each.  I love 50% off day, which Goodwill is now having on the first Saturday of each month.  YAY!!!

Vases from Goodwill before painted

I used acrylic craft paint because I will not be putting water in my vases.  They are for a purpose that will be displayed in a future post (involving yarn… be excited).  If you plan to put live flowers with water, you will want to use Oil based paint, like Vanessa did in the above linked tutorial.
I squeezed a small amount of Plaid FolkArt Acrylic Paint 2 Ounces Napthol Crimson Artist Pigment FA-435; 6 Items/Order mixed with cream colored latex paint leftover from when we painted the trim in our house.  I wasn’t concerned with each vase being exactly the same shade, so I didn’t measure the amounts of pigment and cream paint  I mixed together.

The perfect frugal, quick way to add a splash of spring to any room!!
Privacy Policy