


[pinit]

[pinit]
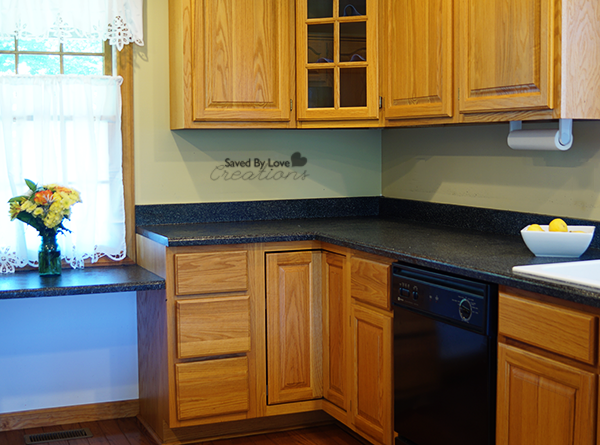
If you have outdated laminate countertops and dream of granite, the look can be yours without breaking the bank! We just revamped our country blue laminate countertops with Rustoleum’s Countertop Transformation Kit, and are thrilled with the outcome. The process was super easy and far less expensive than replacing our existing surfaces.

The kits come with a DVD tutorial, giving detailed accounts of each step.
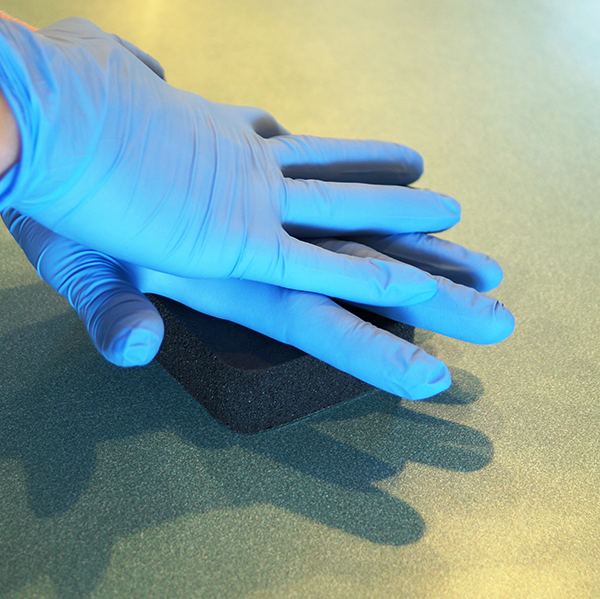
We began by de-glossing the existing clean countertops by sanding them with the included diamond coated sanding pad.

Wiping away the debris from sanding and making sure all areas were de-glossed came next. We weren’t sure what to do about the wood “lip” edging on our tops, since the video example showed a fully laminated top that curved over the edge smoothly. We decided to sand and treat the edging like the rest of the countertop. So glad we did. It looks great!
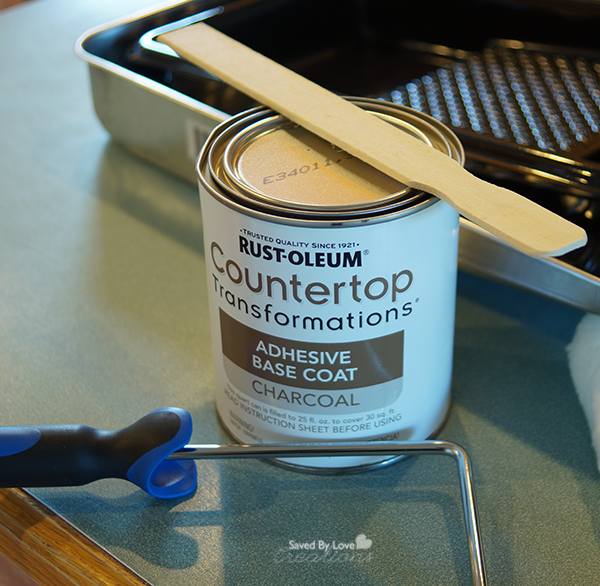
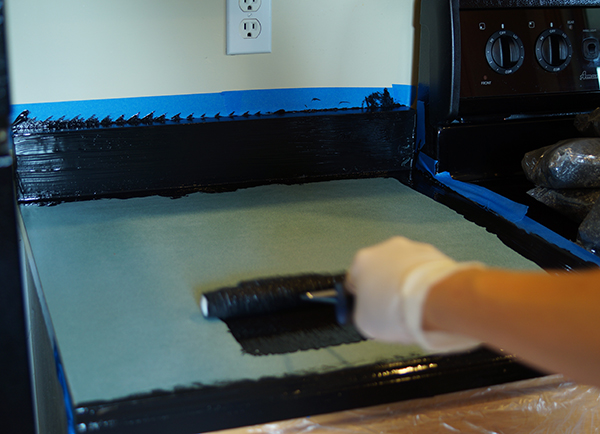
Next we applied the adhesive base coat. In our case it was black since we went with the Charcoal kit.
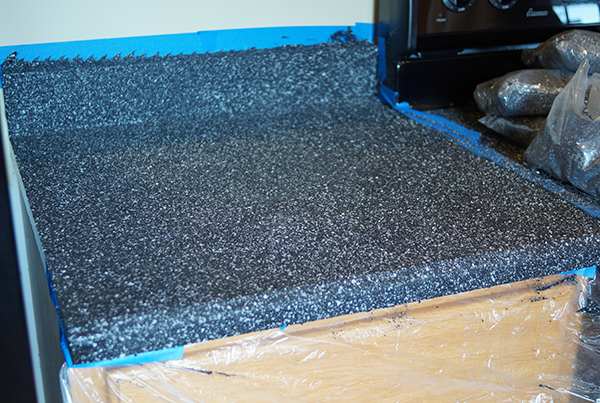
Using the handy dispenser that came with the kit, we spread the flecks over the wet base coat and let that dry 12 hours. This stuff was everywhere! That is why it is important to tape off areas and use drop cloths.
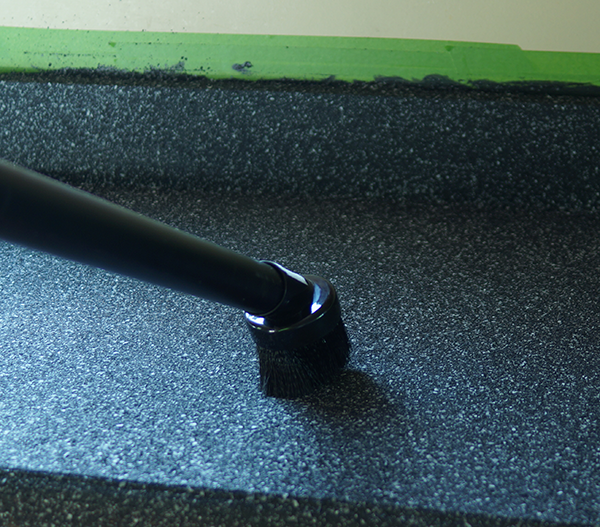
After 12 hours, we shop vacuumed the loose chips with a brush attachment.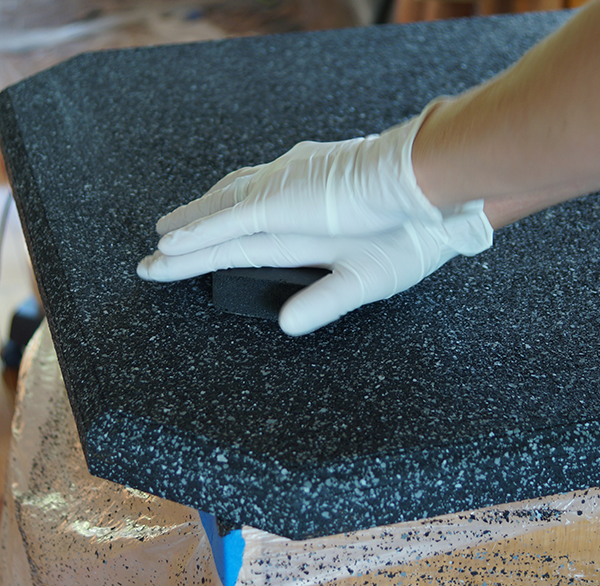
We sanded the surface with the diamond coated sanding pad, being careful not to remove the base coat. Included in the kit is an example of what your countertops should feel like when you have sanded enough.
Before applying the glossy top coat, we vacuumed away the sanding debris and wiped the countertops clean with a lint free clothFor the last part, we mixed the 2 part top coat together and applied with a brush and roller, per the instructions on the video. This was a breeze.
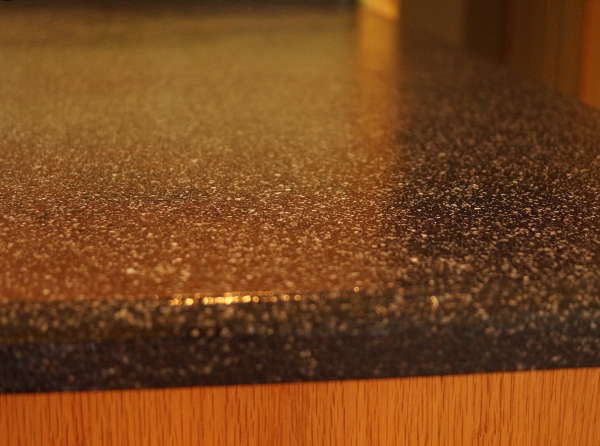
We had to wait one week before being able to use our countertops, and it was totally worth it!

I love how the countertop edge goes all the way over instead of being edged with wood. It looks way nicer. I would recommend this kit for sure. Such a huge difference!!
Stay tuned for the cabinet makeover that is soon to come.
Disclaimer: I received the countertop kits for this project from Rustoleum. That affected my review none whatsoever! All opinions are mine and honest.


What a great idea, your counters look beautiful. I would love to do this, unfortunately the previous owners must not have been cooks. Our counter tops do not overhang far enough. Any crumbs or debris falls into drawers because the counters are at least an inch too shallow. Maybe we’ll replace the counters on the cheap then redo them. Our whole kitchen needs revamping. Seriously, the way it is arranged lets me know the previous wife did not cook at all.
Have you thought about just adding some wood across the fronts of the countertop? If you’re going to cover it with something like this product, I feel like it would be fairly easy and would then just blend in once you apply the treatment! Just an idea! 🙂
This is amazing! I might do this in our bathroom!
WOW ! This looks so different, and it is beautiful! I will have to try it.
Thanks Mary!
Wow, this looks amazing!
Thank you, Laurel!!
Your counter tops look great! I always wondered if this product really worked and now I know that it does!
Paula, I was kinda scared to tackle that kit, but I am so glad I did it! Thanks for stopping by to check out the new house. xoxo
Thanks for the post on the countertops. I was looking at those kits and wondered about them. I do have a question. Now that you have lived with the counter tops for a little while, what is your opinion? They look great but how durable are they for everyday use? My husband would not be so ginger in his use nor conscientious of his interactions with the counters. 🙁
Thanks for the great questions, Frances. Since I have only had them for a short time, I can’t speak to long term durability, but I do know a few other bloggers who after 3 years are still in love with their countertops. I am not careful with them at all, and they are fine so far. I plan to update in a year or so. From what I have heard, I would say go for it!
Hi Johnnie, I’m new to your site from The Graphics Fairy and glad to visit with you and your new home. We moved 2 years ago and I’m still painting! I painted my Sisters counter tops last summer with a product from a different company and they have held up so well. We did put on another top coat this summer just to keep it sealed well. I loved it so much I’m getting ready to do mine as I have lovely formica tops that are white with green flecks (gag) and they go so lovely in my French country décor…NOT! hahahaha! I can’t wait to get them done and to add one more layer of paint on my hands… am I weird I really do love that!!! Your kitchen turned out lovely and you are right, it was an inexpensive way to get BIG bang for less bucks! Look forward to seeing more from you!
Hi Pendra! Thanks for introducing yourself. I am so glad you came by from The Graphics Fairy. I can’t wait to see your countertop transformation. So fun!! xo
Your renovation turned out beautiful! I would like to redo my countertops eventually. I have 3 to 4 separate countertops, would I be able to do 1 countertop at a time?
Michelle, thank you! Not sure about doing your countertops 1 at a time. The only thing that would make that difficult is that once you activate the top coat by mixing the 2 parts, you only have a few hours to use it before it hardens. Does that make sense?
That definitely makes sense, thats why I was asking. Is it true that you can’t use your counter tops for a whole week? With a family of 6, Im trying to figure something out =)
I’m thinking of trying this with my countertops. What about durability? Does it chip easy? Knife mark?
Hi Heather. We are going on about 6 months, and are 100% satisfied with the countertops so far. I am confident that these will stand the test of time. Good luck!
I love the way your counters turned out! We are currently making improvements to sell our home. Our countertops are white laminate with a wood edge. It’s round and not beveled. I like the way you all decided to go ahead and transform the wood edge. Any tips on how to best get the flecks of color on the edging. It seems like it might be more complicated that the flat surface? You mentioned that you’re please with the counters so far. Have you noticed more wear and tear on the wood edging? Thanks, in advance, for your advice!
I’m curious how many kits were needed for your counter top. And , it seems like it’s been approximately a year after this project was completed. Can you tell me how your countertops are now? Thanks!
Hi Natalie! Our countertops required 2 kits, if I remember correctly. They still look great! Hope that helps.
Hi there, your countertops look wonderful! I think this would work for our kitchen, but I’m wondering how you painted around your sink? Did you have to remove the sink? Thank you, Angie
Hi Angie. Thanks for the countertop love. We did end up removing the sink if I remember correctly. Good luck!
[…] house with, as you can see, outdated oak kitchen cabinets. Maybe you were here before and saw our DIY countertop transformation with Rustoleum. To continue the kitchen renovation, we took the cabinets up to the ceiling by boxing them in and […]
[…] wasted. It has been just about 2 months since we took possession and already, you have seen our DIY Countertop Makeover with Rustoleum’s Countertop Transformation Kit, as well as our DIY Kitchen Cabinet Upgrade. We wanted to take the time today to show you around […]
[…] us involved in the project is the countertops. That’s right. We were making plans to do a countertop transformation after painting the cabinets. We were just certain the new cabinets were going to make that […]
[…] Beste Rustoleum Diy von DIY Countertop Transformation With Rustoleum. Quellbild: savedbylovecreations.com. Besuchen Sie diese Site für Details: savedbylovecreations.com […]