[pinit]
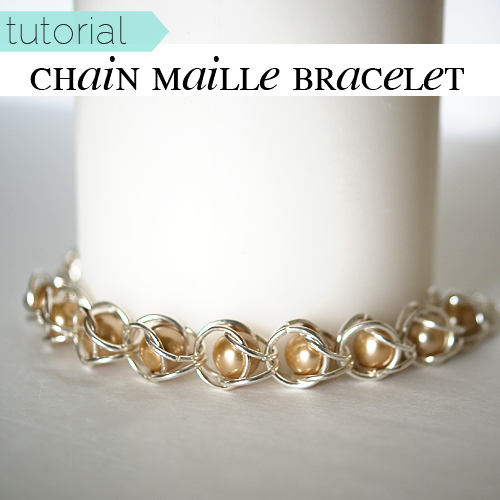
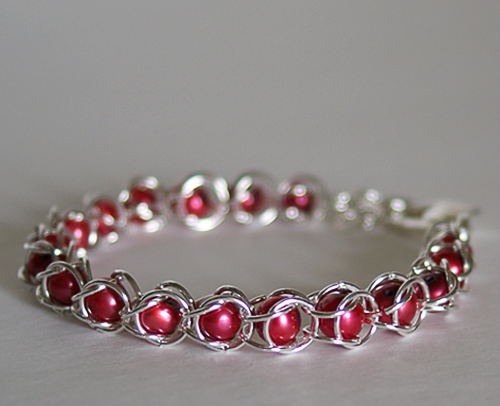
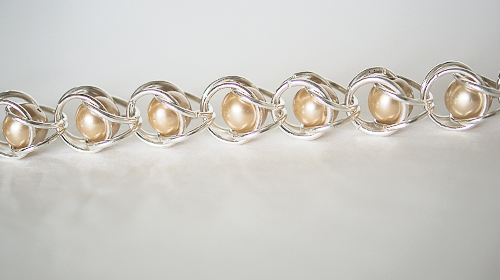
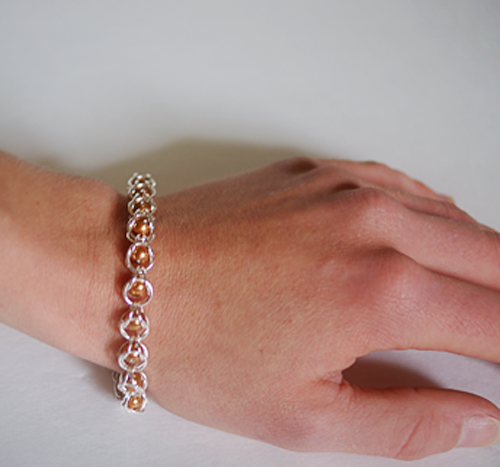
Recently I had Irina from Irina’s Cute Box here to share with you her gorgeous chain maille pearl bracelet tutorial. My sister fell in love with it, so when we had a night together this weekend, we knew it was time to give this project a go. They were super easy, and worked up fast. We are both addicted, and we love our new bracelets. I have a few designs in mind with some beads other than pearls, and sis wants to make one with glass beads next.
Irina’s tutorial linked above is super easy to follow. I want to share with you a few tips I learned in the process of creating these beautiful bracelets.
SUPPLIES:
I used a 6mm pearls with 9mm jump rings and 8mm pearls with 11mm jump rings
Jewelry pliers
OR…
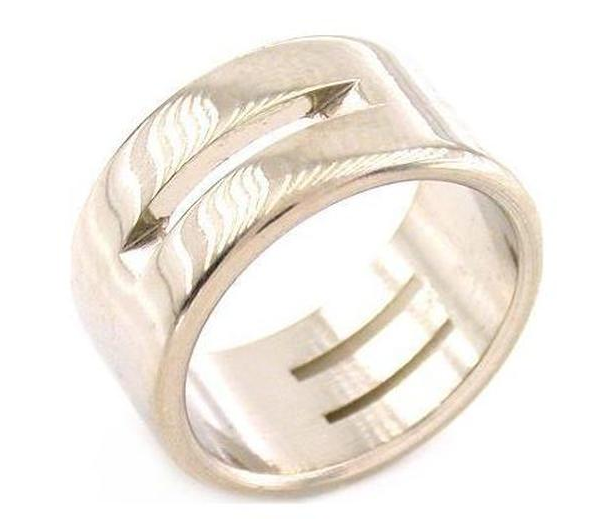
This handy dandy jeweler’s jump ring tool for easy opening and closing of jump rings:
I love this thing because you can put it on your finger and still have both hands available for the jewelry work, unlike using pliers to open and close the jump rings. Well worth the $3.
TUTORIAL:
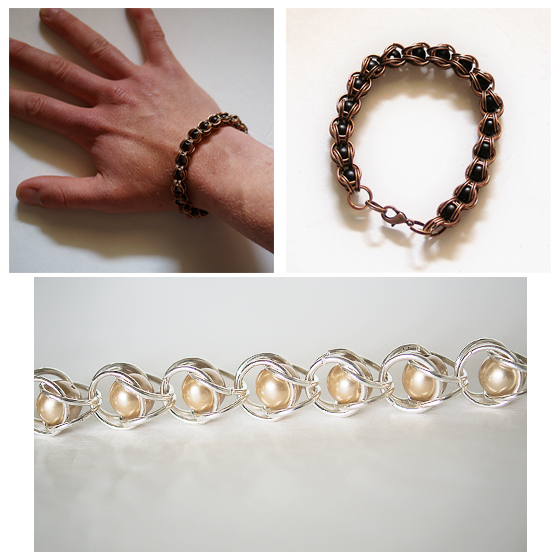
For more detailed description, see original chain maille bracelet tutorial post. After your first “Nest”, make sure you add a jump ring at the bottom to keep the first pearl from popping out (shown in bottom picture). I ended up adding 2 jump rings there since my beads were smaller in comparison to the jump rings than Irina’s. Even with one, the bottom one popped out of its box.
Here is a variation using copper split rings and black glass beads:
The possibilities are endless. Your imagination will go wild when you get into this project. These would make great Christmas gifts. They are stunning, inexpensive, simple and quick!
For more bracelet how to’s, be sure and visit the SBLC tutorial gallery, HERE.
Don’t forget about our 50+ bracelet roundup with the best DIY bracelet tutorials on the web, in one spot!






This bracelet is simple but beautiful! Thank you so much for the tutorial!
I’m in love with this bracelet!
I hope you don’t mind, but I shared a link to your tutorial on my facebook beading page ~ http://www.facebook.com/BeadingWithBeads
Thank you for the great tutorial!
Xx
Thank you, Olivia! So glad you like it. Irina has some amazing ideas.
I followed the tutorial and made this with 9mm jump rings and 6mm pearls. I have had two pearls fall out when I let it go slack. Did I do something wrong or are 6mm pearls just too small?
Hmmm. My sister had the same issue. Mine have held up fine. There are 2 things I can think of that may explain why this is happening. Jump ring labeling and measuring is very inconsistent among manufacturers. Some use inner diameter of the ring to come up with the number, while others use the outside. Also, the gauge of your wire may be to thin! I used 20 gauge wire rings. Finally, if your jump rings aren’t completely closed, I mean even the slightest opening is there, you will lose your pearls. I hope this is helpful.
What was the inner diameter of the rings you used? Or did you give the Outside diameter measurements?
Unfortunately, I don’t know what the exact inner diameter is, since this particular brand is not marked that way.
I’m having the same problem of beads falling out. I can’t even get past the first bead. I’ve tried using jump rings 2mm larger than the bead and 1mm larger than the bead. Not worth using ones that are 3mm bigger. 1mm ones aren’t big enough and the 2mm ones are too big so 3 would be even worse. Think I’m going to have to give up on it which is such a shame as they are beautiful.
Oh no! I am so sorry you are having such difficulty. This may call for a video tutorial. My sister had the same difficulty you describe, and it was because she was letting the “cage” of rings slip open before closing it. It is hard to describe in words. I will try to get a video done.
I as well can not keep beads from falling out please send me the video if you’ve made one
Okay, I hope this helps some of you with the beads-falling-out problem. You CAN use 9mm jump rings with 6mm beads. (If I had to do this again, I would probably do 8mm rings/6mm beads or 9mm rings/7mm beads.) Open enough of your rings to do about five “nests” and start your first nest. The bead will probably fall out. Keep putting it back in–treat it with kid gloves. Add your next nest, and continue to be very careful. The beads will probably keep trying to fall out. It is frustrating, but hang in there. By the time you get to your third or fourth nest, they stay in the nest! I don’t know why this is, but I don’t care! 🙂 Seriously, I almost gave up, but it does work. By the time you’re on your fifth nest, you should be able to shake the thing, smack it against your workspace, etc., and the beads stay put. Good luck! Merry Christmas!
Thanks for that but … I managed to get about 6 inches in length done on mine (a lot more than 4 or 5 nests) then one bead fell out and the rest followed. That’s when I finally gave up. I was using 8mm jump rings and 6mm beads. I’ve also tried 10mm rings and 8mm beads and 6mm rings with 4mm beads. Trying to ‘tighten’ it all I decided to try rings only 1mm bigger than the bead but they were too small. I may try again at some point but it’s unlikely. Friends, who’d been awaiting the outcome of my bracelet, aren’t even going to try after what happened with mine.
So glad that you all posted on here. Didn’t read these before I tried to make the bracelet. I was also frustrated because the beads kept falling out. I thought it was me doing something wrong. Tried the 8mm. Works great. Thanks everyone for you input.
Thanks for this tutorial, especially the specific sizes for beads and jump rings. Irina apparently made her own jumprings to fit, so it wasn’t till I found this version that I bought jumprings for this project– so that was a huge added value for me, to get an idea how much bigger the jump rings need to be. I bought 10mm beads and 12mm 18 gauge jump rings and I was very happy with the results. About 16 beads does a large wrist loosely. Then I bought some 9mm beads and used the same jump rings– bracelet comes out the same length and beads still don’t fall out. I think this may be my first actually completed bracelet ever!
The beads were falling out when I first started, but I noticed in the picture with the first nest it was upside down from where it was being held. As soon as I flipped it over and then added the other jump rings it stayed together like a champ. Hope that helps.
I have done captured bead chainmaille only once before using large bicone beads and jump rings i had lying around. I loved the way it turned out and i’ve tried doing it with round beads but I seem to always have a problem with the beads falling out or being too big to fit the next jump ring in. Any suggestions?
I hope all these suggestions help me I can’t even hold on to the first bead – is it suppose to be a tight fit with the ones over the bead a video would be good
[…] looks fairly easy, and is really pretty. The pearls are caged in the links. I found the tutorial on Saved By Love Creations. Isn't it pretty? Will have to give this one a try. Instead of pearls maybe I will use some […]
[…] The tutorial is by Johnnie of Saved By Love Creations, pictured below and the link to the tutorial is here. […]
[…] Creating Chain Maille can be as simple as starting with a basic bracelet. Anyone can learn to open and close jump rings. Many patterns and techniques exist, here are some for inspiration. This one with the red beads was created by SavedByLoveCreations.com. […]
[…] Download Plan More @ savedbylovecreations.com […]