Browse +
Collaborations
About
Contact
Browse +
Collaborations
About
Contact
Browse +
Collaborations
About
Contact
Browse +
Collaborations
About
Contact
Category: Woodworking
Woodworking
Furniture
Reclaimed Wood Projects
Scroll Saw Projects
Woodworking Plans
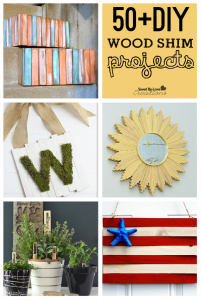
50 Plus Awesome Wood Shim DIY Projects
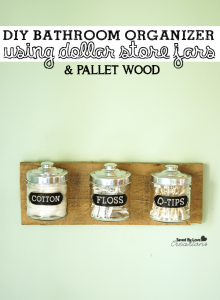
Dollar Tree Pallet Wood Bathroom Organizer Tutorial
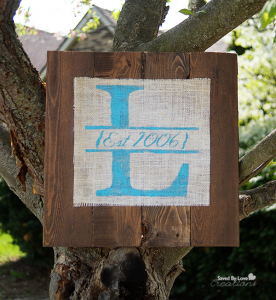
Wood Pallet Burlap Monogram Sign DIY
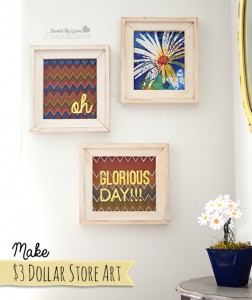
Dollar Store Craft Make $3 Wall Art Trio
Furniture Makeover Chalk Paint a Goodwill Chair
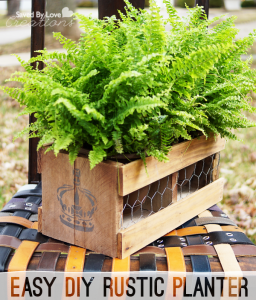
Make a Stenciled Planter Box From Reclaimed Wood
Rustic Hand Painted Sign Giveaway With Little Red Porch
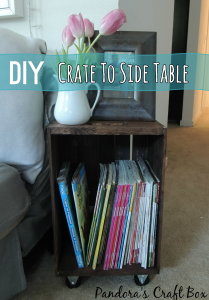
Easy Side Table from Wooden Crate
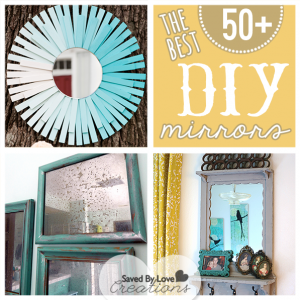
The 50 Best DIY Mirror Projects Ever Made
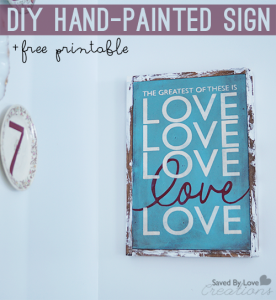
DIY Handpainted Sign + Free Printable Template
Inactive
hello
I’m Johnnie! I am a craft blogger inspired by nature, dogs, running, rock climbing, and all things green and creative.
About me
Collab together
Get in touch
Facebook-f
Instagram
Pinterest
Tiktok
X-twitter
Threads
Inactive
Search
Search
Inactive
follow
weekly
updates
...
la-féminité
Twitter
Facebook
Instagram
Pinterest