Easy DIY Paper Daisies

Paper Daisy DIY #Sizzix #papercraft @savedbyloves

[pinit]

Paper Daisy DIY #Sizzix #papercraft @savedbyloves

[pinit]

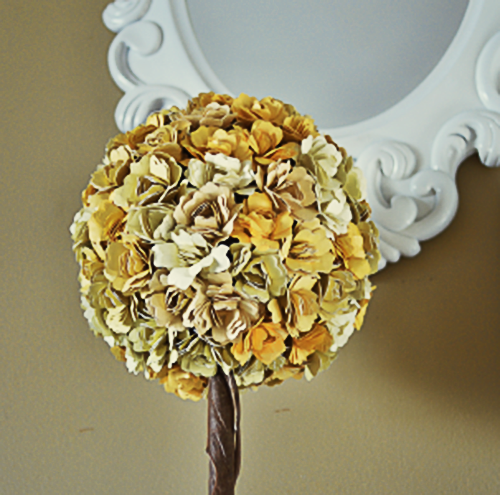
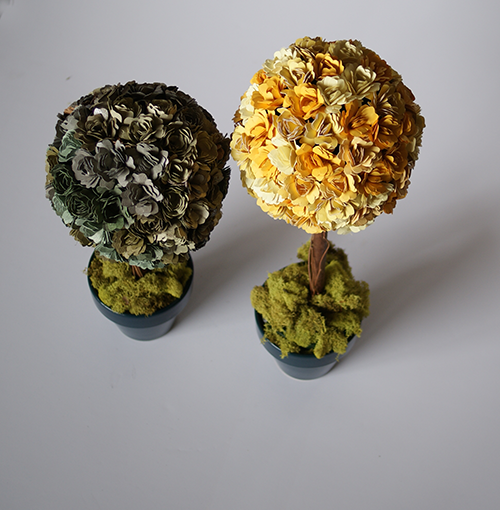
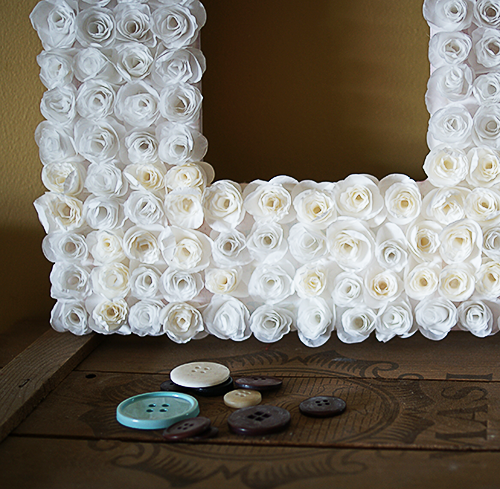
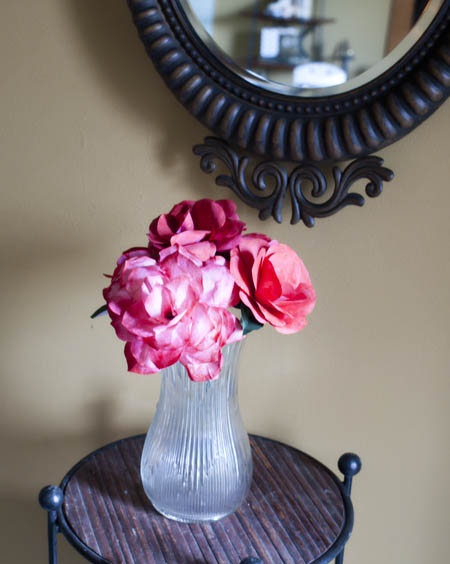
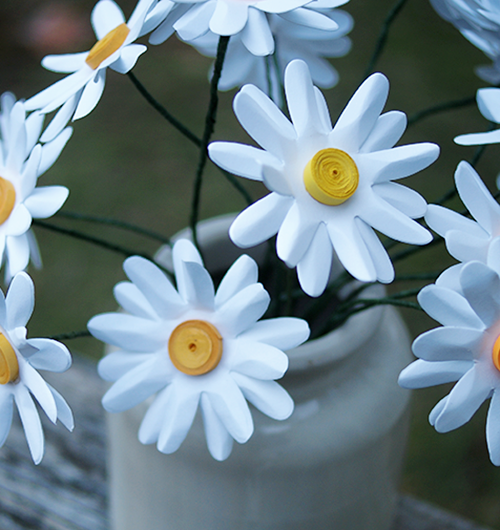
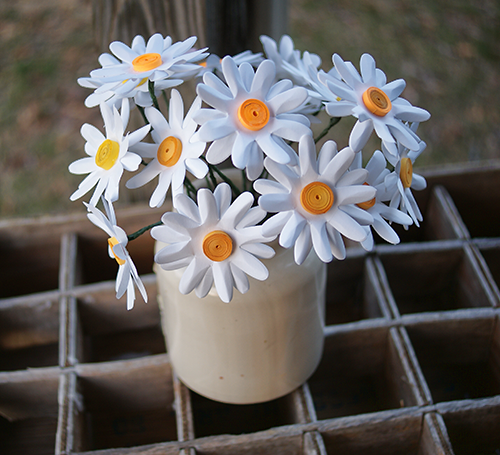
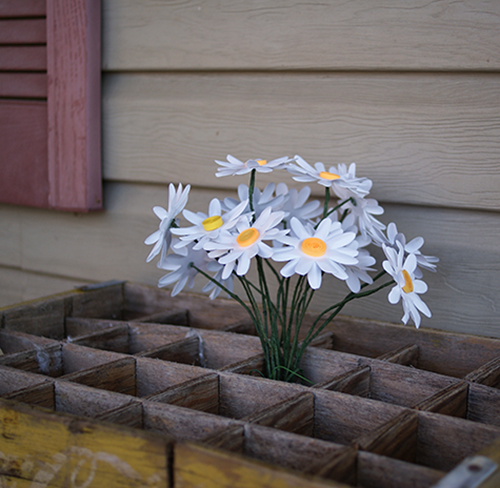
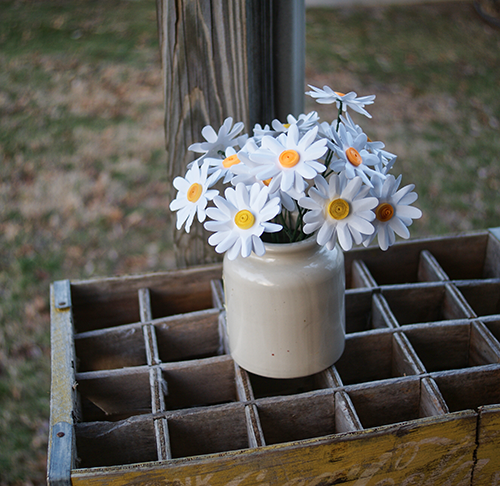
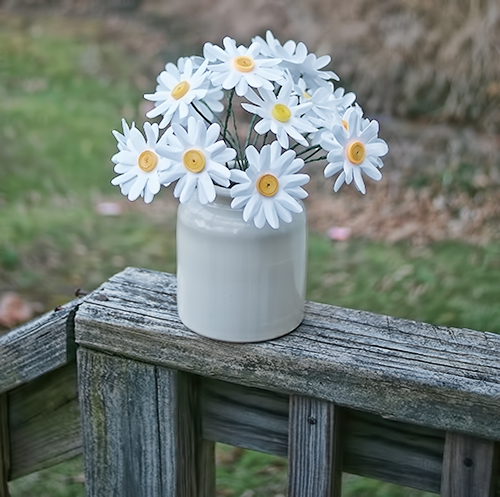
It was time for some new paper flowers to usher in the spring around here.  If you have been here long, you know I am a fan of making paper roses.  I decided to switch it up a bit and create daisies this time.  For a cheap, simple and beautiful DIY spring decor idea, look no further.  These would be great for weddings and other centerpieces too!

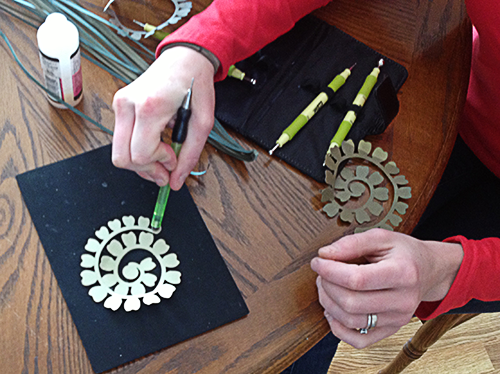
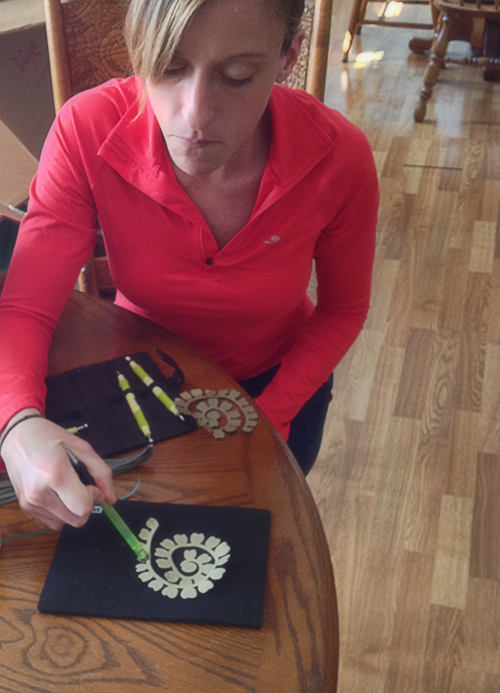
For this project, you don’t need much.  I used my SIZZIX machine and a flower die, but a die cut machine is not necessary.  You could easily do this with a paper punch too.

Supplies:

 Sizzix Flower Layers and Leaves Die

White Cardstock

Yellow Quilling paper

Paper quilling tool or toothpick

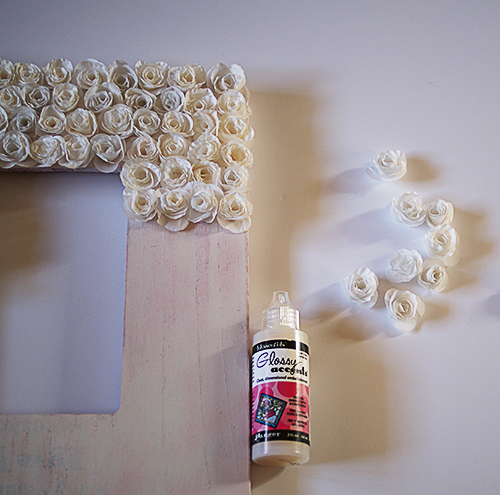
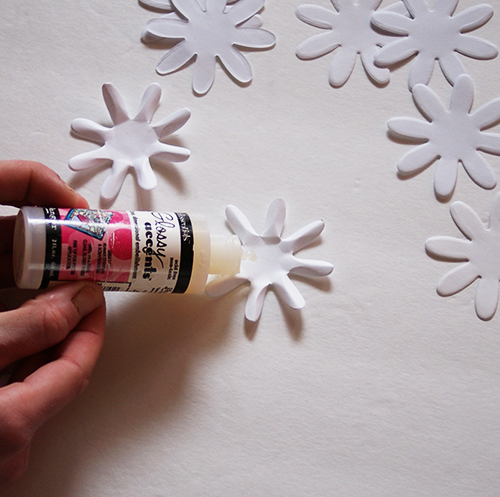
Craft glue (I use Glossy Accents for paper to paper since it dries in 5 sec and holds great)

Floral wire

Floral tape

Hot glue gun

Tutorial:

Paper Daisy DIY #Sizzix #papercraft @savedbyloves

Cut several 8 petal flower shapes, either from a paper punch or die.  You will use 2 of the shapes per daisy.

How to make paper daisies

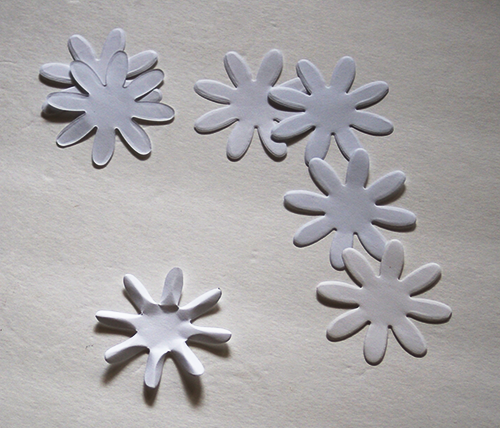
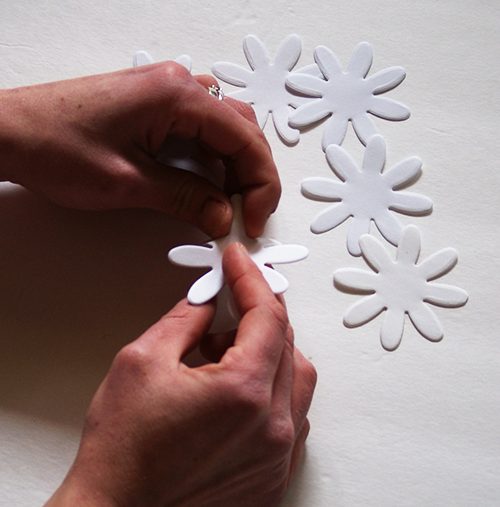
Fold each petal lengthwise, as close to the center as you can get.

Make a paper flower bouquet

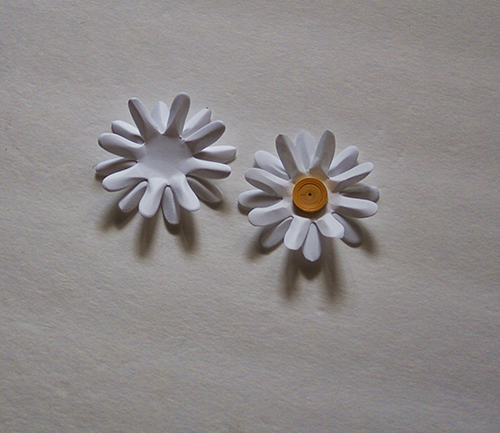
Once your petals are folded, stack one flower shape on top of another, adhering with glue, such that the petals are alternating (see pic below).

Paper Daisy DIY #Sizzix #papercraft @savedbyloves

Paper Daisy DIY #Sizzix #papercraft @savedbyloves

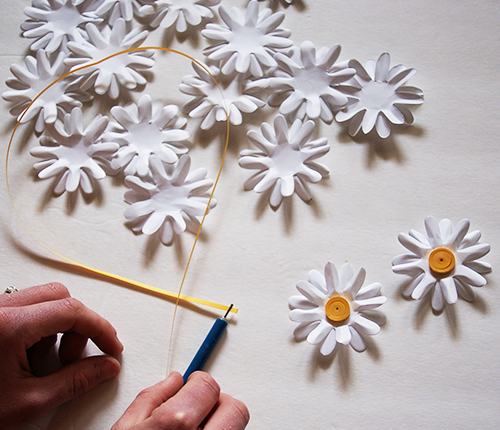
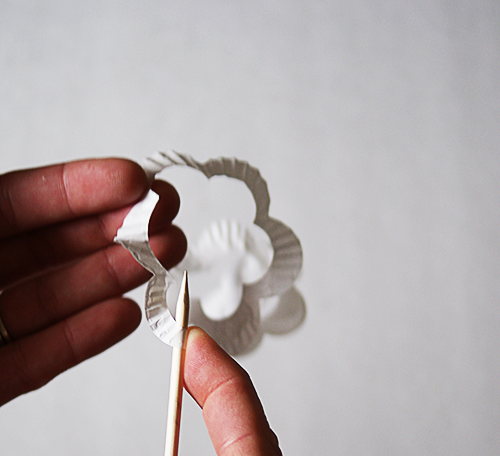
For the center of the flower, coil yellow quilling strips using a quilling tool or toothpick.  I used 2 strips of quilling paper for each flower center.  When one ends, just glue the second there and continue coiling.

Glue flower center in place.

Paper daisy tutorial

#Papercraft #paperflower #DIY #weddingcenterpiece #DIYwedding

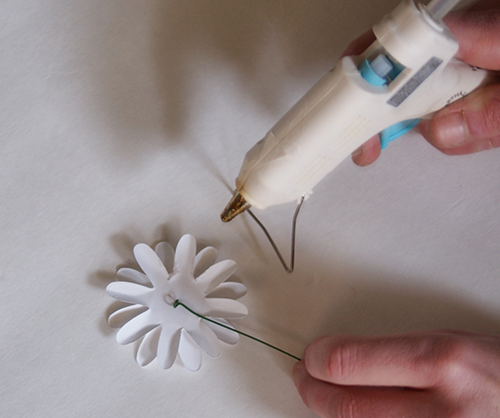
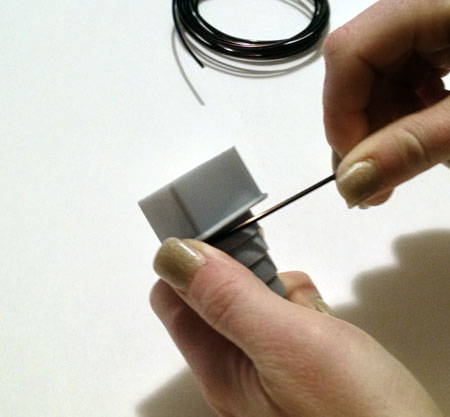
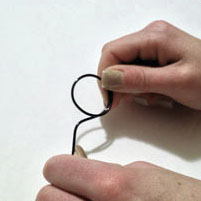
Make a bend in the end of your floral wire to create surface for hot glue to grab and glue wire to flower back.

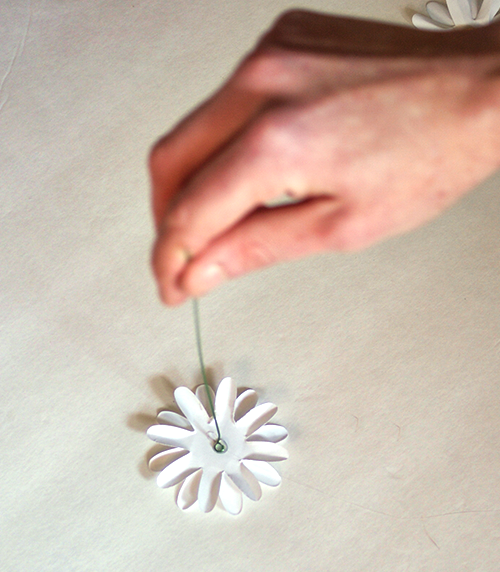
To finish, I wrapped my wire with floral tape.  This is not essential.  I just like the look of the wrapped wire better.

#Sizzix #paperflowers

Paper Daisy tutorial #DIY #weddingDIY @savedbyloves

Paper quilling tool

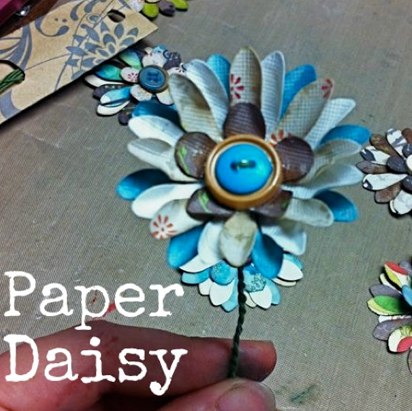
If you love paper daisies, check out the crazy awesome project Amy from Plucking Daisies shared with us awhile back:

Paper Flower Topiaries With Sizzix

[pinit]

Make #Sizzix paper flower topiaries for #Spring @savedbyloves

[pinit]

Make #Sizzix paper flower topiaries for #Spring @savedbyloves[pinit]

3D flower dies from Sizzix are some of my favorite die cuts to use.  I was thrilled to find a new die this weekend while at Michaels.  These fun green and yellow spring topiaries are my first project using them.  This project is simple, but I won’t lie, it is not quick.  I had a little help from my sister and husband, who shaped petals for me as I rolled the flowers and pinned them to the topiary shape.

SUPPLIES:

Sizzix Sizzlits Die – Flower, Rose 3-D

Cardstock in your favorite colors

Glossy Accents

Straight Pins

Topiary Form (got mine at Walmart recently; you could use a stryofoam sphere and dowel rod)

Pot (Got mine at the dollar store last year)

Green moss or other filler

Stylus with large ball or other rounded end (like a pen or sharpie)

Foam pad or mouse pad

Tutorial:

Cut several, I mean way more than you think you’ll need, 3d rose shapes using the Sizzlits die linked above.  I used Coordinations paper in several shades of yellows and greens.  With the Sizzlits dies, you can only cut one piece of cardstock at a time, so get cozy.  I have done a similar project here with the Sizzix Originals 3D rose die, which cuts through several layers of cardstock at a time.  I really wanted to use this shape die though, so I just cut one shape at a time.

Shape the petals with a rounded end stylus ball, or whatever you have on hand that works.  I figured out I really liked the shape of the flower if I pushed in the 7 outer petals of the spiral, then flipped it over and pushed in the remaining petals.  I roll the flower into shape so that the outer petals of the spiral (which become the center petals of the 3D flower) curl inward towards the center like in a real rose.  The remaining flowers bloom outward like a blossoming rose.  I don’t have detailed pics of this, so I hope that makes sense.

This pic shows me starting on the outer petals of the spiral (central petals in final rose).

Shaping paper flower petals

To shape them I just press hard in the center, and draw tiny circles with my stylus ball.  The flower petal “cups”.  I do this for the first 7 petals, then turn the spiral over and do the same thing on the remaining petals.

Make #Sizzix paper flower topiaries for #Spring @savedbyloves

Roll the flower from the outer petals to the center, keeping the bottom strip at the base of the petals aligned.  When you get to the end, glue the tab you see at the center to the base of your flower.  I like to use Glossy Accents for this since it dries so fast and holds great with paper to paper.

Once I had 10 flowers made, I pinned them to the topiary with a straight pen through the center and continued this way until the spheres were full.

Make #Sizzix paper flower topiaries for #Spring @savedbyloves

Make #Sizzix paper flower topiaries for #Spring @savedbyloves

Over 50 Projects to Make With Grungeboard

[pinit] 50+ Grungeboard Projects to Make @savedbyloves

[pinit]

If you have never used Grungeboard, the best way I can describe it is chipboard that you can abuse, twist, sand and color for some amazing effects.  I have used it in several jewelry projects as it is so flexible and durable, and can be cut with my sizzix dies.  I searched out some fantastic projects using this eco friendly material from Tim Holtz.

Check out he describes it in this quick video…

50+ Projects Using Grungeboard


Cupcake Liner Rosette Frame

Make a cupcake liner rosette frame with #DIY from @savedbyloves

[pinit]

I was browsing the swoon worthy pages of one of my favorite publications, Somerset Life, when I came across their call for cupcake liner crafts.  Oh how awesome it would be to make it onto one of those pages!  I decided to make roses from the liners, and adhere them to a plain wood frame for this rosette wreath.  It took awhile to roll all those little flowers, but the project was easy, and well worth the time.

Cupcake liner craft DIY from @savedbyloves

SUPPLIES

White cupcake liners (a few packs, depending on the size of your frame)

Craft glue (I used Glossy Accents)

Sizzix 3D flower Die

Sizzix Machine

If you don’t have a die cut machine, you can cut the spirals by hand with a spiral rose template, like I showed you here

Wreath form or unfinished frame/garage sale frame

Bamboo Skewer or toothpick

TUTORIAL

Stack cupcake liners over die cut shape, tape into place with masking tape and run through Sizzix

How to make paper roses

Roll spiral into rose using bamboo skewer.  I showed you a video demonstrating this part in this Decorative Paper Rose Sphere post.

Sizzix Die Cut Paper rose cupcake liner craft

Glue roses to frame or wreath form with a small dab of glue on the back of the flower

CupCakeLinerFrame7

Frame revamp with paper roses

Simple as that!  I decided to leave the picture out of the frame, since it is a piece of art in and of itself.  I think I want to do a matching lampshade.

Make a cupcake liner rosette frame with #DIY from @savedbyloves

What do you think?  Have you done or seen any cupcake liner crafts?  The contest submission deadline is Feb. 15th.  The issue is linked above and contains all the details!

Make a cupcake liner rosette frame with #DIY from @savedbyloves

Long Stem Paper Rose + Template

Printable Paper Rose template and DIY form Ellinee, featured @savedbyloves

Ellinee is one of my favorite places for paper flower inspiration.  These long stem paper roses with template and DIY tutorial are a fantastic example as to why!  I used her template last year for my very first paper roses, and fell in love with the craft.  Stop by for these and more.

Duct Tape Wreath

 [pinit]

duct tape flowers wreath

I am super excited to have Angie here from Country Chic Cottage.  She is one busy lady, coming up with great projects and tutorials that you can do yourself, on a budget even!  Angie knows me well, and my readers too.  That is evident by the fact that she created a duct tape craft to share with us.  Thank you Angie!

Hello all!  My name is Angie and I blog over at The Country Chic Cottage.  I am so happy Johnnie asked me to guest post.  I am tired of winter already, aren’t you?  I decided to make a new wreath but put a happy spin on it.  We could all use a little cheer when we open the front door don’t you think?  And yes I am in love with duct tape lately.  My duct tape flowers wreath uses duct tape to create a simple, happy wreath that you can enjoy into the spring and even the summer.

Start with any picture frame (mine was already covered in some white fabric).  Add in some colorful fabric and duct tape and you are ready to get started.


duct tape flowers wreath


Tear your fabric into strips and wrap around your frame.  Cover the frame completely then use a dot of hot glue to secure the end of your fabric.


duct tape flowers wreath

Now it is time to break out that duct tape.  We are going to start by making a duct tape flower.  You will need a small square of duct tape plus one long strip.

duct tape flowers wreath

Fold your long strip over about 2/3 of the way as shown below.  Also as shown below, it does not have to be perfect.  🙂

duct tape flowers wreath

Gather your long strip onto your square as shown below.  Continue wrapping around and around until you run out of strip.  The longer the strip, the closer to the outside of the square you can start, and the larger your flower will be.

duct tape flowers wreath

You will end up with a gathered flower something like this.

duct tape flowers wreath

The back does not look as pretty but we are not worried about that!  Note that if any of your “square” peeks out around the edge of your flower, just fold under to hide it.

duct tape flowers wreath

Now attach those flowers to your wreath with hot glue.

duct tape flowers wreath

I also added a couple of buttons to the center of my flower.  They added just the right amount of bling.

duct tape flowers wreath

Now we need to make that duct tape “Welcome” banner.  You will need string (I used baker’s twine), duct tape, and foam letters.

duct tape flowers wreath

Start with a square of duct tape and fold it into a point as shown.

duct tape flowers wreath

Then fold the sides of your square in to make a mini pennant flag.

duct tape flowers wreath

Add your foam letters to each pennant flag.

duct tape flowers wreath

Tie the baker’s twine onto your wreath.  Add the flags by folding the duct tape over the baker’s twine and securing the flap with hot glue.

duct tape flowers wreath

It is really that simple!  Add a cheerful touch to your front door with this duct tap flowers wreath.  You know you could use a little cheer during these dreary months.

duct tape flowers wreath
Thanks so much Johnnie for having me!  Y’all stop by the cottage anytime for a visit.  I blog about crafts, recipes, DIY, and everything in between.  Follow along on facebook, twitter, or pinterest so you won’t miss a beat.
Thanks,
Angie
Don’t forget to check out Angie’s Etsy Store:  Country Chic Cottage on Etsy

Make a Variety of Gorgeous Paper Roses

Make gorgeous crepe paper roses with Design Improvised, featured @savedbylovecreations

[pinit]

Paper roses are one of my favorite things to make.  Roses in general, but especially paper ones.  Design Improvised shows you how they used a template from Martha Stewart to create these beautiful crepe paper roses.  Last year, you saw several paper roses here at SBLC.  One tutorial I ran across called for crepe paper sheets, which I couldn’t find anywhere.  My grandmother picked up a couple of packs of it that she spied while at Ben Franklin.  I had forgotten about it until seeing these from Design Improvised.  I can’t wait to try out some crepe paper roses.

Make a paper rose

This is the pattern I plan to use, which I shared with you in my Paper Rose DIY With Template.

How to make paper roses

Here is a paper rose tutorial I shared with you using .  I ended up embellishing a frame with the little beauty.

These two roses were created from a printable template by Ellinee that I showed you in my Paper Roses Another Way post.  They are so beautiful and I have them all over my house!

Here is another paper rose that I shared with you in my Coffee Filter Rose Tutorial.   There is a fantastic video from Cassie Chappell on the Martha Stewart Show.  It was not the easiest process, I won’t lie, but well worth the effort.  Not only that, but you will have roses made from coffee filters.  How cool is that?  You will be amazed if you watch the video.  Cassie’s roses are quite difficult to distinguish from real ones, and her colors are stunning.

6 Recycled Roses: Make a Plastic Spoon Rose

Make a plastic spoon rose viat Cut Out & Keep, featured @savedbyloves

[pinit]

If I have learned anything about my sweet readers, it is that you love recycled crafts.  Here is a beautiful rose made from recycled plastic spoons that I spied over at Cut Out & Keep.  It is simply beautiful!   You could spray paint it your favorite color, or just leave it the color of your spoons.

Making roses from trash is super gratifying.  Remember the aluminum can rose I showed you?  There is even a video!

Aluminum Can Rose TutorialLet’s not forget the magazine page rose ring and bracelet;

Make a recycled magazine page ring

There was also the time I made a decorative rose sphere using old book pages;

Make roses from book pages

So you got a Keurig for Christmas and you don’t know what to do with all those coffee filters you no longer need.  There is a coffee filter rose project for that;

Make Coffee filter roses

What are your favorite recycled rose projects?

Make an Easy Photo or Placeholder

[pinit]

I have a great placeholder DIY tutorial for you today using just a few supplies.  These can be created in no time, and are perfect for holiday and party table settings, as well as photo or holiday greeting card display.  Change the add-ons to accommodate any occasion!  Add a meaningful photo and give as a gift that will be cherished. The base wire holder is super easy to make, and embellishing possibilities are limitless.

Creating the Basic Stand

SUPPLIES:

Wax or UTEE (ultra thick embossing enamel)

Ranger melting pot if using UTEE, double broiler if using candle wax (see this how to melt candle wax)

Silicone Cube Tray

18 guage craft wire

Wire cutters

Round mandrel or other object to form circle wire holder

    TUTORIAL:

The Wire

 Cut 10 inch segments of wire and wrap around mandrel or other round tube at one end.  Wrap wire twice to create the double circle that the card or photo slips into.

photo(16)

Bend wire at base of circle with your fingers as shown in photo .  Now it is ready to be inserted into the cube.

photo(6)

The Base

Melt your candle wax or UTEE per instructions, carefully pour into silicone square cubes and let harden.  UTEE sets up pretty quickly (just a couple of minutes), wax takes 15-20 minutes.

For this reason, if using UTEE, pour only 2-3 cubes at a time and insert the wire while base is still in tray.  You could also let it harden all the way, then pop it out and drill a hole in the center for you wire.  I prefer the in tray option (sorry no photo) since UTEE acts as a strong adhesive and will secure the wire without glue if placed before hardening.  Just make sure the wire doesn’t shift.  You may have to hold it in place for 1 minute.  If drilling, dip tip of wire in adhesive before inserting into drilled hole.

Here are UTEE cubes after hardening…

DIY place holder or photo display tutorial using wax and wire @savedbyloves

If using wax insert wire when wax is almost completely set.  This will be about 20 minutes.  Just insert the wire and make sure the wax is hard enough to hold it up.  Let harden fully, then remove your ready to embellish stand.

Thanksgiving Placeholders

The idea for these stands came to me when thinking of our Thanksgiving table.  I wanted everyone to have leaves to write gratitude/blessings on, to add to a “thankful tree” centerpiece I threw together.

To make the tree:  I grabbed a mason jar I had painted red, removed the ornaments from my Halloween paper ornament tree and put the tree in a hole I cut in the jar lid, added some stones to hold the tree in place, and topped it off with a fall bow.

Placecard2

Thanksgiving Placeholders; I embellished my stands with leaves I die cut from paint swatches with my Sizzix.  I hole punched them at the base and tied them to the wire with leftover hemp cord from a prior project.  For the name cards, I stamped cardstock circles with monogram letters and mounted them on scalloped circles.

photo(2)

photo(4)

 For Christmas placeholders, I attached a foil poinsettia (tutorial here) to the base, and a shiny silver bow.  I used the interference blue UTEE to create the cube because it looks like snow.

UTEE Ultra thick embossing enamel project tutorial

How to Make Place Cards


Duct Tape Poinsettia Gift Topper

[pinit]

Duct Tape Poinsettia Gift Topper #Christmas #Repurpose #Christmas #DIY @savedbyloves

Duct Tape Poinsettia Gift Topper #Christmas #Repurpose #Christmas #DIY @savedbyloves

What can’t you do with duct tape, really?  Today, I have a great gift topper idea for your Christmas wrapping, using duct tape and a foil lid.  Make several and create a wreath, or garland.  This is a unique, inexpensive way to add a handmade touch to your presents this year.

I used my poinsettia Sizzix die, but I showed you in this DIY poinsettia wreath tutorial a great template for creating poinsettias by hand from Eri Doodle.  This can be done easily by hand.

SUPPLIES:

Poinsettia die or template

Foil lid (available at Sam’s Club in 15 packs for $13)

Red and/or white Duct tape

Scissors

Green Acrylic paint and primer or green Duct tape

Hole punch

Brad

Gold or yellow beads for center

Clear, tacky glue

Duct Tape Poinsettia Gift Topper #Christmas #Repurpose #Christmas #DIY @savedbyloves

TUTORIAL:

Apply strips of duct tape over the foil lid, making sure to smooth out any air bubbles as you go.  I use the flat inner section of the lid only.

Duct Tape Poinsettia Gift Topper #Christmas #Repurpose #Christmas #DIY @savedbyloves

Continue until entire flat part of lid is covered if you want to make several flowers, or just do 2 strips of duct for a single flower.

Cut out the duct tape covered area with scissors and either die cut or trace template with a pen and cut out petals by hand.  You will need 2 green petals for each flower for the leaves.  For this, primer the lid and paint with green acrylic paint (I used Martha Stewart Glitter paint in green) or just use green duct tape.  I wanted the glitter look, and wasn’t too thrilled with the shade of green duct tape in the store.

The purpose of the foil is so that you can shape your leaves by creasing them down the center and curling the tip under for a greater 3D effect.  This foil holds the shape great, but you still get the color and gloss of the duct tape.

For flower assembly – Refer to the pic below for petal arrangement.  You can use glue like I did in the paper example pictured, but I prefer to punch a hole at the bottom of each petal (stack several petals and punch them at once to save time), and at the center of the central start, then put a brad through all the holes to connect the parts.

That is it.

Duct Tape Poinsettia Gift Topper #Christmas #Repurpose #Christmas #DIY @savedbyloves Duct Tape Poinsettia Gift Topper #Christmas #Repurpose #Christmas #DIY @savedbyloves

Privacy Policy