DIY Upcycled Cookie Sheet Memo Board

Easy Upcycle Cookie into Copper Patina Magnet Board @savedbyloves @petscribbles

Hi everyone! I’m Laura from Pet
Scribbles
, and I’m thrilled to be guest posting for Johnnie
today!

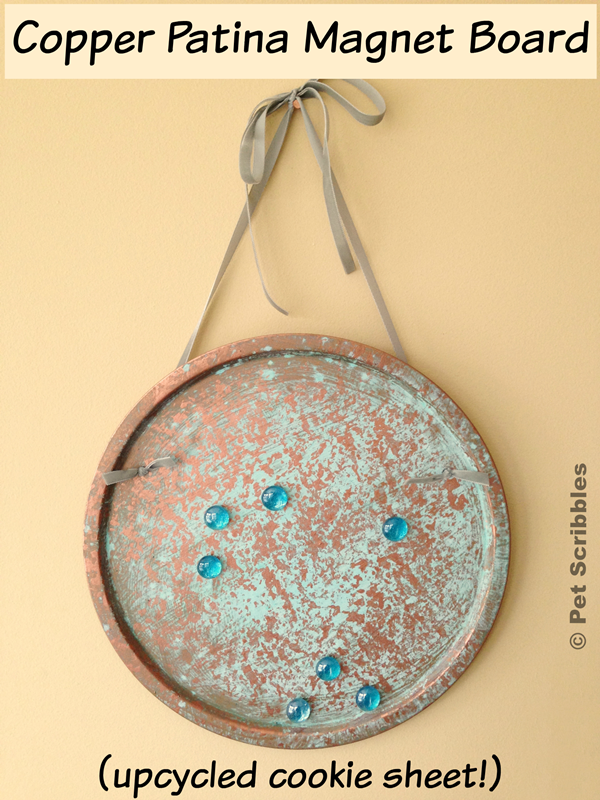
I’ve got a fun DIY project to share: a copper patina magnet
board from an upcycled cookie sheet!

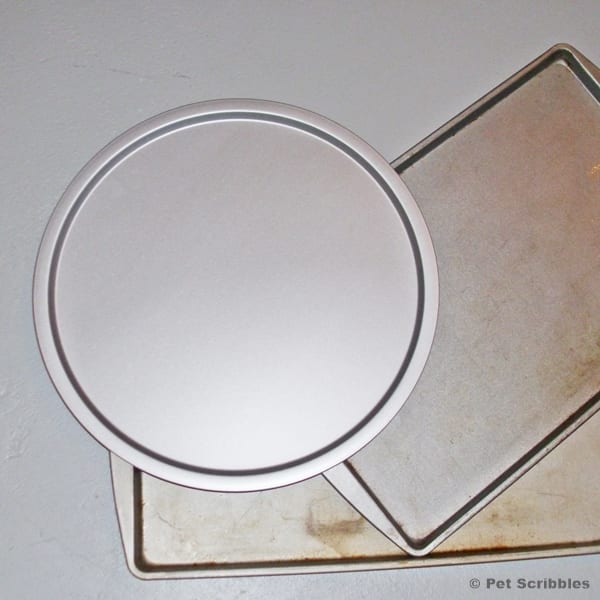
After seeing so many cookie sheet makeovers on Pinterest, I began
collecting some of our older ones. I also bought this new round one at
the dollar store:

Copper Patina Magnet Board

As regular readers of my blog know, I love the look of copper and
patina. I’ve made over quite a few pieces using this technique, from
glass
vases
made to look like copper pipes to large wooden planter boxes made to look
like metal. In each DIY, the steps are the same but the patina effect is
always different – just like real patina on aging copper.

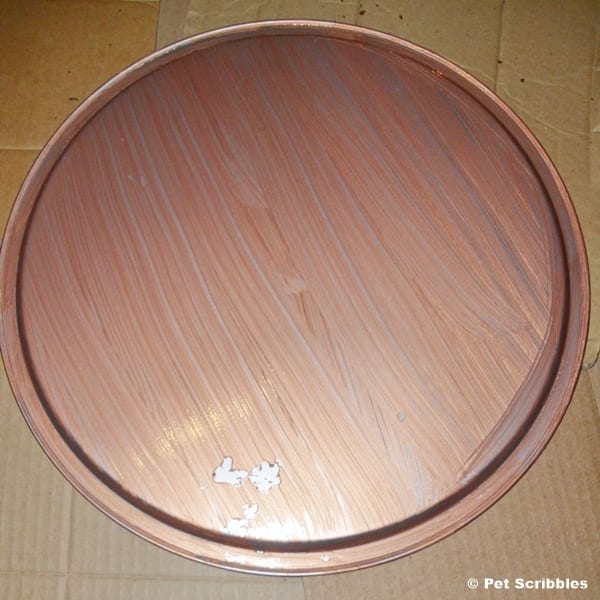
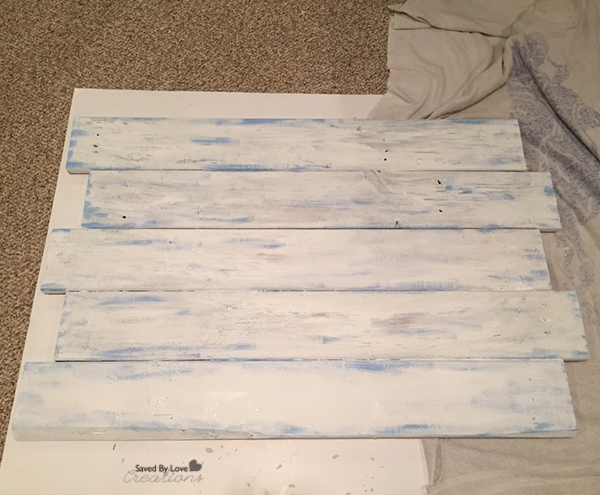
Step One: Apply one coat of Modern Masters Copper Reactive
Metallic Paint to both sides of the cookie sheet.
Let dry.

For many surfaces, I use the Metal Effects Primer (also by Modern
Masters) as the first coat. On metal, it isn’t necessary as the first
step. However, as you’ll see in the image below, the first coat of paint
did go on a bit more streaky than I would have liked. (Using a primer
always provides some tooth for any subsequent coats of paint to adhere to.)

Copper Patina Magnet Board

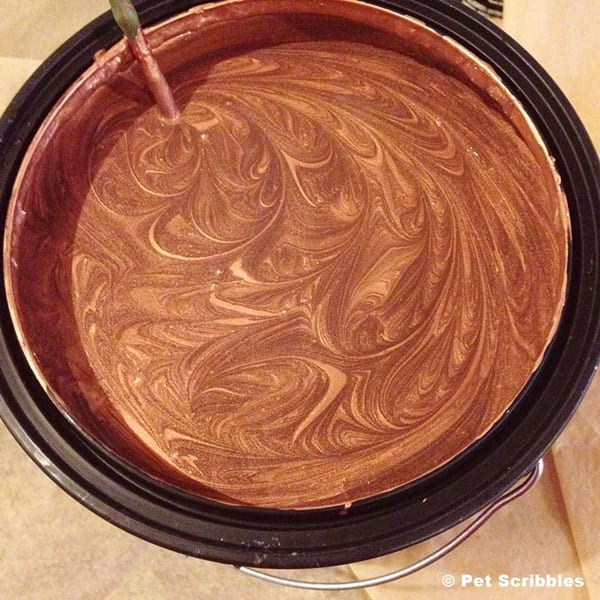
Step Two: Apply a second coat of the copper paint to the back
side of the cookie sheet only.
Let dry.

Isn’t the paint gorgeous? There’s real metallic particles in the paint,
which is what reacts with the patina solution that will be added in the
next steps.

Copper Patina Magnet Board

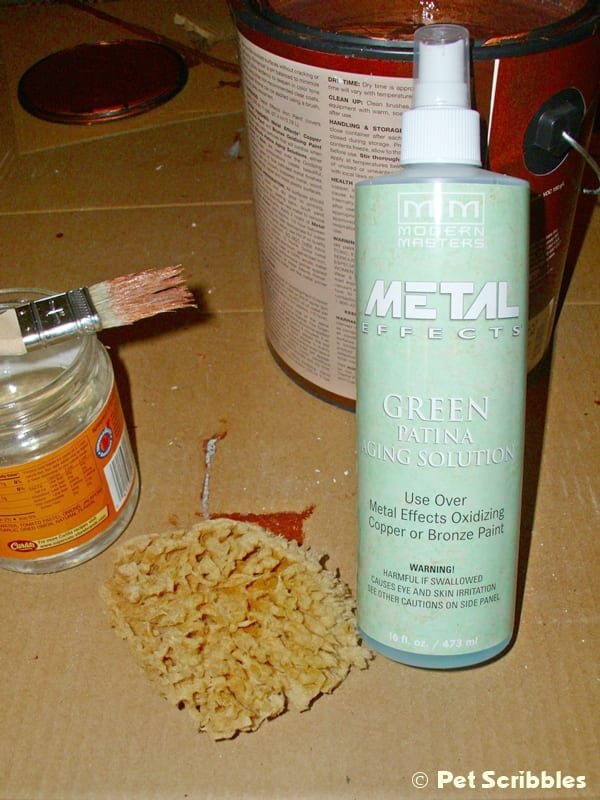
Step Three: Apply a new coat of the copper metallic paint to the
front of the cookie sheet, then immediately spray the patina solution
onto the cookie sheet right over the wet paint.
The patina
solution comes in blue and green. I used the green shade:

Copper Patina Magnet Board

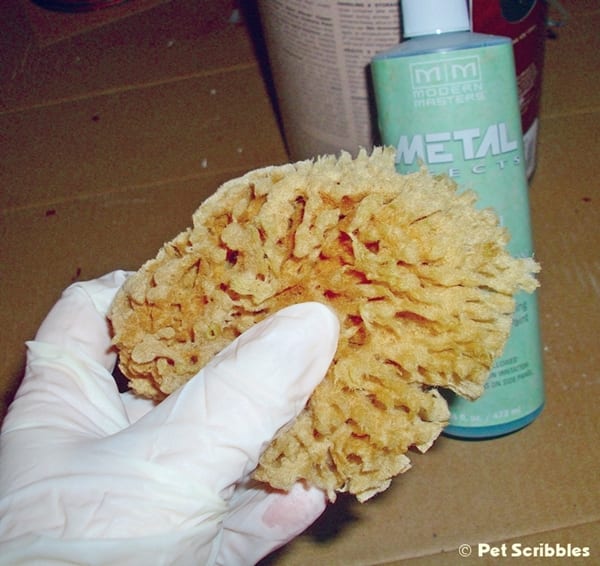
Using a sea sponge, I then played around pouncing the solution on the
cookie sheet, just making random patterns. It isn’t necessary to do
this, but it sure is fun!

Copper Patina Magnet Board

Step Four: Add a bit more of the copper paint, if
desired.
After everything dried overnight, I used the same sea
sponge and pounced a bit more copper paint here and there onto the front
of the cookie sheet. There’s no right or wrong way to do this, just play
with the look until you love it.

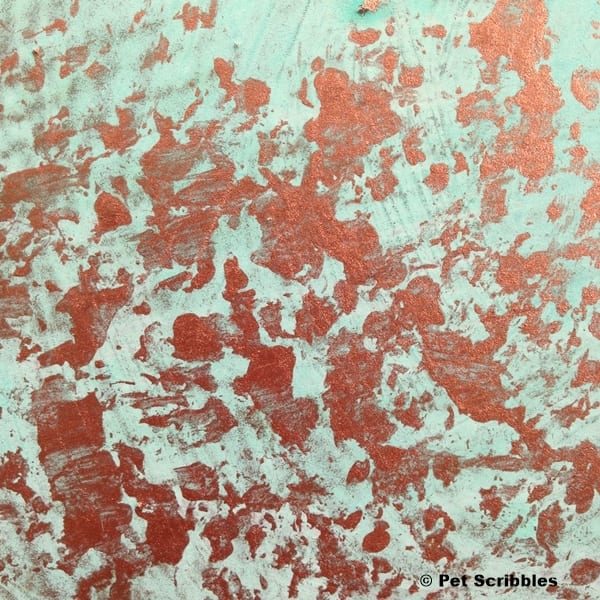
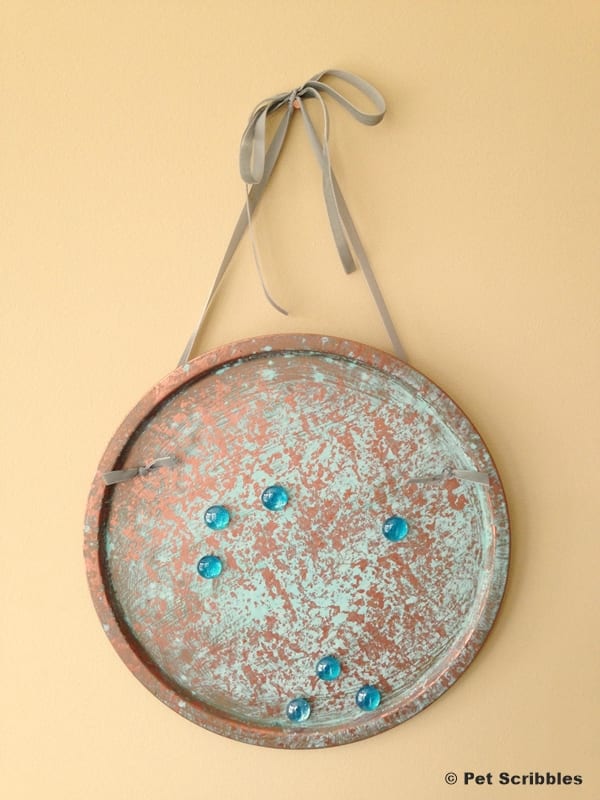
Here’s a close-up of the gorgeous patina finish:

Copper Patina Magnet Board

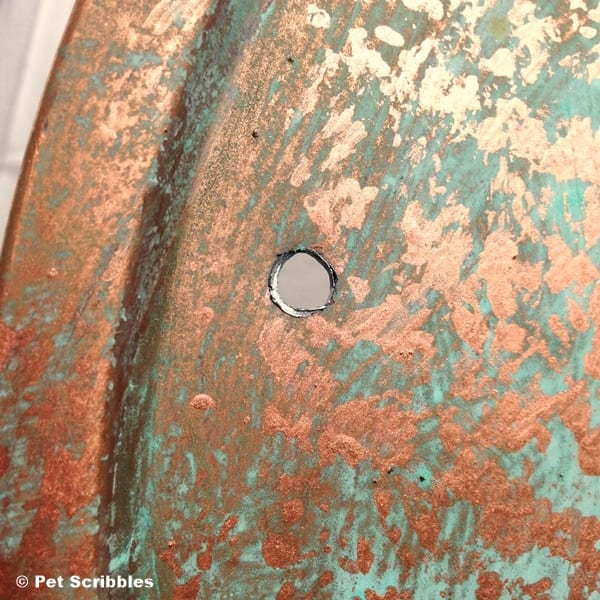
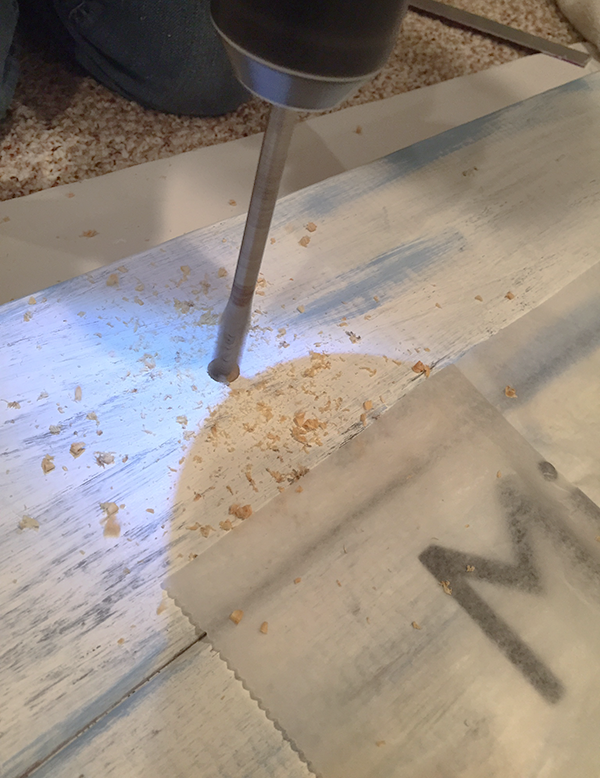
Step Five: Drill two holes into the cookie sheet. These
holes will be where you thread your ribbon through, to make the hanger
for your magnet board.

Copper Patina Magnet Board

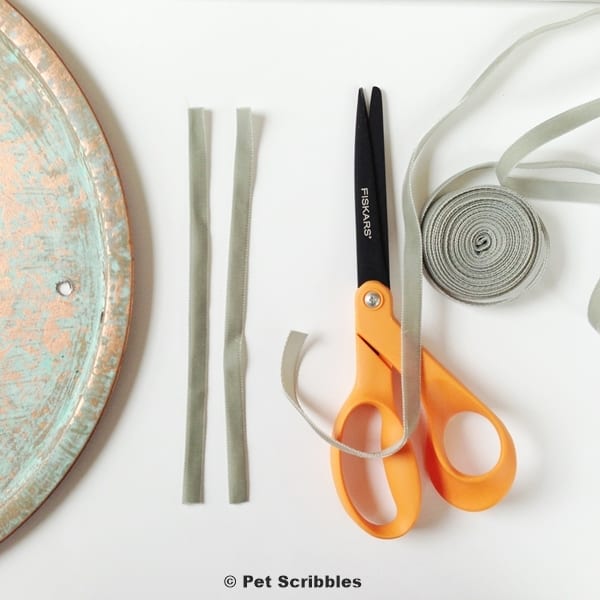
Step Six: Cut two pieces of thin velvet ribbon (or a ribbon of
your choice), which will become small bows on the front of the magnet
board.
Cut two longer pieces of the same ribbon, which will be
used to create the hanger. (I didn’t measure my pieces, instead I just
eyeballed it.)

Copper Patina Magnet Board

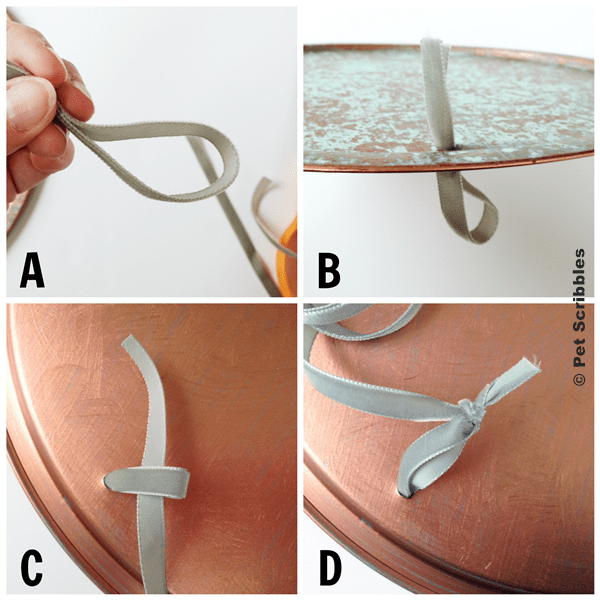
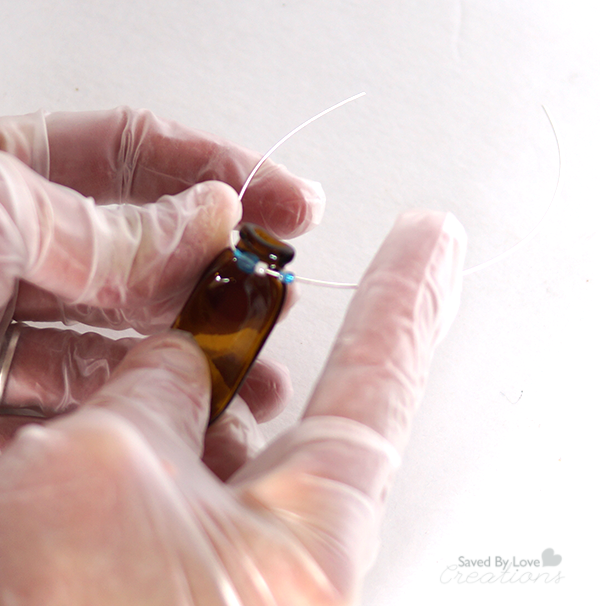
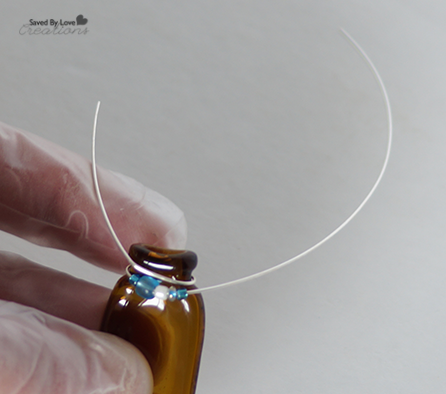
Step Seven: Create the velvet ribbon hanger. Make a
loop with the smaller piece of ribbon (A), then thread
it (B) through the drilled hole, with both ends coming
through to the front. (C) Turn the tray over and slide
one end of the longer ribbon through the loop of the smaller piece.
(D) Tie the longer piece onto that loop with a simple knot.

Repeat this step for the other drilled hole.

Copper Patina Magnet Board

Step Eight: Pull the ends of the smaller pieces of ribbon all
the way through the drilled holes.
(They will be stopped by the
knots underneath that you made in Step Seven.

Step Nine: Tie the ends of each ribbon together with a simple
knot, then trim the edges to a length you like.
I trimmed mine
so each looks like a very basic bow shape and covers the holes
completely. (See image below.)

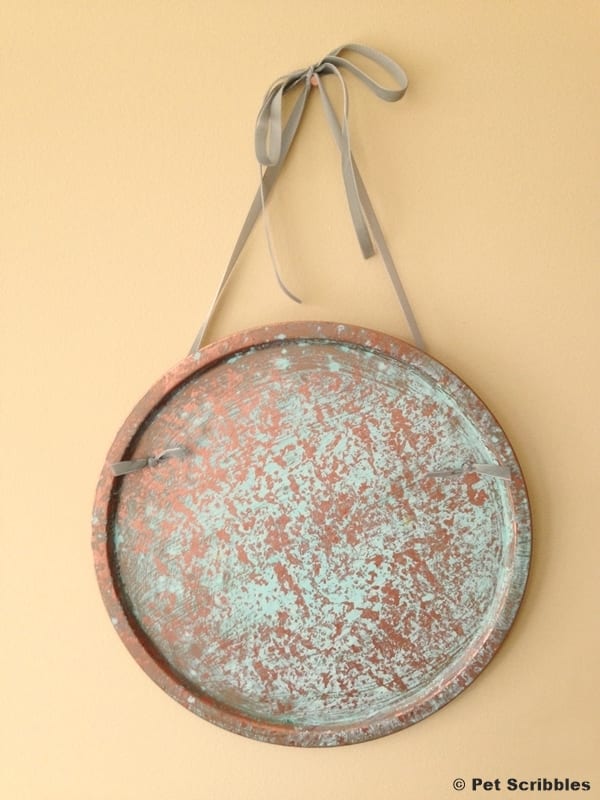
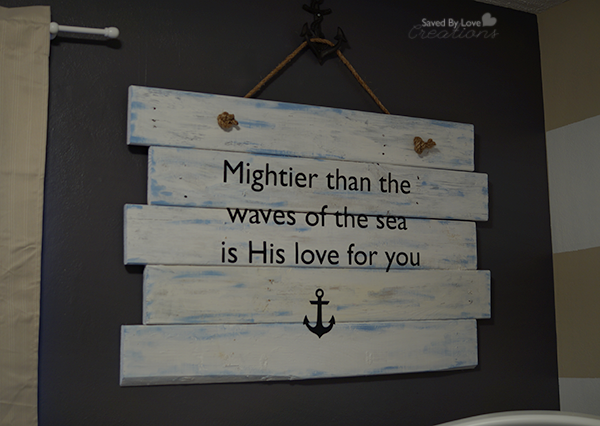
Step Ten: Tie the long ends together and make a large, floppy
bow.
Hang up on the wall and enjoy!

Copper Patina Magnet Board

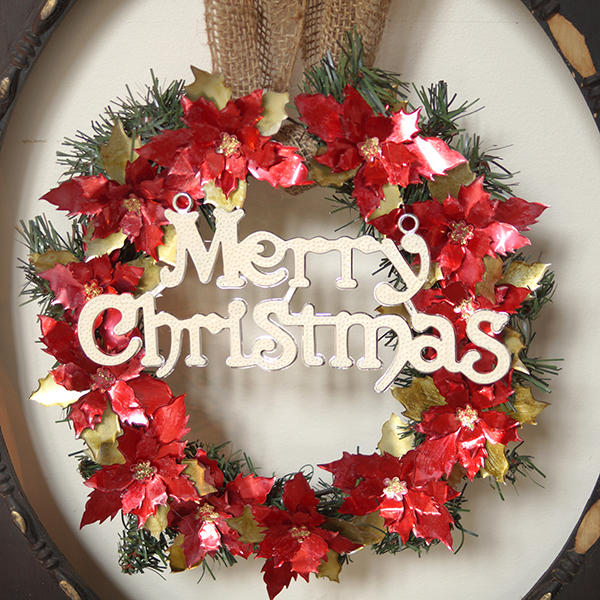
Since it’s Christmas time, I decorated my magnet board with some of my
favorite vintage Christmas postcards. (I also made the glitter marble
magnets, and you can find that tutorial here.)

Copper Patina Magnet Board

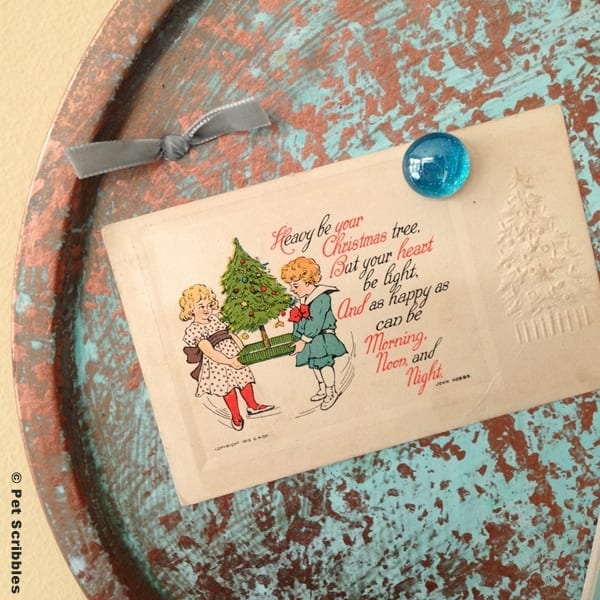
I added a sprig of a faux pine branch too.

upcycled-cookie-sheet-memo-board

And when the Christmas season is over, my magnet board will be ready to
take on the new year and hopefully keep us more organized! (Unless I
decide to decorate it with more vintage postcards!)

Copper Patina Magnet Board

I’ve been a long-time admirer of Johnnie. Whether she’s crafting
bracelets or building furniture, her creativity knows no bounds!

Thanks Johnnie for having me guest post today, and thank you Saved By
Love readers too!

Happy crafting!

~Laura

50 Plus Favorite Pottery Barn Knock Offs

50 Plus Best Pottery Barn Knock Off Ideas from @savedbylovesWho doesn’t love getting designer home decor and furniture for a fraction of the price? Today I am sharing our favorite Pottery Barn knock off decor DIY tutorials from around the web. If we missed your project, leave us a link!


DIY Alcohol Ink Aluminum Can Christmas Wreath

Aluminum Can Poinsettia Wreath by @savedbyloves

If you are anything like me, you love Ranger Ink products.  I am particularly obsessed with alcohol inks, which paint vivid color on non-porous surfaces such as aluminum and glass.  How excited was I to be invited to share a Christmas project on the Ranger Ink Blgo?! Very. Come see how I created this Recycled Pop Can Poinsettia Wreath for less than $3 with cans, dollar store supplies and alcohol inks! With tons of other projects to inspire you, you will want to make sure to look around while you are there!

If you like this project, I have lots more you don’t want to miss!

Fall Leaf Aluminum Can Wreath with Alcohol Inks

Aluminum Can Angel DIY

50+ Aluminum Can Crafts

Psalm 93 DIY Wood Pallet Nursery Sign

DIY Nursery Decor Wood Pallet Sign Psalm 93 @savedbylovesMy friend Jordan will be a momma any day now. I wondered if I would end up delivering the little guy the day she came over to make this nursery wall art, but he is not here yet! Today I am sharing how we created this lovely Psalm 93:4 sign for next to nothing out of pallet wood. It is so perfect in her nautical themed nursery! Download the cut file below and follow the steps to make your very own!

SUPPLIES:

Five pallet wood planks (Here is my video: How to Break Down Wood Pallets)

White chalky paint

Blue acrylic or chalky paint

Black vinyl for your die cut machine and transfer tape if you are die cutting the letters (if you don’t have a die cut machine, you could download the phrase below and transfer the letters to the sign to hand paint it like I showed you here: DIY Hand Painted Rustic Wood Signs)

Die Cut machine and software to trace jpg file provided below (this is not needed if you are hand-painting the sign as shown in the previous link)

Drill and 1/2 inch hole saw bit

Rope

Kreg jig

1 1/4 inch Pocket Hole Screws

2 inch flat paint brush and round stencil brush

Psalm 93:4 text download

Free Anchor Clip Art

Mod Podge Matte Finish

TUTORIAL:

DIY Nursery Decor

Cut your boards to about 45 inches wide and attach them with pocket holes, staggered as shown – (Here is How to Use a Kreg Jig).

DIY Nursery Decor2

Paint the sign white with chalky paint (we used Folk Art Home Decor Chalk).

Let that dry, then dry brush blue randomly as shown.  We used a round stencil brush for this.

Let dry and cut or print and transfer text and anchor.  We used a 12×24 inch mat  and filled the entire area with the text.  We sized the anchor to 5 inches and cut everything in black vinyl.

DIY Nursery Decor3

Center and adhere vinyl letters and anchor using transfer tape. Seal letters and sign with Mod Podge Matte or desired finish.

DIY Nursery Decor6

Mark desired placement of holes and drill with spade bit to fit diameter of rope you are using. (We have the letters covered in this image because the Mod Podge wasn’t dry and the saw dust would stick in it.  Don’t judge, we were in a hurry)!

DIY Nursery Decor8We inserted the rope and hung it from a cool anchor hardware piece that Jordan found at Hobby Lobby for just $3!

DIY Nursery Decor Ideas

We LOVE it!! Jordan did a fantastic job with this nursery, and our sign tops it off perfectly.

We hope you are inspired to create your own!

DIY Snowflake Window Garland

DIY Christmas Decor Idea


Today I am sharing with you a simple way to add some wintery snowflake decor to your house for the season! This project is super quick, easy and cheap with the right supplies. I love it with the first snowfall of the season painting the landscape beyond the window.  Perfect!

DIY Snowflake Window Garland @savedbyloves

SUPPLIES

Snowflake Decor

White paper (I used filter paper I was given from the local recycling center)

Sizzix Snowflakes #3

Sizzix Snowflake With Texture Fade by Tim Holtz

Clear string

Hot Glue and glue gun

Sticky foam mounts or other removable tape

TUTORIAL

Die cut several snowflakes from white paper.

Add a line of hot glue to the back of the snowflakes and adhere the clear string.

                                                    Continue adding snowflakes this way until the strand is as long as you want.

Snowflake Decor DIY

I made 7 strands of snowflakes and stuck them to the window’s “ceiling” using removable foam mounting tape.

If you don’t have a die cut machine, you can make your paper snowflakes with this detailed tutorial from Instructables:

How to make Paper Snowflakes

For more Christmas inspiration, visit our 50+ Christmas Kid’s Crafts:

Christmas-Kids-Crafts-to-Make-Pinterest-Saved-By-Love-Creations1

Make gifts for your loved ones on the cheap with our 50+ Gifts to Make for Under $10:

50 Christmas gifts to make for less than $10

Upcycle Wine Corks to Business Card holders & More

DIY Upcycle a Wine Cork to Card Holder for place cards, business cards and more @savedbyloves

Display your business cards in eco-friendly style with this simple wine cork to card display upcycle. The same cork can be used for placeholder cards, or to display gift cards, just in time for the holidays. This project is free and requires just a cork and a craft knife!

Wine Cork Business Card Holder

MATERIALS


Wine Cork Business Card Holder 2

Cork

Craft Knife

Gift card or Credit card

Business cards

DIRECTIONS


Wine Cork Business Card Holder 3

Wine Cork Business Card Holder 4

 Use the craft knife to level the bottom of your cork by shaving a small section flat, down the length of the cork.

Wine Cork Business Card Holder 6

 On the opposite side of the cork, make a slice with the knife down the length of the cork.

 Wine Cork Business Card Holder 7Make the slit wider by running a credit/gift card down the length of the slit.

 DIY Upcycle a Wine Cork to Card Holder for place cards, business cards and more @savedbyloves

I told you it was easy!  You could add a string to one end of the cork and hang these on your Christmas tree with gift cards, or set them next to the stockings on the mantel as a creative way to display your gift cards!

For more inspiration, visit our 50+ WINE CORK CRAFTS:

25 DIY Awesome Advent Calendars to Make

25 Awesome DIY Advent Calendars to Make @savedbylovesSince the mid 1800’s, we have been counting down to Christmas with advent calendars, and the tradition continues.  It is a favorite childhood Christmas memory for people around the globe. Get a jump start on your Christmas anticipation with this round-up of 25 amazing DIY advent calendars you can make!


DIY Fused Mini Amber Glass Bottle Earrings

DIY Fused Glass Bottle Earrings @savedbylovesSo, I am crazy excited to share today’s jewelry tutorial with you. These earrings are my go to piece for several reasons.  They are beautiful, unique and go with all kinds of outfits.  I got the idea when flattening wine bottles in my kiln.  I remembered the tiny bottles, or vials that people fill with mica powder and little notes and thought it would be so cool to flatten them.  I wasn’t sure what I would do with them flat, but as soon as the kiln cooled and I laid eyes on them, I knew I wanted to wire wrap and wear them!

MATERIALS

7 Gypsies Amber Apothecary Bottles

Round nose jewelry pliers

Flat nose jewelry pliers

20 gauge jewelry wire

Flush wire cutter

Earring findings

10 coordinating seed beads

Microwave kiln

 TUTORIAL

Fuse your bottles, one at a time in your microwave kiln.  I showed you how to use that here: DIY Wine Bottle Earrings. You can also use a regular kiln if you have that. Let them cool to room temperature before continuing.

How to wire wrap jewelry

Cut 7 inches of wire and string 5 beads onto it.

How to make fused glass jewelry

Place beads in front and situate wire at neck of fused bottle as shown.

How to wire wrap jewelry2

Bring the left side wire around the bottle neck and back to the front as shown.

How to wire wrap jewelry3

Wrap both wire ends around the neck a few times, ending with 2 wire tails in the back as shown.

How to wire wrap jewelry4

Wrap the two ends as shown so that they are vertical.

How to wire wrap jewelry5

Coil one end around the other as shown.

How to wire wrap jewelry6

Trim the end of the wire you just coiled.

How to wire wrap jewelry7

Use the flat nose pliers to bend the remaining tail to form a 90 degree angle.

How to wire wrap jewelry9

With the round nose pliers, form a loop as shown.

How to wire wrap jewelry10

Thread the ear wire onto the loop, then trim the excess tail.

Fused Amber Glass Bottle Earrings

I love them!  I can’t wait to make more.  Next I will use clear vials and color them with alcohol ink.  Exciting stuff!

DIY Recycled Glass Bottle Frames

Photo In a Bottle Upcycle from @savedbyloves

Display meaningful photos in a unique way while busting through your stash of vintage buttons, ribbons, fabric scraps and found objects. These little medicine bottles can be found in thrift stores, at tag sales and online for cheap.  Use them for Christmas gifts, or as photo frames for yourself!

Photo In a Bottle 6


MATERIALS

Photo In a Bottle 1

-Variety of antique medicine and food bottles

-Photos sized to fit in bottles and printed in black and white or sepia tone on copy paper

-Glitter, sand or other filler

-Found objects, beads, vintage buttons, old keys and other embellishments

-Decorative ribbon, twine, lace, burlap and fabric scraps

-Corks for bottle tops

-Copper craft wire gauge 20-22

-wire cutter

-scissors

-hot glue

-Bamboo skewer or pencil

DIRECTIONS


  1. Clean bottle and remove any labels. Let dry.

Photo In a Bottle 4

  1. Add sand or glitter using funnel or folded paper scrap
  2. Drop in a few beads, buttons or other small meaningful objects.

Photo In a Bottle 5

  1. Roll the photo into a tube and insert it into the bottle. Use a skewer to unroll it and flatten it against the inner surface of the bottle.
  2. Embellish outside of bottle with ribbon, lace, twine, vintage pearls and other scraps. Glue on buttons and found objects with hot glue.

Photo In a Bottle 10

  1. Place cork in bottle and embellish with vintage buttons, beads or brooches. Secure with wire wrapped around cork and through button. Add a dab of hot glue at the base of the button to hold in place on top of the cork.

Photo In a Bottle Upcycle from @savedbyloves

Upcycled Frap Bottle Frosty Heart Lanterns

Frosty HeartsDIY Upcycled Frap Bottle Votive Holders @savedbyloves

Handmade lanterns are all the rage. With adhesive stencils and paints made just for glass, creating fun designs on bottle is easier than ever. This project involves cutting the bottles roughly in half. Frost and glitter paint are used with heart stickers in a masking technique, so that light from the candles shines through the frosty heart shapes. Create a warm glow for your Valentine’s Day dinner at home!


Frosty Hearts Frap Bottle Votive Holders 7


MATERIALS

– Frappuccino bottles

–Martha Stewart frost glass paint in white

– glitter glass paint in red and pink

– heart stickers cut from foil tape or adhesive vinyl

– cosmetic sponge

– Rubbing Alcohol

– Lint free dry cloth

– Protective gloves

– heart stickers that adhere well to glass

-Surface protector such as newspaper or craft sheet

-bottle cutting supplies (See How to Cut Glass Bottles)

DIRECTIONS

  1. Remove labels with soapy water or Krylon Adhesive Remover. Clean and dry bottles.

Frosty Hearts Frap Bottle Votive Holders 2


  1. Cut bottles roughly in half. You don’t have to be exact. You just want to be able to lift off the top and place a votive candle inside when you are finished.
  2. Protect your work area with newspaper or craft sheet.

Frosty Hearts Frap Bottle Votive Holders 1


  1. Paint bottles by dabbing thin layer of frosty glass paint in white with a cosmetic sponge. Don’t go over the same area more than once. It is best to apply several light layers, allowing 10-15 minutes of dry time between to achieve the look you want. Applying too heavily leads to streaks and splotches that you won’t like. Once you are happy with coverage (1-3 coats should do it) let dry for about 30 minutes before moving onto the next step.

Frosty Hearts Frap Bottle Votive Holders 3


  1. Vinyl and foil tape work well for heart stickers. Cut out hearts using die cut machine, freehand or template (see Hearts page ?)
  2. Apply Heart stickers where you want light to come through the frosty heart. I went for almost center, spanning the cut seam.

Frosty Hearts Frap Bottle Votive Holders 4


  1. Paint one jar with glitter pink, and the other with glitter red. Several light layers with 10 minutes or more dry time in between is best.
  2. After your final layer, remove the heart stickers with tweezers or a craft knife, being careful not to smudge adjacent paint.
  3. Let dry overnight, with top and bottom apart so that they don’t dry stuck together.
  4. Lift off top and place candle.
  5. Light and enjoy!


EXTRA TIPS

○ Masking Tips – Foil tape in the electrical section at the hardware store works great for these projects. It adheres well so that the paint doesn’t seep underneath, but doesn’t disturb any base layers of paint when removed. A large roll of it is under $8 and lasts years. Don’t leave the stickers on overnight, or the surrounding paint will peel away with them upon removal. You want to remove them soon after your last coat of paint.


Privacy Policy