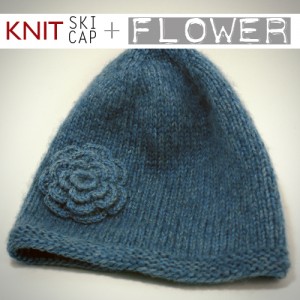
Knitted Hat With Garter Stitch Brim and Flower

knit hat pattern with brim

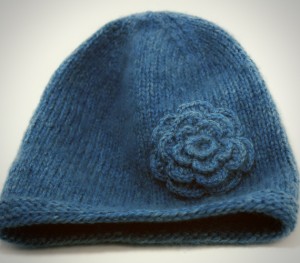
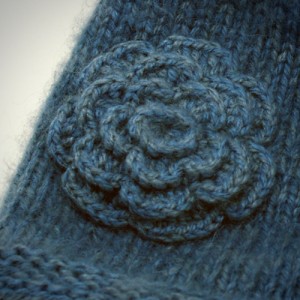
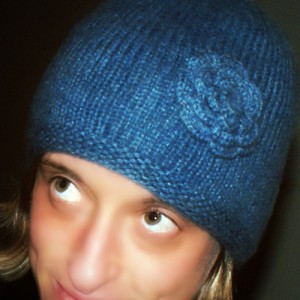
I am crushing on this cute hat with flower embellishment, big time.  It is so fun to wear and simple to knit.  I knitted the hat last year, then crocheted the flower recently to jazz things up a bit.  It is the perfect addition and I am excited to share how I did it with you.  If you make your own, come share pictures with me, please!
how to knit a hat

***Pattern***

Worsted or aran weight yarns may be used, but please check gauge.
Gauge 17sts x 26 rows in stockinette stitch = 4 inches or 10cm
Gauge does not have to be exact, as the hat is stretchy.  This pattern makes a hat to fit most teens and adult females.

5.5mm (US #9) dpns or circular needles

If using circular needles, a length of 40 inches is recommended for magic looping throughout.

Garter Brim Hat

free winter hat knit pattern

Cast on  72 sts.  Join in the round, place marker for end of round.

BRIM:

Rows 1-8:  Begin working in stockinette stitch; knit one row, purl one row – for the brim of the hat.

BODY:

Rows 9-40:  Change to stockinette stitch (knit every row) and continue until the hat measures 6.5 inches from the cast-on edge (about 40 rows).

CROWN:

Decreasing for crown:  (switch to DP needles when necessary)
Row 1:   *K6, K2tog*  repeat to end of row
Row 2:    Knit (on this and all even numbered rows)
Row 3:   *K5, K2tog*  repeat to end of row
Row 5:   Knit across all stitches
Row 7:  *K4, K2tog*  repeat to end of row
Row 9:  *K3, K2tog*  repeat to end of row
Row 11: *K2, K2tog*  repeat to end of row
Row 13: *K1, K2tog*  repeat to end of row
Row 15:  *K2tog*  repeat to end of row
Row 16:  Knit across.  Break yarn leaving a tail for securing.

Run yarn through remaining stitches and pull tight to secure.   Weave in ends.

FLOWER (CROCHET)

free knitting patterns

Using Crochet hook size H, and the same yarn used for the hat:
ch 5. Join ch with a sl st
forming a ring.
Round 1 (right side) Ch 3 (counts as 1 dc), work 21
dc in ring, join round with a sl st in 3rd ch of begin-
ning ch-3—22 dc.
Round 2 Ch 6 (counts as 1 dc and ch 3), skip next
st, *dc in next dc, ch 3, skip next dc; repeat from * 9
times more, join round with a sl st in 3rd ch of
beginning ch-6—11 ch-3 lps.
Back row of petals
Round 3 *Work (sc, hdc, 3 dc, hdc, sc) in next ch-3
lp; repeat from * around, join round with a sl st in
first sc. Fasten off.
Front row of petals
Round 4 With right side facing, join CC with a sl st
in any skipped dc of round 2, ch 3, *sl st in next
skipped dc, ch 3; repeat from * 9 times more, join
round with a sl st in first sl st—11 ch-3 lps.
Round 5 *Work (sc, hdc, 3 dc, hdc, sc) in next ch-3
lp; repeat from * around, join round with a sl st in
first sc. Fasten off.
Front row of petals
Round 6 With right side facing, join CC with a sl st
around post of any dc of round 1, ch 2, sk next 3 dc,
*sl st around post of next dc, ch 2, sk next 3 dc, sl st
around post of next dc, ch 2, skip next 4 dc; repeat
from * once more, join round with a sl st in last
dc—5 ch-2 lps.
Round 7 *Work (sc, hdc, 2 dc, hdc, sc) in next ch-2
lp; repeat from * around, join round with a sl st in
first sc. Fasten off

FINISHING
Weave in all loose ends and sew to hat.

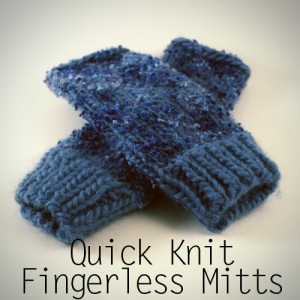
Quick Fingerless Mitts for Last Minute Gifts

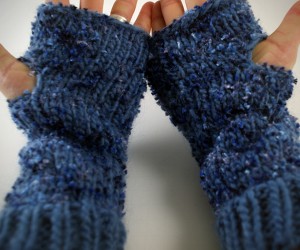
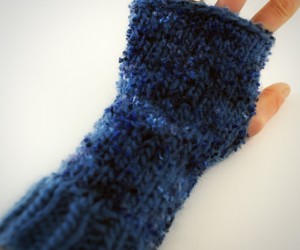
Fingerless Mitts

This pattern is for small women’s size

Size 8 Circular Needles or DPNs
Worsted Weight Yarn and fun yarn (optional)

Instructions:

Cast on 24 sts and distribute on circular needles (or DPNs)
Rows 1-8: k2p2 ribbing

**Pick up fun yarn at this point if you are using it**
Row 9-27: st st around (21 rounds)
Row 28: k5, pm, m1, k1, m1, pm, k18 (26st)
Row 29: Knit
Row 30: knit to marker, sm, m1, knit to marker, m1, sm, k18.
Row 31-34: Repeat rows 29 & 30 twice more
Row 35: k5, remove marker, K1 BO 8, remove marker, k18 (24st on needles)
Row 36-43: Knit around
Bind off in pattern.
Sew in all ends.

Free knitting pattern

Free fingerless mitt knitting pattern

Easy Crochet Scarf Pattern

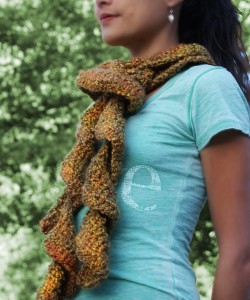
Easy Crochet Scarf

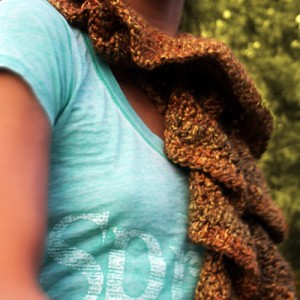
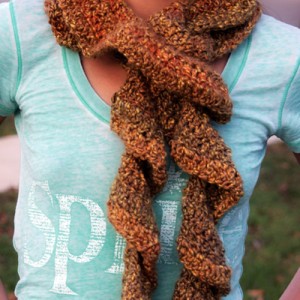
It was love at first stitch with me and Lion Brand Homespun yarn.  Rummaging through the ol’ yarn supply, I found a single skein of this fluffy, soft, variegated fiber in the warm color scheme “Bourbon”.  A simple scarf I whipped up a few years back came to mind, and I got busy.   Today I will share with you this beginner level, super fast pattern that creates an elegant spiral effect, using evenly spaced increases every row.  The only stitch you need to know besides chain stitch is double crochet.  I made this in a single evening while catching up on a miniseries.  I plan to make a few more for Christmas gifts.  This project is ideal for sharing some holiday handmade love!

Easy Crochet Scarf

You will need:

  • Size K crochet hook
  • Single skein of Lion Brand Homespun, or other bulky weight 5 yarn
  • Netflix 🙂

Instructions:

  • Chain 144
  • Row 1:  Double crochet in fourth chain from hook, *double crochet in next chain, 2 double crochet in next chain; repeat from * to end of row.
  • Row 2: Chain 3, turn, double crochet in same space, *double crochet in next two double crochet, 2 double crochet in next double crochet; repeat from * to end of row.
  • Row 3: Chain 3, turn, double crochet in same space, *double crochet in next three double crochet, 2 double crochet in next double crochet; repeat from * to end of row.
  • Row 4: Chain 3, turn, double crochet in same space, *double crochet in next four double crochet, 2 double crochet in next double crochet; repeat from * to end of row.  Fasten off.  Weave in ends.

Crochet gift ideasIf you have never crocheted, I hope this inspires you to learn.  It brings great joy in many ways.  For my favorite resources to get you started, visit my craft links page and look under “Crochet”.  I taught myself using Crochet Cabana, which you will find linked there.  Happy hooking!

Easy Crochet Shawl Pattern

Crochet Shawl Pattern

Are you working on your handmade Christmas gifts yet?  This “8-hour” shawl is a quick, simple, and beautiful gift to mark some girlfriends off of your list.  I found the pattern by A la Sascha on ravelry, and it is free to download, here.

Shawl Pattern

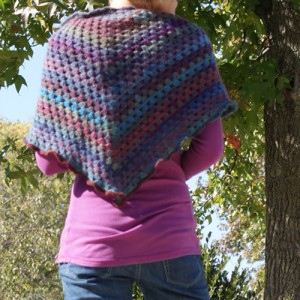
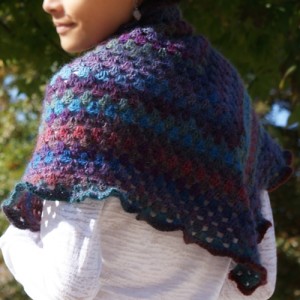
The yarn I used for this project is  a lovely worsted weight, soft wool blend; Lion Brand Amazing in Ruby.   The  vivid colors and a light softness are irresistable.  The pattern calls for 3 skeins, but I wanted the shawl larger, so I used 4 skeins, and crocheted 33 rows before beginning the edging, which I did as the pattern instructs.  I love the ruffled edging.  I finished this project in 3 days, and my niece is gonna love her new shawl.

What is on your hook today?

Crochet shawl pattern

Quick Lacy Shawl Crochet Pattern

Free shawl pattern

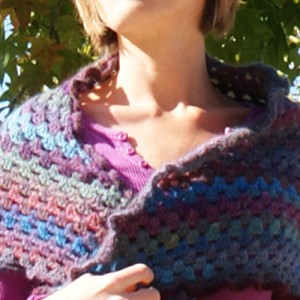
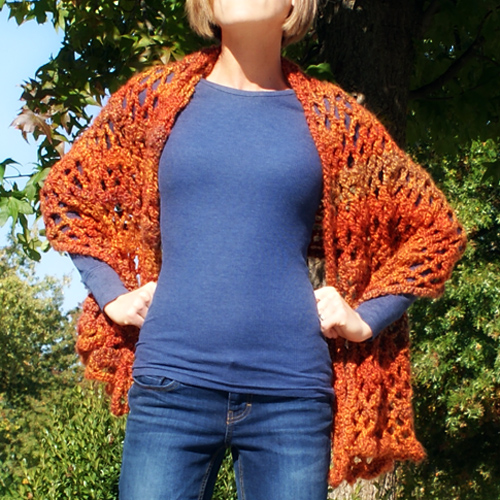
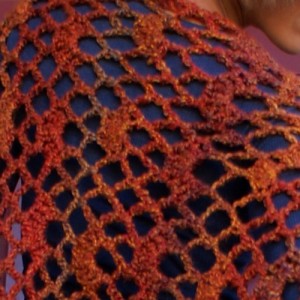
It is time for crochet hooks and knitting needles everywhere to get stitching on those handmade holiday gifts.  As wonderful as it would be to have the time to make everyone on our lists a luxurious afghan, that just isn’t a possibility for me, and I am assuming you are in the same boat!  Prayer shawls make perfect gifts and work up in a jiffy.  Here is one that I recently created with  the intention of gifting it, however the verdict is still out on whether or not I will be able to part with it.  I should have know better than to make it in my favorite color.

Crochet Shawl

Supplies:

  • Size K Crochet Hook
  • Homespun yarn or bulky weight (5) yarn of your choice; 2 skeins (I used Homespun Wildfire
  • Yarn needle for hiding tails

Instructions:

  • Ch 74.
  • Row 1: Sc in 2nd ch from hook, ♥ch 5, skip 3 chs, sc in next ch; repeat from ♥ to last 4 chs, ch 2, skip next 3 chs, tr in last ch; 18 sps
  • Row 2: Ch 1, turn; sc in first tr, skip next ch-2 sp, ♥♣ (2 dc, ch1, 3 dc, ch 1, 2 dc) in next ch-5 sp ♣ ch 5, sc in next ch-5 sp; repeat from ♥ four more times, then repeat from ♣ to ♣ once, ch 2, tr in last sc.
  • Row 3: Ch-1, turn; sc in first tr, ch 5, skip next ch-2 sp, ♥(sc in next ch-1 space, ch 5) twice, sc in next ch-5 sp, ch 5; repeat from ♥ acrossto last 2 ch-1 sps, sc in next ch-1 sp, ch 5, sc in last ch-1 sp, ch 2, tr in last sc.
  • Row 4: Ch 1, turn; sc in first tr, ch 5, skip next ch-2 sp, sc in next ch-5 sp, (ch 5, sc in next ch-5 sp) across, ch 2, tr in last sc.
  • Row 5: Ch-1, turn; sc in first tr, ch 5, skip next ch-2 sp, ♥ sc in next ch-5 sp, ch 5, sc in next ch-5 sp (2 dc, ch1, 3 dc, ch 1, 2 dc) in next ch-5 sp, sc in next ch-5 sp, ch 5; repeat from ♥ across to last ch-5 sp, sc in last ch-5 sp, ch 2, tr in last sc.
  • Row 6:  Ch 1, turn; sc in first tr, ch 5, skip next ch-2 sp, sc in next ch-5 sp, ch-5, (sc in next ch-1 space, ch 5) twice, ♥ (sc in next ch-5 space, ch 5) twice, (sc in next ch-1 space, ch 5) twice, repeat from ♥ across to last 2 ch-5 sps, sc in next ch-5 sp, ch 5, sc in last ch-5 sp, ch 2, tr in last sc.
  • Row 7: Same as Row 4.
  • Row 8: Ch 1, turn; sc in first tr, skip next ch-2 sp, ♥♣ (2 dc, ch1, 3 dc, ch 1, 2 dc) in next ch-5 sp, sc in next ch-5 sp ♣ ch 5, sc in next ch-5 sp; repeat from ♥ four more times, then repeat from ♣ to ♣ once, ch 2, tr in last sc.
  • REPEAT rows 3-8 until shawl measures about 50 inches in length.  End on row 8, but don’t tie off.  Continue to edging.
  • Edging:  Ch-1, do not turn sc evenly  all the way around with 3sc in the corner stitches.  Join with sl st to first sc.  Weave in any ends.  Finished.

Crochet Shawl Pattern

Crochet gift ideas


Spring Inspired Crochet Headband With Free Pattern

crochet headband pattern
 

I am on a spring headband kick these days. In fact, spring everything, really. Just got back from a sunny, warm vacation and now I am doing all I can to deny what is left of winter here in Indiana.

 
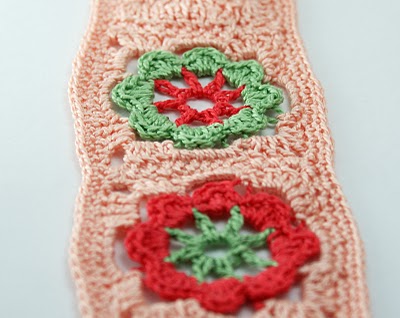
Here is the pattern I designed for the above headband, composed of three granny squares and two triangles made in the round, with slip stitch ties. This beauty works up quick. I used DMC thread size 5, and a size D crochet hook
 
 
Materials:
3 colors of DMC size 5 (Color A=bright pink, B=Green, C=light pink in the above pictures)
Size D crochet hook
Tapestry needle for finishing
 
Instructions: (For a Crochet Abbreviation Glossary, click HERE)
Flower Square Motif (Make 3 total—> 2 using A as center and 1 using B as Center)
Foundation Ring: Using A (B), ch 6, join with sl st to form a ring
Round 1(RS): Chain 5 – this counts as first dc and ch 2; (dc in ring, ch 2) 7 times; join with sl st in 3rd chain of beginning chain 5—8 dc and 8 ch-2 loops.
Round 2: With RS facing, join B (A) with sl st in next ch-2 sp, ch 1, in same sp work sc, hdc, 2 dc, hdc and sc; join with sl st in first sc. Fasten off.
Round 3: With RS facing, join C in back lp of same sc as last sl st, ch 5; working in back loops, (sl st in first single chain of next petal, ch 5) 7 times; join with sl st in first ch of ch-5.
Round 4: Sl st into next ch-5 sp, ch 1, 6 sc into same sp; *work 3 dc, ch 2, and 3 dc in next ch-5 sp**, 6 sc in next ch-5 sp; rep from*twice and from*to**once again; join with sl st into first sc. Fasten off.
 
Triangle Motifs (make 2 using color C)

Foundation Ring: Ch 3, join with sl st to form ring.

Rnd 1:Ch 3 (counts as first dc), 11 dc into ring, sl st in top of turning ch—12 dc total.

Rnd 2: Ch 3(counts as first dc), 2 dc in each st around and in same st as beginning chain 3, sl st in top of beginning

ch—24 dc.

Rnd 3: Ch 3, *(2 dc, tr, 2 dc) all in next st, dc in each of next 7 sts;

rep from * 2 times, sl st in top of turning ch—33 dc plus 3 ch-2

corner spaces. Fasten off.


Finishing:

Seam one triangle motif, 4 flower square motifs and 1 triangle motif

together, either by sewing, slip stitching, or single crocheting. When

seaming tog the last square and triangle, at the end of the seam

turn the work and sc along the edge of the joined motifs. Cont

down to the point of a triangle. To make tie: Sl st into st at point

of triangle, then ch 50. Skip first ch st and sl st in rem ch, then sl

st into the st at the point of the triangle again. Cont to sc along

the edge of the joined motifs to the point of the second triangle

and make a second tie. Sc to beg of sc edge and fasten off. Weave

in all ends.


Here are some more of my favorite spring colors you will see all headband-tastic in the near future!


Knit Bubbly Scarf With Basic Mittens +++ Patterns

knit scarf and mittens pattern


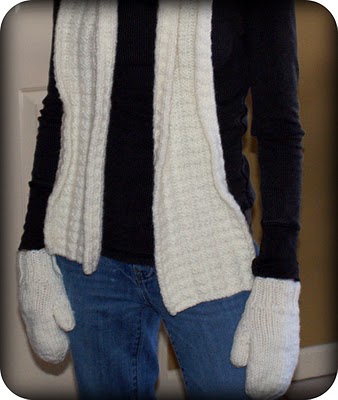
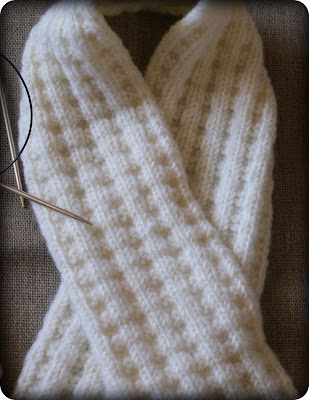
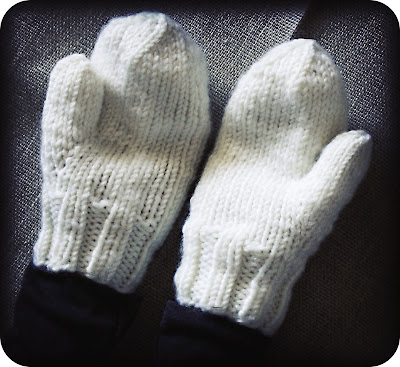
I am officially feeling arthritic. Knitting needles are my new appendages. Here is the latest: My mom wanted a cream scarf to go with a new coat. I found the over at Bernat, and the mitten pattern at ravelry.com. I used Yarn Bee “Melody Bulky Wool Blend” in Alabaster which I bought at Hobby Lobby. It is 70% wool and 30% acrylic, making it machine washable and dryable, with the warmth of wool. I washed these on warm and tumbled dry on low heat. They did not felt any noticeable degree, and emerged from the dryer all cuddly soft. I finished both patterns over a 3 day span (knitting a little obsessively), so if you need a quick, beautiful and classic project, give it a shot. Both patterns great for beginners! Spend time with yarn daily…

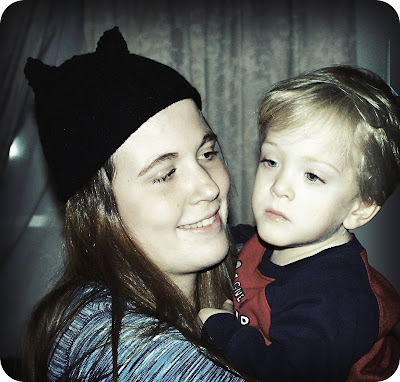
Knit Cat Ear Hat With Pattern


This project was inspired by my niece, who has always adored cats. I knew she would rock this look and I was right! Read on for pattern.

I knitted on long circular needles (size 10) for the hat part, and used “full o’ sheep” yarn in black.
For the ears, I used Size 7 needles.
Please read pattern before starting. I felted the final project lightly in the washer on hot because I like the look of the felted stitches. If you plan to skip this part, or use non felting yarn, take that into consideration when sizing, as the hat will be bigger than the one pictured and you may want to change needle size.

HAT
Cast on 66 sts Using DPN or Long Circular Needles and join in the round being sure not to twist cast on row
Rows 1-4: Purl.
Rows 5 and 6: work in St st (which, when working in the round means knitting each row). Continue until piece measures about 6 in. from beg.
Shape Crown
Next (Dec) Row:
K7, k2tog, *pm, k2tog, k12, k2tog; rep from * 2 more times, pm, k2tog, k to end – 58 sts remain at end of row.
Next Row\: Knit.
Next (Dec) Row: *K to 2 sts before marker, k2tog, sm, k2tog; rep from * 3 more times, k to end – 50 sts at end of row.
Next Row: Knit
Rep last 2 rows 5 more times.
Cut yarn, leaving a long tail. Thread tail through rem 10 sts and pull together.

EARS

Left ear:

using the size 7 needles (or size desired – not crucial to be exact gauge here)

pick up 13 sts along

decrease seam, in desired position beginning with the WS:

Rnd 1-3 knit in seed st pattern to end. (11 sts)

Rnd 4 (RS) ssk, seed st pattern to last 2 sts, k2tog. (9 sts)

Rnd 5 and al l WS rows knit in established seed st pattern.

Rnd 6, 8, 10 (RS) as Row 4.

Rnd 12 (RS) k3tog.


Right ear:

using the size 7 needles (or size desired – not crucial to be exact gauge here) , pick up 13 sts along

decrease seam, beginning with the WS, continue as for the left.


FInishing:

Weave in all loose ends. Lightly felt my machine washing in HOT water. Let air dry. This tightens up and neatens the stitches. *IMPORTANT* If you used wool, from this point on, hand wash in cold water only, air dry.


Lightly Felted Men’s Fingerless Gloves With Pattern


It is crunch time folks, and I am knitting myself right into an arthritis diagnosis. I do this every Christmas. Handmade mania with an emphasis on wooly treasures to temper the winter freezes.My nephew wanted fingerless mitts and here is what I came up with (after making 3 oddly shaped gloves I would rather forget). I used Stitch Nation yarn by Debbie Stoller called “Full o’ Sheep”, 100% peruvian wool.


Here is the pattern I used, which I found at Piece By Piece. I used size 5 circular needles and the magic loop method. This pattern called for size 6 needles, but i knit BIG, so I dropped down a size. I also decided to machine wash felt the finished mitts for 10 minutes. It makes a fuzzier, tighter, neater knit, smaller mitt. Taylor will love. I am considering some button embellishments or maybe some embroidery. Off to knit more…

Privacy Policy