Search Results for: valentine banner

DIY Burlap Hearts Valentine’s Day Banner

Hi there! My name is Laura and I’m so excited to be contributing on Saved By Love Creations! Today I will be sharing with you a super easy Valentine’s Day craft.

[pinit]

[pinit]

All you need to make this lovely Burlap Valentine Banner is some scrap book paper, a few burlap hearts, a roll of burlap, some baker’s twine, scissors and a glue gun. Basically any  crafters essentials! 🙂

The first step was to make my hearts. I used my burlap hearts as a guide for tracing my hearts on the scrap book paper.

After I cut out my hearts it was time to make my individual burlap banner. I cut my my first burlap banner at 7 inches long. I then folded it in half and cut at an angle to make the triangle cut. To make sure all the entire banner was cut to the same size, I used this one as a guide for cutting.

After the burlap was cut, I folded the top of each piece over about an inch to create a lip for the twine.

Next it was time to measure my twine. I knew that I wanted to do three rows in a zig-zag type of pattern.  So I decided to even out burlap banners to three per row.

I took the twine an laid it on the counter and placed my burlap pieces on top. I just used my scissors to space them out. (I’m a very hard-core crafter, can you tell?)

When I got everything spaced just right, I placed the twine inside the lip and a little hot glue and then pressed it close. 

I flipped the banner over and then attached my hearts with some hot glue as well.

That’s pretty much it. I just repeated those step to make all three rows.

I love how the banner adds a subtle touch of Valentine decor to my home without going over the top. 

I hope you enjoyed this easy holiday craft. If you would like to see more of my projects or keep up with my latest updates, follow me onFacebookPinterestTwitterGoogle+ or Instagram.

For More Valentine’s Day Crafts, Gifts and Decor, check out SBLC’s 50+ Valentine’s Day DIY Gift Ideas and 50+ Valentine’s Day DIY Decor Ideas!


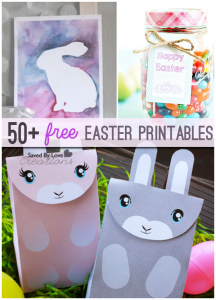
The 50 Plus Best Free Easter Printables

50 plus amazing free Easter Printables @savedbyloves
Valentine’s Day is behind us, and Easter is rapidly approaching. Today, we are excited to share our favorite free printables with an Easter theme. You will find bunnies, scripture, flowers, eggs and crosses galore. Refresh those ink cartridges and get ready to spring-ify your crafts and decor, without hurting your pocketbook! As always, if you have a great Easter printable that we missed, leave us a link in the comments so we can include you!


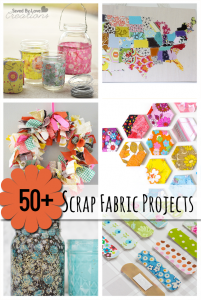
The 50 Plus Best Scrap Fabric Project Tutorials

[pinit]

The 50+ Best Scrap Fabric Crafts @savedbyloves[pinit]

If you are anything like me, you have fabric scraps that are so beautiful and you just can part with them.  Well, what to do?  Today I am sharing the 50 best scrap fabric project tutorials my search revealed.  You can make anything from fabric scrap home decor to jewelry, shoes and more.  Many of these are great last minute gift ideas as well.  Happy scrap busting!


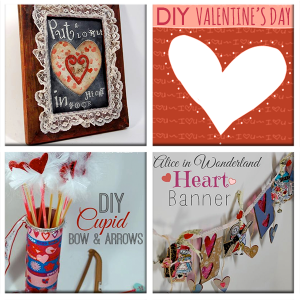
Valetine’s Day DIY Projects from Plucking Daisies

[pinit]

DIY Handmade Valentine's Day Decor @savedbyloves[pinit]

My friend Amy at Plucking Daisies has some fun DIY  Valentine’s Day projects that I want to share with you today.  I have always loved her style.  It all started over Sizzix and paper flowers.  She is my flower hero! The two of us have only spent time together in real life twice but it seems like we’ve know one another since childhood.  She brings me such joy, both through her art and her friendship.  Check out her mad skills and be inspired!


Recycled Cardboard Heart Banner | @PluckingDaisy #AliceInWonderland #Sizzix #RangerInk #DIY

 Recycled Packaging Heart Banner

Cupid's Arrow Valentines | @PluckingDaisy #ValentinesDay #KidsCraft

DIY  Cupid’s Arrow Valentines 

Faux Barn Wood Chalkboard Frame | Pluckingdaisies.com

Faux Barnwood Chalkboard Frame

Printable Chalkboard Valentines with Duck Brand Prism Stickers | Pluckingdaisies.com #DuckBrand

Printable Chalkboard Valentines

Bitter Conversation Hearts Valentine's Day Centerpiece | Pluckingdaisies.com

Bitter Coversation Heart Centerpiece

Find over 50 ways to decorate for Valentine’s Day:

50+Valentine’s Gifts to Make

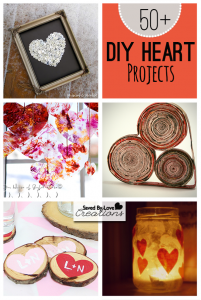
50+ Heart DIY, Crafts and Jewelry Projects to Make

[pinit]

Heart Crafts Valentine's Day Ideas[pinit]

It’s all about hearts today, with this collection of over 50 DIY heart projects you can make. You will spy jewelry, crafts, wall decor, clothing and more, sure to inspire your Valentine’s Day festivities.


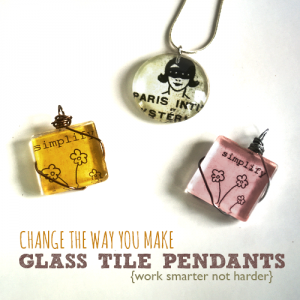
Tips to Fast, Mess Free, DIY Glass Tile Pendants

[pinit]
Xyron Create a Sticker for Easy, mess free Glass Tile Pendant @savedbyloves

 [pinit]

If you have ever made glass or acrylic tile pendants, you probably know that it is more involved than it looks.  About 2 years ago, I need to make a slew of these, and decided to run my images that I wanted to adhere to the pendant through Xyron’s Create-a-Sticker Machine.  I ran them through oriented so that the image side would be the sticky side, and stuck the tile right on the sticky, as you will see pictured in this tutorial.  This eliminates having to glue the images onto the tiles, which is, at least for me, a messy hassle!  I wanted to scream this technique from the rooftops when I thought of it, but I decided to wait and see how the pendants held up long term.  At last I am here to report that after 2 years, the tiles I made this way look gorgeous.  The image has not peeled away from the glass or discolored even slightly.  You still have to seal the backs so that the pendants are waterproof, but I have a great tip for that step as well.  Read on and you will be busting out gorgeous, durable graphic pendants crazy fast.

 Xyron Create a Sticker for Easy, mess free Glass Tile Pendant @savedbyloves

 SUPPLIES:

XyronGlassTilePendant2

Xyron 1.5 inch Create-a-Sticker  with Permanent adhesive cartridge

Printed images for your tiles, or decorative scrapbook paper/artwork – I create collage sheets in Photoshop with images made to fit whatever tiles I am using (round, square, rectangle in various sizes) and print it, or I create backgrounds with spray ink, ink pads, markers, stamps, rub-ons, doodles to use on my tiles.

Detail scissors

Mod Podge (I prefer satin finish to seal my glass tiles)

Small flat paintbrush

Masking tape or contact paper (super cheap at dollar store and works great for the sealing trick you will see later)

Ceramic tile or other flat surface

Sandpaper 150-200 grit (I use Tim Holtz

Glass tiles or Acrylic Tiles (I use Mod Podge Podgeable Shapes and glass tiles)

Glue on bails (my very favorite are aanraku small bails.  They are beautiful, the perfect size for 1-2 inch round, square or rectangle tiles and are well worth the cost (about $0.40 each)

E6000 glue for the bails (this stuff would glue a person to the ceiling and hold)

-OR-

Jewelry wire to wrap pendants in a glue free way like I showed you previously:

Glue Free, Drill Free Way to Attach Pendants

I love this method for the fancier look compared to the glue on bail.  Sometimes people want simple, other times wire is just the special touch that makes them fall in love with a piece.

TUTORIAL:

XyronGlassTilePendant4

Take the image and cut into a strip that will fit in the Xyron sticker machine.  If you have a larger machine, you can run larger sheets through it to create stickers for several tiles at once.  Here I am using the 1.5 inch on cardstock covered on both sides with lovely washi tape.  Scrapbook paper, photos or whatever you want as your pendant image can be used.  Place the image side face down in the machine (this is the opposite of how you make most stickers since you are going to adhere the glass to the sticky image you want to show).  It is not really important for this example since my washi covered paper is the same on both sides.

XyronGlassTilePendant5

Burnish the image onto the adhesive with a bone folder, credit card or ink pen (yep, I improvised).  This assures the maximal adhesive transfers to the paper image.

XyronGlassTilePendant6

XyronGlassTilePendant7

XyronGlassTilePendant8
Sand any uneven edges left after cutting to tidy up your piece.

XyronGlassTilePendant9

TIP:  Lay contact paper with sticky side up, or masking tape sticky side up on a tile or other flat surface. Place your pendants paper side up, glass side down on the tape or contact paper.  This keeps the pieces from moving around when you seal the back.  I lost hours of my life with sliding pendants that I moved back into place with my fingers, getting glue all over me and fingerprints all over my tiles.  No fun.  This is the best solution ever.

Apply 3 layers of Mod Podge, drying at least 30 minutes between each.  I like to let cure 1 week before sending the pendant off to it’s new home.  After 24 hours, I glue on the pendant bail or make a wire wrap bail like I discussed earlier (see above link).

XyronGlassTilePendants10

Speaking of Xyron, Feature Product Friday is happening, and the start of the show is Xyron.

What is Feature Product Friday, you ask?  It is the brainchild of my friend Amy of Plucking Daisies.  If you’ve been here awhile, you have probably seen her rockin contributions to SBLC.  I love talking about products with Amy.  We are equally obsessed with the next new creative spray ink, paper, design line, gadget and trinket that will help us create what we love and take our imaginations to new places.  We want to share our go to products with you, and see what you have come up with using them.   Each Friday will be a new product featured.  We will show you our projects, as well as a roundup of your best projects using the featured product (see the list below).

Even more good news… Amy is giving away a stash of Xyron supplies, so head over and enter the Xyron Giveaway at Plucking Daisies.

TOP PROJECTS USING XYRON


Privacy Policy