See mine? It follows every post – not just the ones published subsequent to the addition of the code.

Ok, first make your signature. I did mine in photoshop. Here is how…


1. Open a new file. I made mine 220px by 96px (trial and error – it fits best after my posts). Make sure you choose “transparent” in the background contents tab as below.
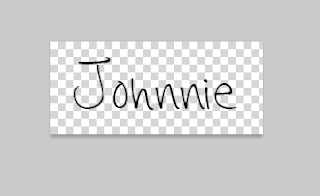
2. Choose the Text tool (keyboard short cut T) and pick your favorite font. I used “Hannah’s Messy Handwriting”, which I downloaded here at dafont.com. Pick your font color and size, and type your name…
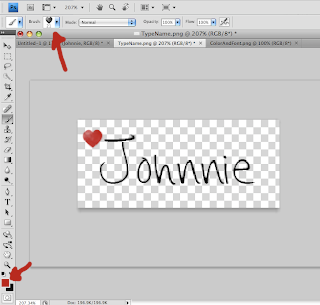
3. I added a heart using a heart brush that I made (that is for a later tutorial)…
Choose the brush tool (keyboard shortcut ‘b’), pick a foreground color and brush that you like and paint design of your choice…
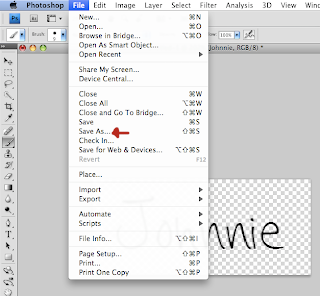
4. Save file and upload to image hosting website (I use Photobucket)…
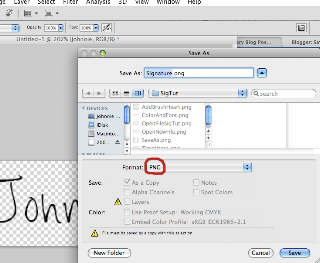
Save File as .png, so that transparency will be maintained and the signature file will not come with a background that may vary from your post background color.
Now put code for your image into your Blogger HTML template…
Go to your blogger dashboard and click ‘layout’, then ‘edit HTML’, then
check the expand widget box as follows…
Find the line:


Thanks for all these blog tips! I can't wait to look at the other one you posted about changing the look of your blog. I tried changing mine a little while ago and completely messed the whole thing up… luckily I was able to fix it quickly… but I still want to change the look as a whole, so I can't wait to look at those tutorials… Thanks! 🙂
Love this tutorial. I can’t remember where I was able to center my signature. Hoping you can help me out?
Thanks, Lucy