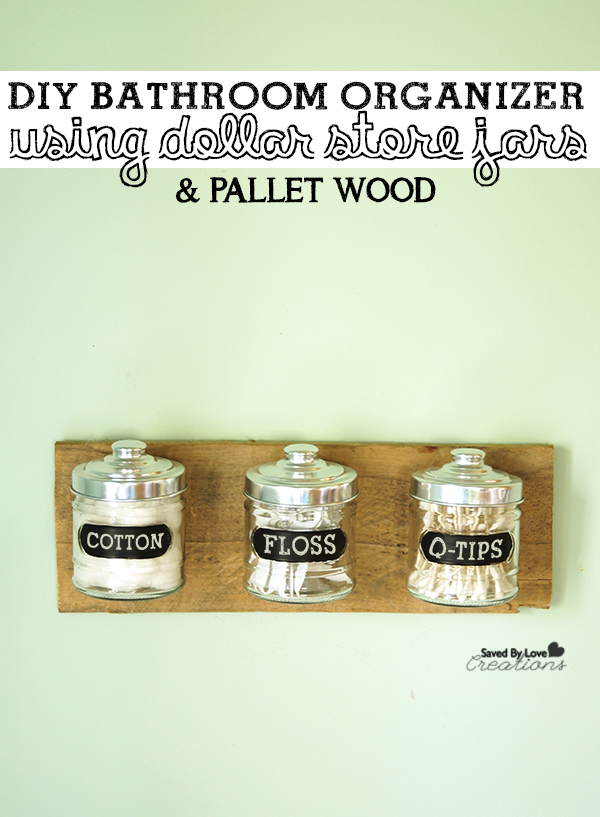
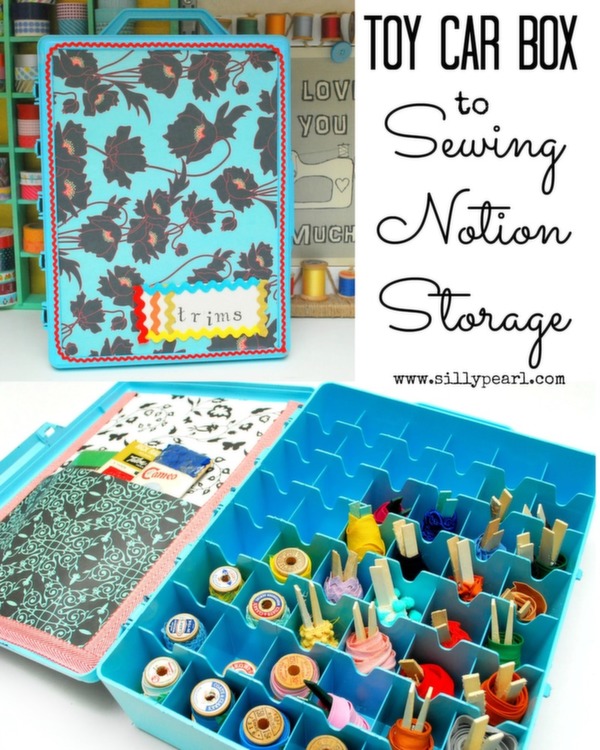
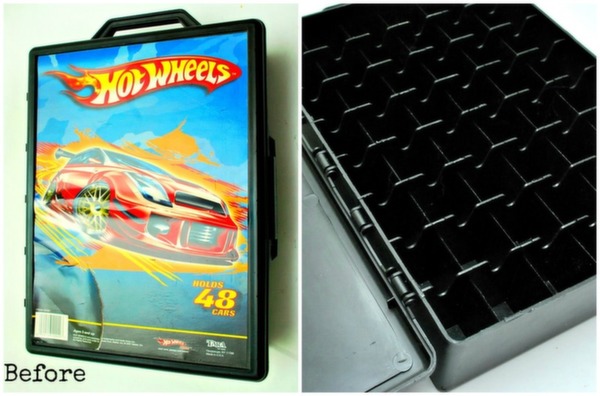
Hello! I’m Steph and I blog at The Silly Pearl. I’m mom to 7 year old twin girls and I live in the San Francisco Bay Area.I love to repurpose containers into storage for my craft room. So I’m excited to show you what I made today here on Saved By Love Creations: I took a plastic toy car storage box (don’t worry, it’s not vintage!) and created a storage box for my collection of vintage trims that I’m always collecting from the thrift store. Thanks so much Johnnie for having me on your blog today to share my tutorial!
My girls do have a collection of cars themselves, but most are larger and wouldn’t fit into the compartments of the box. So I thought I could use it for myself in the craft room, to house all the little lengths of rick rack, seam binding, lace, and bias tape currently tangled in a box.
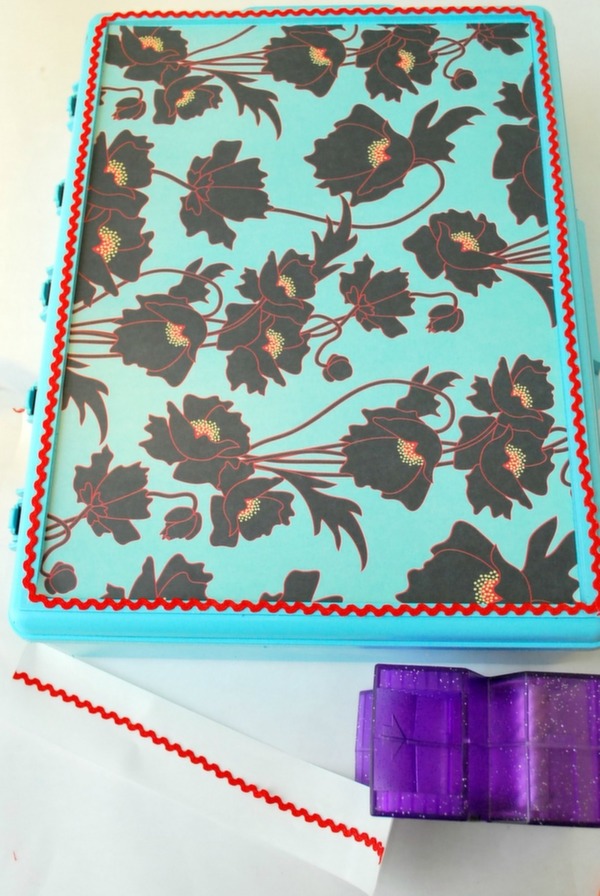
First step is to remove the label on the front and spray paint the entire box, inside and out. Choose a spray paint that bonds to plastic. Use a primer as well. Do several thin coats, allowing time to dry in between. Be sure to follow the drying time recommendations on the spray cans, particularly in between the primer and the color. I chose a turquoise color that I have a lot in my craft room.

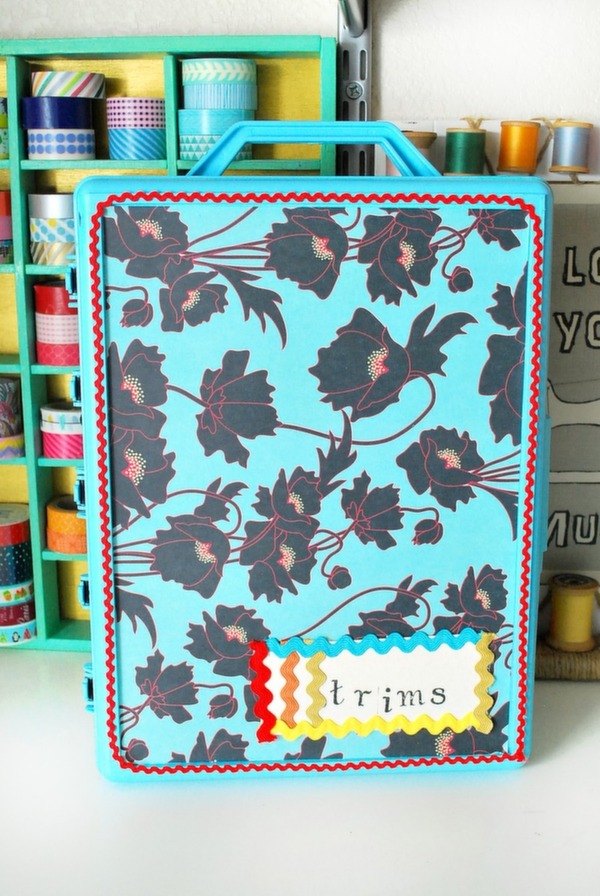
Once the paint is dry and you’ve allowed it to cure, you can start applying the scrapbook paper. An 8×12 inch piece of scrapbook paper fit perfectly on the front (I used my Xyron 9-inch Creative Station to apply adhesive to my scrapbook paper). Then I framed the paper with some red rick rack using my Xyron 1.5-inch sticker maker.
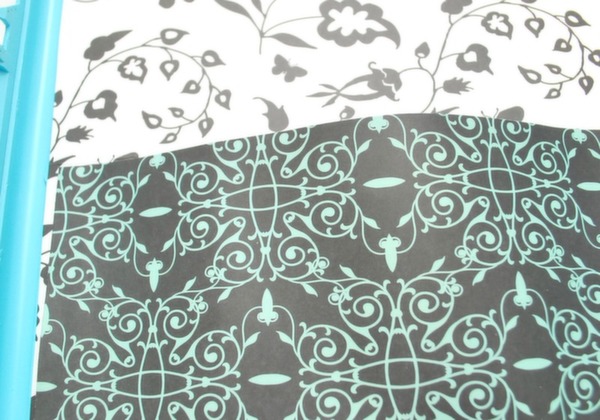
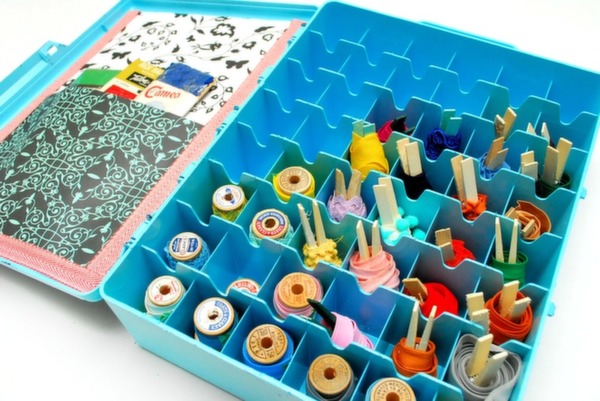
Inside the lid, I created a pocket by folding an 8×12 inch piece of paper in half. I applied adhesive to just one of the folded sides and pressed that to the bottom half of the lid so that the other half of the paper unfolds out towards the bottom. Then I applied adhesive to another 8×12 inch piece of paper and pressed it to the inside of the first piece.
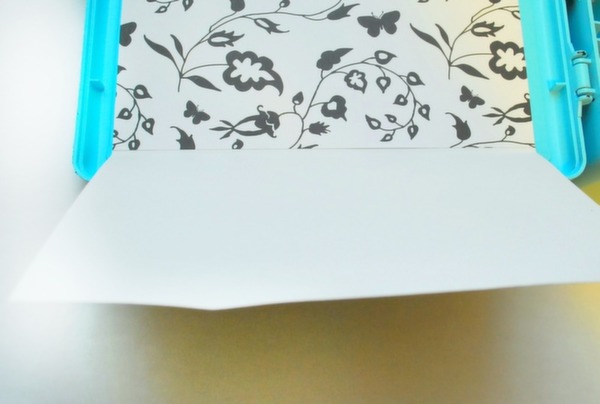
Then I applied some double-stick tape to the edges of that unfolded half and pressed down the edges over that 2nd piece of paper. To allow some give for the pocket, I adhered the pocket at a slight angle on both sides.
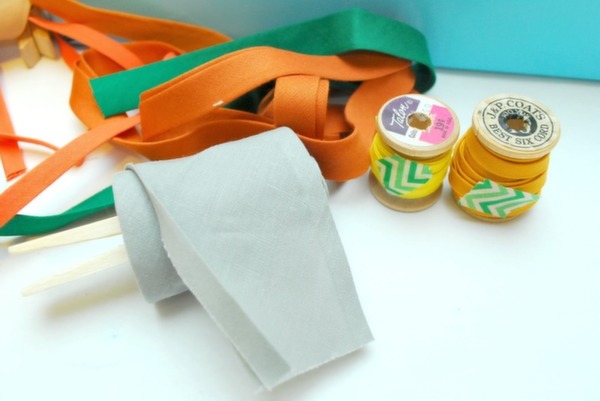
I grabbed some clothespins and wooden spools and wrapped my trims around them. For narrower trims, I used the wood spools, securing the ends with a little bit of washi tape. For wider trims, or for trims where I had a longer length, I used clothespins. Just make sure the clothespins and wood spools you use aren’t too wide or tall for the compartments. I was able to stack two of these one-inch spools into one compartment.
 On the outside, I used a piece of cardboard that one of my trims came in, and with some letter stamps and more trims (of course), I created a label and adhered it to the front. All done!
Inside, I stored some vintage trims that are still in their packaging. Plus, I added some trim along the edges of the pocket papers.
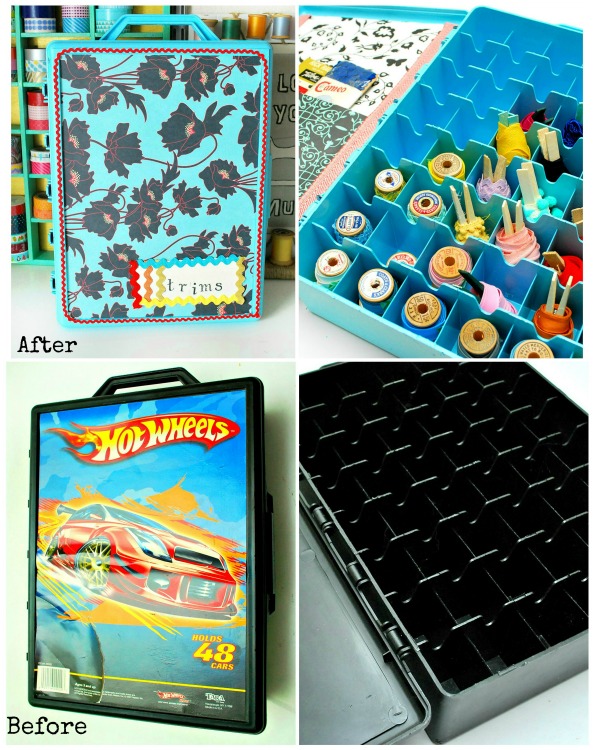
Before and After!
Hope you’ll come on by my blog for more craft tutorials and check out my craft room ideas as well. Also, find me on Facebook, Pinterest, Twitter, and Instagram. Thank you again Johnnie for having me here on your blog today! –Steph @ The Silly Pearl