DIY Prom Accessories From Duck Tape®

This is a Sponsored post written by me on behalf of Duck® Brand for SocialSpark. All opinions are 100% mine.

[pinit]

Make Duck Tape Crafts #StuckAtProm #DIY @theduckbrand @savedbyloves

[pinit]

If you have been around SBLC for awhile, you know that I heart crafts made from Duck Tape®.  That is why I was so thrilled when invited to use it to create a prom themed project.  The stuff comes in over 140 colors and prints, meaning you are sure to find the perfect match to accessorize that fab dress, or even to make the dress in its entirety!  I am going to show you how I created these roses and used them to make hair pins, earrings and a ring.  This project is quick and easy.  You will have beautiful prom accessories in no time.  Then I will tell you about Stuck at Prom®, a scholarship contest in which your creativity could win you some serious cash!

Sizzix and Duck Brand Duck tape jewelry #prom

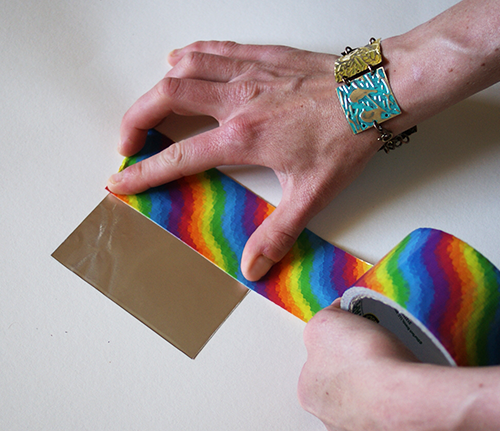
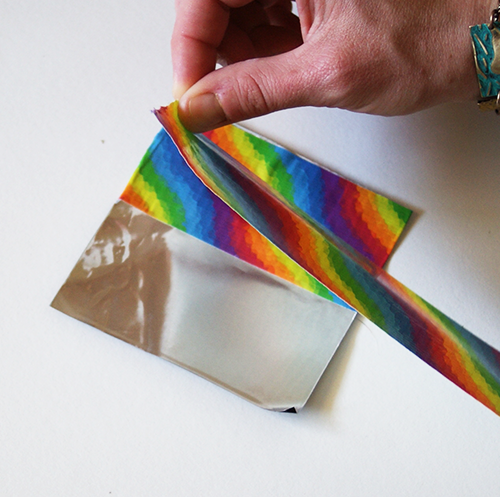
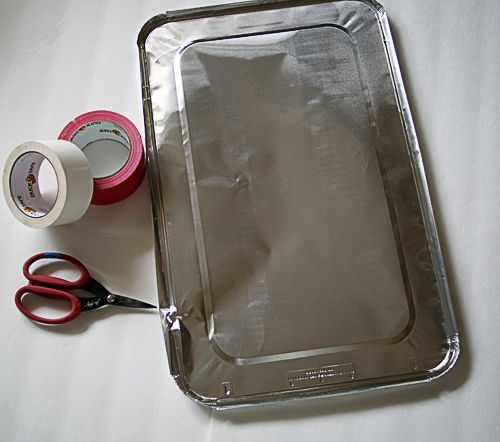
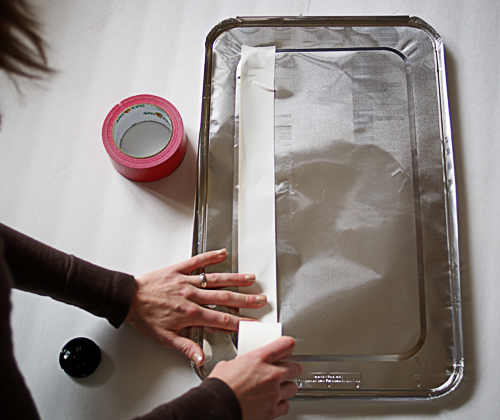
To start, I made Duck Tape® sheets using foil squares I had on hand.  Disposable foil containers or any craft foil that is thin and flexible will work. Cut it the apporpriate size for the die shape.  Cover both sides of the foil with your favorite color/pattern of Duck Tape®.

Sizzix Flowers 3-D die jewelry

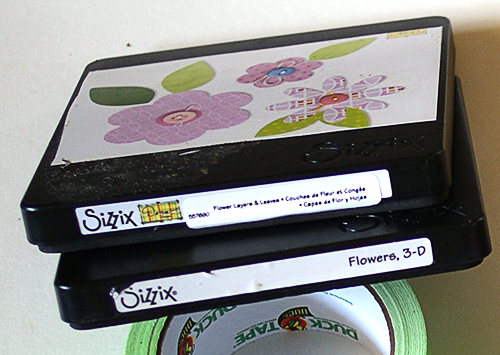
I used the Sizzix Flowers 3-D Die for the rose shape and the Flower Layers & Leaves Die for the leaves.

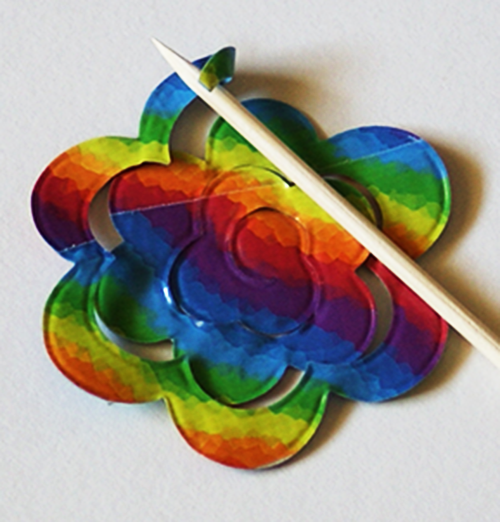
Run the tape covered foil through the machine and coil the resulting spiral shape around a skewer or toothpick from the outside towards the center per die instructions.

E6000 Sizzix flower die Duck Tape Crafts

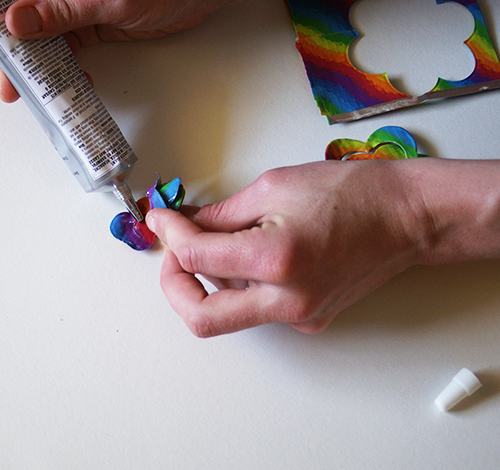
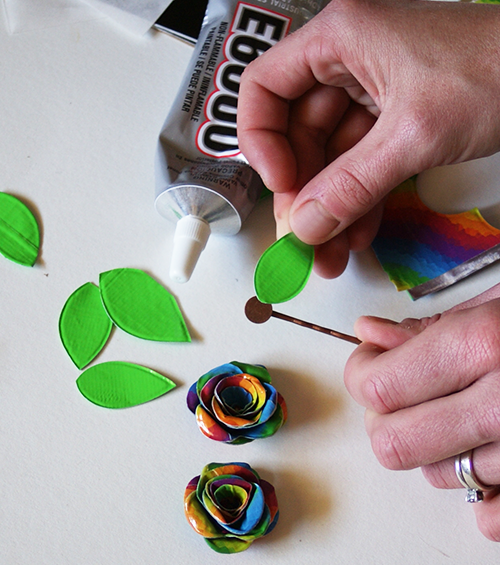
Put a dab of glue on circle tab in center of die cut flower and press to bottom of rolled shape.  Hold between thumb and index finger for 20 sec or so for glue to have time to grab.

Duck Tape Crafts

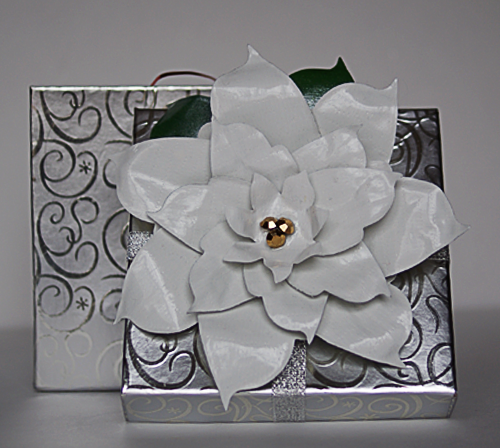
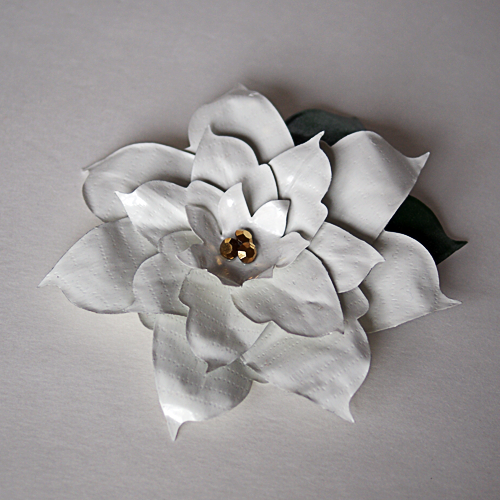
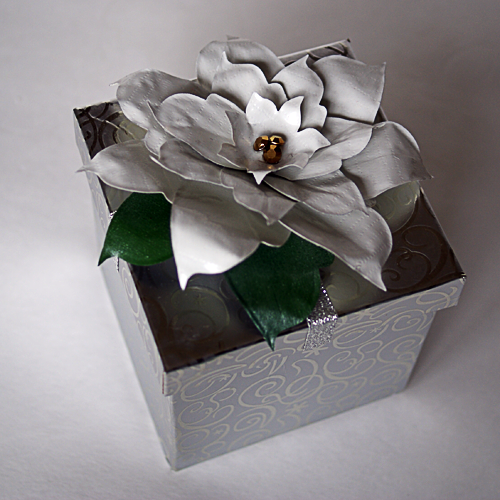
Now you have your rosette.  If you want leaves, die cut or hand cut them from green Duck Tape® covered foil and glue them to the bottom of the rose.

#ducktapecrafts #DuctTapeFlowers

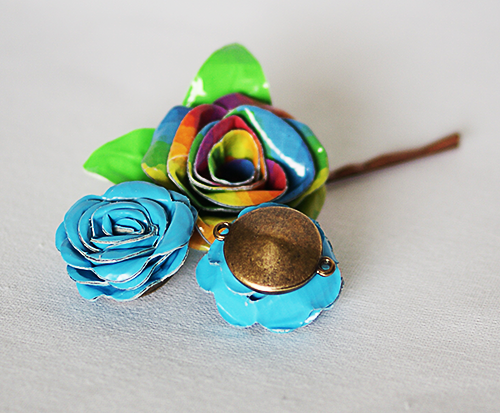
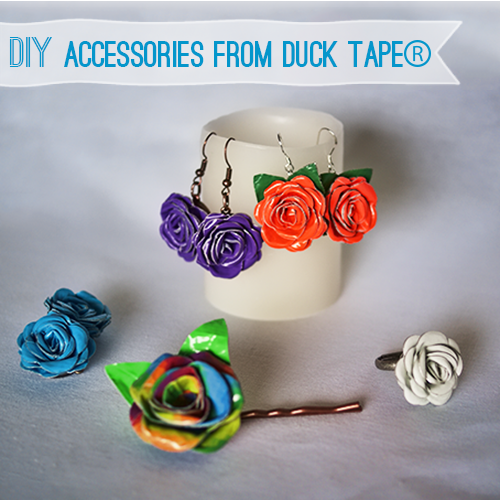
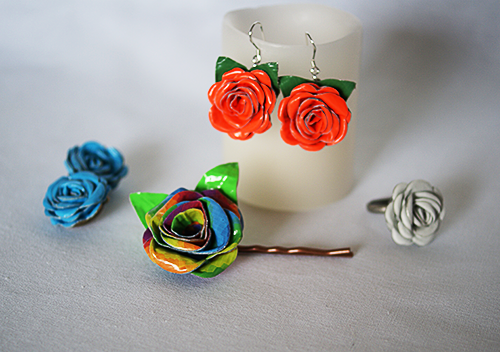
I used my duck tape roses to make earrings, a ring and a hair pin, all of which would make perfect prom accessories when matched with the dress.  It takes 5 minutes to create a rose, and not much longer to incorporate it into an accessory.  Quick, easy and super cool… my kind of project!

Rivoli Holders

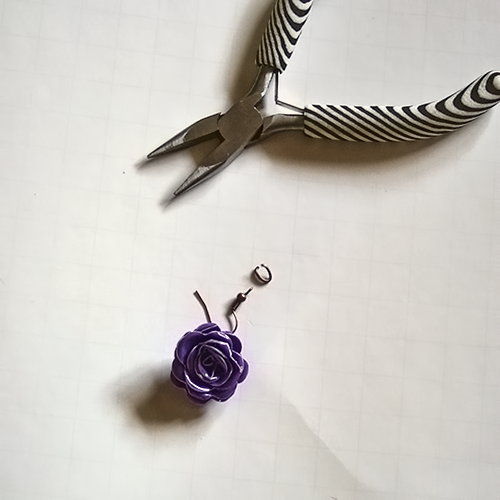
For the earrings, I glued the roses into these rivoli holders that have a connector ring on 2 sides.  I added an ear wire with a jump ring and that was that.  You could add a crystal or other charm in the bottom ring if you wanted some extra bling.

Duck tape hair accessories

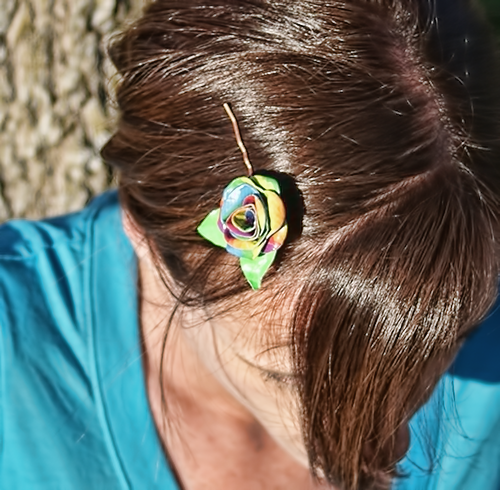
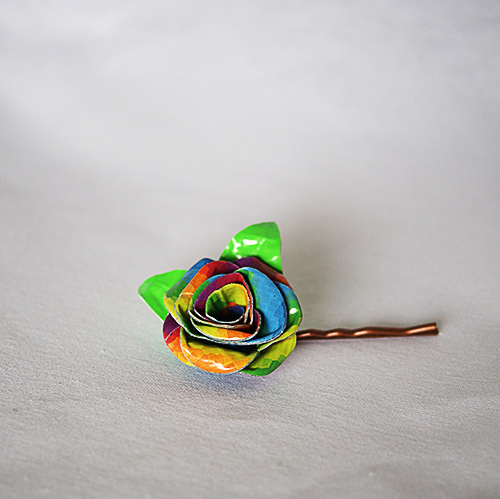
For the hairpin, I glued the leaves to the bobby pin blank, then the rose on top of those.

Duck tape rose ring

duct tape rose tutorial

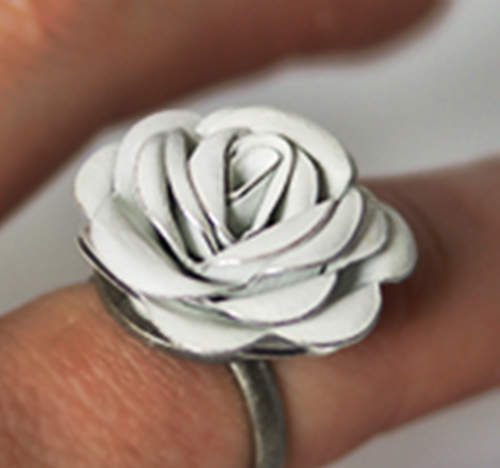
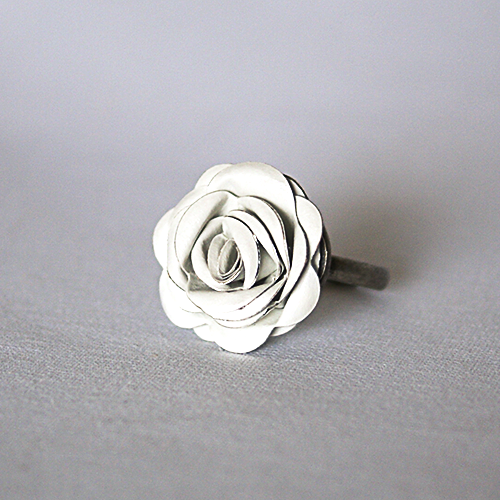
For the ring, I simply glued the rose onto a ring blank.  Easy!

#StuckAtProm

Do you have a Duck Tape® prom idea?  If so, you will want to check out the Stuck at Prom® Scholarship contest where over $40,000 in scholarships are up for grabs!  Visit the link for entry details and deadline.  Join me in following Duck Tape on Facebook for inspiration and updates.

Visit Sponsor's Site

Duct Tape Wreath

 [pinit]

duct tape flowers wreath

I am super excited to have Angie here from Country Chic Cottage.  She is one busy lady, coming up with great projects and tutorials that you can do yourself, on a budget even!  Angie knows me well, and my readers too.  That is evident by the fact that she created a duct tape craft to share with us.  Thank you Angie!

Hello all!  My name is Angie and I blog over at The Country Chic Cottage.  I am so happy Johnnie asked me to guest post.  I am tired of winter already, aren’t you?  I decided to make a new wreath but put a happy spin on it.  We could all use a little cheer when we open the front door don’t you think?  And yes I am in love with duct tape lately.  My duct tape flowers wreath uses duct tape to create a simple, happy wreath that you can enjoy into the spring and even the summer.

Start with any picture frame (mine was already covered in some white fabric).  Add in some colorful fabric and duct tape and you are ready to get started.


duct tape flowers wreath


Tear your fabric into strips and wrap around your frame.  Cover the frame completely then use a dot of hot glue to secure the end of your fabric.


duct tape flowers wreath

Now it is time to break out that duct tape.  We are going to start by making a duct tape flower.  You will need a small square of duct tape plus one long strip.

duct tape flowers wreath

Fold your long strip over about 2/3 of the way as shown below.  Also as shown below, it does not have to be perfect.  🙂

duct tape flowers wreath

Gather your long strip onto your square as shown below.  Continue wrapping around and around until you run out of strip.  The longer the strip, the closer to the outside of the square you can start, and the larger your flower will be.

duct tape flowers wreath

You will end up with a gathered flower something like this.

duct tape flowers wreath

The back does not look as pretty but we are not worried about that!  Note that if any of your “square” peeks out around the edge of your flower, just fold under to hide it.

duct tape flowers wreath

Now attach those flowers to your wreath with hot glue.

duct tape flowers wreath

I also added a couple of buttons to the center of my flower.  They added just the right amount of bling.

duct tape flowers wreath

Now we need to make that duct tape “Welcome” banner.  You will need string (I used baker’s twine), duct tape, and foam letters.

duct tape flowers wreath

Start with a square of duct tape and fold it into a point as shown.

duct tape flowers wreath

Then fold the sides of your square in to make a mini pennant flag.

duct tape flowers wreath

Add your foam letters to each pennant flag.

duct tape flowers wreath

Tie the baker’s twine onto your wreath.  Add the flags by folding the duct tape over the baker’s twine and securing the flap with hot glue.

duct tape flowers wreath

It is really that simple!  Add a cheerful touch to your front door with this duct tap flowers wreath.  You know you could use a little cheer during these dreary months.

duct tape flowers wreath
Thanks so much Johnnie for having me!  Y’all stop by the cottage anytime for a visit.  I blog about crafts, recipes, DIY, and everything in between.  Follow along on facebook, twitter, or pinterest so you won’t miss a beat.
Thanks,
Angie
Don’t forget to check out Angie’s Etsy Store:  Country Chic Cottage on Etsy

Duct Tape Poinsettia Gift Topper

[pinit]

Duct Tape Poinsettia Gift Topper #Christmas #Repurpose #Christmas #DIY @savedbyloves

Duct Tape Poinsettia Gift Topper #Christmas #Repurpose #Christmas #DIY @savedbyloves

What can’t you do with duct tape, really?  Today, I have a great gift topper idea for your Christmas wrapping, using duct tape and a foil lid.  Make several and create a wreath, or garland.  This is a unique, inexpensive way to add a handmade touch to your presents this year.

I used my poinsettia Sizzix die, but I showed you in this DIY poinsettia wreath tutorial a great template for creating poinsettias by hand from Eri Doodle.  This can be done easily by hand.

SUPPLIES:

Poinsettia die or template

Foil lid (available at Sam’s Club in 15 packs for $13)

Red and/or white Duct tape

Scissors

Green Acrylic paint and primer or green Duct tape

Hole punch

Brad

Gold or yellow beads for center

Clear, tacky glue

Duct Tape Poinsettia Gift Topper #Christmas #Repurpose #Christmas #DIY @savedbyloves

TUTORIAL:

Apply strips of duct tape over the foil lid, making sure to smooth out any air bubbles as you go.  I use the flat inner section of the lid only.

Duct Tape Poinsettia Gift Topper #Christmas #Repurpose #Christmas #DIY @savedbyloves

Continue until entire flat part of lid is covered if you want to make several flowers, or just do 2 strips of duct for a single flower.

Cut out the duct tape covered area with scissors and either die cut or trace template with a pen and cut out petals by hand.  You will need 2 green petals for each flower for the leaves.  For this, primer the lid and paint with green acrylic paint (I used Martha Stewart Glitter paint in green) or just use green duct tape.  I wanted the glitter look, and wasn’t too thrilled with the shade of green duct tape in the store.

The purpose of the foil is so that you can shape your leaves by creasing them down the center and curling the tip under for a greater 3D effect.  This foil holds the shape great, but you still get the color and gloss of the duct tape.

For flower assembly – Refer to the pic below for petal arrangement.  You can use glue like I did in the paper example pictured, but I prefer to punch a hole at the bottom of each petal (stack several petals and punch them at once to save time), and at the center of the central start, then put a brad through all the holes to connect the parts.

That is it.

Duct Tape Poinsettia Gift Topper #Christmas #Repurpose #Christmas #DIY @savedbyloves Duct Tape Poinsettia Gift Topper #Christmas #Repurpose #Christmas #DIY @savedbyloves

Privacy Policy