How to Distress Furniture With Vasoline

[pinit]Distressed Painted Table
[pinit]

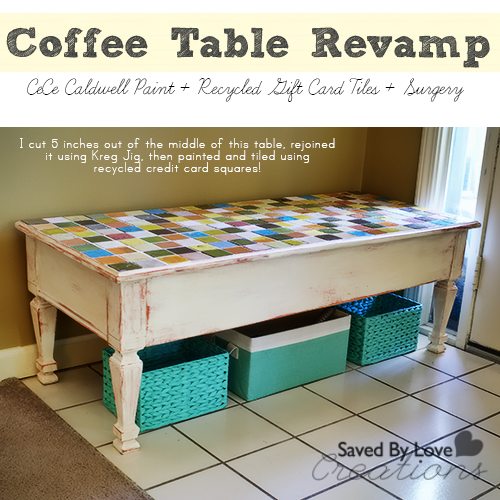
Did you know that Vasoline petroleum jelly is a fantastic ingredient for distressing furniture?  It is true.  The technique is simple and fast.  Today I am sharing how I took this chevron painted table I shared with you in a previous tutorial, and used Vasoline to create a chippy, funky distressed piece to go with my new living room.

Distressed Furniture Tutorials

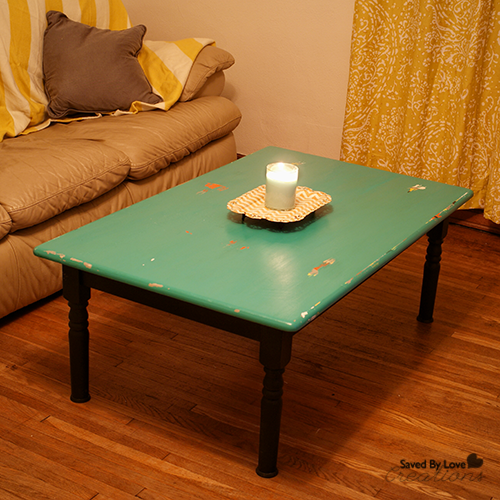
I needed a coffee table to go with my urban-modern-distressed-vintage-eclectic decor style in progress.  You will be seeing reveals as I decorate in my new home.  I am into yellow, gray, orange poppy, turqouise, emerald green, navy blue and vintage white these days.  My living room kinda has a little of all of these, with yellow, gray and turquoise dominating the stage.

Paint a Chevron Coffee Table with @DecoArt_Inc @savedbyloves

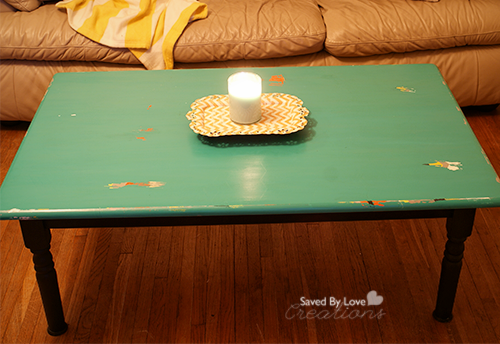
I revamped this roadside find last week, thinking it would be the perfect coffee table for the living room.  Well, it wasn’t.

Pantone Emerald Green Valspar

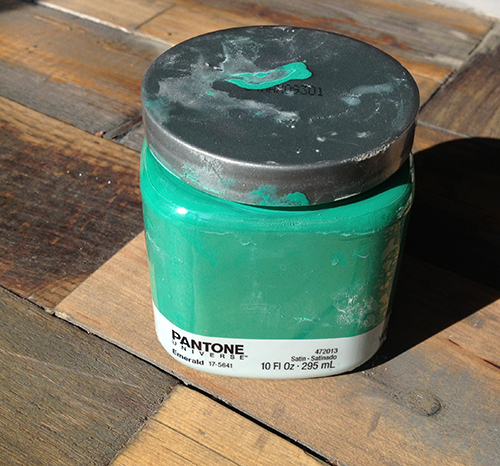
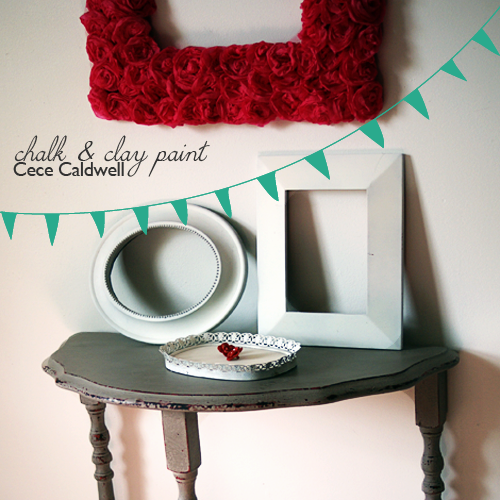
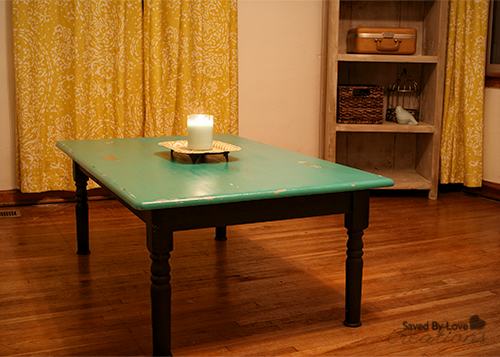
I decided to apply Vasoline to the areas of the table I wanted to look “chippy”, then paint with homemade chalk finish paint (see how to make chalk paint yourself in my barnwood frame tutorial).  Valspar’s Pantone Emerald was the perfect color!  I picked it up at Lowe’s.

Distressing Furniture Tutorial

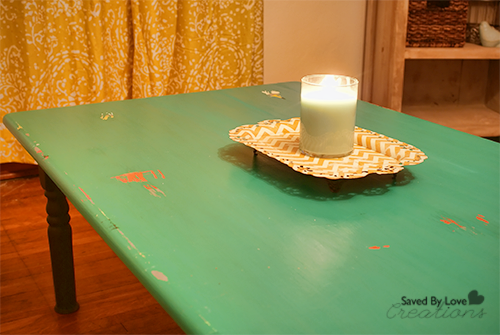
Once the paint dried, I just took my scraper to the areas where I had applied the Vasoline and the it peeled right off, revealing the colors in the chevron stripes.  I love the effect!  It looks so cool with the random colors.

Martha Stewart Decoupage copy
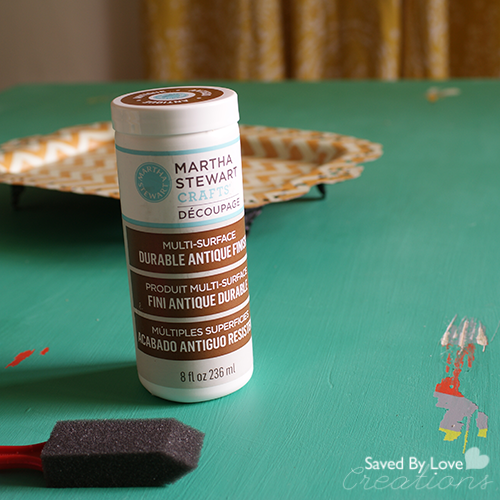
Once I was happy with the amount of scraping, I sealed the piece with Martha Stewart’s Antique Finish Decoupage Medium.  It was my first time using the stuff and it gives a subtle warm antique feel to the piece.

Distressing a Table

Stay tuned for more DIY home decor as I settle into my new place!

How to Build a DIY Reclaimed Wood Bookshelf

How to build a reclaimed barnwood Bookcase @savedbyloves

How to Build a Bookshelf

I have another reclaimed wood DIY project for you today.  I got a truck load (it probably should have been two truckloads, but we squeezed it into one) of 4×8 plywood sheets, 2×6 and 2×8 boards from a craigslist ad.  It was salvaged from a home that these folks tore down and they were happy to have it hauled off and out of their yard.  This project is made mainly from that wood.  The panels that back the bookshelf were milled by a friend of mine who passed them along to me, where they have patiently waited for me to put them to use.  I came up with this cool bookshelf that i finished with homemade chalkboard paint and sand distressed.  CeCe caldwell Clear Wax then Aging Wax sealed the deal and added just the amount of antiquing to suit my vision.  You can finish this project in a day if you are committed, over a weekend if you have some distractions.

Ana White Kentwood Bookshelf Plans by Shanty2Chic

This fine Kentwood Bookshelf by Shanty2Chic that I spied at AnaWhite.com was my inspiration.  I had just taken a woodworking DIY class by Whitney and Ashley of Shanty2Chic at Haven Conference, and I came home on fire to build.  These girls are amazing!  They shared their journey coming from zero knowledge of building or power tools, to being able to build some amazing furniture for their homes.  I have been building since April, and before I started, I was totally intimidated.  I still am by lots of projects, but I am so glad that I broke into the power tool world.  It is way easier than I thought, and not much is more gratifying than building custom pieces, from reclaimed wood no less.  Go check out Shanty2Chic, walk through some of their detailed tutorials and you can build awesome stuff too!  You really can.

One thing they taught me at Haven was to measure as I go instead of cutting all of my pieces called for in the plan.  I hadn’t been doing that, and my pieces would be off almost every time.  Wood is going to curve and bow and do funky things, especially reclaimed lumber and shipping pallets.  I am so glad they emphasized measuring and cutting based on reality and not on the perfect plan.  I decided to scrap the plan entirely for this shelf, and just go with my own dimensions based on what pieces I had on hand, and the measurements as I built.

Bookshelf DIY Tutorial

I made my own 2×2 pieces by ripping the 2×6 boards from the house demolition that I scored.  This is what I used to frame the side planks, which I cut 11.5 x60 inches from the 4×8 sheets of 5/8 inch plywood also from the house demo.   Shanty2Chic used 1×12 boards for the side panels.  I went with plywood since I had it on hand, and I knew I was going to paint the final piece.

Building Bookshelf With Kreg Jig

How to Build your own furniture

You can see the Kreg pocket holes in the plywood side planks that I drilled to attach 2×2 framing.  Attach shelves and top.

How to Build a shelf from reclaimed wood

I  used 3 pieces of the wood my friend milled for the backing.  They were different thicknesses, but since that would only be visible from the back, I didn’t much care.  I just measured and cut to length the center piece, and ripped what I needed off the 2 side pieces so that they didn’t stick out over the edge.  I counter sank 2 inch wood screws to attach the back panels.

How to distress paint furniture

I love the larger panels for the backing, and that I didn’t have to buy any wood for this piece!  Fill Kreg holes with wood putty, liquid nail or caulking.  It doesn’t need to be something that takes stain if you are painting the piece anyway.

ReclaimedSmall Wood Furniture Tutorial

I sanded the unfinished bookshelf with medium grit paper and painted a base coat of CeCe Caldwell Paint in Vintage White  (You can see my other CeCe Caldwell Chalk and Clay Paint projects by clicking the thumbnails below).  After that was dry (about 1 hour indoors) I made a gray DIY Chalk finish Paint using the Make Your Own ChalkBoard Paint Recipe I showed you in an earlier post.

How to Build Furniture From Reclaimed Wood

For a little more aging, I added a coat of CeCe Caldwell Clear wax, then Aging Wax.  I buffed with a soft cloth an hour later and that was that.

Build your own furniture

LOVE!  Thank you Whitney and Ashley.  Can’t wait to see you again!!

Painted Glass Vase Tutorial

 Distressed Painted Glass Vase at savedbylovecreations.com by Fox Hollow Cottage

Give a warm welcome to today’s guest poster, Shannon!  Thanks for being here today to share this great, quick fall decor painted vase project.

Hi there SBLC readers!

My name is 
and I blog at

Today I’m going to share a super… 
(and I mean super)
simple craft that will result in a pretty decor accent, perfect for anytime of year!

-Make a Painted, Distressed Vase-

Grab yourself a vase.
You might have a few on hand already. 
The more cut work, (nooks&crannies) the better!
I got mine at Goodwill for 99 cents.

Make sure it’s clean & dry.

Next, you’ll want to use a paint that is suitable for glass surfaces. 
I used a (new to the USA) paint called 
La Craie.
It’s a chalk based paint and it worked beautifully on the glass. 
I decided on Cobblestone.
It’s a perfect neutral and I thought I could get lots of use out of my vase in this shade.

I like to move stuff around. A lot!

After my paint was dry. I grabbed  a sanding sponge and just knocked-off the paint until I liked the look!

Done
Decorate
 
Enjoy
This idea can be utilized to make centerpieces for parties, showers or casual weddings too. Any paint color can be used and embellishments can be added to make them really personal too! 

For Fall… I liked the simple, unadorned vase dressed in paint only. I can really enjoy the texture and cuts in the vase and I liked it paired with the branches, leaves and the natural elements of the wood and jute twine.
If you would like to view some more ideas for dressing up simple items… I have a some fun, 
tin-can crafts you might want to peek at.


Thanks so much for having me today!!
It was a real pleasure 🙂
Photobucket
Privacy Policy