101 Tasty Freezer Meals Plus Great Tips

101 Freezer Meals @savedbylovesToday I am thrilled to share with you this yummy collection of 101 Freezer Meals from Julia at Rock it Like a Mom!

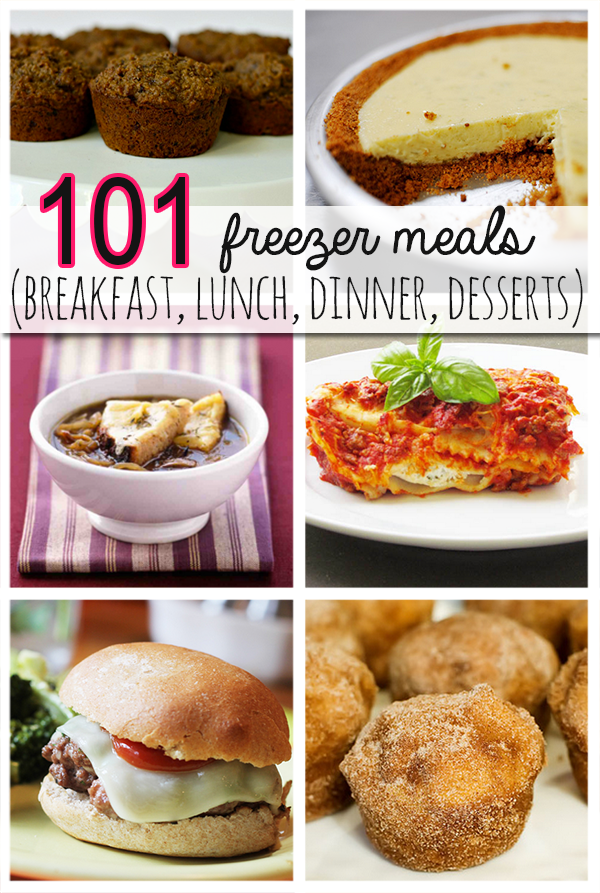
Whether you are flying solo, or cooking for a large family, make ahead meals save you loads of time. Especially if you tackle a ton of meals in one day. Julia gives you great tips for doing just that, as well as over 100 recipes she has curated. There is something to fit every taste, including breakfast, luch, dinner and desserts!

Find them here:

101 Freezer Meal Recipes

Thanks Julia!

Over 50 Easy Watercolor Inspired DIY Tutorials

50 Plus Easy Watercolor DIY Decor and Art Tutorials @savedbyloves
I am thrilled to share today’s 50+ round-up! It is a colorful collection of watercolor inspired DIY tutorials that you can make, even if you aren’t an artist! From fashion to wall decor to kid’s crafts and more, you will be ready to create with these detailed tutorials. Enjoy!

Over 50 Awesome DIY Stencil Decor Projects

50 Best DIY Stencil Decor Projects @savedbylovesI must admit that stencils are a part of my everyday life. They are particularly fun to use in mixed media projects and art journaling, but their role in DIY home decor is not to be underestimated. Today’s round-up proves just that with over 50 DIY stencil decor projects you can make. Walls, floors, headboards and more can be made fabulous with a little time, some paint and your favorite stencil! Enjoy.

50 Plus Awesome Yarn Crafts to Make

50 Best Yarn Crafts to make from @savedbylovesDon’t let the title scare you. For this collection, no crochet or knit skills are needed. This week’s crafty round-up is all about things to make with yarn. You will find all kinds of kids crafts, home decor, paper crafts and more. Enjoy!

50 Plus Awesome DIY Storage Ideas

50 Plus Awesome DIY Storage Ideas @savedbylovesIt is time for spring cleaning, and I am here to help you with 50+ awesome DIY storage ideas. You can get organized on a budget with this week’s collection. As always, if we missed your awesome DIY storage tutorial, send us the link or comment after this post. Enjoy!

30 Plus Free Spring Crochet Patterns

30 Plus Free Spring Crochet Patterns from @savedbylovesThe fact that winter is coming to an end doesn’t mean it’s time to put away the yarn. Today’s round-up is full of beautiful free spring crochet patterns. You’ll find everything from Easter decor to spring scarves and more. Enjoy!


50 Plus Awesome Ribbon Crafts

50 Best DIY Ribbon Crafts @savedbylovesIf you are obsessed with ribbons like me, you will love today’s round-up. Read on for over 50 ribbon crafts, including holiday projects, DIY home decor, kids crafts and more! If you want your ribbon project included, leave a link to your tutorial in the comments.


How to Mod Podge Crackle a Dress Form

DIY Crackle Dress form @savedbyloves

Hallo there! My name is Amy – from the blogs Mod Podge Rocks, DIY Candy, and Washi Tape Crafts. Yep, I have three blogs. You could say I really love crafts – and also being busy, apparently. I guess that’s just how I roll! This is a tutorial I haven’t share yet, and am thrilled to show you today. Awhile back I made this initial wall art you see above, and at the same time I made the dress form in the photo. Here’s a closer look:

Dress form detail

The tutorial for the easy initial wall art is on Mod Podge Rocks, but I never shared any steps for the dress form. That is what I’m doing today! It uses Mod Podge Crackle Medium, which gives projects a fine eggshell crackle in one step. Here’s how I made it.


  • Paper mache dress form
  • Wood candlestick
  • Mod Podge Gloss
  • Mod Podge Crackle Medium
  • Fabric – you can use scraps
  • Acrylic paint – white and two other coordinating colors for the crackle portion – I used light green and dark green
  • Craft glue
  • Embellishments – I used a key on gold thread
  • Scissors
  • Paintbrush
  • Old cloth
  • Flow medium (optional)

Step One

Paint your wood candlestick with your lighter acrylic paint color – in my case, light green. Let dry.

Step Two

Paint your dress form white. This isn’t essential if your fabric is thick . . . but if it’s cotton like mine, the Mod Podge can make it a little transparent and dull down the color. So I always basecoat white because it just takes a few extra minutes.

Mod Podge Home Decor

Paint Mod Podge on your fabric and let it dry. This makes it easy to cut without fraying.

Step Four

Decoupage your fabric pieces to your dress form. Continue overlapping . . .

Step Five

until the whole thing is covered! You might have to trim and/or dart some pieces by cutting slits in the middle toward the top. It takes a minute, but you’ll get it. Set your dress form aside and let it dry.

Mod Podge Crackle Medium

Carefully read the instructions on the package of your Mod Podge Crackle Medium. I know it’s tempting to just re-open the package and begin, but with crackle medium, you need to read to make sure you understand. This is just one step, so it’s not that hard.

Step Seven

Brush the crackle medium onto your candlestick in a medium layer. Don’t keep brushing over and over the same area – just brush it on and try not to overlap. Let it dry.

Step Eight

This step is optional. If your darker paint color is a little thick, adding flow medium to it will help. The reason is because you are going to use a cloth to wipe it off in the next step, so you want the paint to be less viscous (more liquid and not as thick).

Step Nine

Brush the darker color over the lighter color and watch the crackle! Wipe off the excess (not hard, just gently wipe away the extra). Keep in mind it’s a fine eggshell crackle . . . so you can see it, but it’s not going to be huge divots. I personally love the effect!

Once you’re done, glue the dress form to the candlestick and add any embellishments (like my little necklace) to finish. Then display.

DIY Crackle Dress form @savedbyloves

Decoupaging dress forms is so fun! Give it a try. For more great ideas, come visit me on Pinterest . . . I also have a Mod Podge Rocks newsletter and DIY Candy newsletter that you should sign up for to get weekly inspiration. Thanks to Johnnie for having me and I’ll see you next time!

Wood Pallet Cross Tutorial

Wood Pallet Cross DIY @savedbyloves

Today’s project is a great way to use up those wood scraps leftover from previous projects. I will show you how to make this sturdy wood cross using pallet scraps and pocket holes. You will also learn how to easily create the chippy, distressed paint look seen here.

Wood Pallet Cross DIY

To start, I cut one scrap wood piece (2×4) to 18 inches and two pieces to 5 inches long.

I attached the 5 inch pieces to the 18 inch piece using pocket holes with my Kreg Jig (see How to Use Kreg Jig). The pocket holes are circled in the photo.

*Place a pocket hole on the bottom of the 18 inch piece for attaching the finished cross to a base. You want to do this before attaching the patchwork pieces in the next steps.

Folk Art Home Decor Chalk

I used Folk Art Home Decor Chalk to create the distressed paint look. It is super easy!

How to Distress Wood

I brushed base coat on thin pallet wood pieces and let that dry.

Create Chippy Paint Look

Using the Layering Block, I added more colors.

Create Weathered Wood Look with Paint

Lightly dragging the block across the dry painted board adds color in a chippy, random distressed fashion. Layer as many colors as you want, drying between each layer.

Patchwork Wood Cross

Once I had all the boardws painted, I cut them into random sized pieces and placed them on the cross. I made necessary cuts to the patchwork pieces with my mitre saw until everything fit into place.

Reclaimed Wood Projects

I glued the pieces into place and used my Ryobi AirStrike Nailer with one inch brads to secure them.

Reclaimed Wood Cross Tutorial

To finish, I centered the cross on a 2×4 rectangle and attached it with a pocket hole on the back of the cross and wood glue.

For more inspiration, visit our 50+ Scrap Wood Projects:

And our 50+ Wood Pallet Projects:

DIY Dollar Store Eraser Valentine Earrings

Valentines Day Jewelry Tutorial

I heart creating with dollar store supplies. For one, it is cheap, and it challenges me creatively. When I saw these cute Valentine’s Day erasers over the weekend, I immediately thought they need some resin and ear wires! Follow along to see how I made earrings from dollar store erasers!

Dollar Store Craft Idea

At first I imagined making a pendant, but then I realized the erasers came in pairs, just perfect for earrings. This project is super cheap and easy to do. Don’t be intimidated by resin if you’ve never used it.

ICE Resin Jewelry Tutorial

Especially now that ICE resin has made mixing the two parts so simple.

Dollar Store Resin Craft Idea

When working with 2 part resin, it is crucial to mix equal parts A and B. If you are off even just a little, the resin may no cure properly. ICE resin comes in a plunger that extrudes equal parts automatically.

How to Use Resin

Use a craft stick and mix the 2 parts by stirring for at least 1 minute.

TIP:  After mixing, let resin sit for 5 minutes before applying it. This lets the mixture settle and decreases air bubbles.

How to apply resin

Apply a little bit of resin at a time, starting in the center using the craft stick. It can take awhile to get use to how much resin to use. Just don’t go overboard. You can always add more to create a dome effect after the first layer has dried, but you are in for a mess if you use to much and it spills over the edge.

Let resin cure for 12 hours.

Upcycled Jewelry

I picked up these screw eyes at Walmart for $0.97.

How to Make Earrings

 Upcycling

Just screw the hardware into the top center of your resin eraser.

Jewelry Making Tutorial

Add ear wire and you are set!

Valentines Day Craft

Do you love them as much as I do? You can make 6 pairs with the pack of $1 erasers!

Make Adorable Valentine's Day Earrings Dollar Store Craft @savedbyloves

Find over 50 ways to decorate for Valentine’s Day:

50+Valentine’s Gifts to Make:

Privacy Policy