Furniture Makeover Chalk Paint a Goodwill Chair

[pinit]

Use chalk paint to revamp a chair

[pinit]

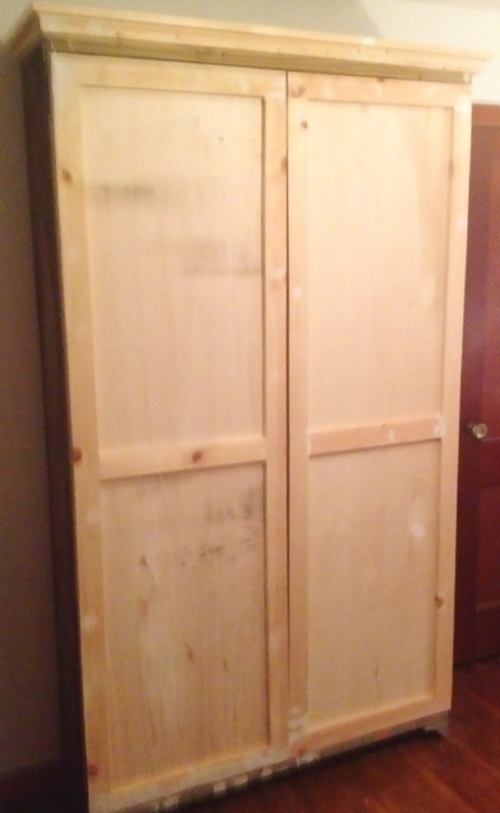
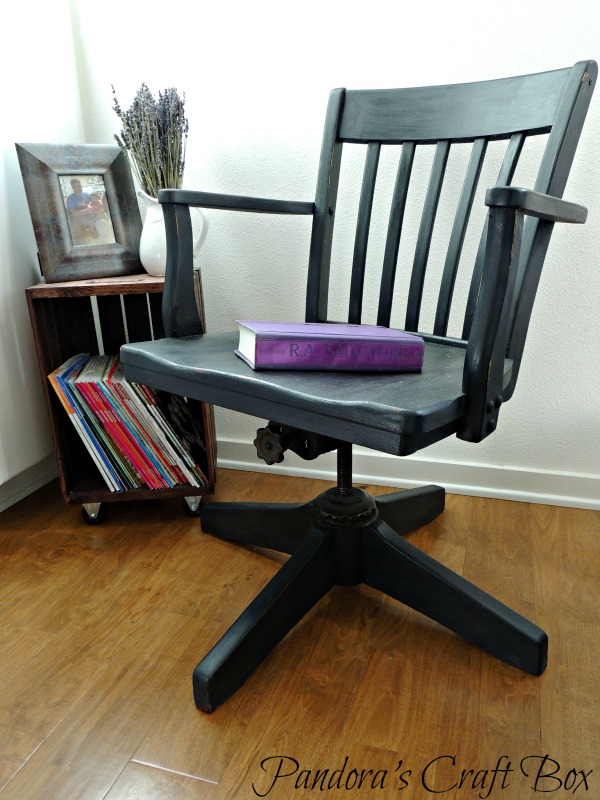
I decided one day to take a little trip to the local goodwill and see if I could find any good finds. Guess what?  I always find something I just think I can’t live without and this time around it was no different. I found a beautiful banker’s chair just waiting for me to take home! I did not even think about it twice and just drove it home.

 How to paint a piece of furniture with Chalk Paint

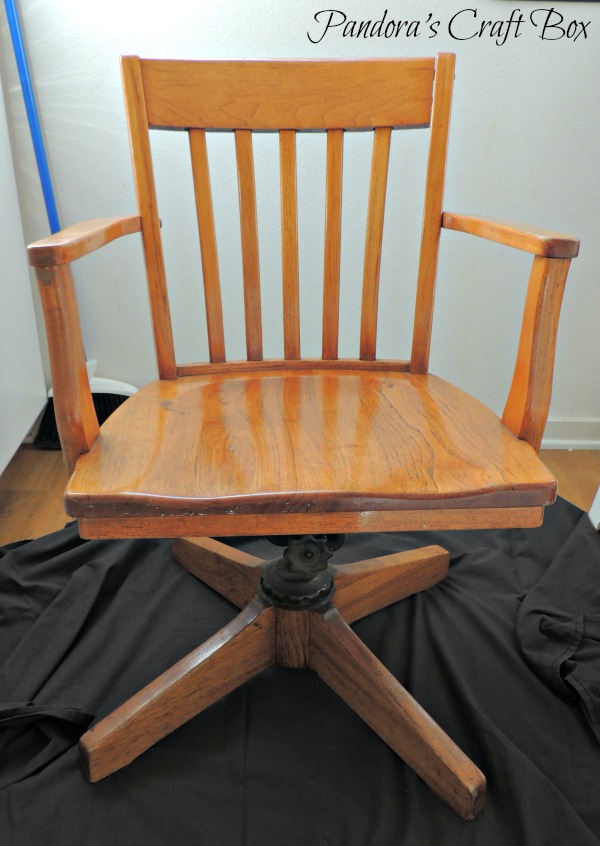
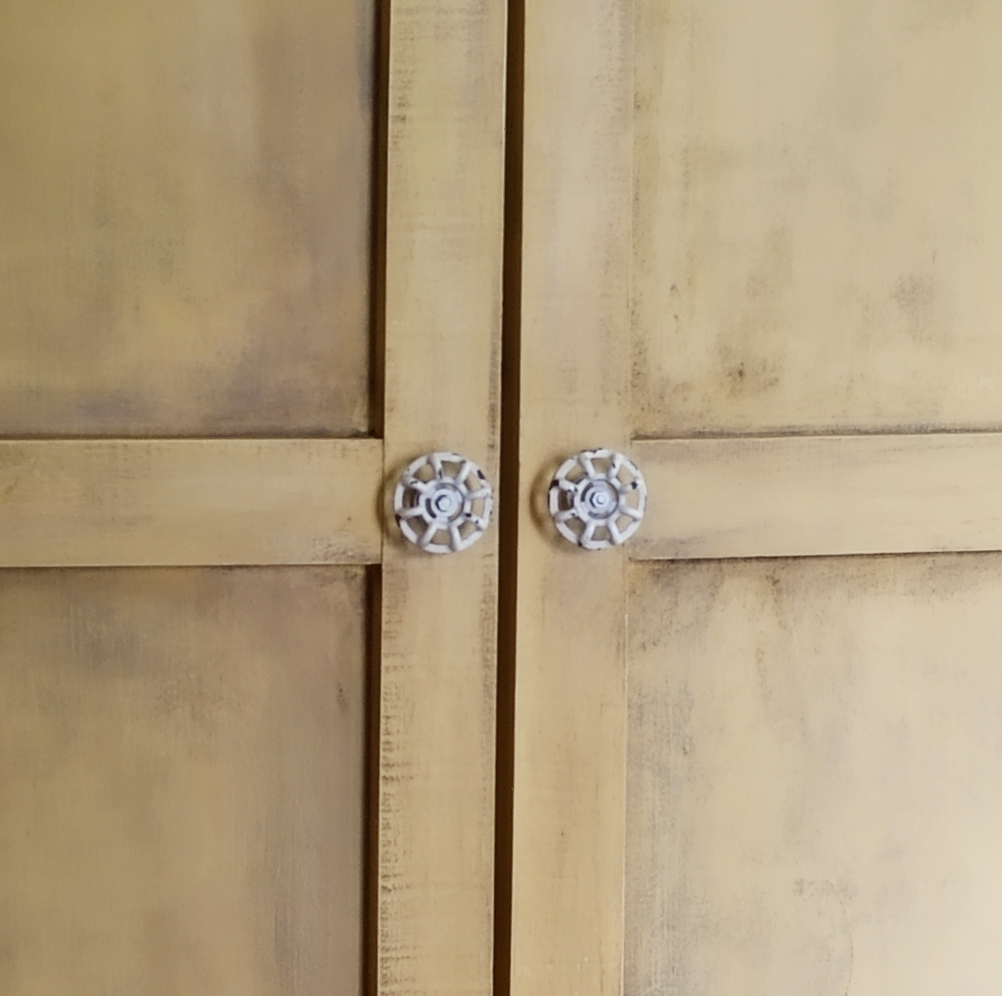
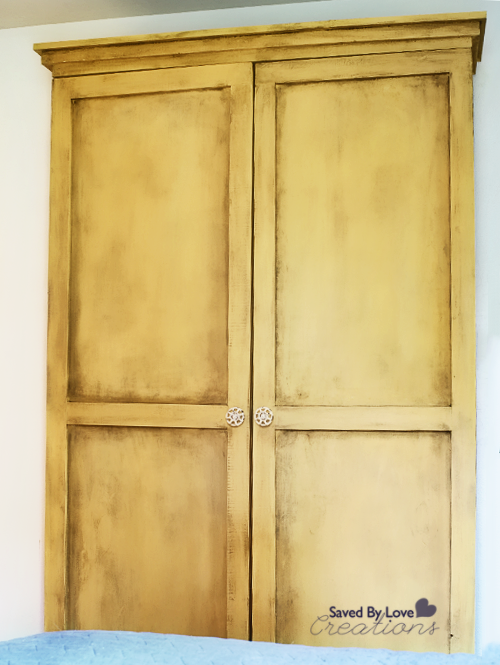
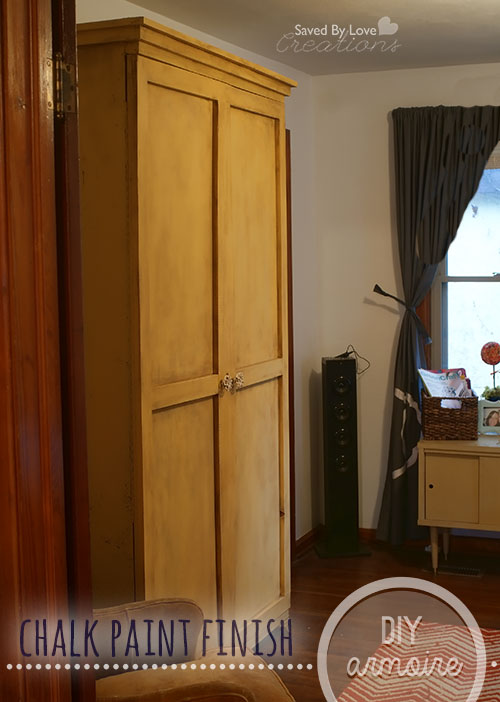
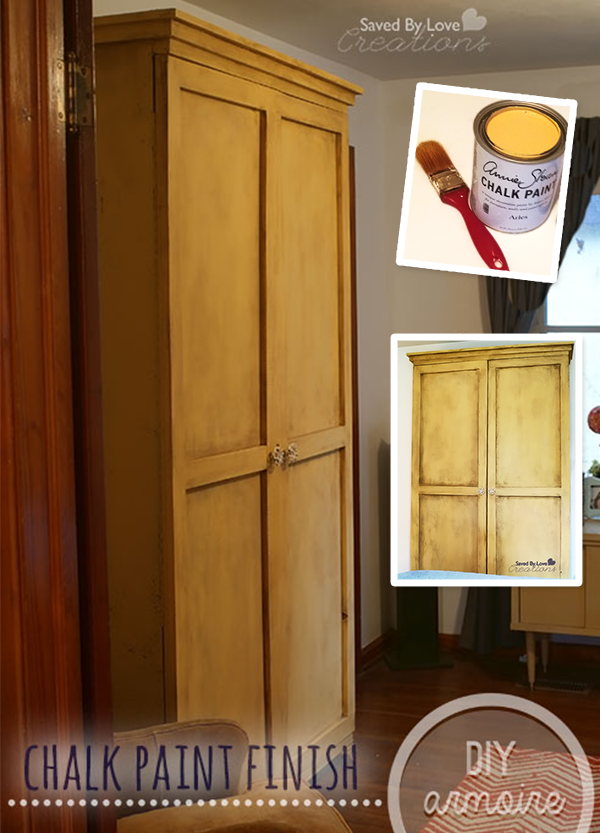
Once it was home I had to decide what I wanted to do with it. I did not want to spray paint. I choose to do my home made chalk paint and paint it.


The great thing about using chalk paint is that I don’t have to sand the chair and it’s all about just painting and not worrying about all the mess of sanding.

 Goodwill makeover

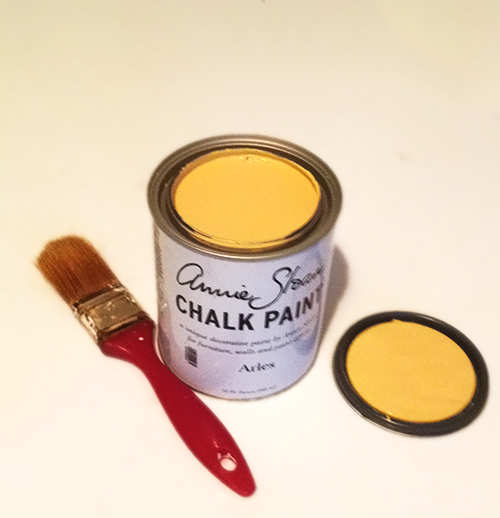
I made my home made chalk paint with black paint I got at my local hardware store. If you would like to know more about my home made chalk paint you can find it here.

 how to use chalk paint

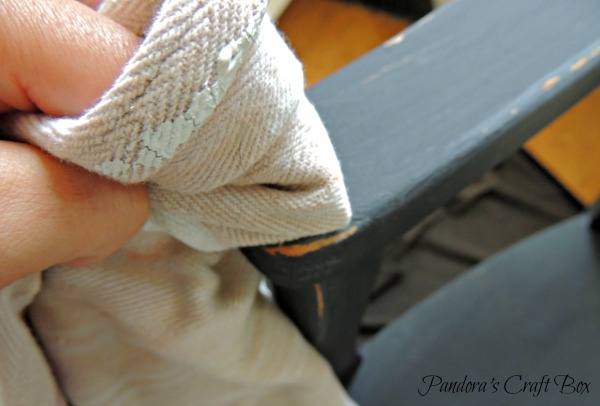
I applied about two coats of chalk paint and let it dry.  Once it was dried I just used a wet cloth and rubbed off the paint the selected areas. I wanted the chair to look used and I rubbed the chalk paint off in the areas where it would be well used.  Now the chair has a little chic look.

chalk-paint-sealer

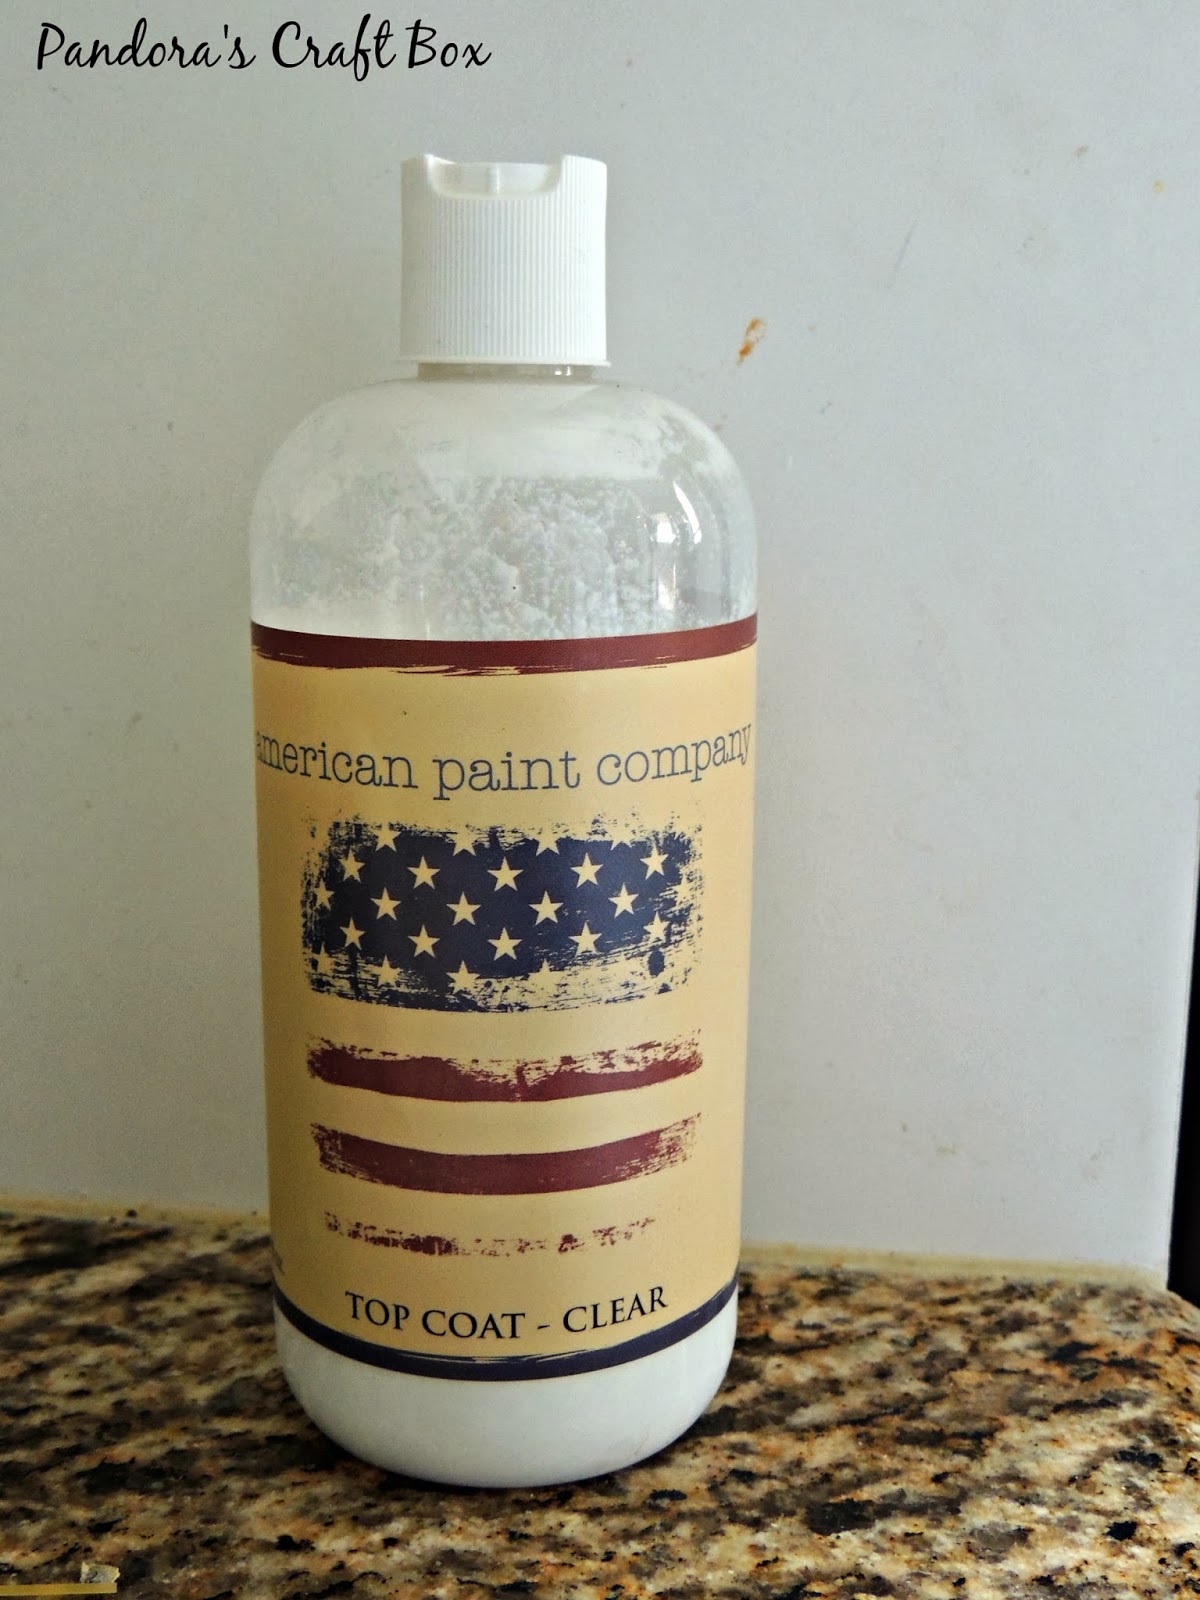
I then applied a sealer coat on the chair to make sure they chalk paint will not continue to come off with wear.

What do you think? What will you use your home made chalk paint on?

Stay Crafty!

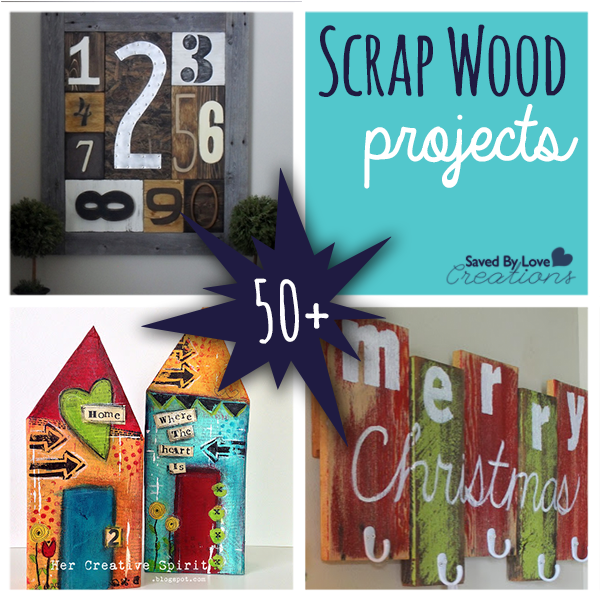
Don’t miss our roundup of over 75 great projects using Chalk Paint!!

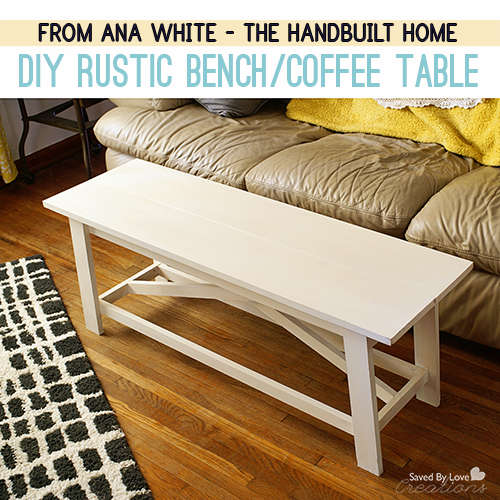
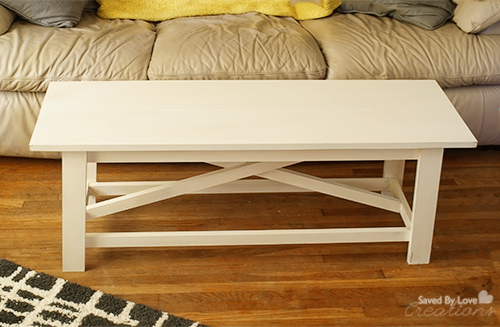
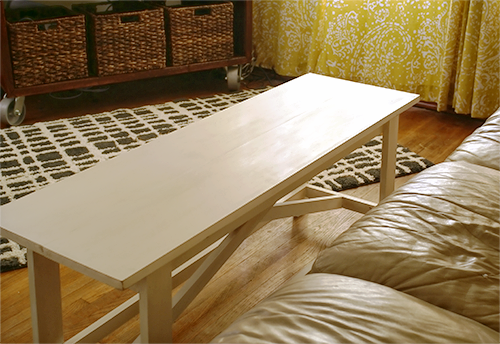
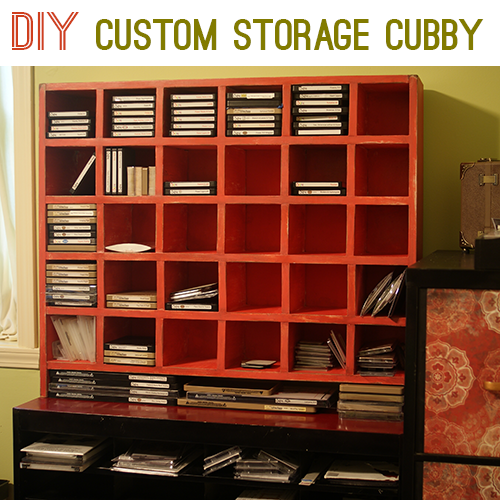
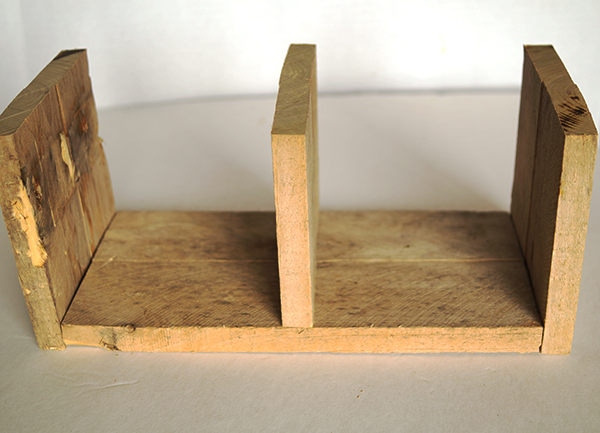
 And how about this DIY custom storage cubby I built for storing my Sizzix Dies?  It is painted with a recipe for chalk paint you can make yourself.  Head over for the DIY woodworking plan and chalk paint recipe!

Make a Stenciled Planter Box From Reclaimed Wood

*This is a sponsored post written by me on behalf of Blue Print Social for Ed Roth Stencil1 Stencils and FolkArt Multi-Surface Paint by Plaid Crafts.  All opinions are 100% mine and honest.

[pinit]Easy Rustic Planter DIY with @PlaidCrafts @savedbyloves[pinit]

Today’s project is a simple, inexpensive stenciled planter box made from reclaimed wood .  Use this rustic crate for house plants, flower bouquets, to display vintage bottles, candles and more!  I used FolkArt Multi-Surface Paint and an Ed Roth Stencil1 stencil with some scrap wood and chicken wire I had on hand to build this versatile rustic home accent.  Read on to find out how you can make your own version!

Rustic Home Decor Ideas

SUPPLIES:

Ed Roth Stencils @PlaidCrafts

Scrap Wood

Chicken Wire

Metal Snips

Wood glue

Ed Roth Stencils

FolkArt Multi-Surface Paint

FolkArt Antiquing Medium

Foam Brush

Lint Free Cloth

Stencil brush

Masking Tape

Table Saw

Nailer or hammer and nails

TUTORIAL:

How to build a scrap wood vintage crate

Cut wood for the bottom, 2 ends and divider of your crate.  I these all from the same piece of pallet wood.The two ends should be the same height, and the middle divider should be that height minus the thickness of the bottom piece.

Ryobi Airstrike Nailer

Attach the ends to the bottom as pictured, placing a strip of wood glue at the contact point before nailing together.  I used one inch brad nails with my nail gun.

How to make a reclaimed wood planter box

Attach the divider by flipping box over so that the bottom is up and nailing through the bottom into the divider so you are left with the above image.

Reclaimed wood projects to make

For the sides of the crate, I used a wood shim like scrap piece from my stash.  You could use paint stirrers or vintage yard sticks here too.  Cut four of them (2 for each side) the same length.  To get the length just hold the wood up to the crate with one edge flush and mark the other edge to cut.

How to use Nail Gun

Cut chicken wire with metal snips to same length and height as crate.  Put the wire in place and secure by nailing side planks in place over the top of the wire.

Ryobi Nailer

Repeat with the remaining side plank at the top, then flip the crate over and repeat on the other side.

Folk Art Antiquing Medium

Since all of my wood was random and mismatched, I decided to pull it together with FolkArt Antiquing Medium.  This stuff is super easy to use and I love the aged effect, on top of how it unifies the various wood pieces.

How to created aged wood effect

Apply the medium with a sponge brush in a few inch sections at a time, then wipe back with a lint free cloth until you get the desired effect.

Wipe back antiquing medium

If you find it too dark, use a damp cloth to remove more of the stain.

How to use stencils

Once that is dry, tape your stencil into place and apply the FolkArt Muti-Surface Paint using a stencil brush.

I found the stencil I tried easy to use.  The lines were crisp and there was no bleeding.

 The Ed Roth Stencil1 Stencils come in large formats that are ideal for walls, floors and furniture, and are made of durable, reusable mylar that is super easy to clean.  These stencils will be available at Jo-Ann Fabric & Craft stores soon.
As for the paints, they work on any surface, are dishwasher safe and can be used indoor and outdoor.  I personally can’t wait to try them on glass so I am sure you will be seeing that around here in the near future!

Build a Rustic Planter Box

Once that is dry, you are ready to use your awesome handbuilt crate!  I went with ferns, but the customization options are endless.  Make it all you.

If you loved this project, you may want to fcheck out Plaid Crafts on FacebookTwitterYouTubePinterest, and Instagram or visit their blog, The Plaid Palette.

Want more projects with Ed Roth Stencil1 Stencils and FolkArt Multi-Surface Paint from your favorite bloggers?  Here you go…


Build Your Own Butcher Block Kitchen Island

[pinit]DIY Butcher Block Island

[pinit]

My sister needed a kitchen island, giving me a great Christmas gift idea, and an excuse to tackle another Ana White woodworking plan.  I used Ana’s Easy Kitchen Island plan, adjusting the dimensions to fit in Amber’s kitchen.  Instead of 54 inches wide, we made our version 36 inches.  This was a quick and easy build.  I have some tips to share that  I wish I had known before this build, but we learn by making mistakes, right?!

DIY Kitchen Island Woodworking Plan

I highly recommend staining the “planks” before attaching them for the bottom and middle shelves.  Ana attached the planks with Kreg joins.  This seemed like a ton of work and I couldn’t think of a reason that using my nail gun and wood glue wouldn’t suffice, so that is what I did.  Super quick and easy with my Ryobi AirStrike Nailer.

Also, I used a 5 gallon bucket paint stirrer to space the planks, which worked out well.

Furniture plans

Other than those few changes, I followed Ana’s plan linked in the first paragraph.

DIY Reclaimed Wood Christmas Tree and Advent Artist Blocks

[pinit]DIY Advent Calendar Reclaimed Wood Tree #stencilGirl #Christmas with @eileenhull @artistsontheblock @Sizzix_US @savedbyloves[pinit]
Make a Reclaimed Wood Advent Calendar Christmas Tree

Today’s project is a rustic, reclaimed wood Christmas tree advent calendar that you can make for little to no cost!  Building from salvaged wood and paper crafting all in one project! I created the blocks using Eileen Hull’s (soon to be released) Scoreboards Block dies.  The die makes blocks in three sizes, for tons of creative potential.  Think about artist trading cards, but 3-D!  Last Christmas I showed you how to make an advent calendar from wooden blocks, and that is the first thing I thought of when I saw this die.  Read on to see how I used stencils from Stencil Girl, spray ink, number stickers and washi tape to decorate my mat board cubes.  Watch the video to make your own tree, or display your blocks freestanding.  These would make great Christmas gifts and decor for your holiday get togethers.

How to Make a Reclaimed Wood Advent Calendar

SUPPLIES:

For the Blocks

Mat Board

Heidi Swapp Spray ink Gold, Green, Red

Stickles in red, green, gold

Washi Tape in Christmas Patterns

Stencils (I used Stencil Girl)

Mod Podge Antique

For the Tree

Scrap wood

Mitre Saw

Nailer or hammer and nails

Wood Glue

E6000

5 gallon paint stirrers

TUTORIAL:

ADVENT BLOCKS

You may want to decorate your cubes before assembling them into the 3D shape.  First I will show you assembly, then how I decorated my cubes.

Artists on the Block


I chose the smallest of the three cubes for my calendar.  This is what the mat board looks like after it is cut with Eileen’s awesome new die!

Paper Craft DIY Christmas

Fold cubes along score lines.  Two of the scored rectangles are needed for each cube.  Place them together to form the cube.  You can glue the tabs in place if you would like, but I didn’t find it necessary with the mat board.  I haven’t tried other paper.

Stencil Girl Stencils

Place stencils over blocks and spray.

How to Make an Advent Calendar

Clean up excess ink that’s on the stencils for a reverse image on the blocks, and you waste less ink!

How to make Paper Advent Calendar

I used red, gold and green sprays, allowing about 10 minutes dry time between each color.

Mixed media Artist Blocks

Once that dried, I adhered washi tape to some blocks, the black sticker numbers and coated with the front surface with Mod Podge Antique for an aged look.  I thought it needed some sparkle, so I added stickles in red, green and gold.

RECLAIMED WOOD CHRISTMAS TREE

I made the tree like I showed you in this  DIY wood pallet Christmas Tree post, and in the video at the end of this post.  The only difference is I used chippy, weathered 2×4 scrap wood I found at a demolition site.  I determined the dimensions of my tree based on the 1.5 inch advent cubes.  The base is 19 inches, and the height is 20 inches without the frame.

I made the five shelves from paint stirrers, cutting them with the mitre saw to lengths that allowed 2 inches for each block.  So the first one is 2 inches, then 6 inches and so on, 10 inches, 14 inches and finally 18 inches for the bottom shelf.  I laid the tree flat and added a thin line of E6000 to the back of the paint stirrer and placed them on the tree where I wanted the shelves.

DIY Advent Blocks Pallet Christmas Tree

I decided to use scrap wood strips to frame the tree, just cutting to length with my mitre saw and using my Ryobi nailer to attach.

I hope you enjoyed the project and the blocks as much as I did!  Visit Artists on the Block for more news, updates and projects as artist trading blocks take over the mixed media community!

Be sure and visit other projects using the blocks in the Stencil Girl and Sizzix Artist Trading Blocks Hop

Blog Hop Order

SGSIZZIXBLOGHOP

DIY Washi Tape Storage and Vintage Trunk to Craft Organizer

[pinit]DIY Craft Storage from Repurposed Vintage Steamer trunk and reclaimed wood/cafe rod washi tape storage @savedbyloves[pinit]

This is your first peak into my new studio, unless of course, you follow Saved By Love Creations on Instagram.  It is finally coming together in an awesome creative space after a couple of months of building and repurposing.  Today I am sharing with you a vintage steamer trunk I scored and converted into storage for my supplies, as well as a scrap wood + curtain rod washi tape organizer I threw together with my Kreg Jig.

DIY Washi Tape Storage

The vintage steamer trunk organizer is self explanatory.  I just opened it up and stored my stuff in there.  It is so cool looking that I didn’t have to do much.

Washi Tape Organizer DIY

Build your own craft storage

My friend gave me these random thingies.  He knew I would use them eventually.

How to use a kreg jig

I attached scrap wood planks between them using my Kreg Jig, like I showed you in this DIY Pallet Sign Tutorial.

Make your own ribbon storage

I removed the “legs” and distress painted the piece like I showed you in this DIY Distress Painting With Vasoline Tutorial.

Next I attached curtain rods to the front that I got for $2 each at Wal Mart, screwed wire onto the back and hung on a hook to the wall.

Pretty simple project, and I cost next to nothing.

While we are on the topic, you may want to check out last year’s budget friendly craft storage ideas we brought you:

Wood Pallet Storage DIY

Wanna see how I made that handy dandy hanging marker storage up there on the left?  Click the following image…

How about some free, stylish book storage?  Click the image below…

And here is a quick and easy dollar store 3 tiered organizer DIY:

Over 50 Creative Scrap Wood Projects to Make

[pinit]

Over 50 creative uses for your scrap wood #diy #woodworking @savedbyloves[pinit]

I was pondering what to do with the ever growing pile of scrap wood in my work room, when it occurred to me that you might have the same quandary.  I started searching and was amazed to find everything from toys, to storage to jewelry to home decor and more.  Lots of cool wall art and holiday decor projects are waiting for you and your scraps.  Get going!


Build an Armoire & Distress it With Chalk Paint

Knobs

Ana White Armoire Plan #woodworking @savedbyloves

DIY armoire woodworking plan from Ana White and how to distress with #chalkpaint #AnnieSloan[pinit]

I am so excited about today’s project.  The closet situation in my new place is less than optimal (totally crappy).  In desperate need of a solution, I searched and landed on this simple armoire building plan from Ana White.  If you have been around here long, you know I am a big fan of Ana’s site.  She introduced me to woodworking and I have been covered in sawdust since that day.  This project was easy to follow.  I made some adjustments since I wanted it larger than the dimensions of the original plan, and I was improvising with salvaged wood I had on hand.

This was my first project using Annie Sloan chalk paint.  Don’t you love the color?!  It is called Arles, and I finished with Annie Sloan Clear Wax, then Dark Wax over the top of that.  Its a bit more “aged” than what I had planned.  Turns out a little of the dark wax goes quite far.  I will keep that in mind for my next project.   I still love it.  If you run into that, you can always paint over the wax.  It wasn’t that big of a deal to me in this case.  We all know I will be painting it a new color when I change my room decor anyway, right?

Annie Sloan Chalk Paint Arles

Here is the Annie Sloan paint.  Yum.

How to build an Armoire from salvaged wood

Sad quality iPhone shot of the armoire before painting.  Hard to get any shots of it really, because of the room size and… oh yeah, I made it huge.

Knobs

Did you check out the knobs I found at Hobby Lobby?  Perfect.

Pin

That’s it.  I love it.  Off to figure out what to build next.

Woodworking Project Gallery Page

Powered by CGView

Over 50 Awesome DIY Shelves to Make

over 50 cool DIY shelves to make @savedbyloves #woodworking #repurpose #reclaimed[pinit]

This week’s 50+ round-up is all about DIY shelves. It is amazing what you can use to create shelving, so think outside of the box and keep your eyes peeled while you are out there junking!


DIY Rustic Coffee Table from The Handbuilt Home

[pinit]

DIY Woodworking plan for coffee table

[pinit]

You may have heard me mention Ana White one or a million times and if so, you know that I am a big fan of her woodworking plans.  Reading her blog convinced me that I could build, and that turned out to be true.  I was hooked immediately with my first project;  DIY Chalkboard Crates:

ChalkboardCrates10

That was in may (5 months prior to the writing of this post), and since then, I have built:

Powered by CGView

DIY Rustic Coffee Table


This table is from Ana’s book The Handbuilt Home, and can be found on page 64.  The plans in the book are detailed with shopping list, tools, cut list, step by step instructions and “Notes” or tips.  I particularly love the fact that each project is labeled with icons so you can quickly see the skill level, cost and time for completion.

I completed the build in about 2 hours, twice as long as Whitney from shanty2chic took according to the book, and I am thrilled with that!  I have watched her build in person, and she wastes no time.

I finished with Chalk Country Paint.  I found it on Amazon and hadn’t used it before.  Since it was considerably cheaper than Annie Sloan and CeCe Caldwell, and I had some Amazon Credit, I thought I would give it a go.  Not bad, but it is no CeCe.:

DIY Chalk Paint Table

To finish I sand distressed the edges and sealed with CeCe Caldwell Clear wax and Aging cream.  So happy with this.  Stay tuned for more projects from The Handbuilt Home.  Order your copy and while you are waiting, visit Ana White’s website for tons of free woodworking plans, tips and tricks.  You will find everything you need to get stared.  You can build!!

Build, Stain and Seal a Side Table in Less Than One Hour

[pinit]How to build a side table[pinit]

If you are looking for an easy, quick, mission style side table to build, you are going to love this project.  You can build, stain and seal this bad boy in under 1 hour, provide you stay focused, and use your Kreg jig and Minwax wood finishing cloths!  Even if you don’t have those things, you can build this pretty quickly.  For the plan details, visit Ana White’s Adirondack stool or side table free woodworking plan.

adirondack-stool-5

Ana painted hers.  I went with walnut Minwax Wood Finishing cloths.  I recommend staining the wood after you make your cuts and drill your pocket holes.  I did that for the top five pieces, but had already assemebled the rest of the table before deciding to stain.  I get a much better look with the finishing wipes when I don’t have to deal with corners and joints.  I end up with blotches, streaks and/or crevices I can’t get to at the joints.  I love that these wipes stain and seal all at once!  Work smarter – not harder, right?

DIY end table woodworking plan

How to make an end table

Check out our other woodworking projects:

Woodworking Project Gallery Page

Powered by CGView

Privacy Policy