DIY Wood Pallet Hanging Planters

Wood Pallet ProjectKreg Jig K4 Pocket Hole System

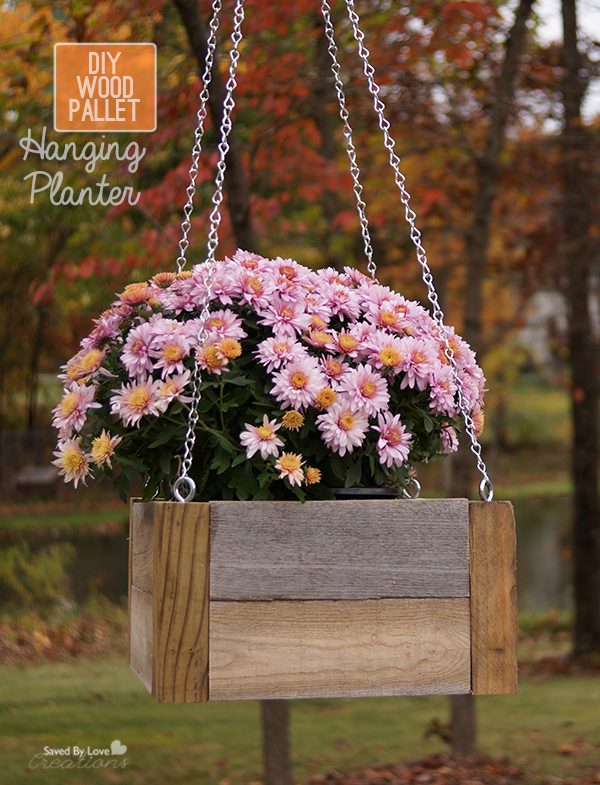
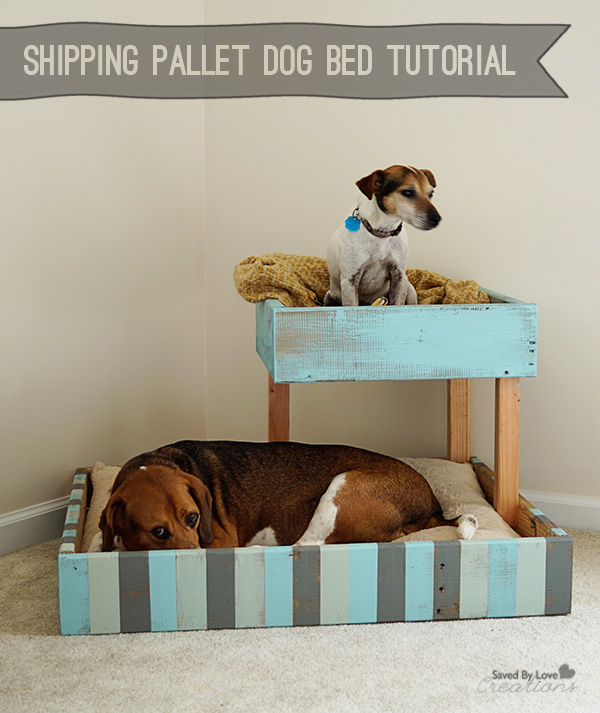
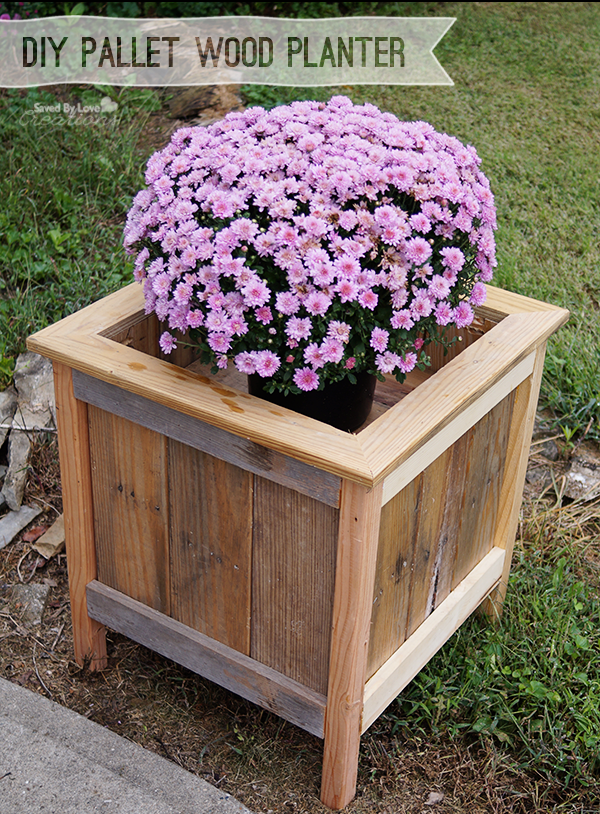
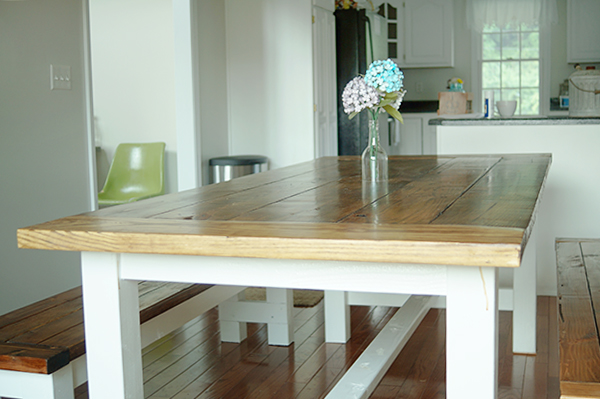
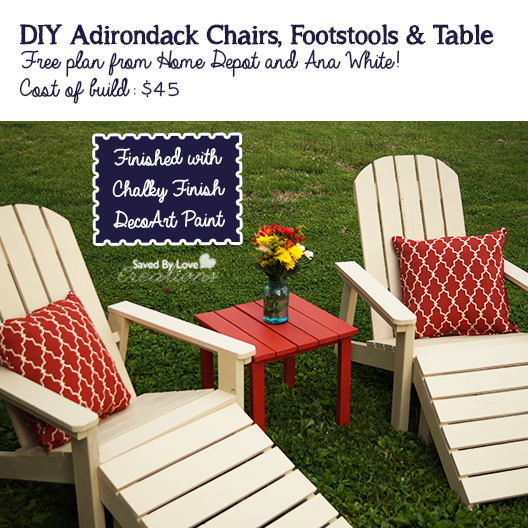
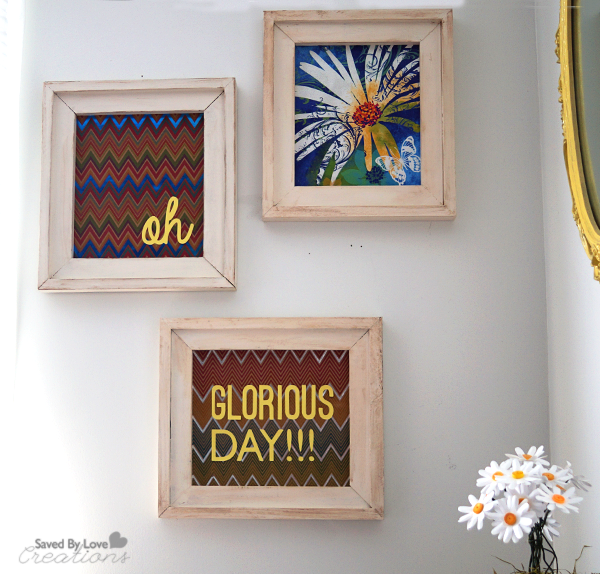
I love decorating with mums in the fall, and it is well know that I am a wood pallet upcycling kind of DIY blogger. Today’s project combines the two for some easy, inexpensive wood pallet hanging planters. This is a great way to use up your scrap wood, and is a perfect project for those new to woodworking since it doesn’t require any fancy techniques. The metal chain and hardware with the wood give these planters a rustic, industrial feel that I adore.  Let’s get started!

Cut List

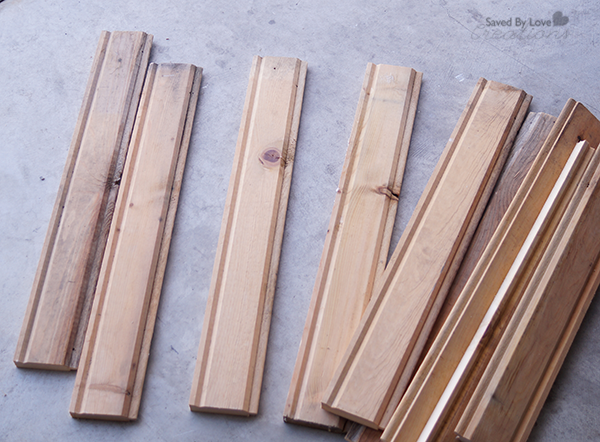
4 – 2×2 pieces 6 inches long for the side posts

8 – 1×3 pieces 8 inches long for the side panels

1 – 1×6 piece 1o inches long for the bottom (this doesn’t have to be exact – you can use whatever scrap wood you have on hand to make the bottom)
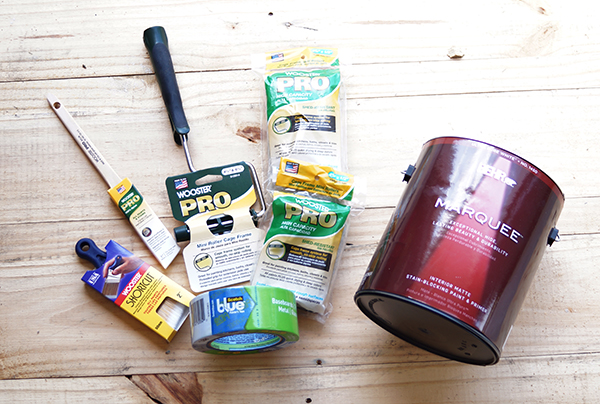
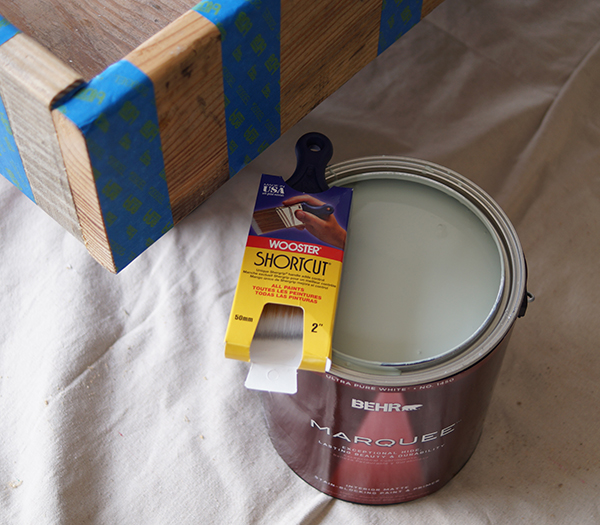
Materials

Metal chain and eye screws

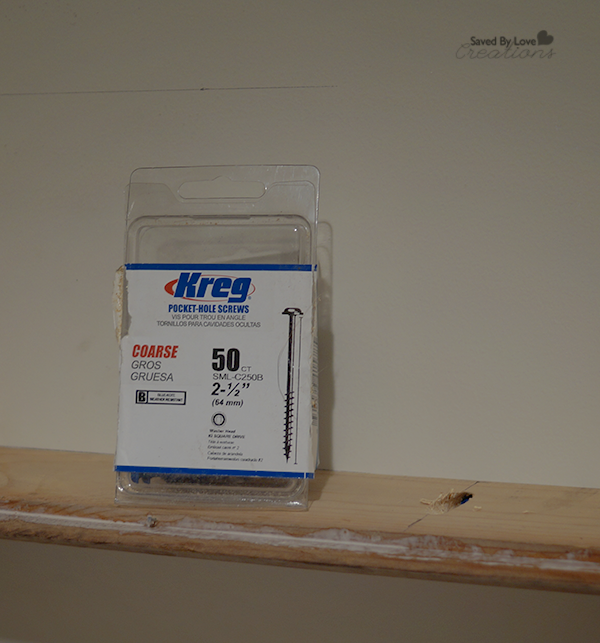
Kreg screws 1 inch and 1.25 inches
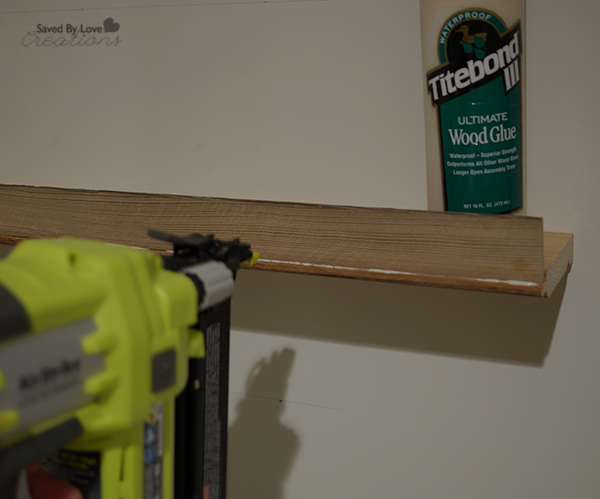
Wood Glue

Kreg jig

Instructions

I made my planter to fit the plants I had on hand.  You can adjust the size to fit your plant.

Make Wood Pallet Home Decor

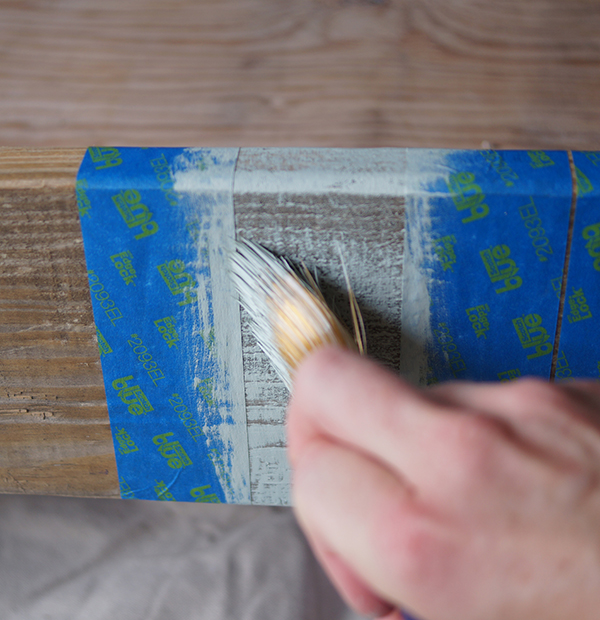
*I always use wood glue!

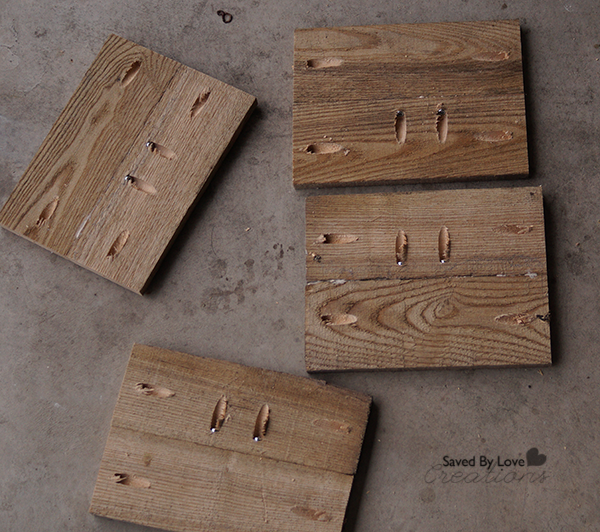
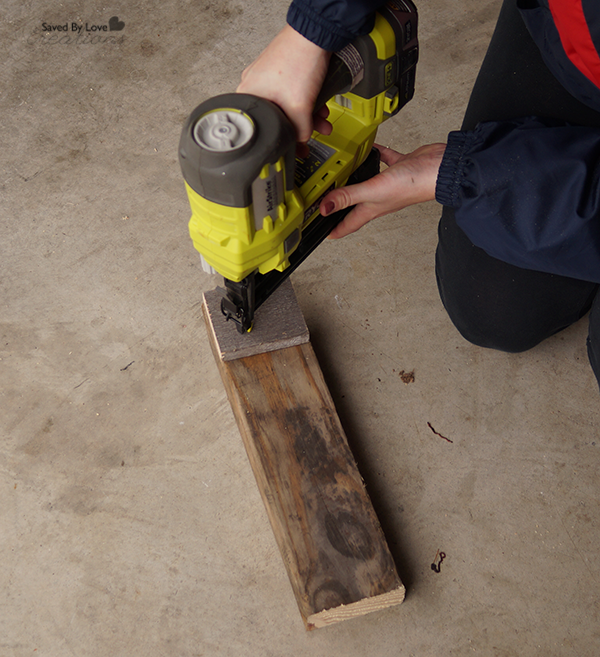
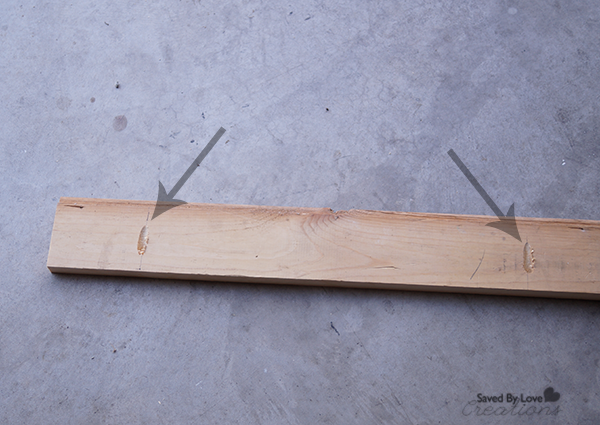
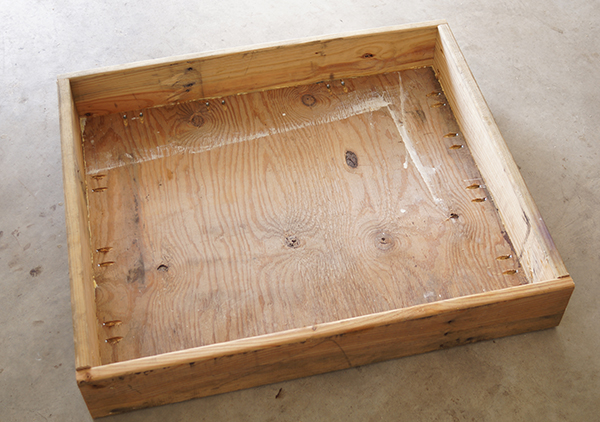
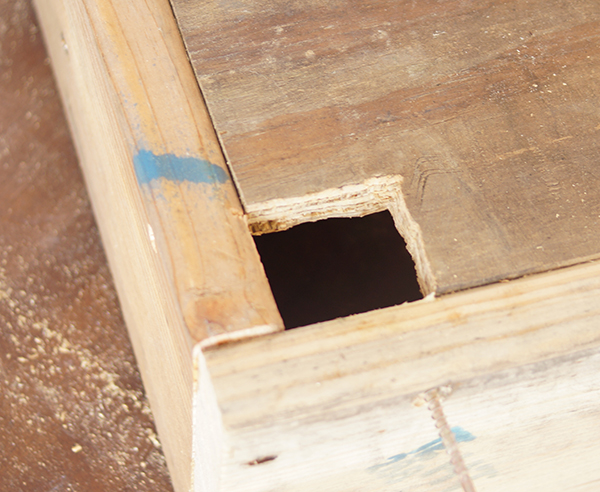
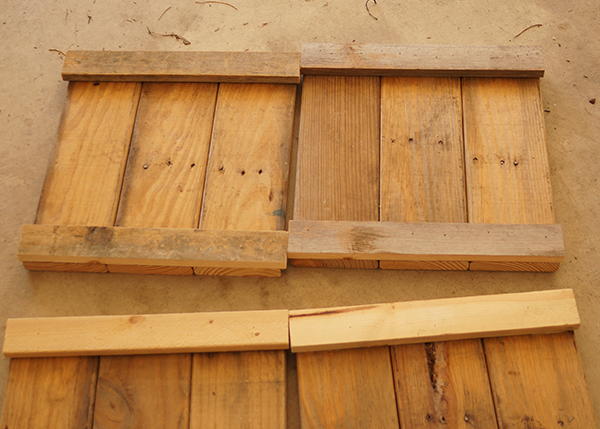
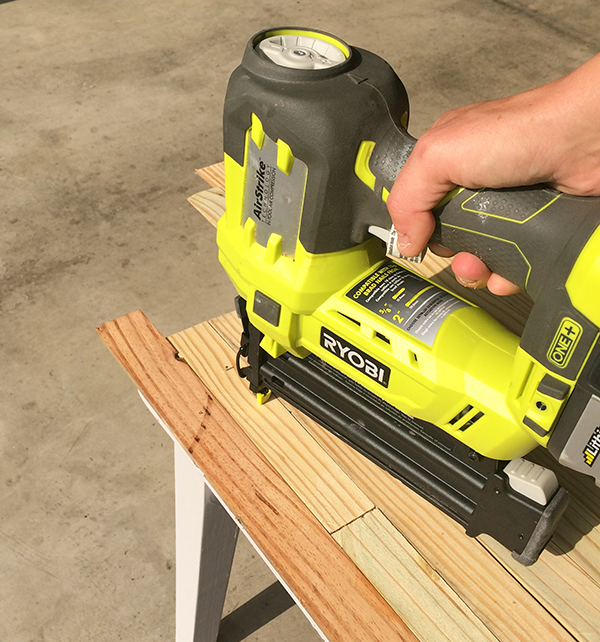
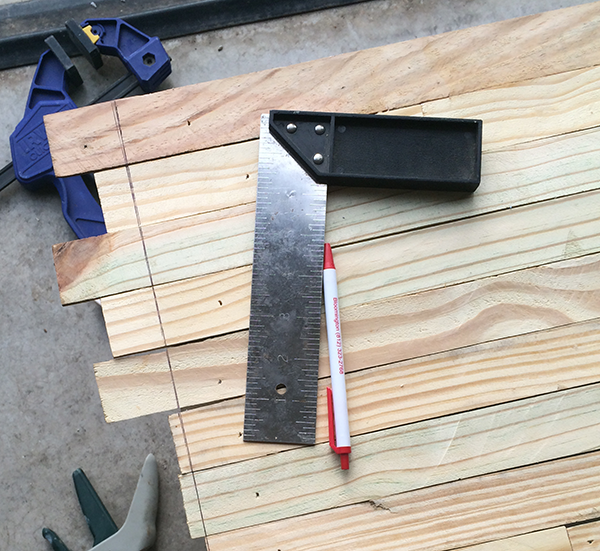
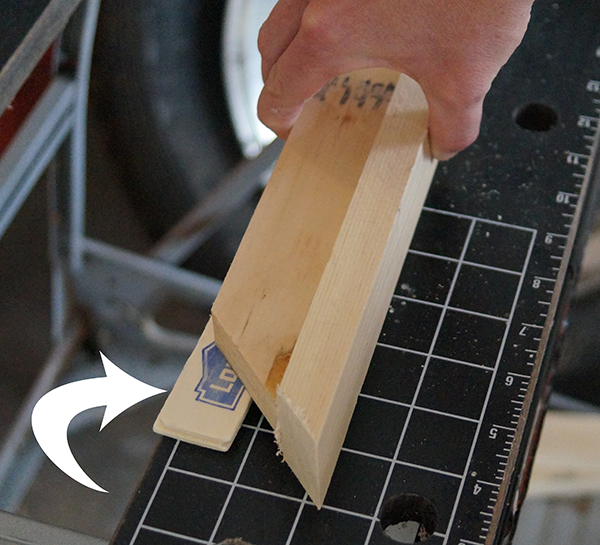
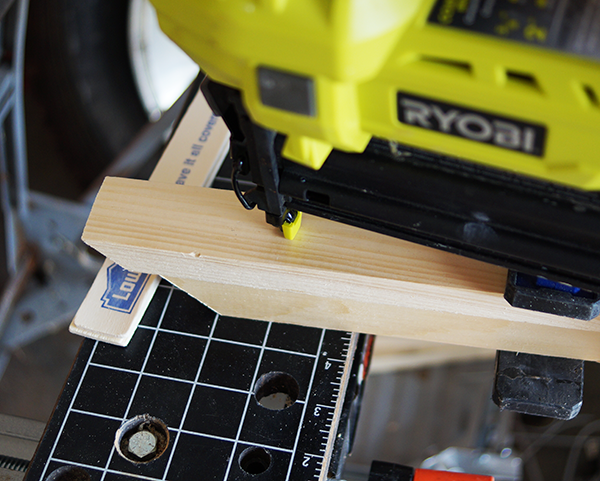
Begin by assembling the side panels with two pocket holes (I show you how to use the Kreg Jig here).  Set the depth of the jig to match with thickness of your pallet wood.  My pieces were 1×3 (which is really .75 inches thick) so I set the depth to 0.75 inches.  Use 2 – 1.25 inch screws to connect the sides.  Drill pocket holes one both sides of each side panel for attaching to 2×2 posts later.

Wood Planter Free Woodworking Plan

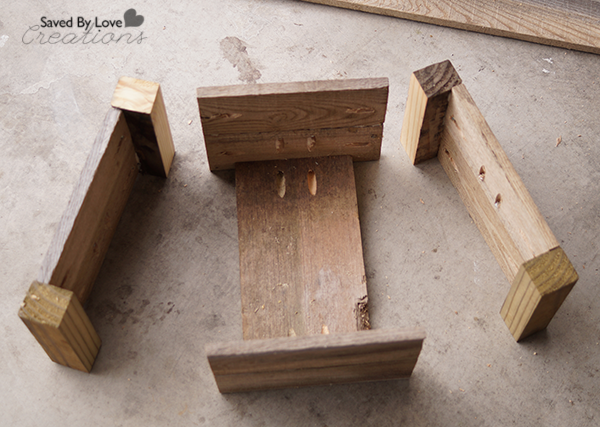
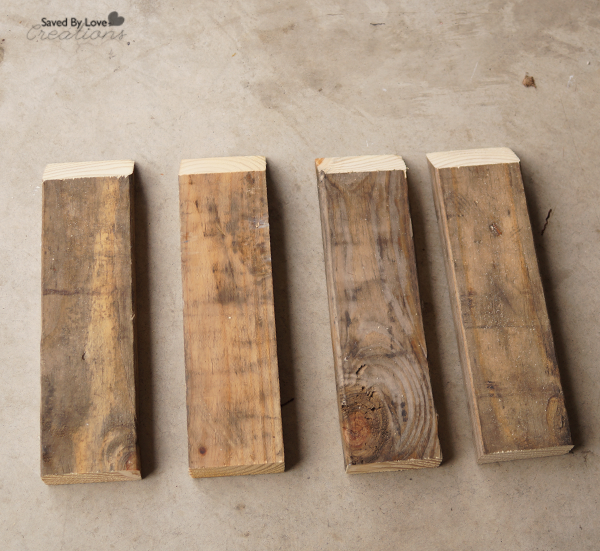
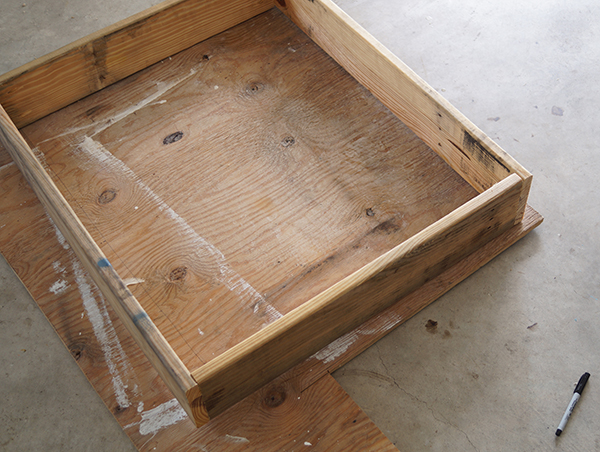
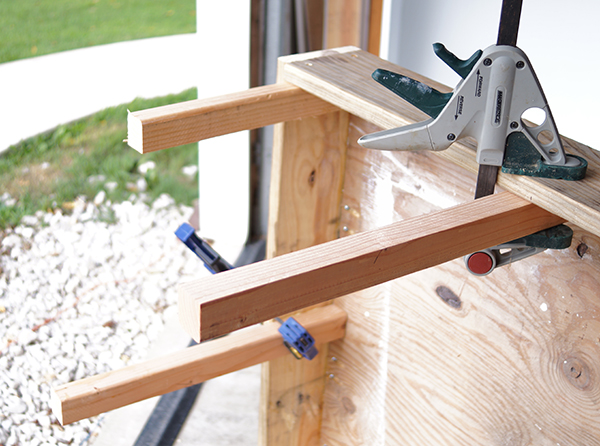
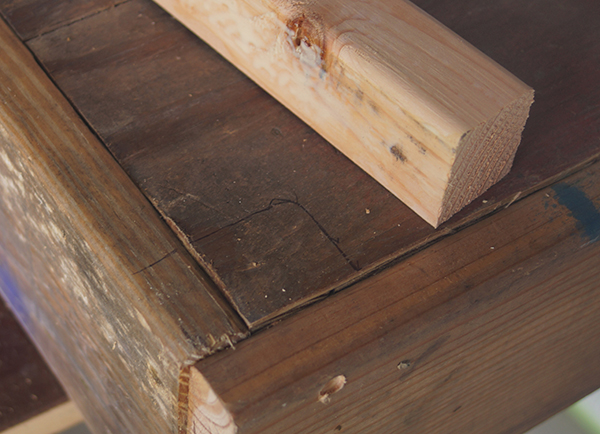
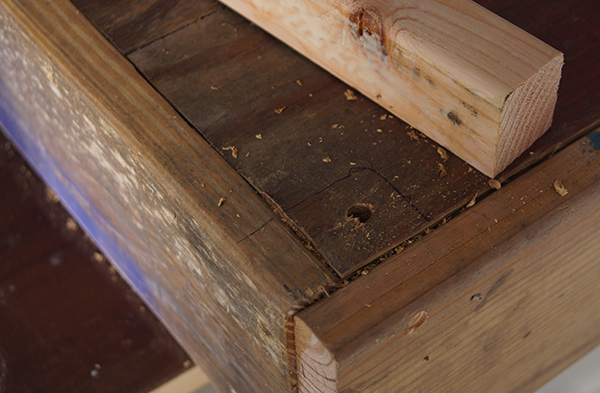
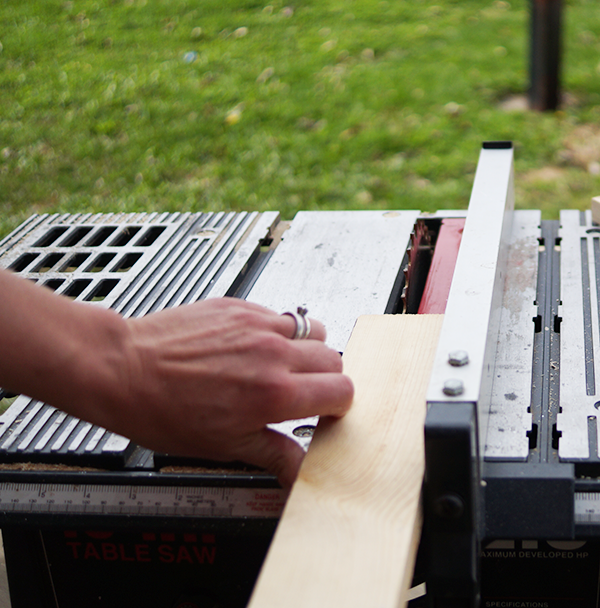
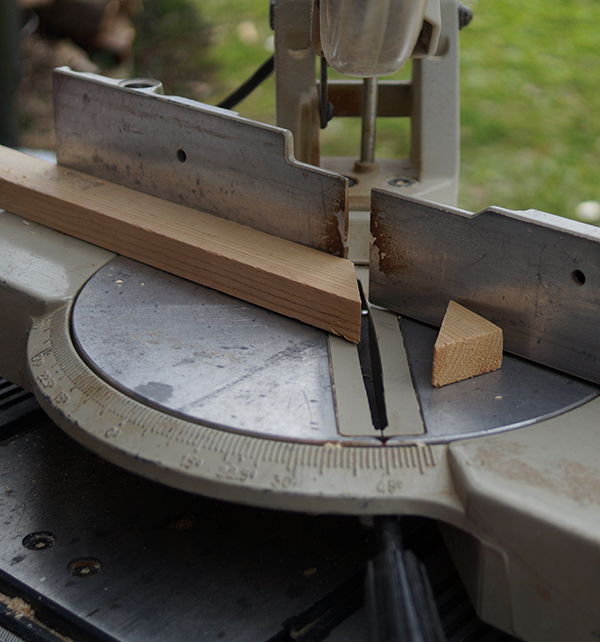
Next, attach the four posts to 2 of the side panels as shown.  I made the posts by cutting 2×4 to 6 inch pieces, then ripping those in half, all with my mitre saw.

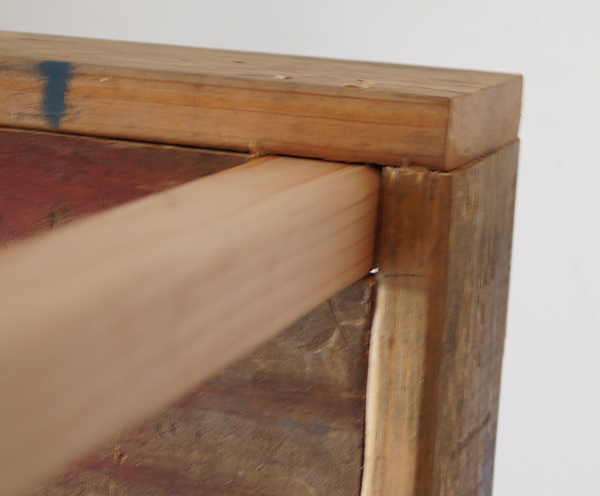
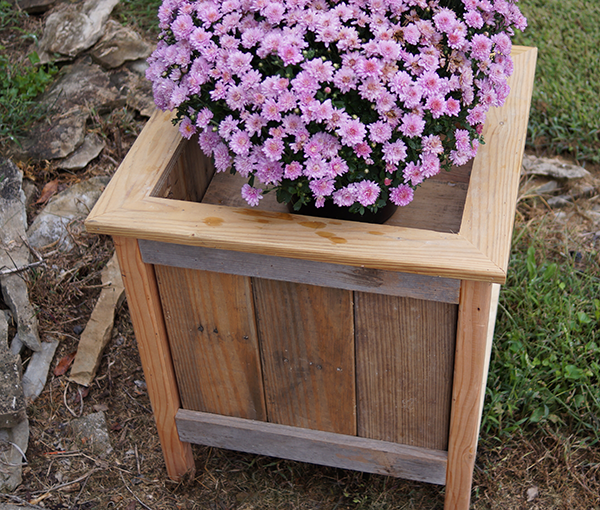
Attach the bottom piece to the remaining 2 side panels with 2 pocket holes in each end.  Knowing what size kreg screw to use can be a process of elimination, but a general way to gauge pretty closely is to add the widths of the two pieces you are attaching and subtracting 0.25 from that to get your screw length.  So in this case 0.75 for the bottom piece + 0.75 for the side panel thickness – 0.25 equals 1.25 inch screws.

Free Woodworking Plans Hanging Planter

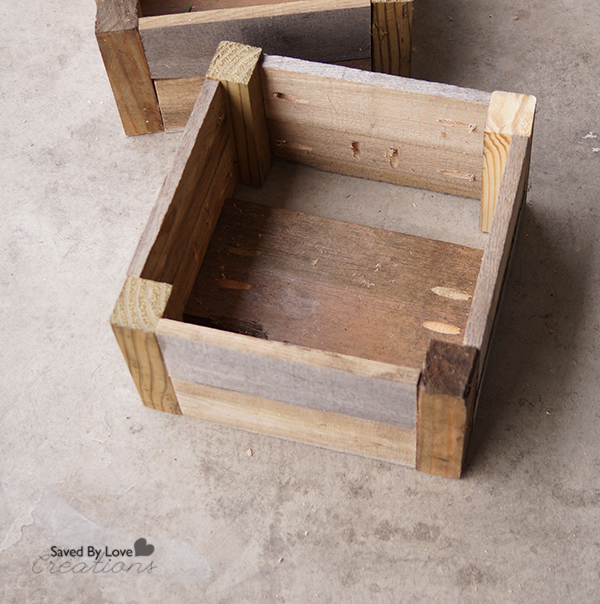
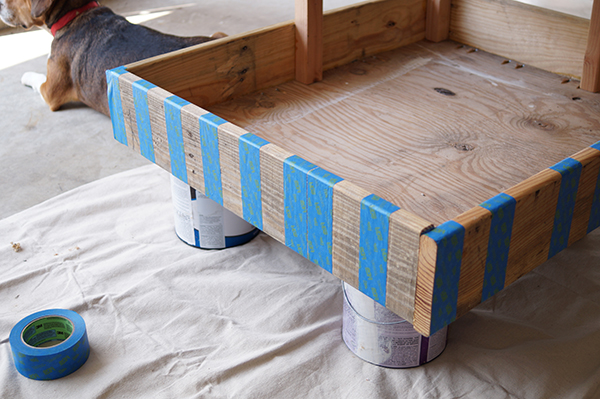
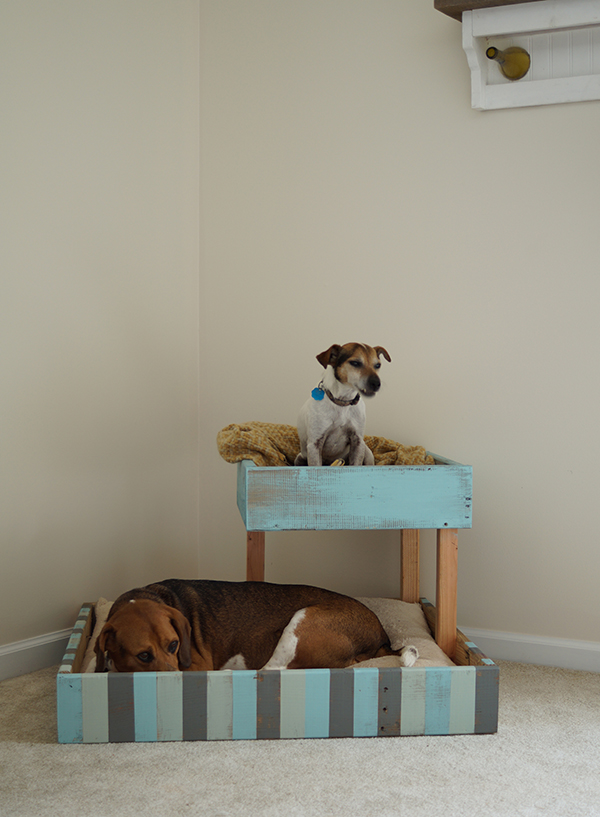
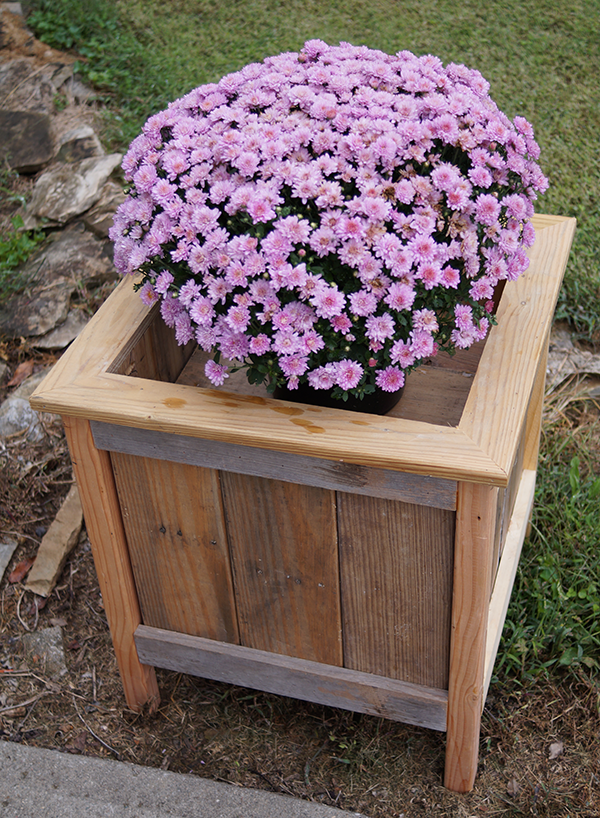
Finish the planter using the side panel pocket holes you drilled for the side post to attach the three pieces you assembled.

DIY Wood Pallet Hanging Planters @savedbyloves

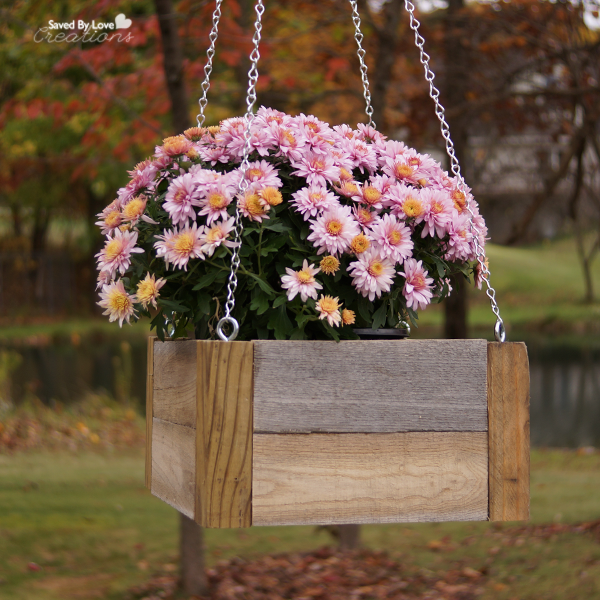
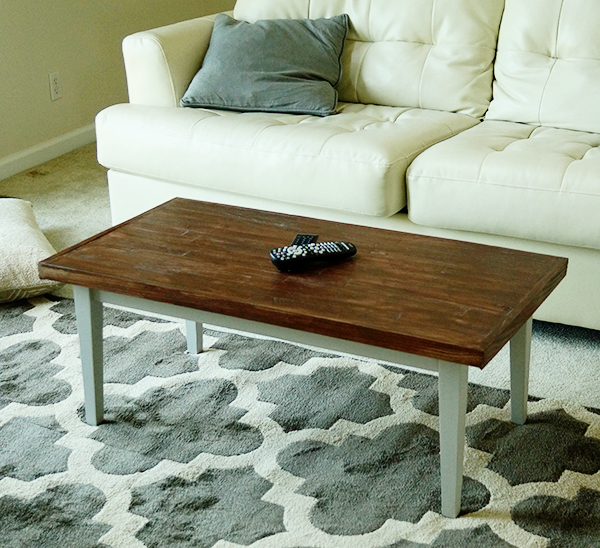
Add eye screws into the 4 posts for chain and enjoy!

DIY Wood Pallet Coat Rack

How to Make a Wood Pallet Coat Rack @savedbyloves


My sweet friend Jordan came over to learn how to build, and we started with this simple DIY Coat Rack from Shanty 2 Chic. I love when people have an interest in learning how to work with power tools, especially women.  It is so much easier than most would think, and there is not much more fulfilling than creating your own beautiful pieces from a pile of wood.  We followed Ashley’s steps, substituting pallet wood everywhere except for the 4×4 and the furniture foot on top of the coat rack.  That made this project super cheap, and Jordan mastered the Kreg Jig, compound mitre saw, drill and air nailer! I think she is addicted, just like I was after My First Woodworking Build.

Wood Pallet Ideas

Here are the pallet wood legs that attach perpendicular to the bottom of the 4×4.

DIY Wood Pallet Furniture Plans

I was so glad the Shanty  2 Chic instructions suggested to make a line around the bottom of the 4×4 using the width of 1×3 scraps attached to the underside of the legs. This made attaching the legs to the 4×4 super simple.  Jordan used the Ryobi Air Strike cordless nailer to attach the pallet scrap “feet” to the underside of the legs. This tool makes building way faster and easier!

Wood Pallet Project Idea

Jordan attached the legs to the 4×4 using pocket holes she created with the Kreg jig, just like Ashley did in the Shanty 2 Chic tutorial.  To attach the angled supports, she used the Ryobi Nailer again.

DIY Furniture Woodworking Pallet Plans

To finish up, I cut a square from pallet wood and drilled a hole in the middle of it, using a bit just smaller than the diameter of the rebar on the furniture foot I picked up at Lowes.  (Jordan had to take off for an appointment, so I finished up the project that took just a couple of hours start to finish).

Mineral Green Stain

I applied Minwax Wood Conditioner, followed by Rustoleum Wood Stain in Mineral Green. Since I used wood that was different to start (the purchased, unfinished 4×4 and the weathered pallet wood), the stain took differently.  To unify the piece, I went over the stain in aging wax by Plaid.

Wood Pallet Furniture

Once that dried, I placed the furniture foot in place on top, and added 4 hooks purchased from Lowes.

DIY Wood Pallet Furniture

The piece stayed at my home for a few days before I took it to Jordan.  I got attached.  That is why I am no building my own!  It is a perk of creating with others… this isn’t a piece I would have thought of for my space, and now I must have it.  Thanks Jordan!

DIY Reclaimed Wood Craft Paint Storage Shelves

DIY Craft Paint Storage from Reclaimed Wood @savedbyloves

Paint storage is an issue in my new craft space.  Bookshelves are not a great solution since they are so deep and tall.  I like to be able to see my paints for inspiration, and to get to the colors I need easily.  I decided to make my own shelves that are shallow and closely spaced so that I could fit as many as possible in the allotted area.  This was a quick and easy project, made with reclaimed wood I had on hand, so I spent zero dollars.

SUPPLIES:

Reclaimed wood cut to length and width you want your shelves

Shims cut from 2x wood, the same length as the shelves (mine are 24 inches), 1/4 inch thick

2 1/2 inch Kreg Screws Kreg Jig

Ryobi Air Nailer

Wood Glue

Leveler

Stud Finder

Pencil

Tape Measurer

Straight Edge

TUTORIAL:

How to build wood pallet shelves

Cut shelves to 24 inches.  I used tongue and groove boards that I had on hand and ripped to 3.5 inches to fit my 3.25 inch paint jars.  I cut the groove edge off when I ripped them, so that the tongue edge would create a lip for the wood shims to sit on as the front of the shelf in a later step.

Drill Pocket Holes with Kreg Jig

Find studs and mark shelf boards in 2 spots where you will create pocket holes with Kreg Jig.  Create pocket holes like I showed you here:  How to use a Kreg Jig.  I decided to stagger my shelves, so I created pocket holes four inches from each end on half of my shelves and on the other half, 1 inch from one end and 7 inches from the other end.

Use Kreg Screws to attach shelf to studs

Use tape measurer and straight edge to draw lines on the wall where your shelves will go.  I spaced my shelves 5.75 inches apart.  Use 2.5 inch Kreg Screws to attache shelves into studs on your marked lines.  After placing the first screw, use leveler to level shelf, then place second screw in the other stud.

Attach Shelf Lip with Wood Glue and Air Nailer

Add wood glue to the tongue lip and place wood shim, creating front of shelf.  Nail shim into place with 1 inch brads in air nailer.

Craft Storage Ideas

Attach all shelves and place paint!


DIY Craft Paint Storage from Reclaimed Wood @savedbyloves

So easy, and free, this paint storage solution is tops!

What do you think?  How do you stay organized in your creative space?

DIY Craft Storage from Reclaimed Wood @savedbyloves

50+ DIY Home Decor Projects to Make with a Jigsaw

50 Plus Best DIY Home Decor Projects to Make With a Jigsaw @savedbyloves

The jigsaw is a super versatile tool, and a great place to start the power tool journey. It is handheld, can be fairly inexpensive (like this Corded : Skil Saw. Variable Speed 4290-02), and cuts shapes in a variety of materials, with the appropriate blade.  I did a number of projects with a the above linked Skil Saw I scored at a garage sale for, and only recently splurged on a new one because of a gift card I received. The new one is fancy pants and cordless, but it doesn’t do anything the bare bones version can’t.  You can build the same projects with a basic jigsaw and a little practice.  That is great news, since as you will see below, you can make some seriously stylish and functional pieces for your home with this tool.  Enjoy!


DIY Shipping Pallet Dog Bed

Shipping Pallet Dog Bed Tutorial from @savedbyloves #thehomedepot & #3MPartner

What kind of DIY blogger am I, with my dogs sleeping on a pillow tossed on the floor?  I know.  That is why I thought a striped doggie bunk bed made from shipping pallets would be perfect for the “Get It, Got It, Go” Summer Blog Hop hosted by ScotchBlue™ Painter’s Tape and The Home Depot!  This project is a wonderful upcycle that can be color customized to fit any decor, and requires beginner woodworking skills to achieve.

MATERIALS USED

Shipping Pallet Dog Bed 2

ScotchBlue™ Painter’s Tape Multi-Surface with Advanced Edge-Lock™ Paint Line Protector 2093EL

Behr  Marquee™ Paint in Costal Storm #MQ6-20, Recycled Glass #MQ6-18 and Aquifier #MQ6-8 colors

Wooster® Shortcut 2 in. Nylon/Polyester Angle Sash Brush

Shipping Pallet Dog Bed 3

Shipping pallets

1/2 inch plywood sheets

Reciprocating saw with blade for cutting metal

Kreg® jig

1 1/4 inch Kreg® screws

2 inch wood screws

drop cloth or plastic painters tarp

Wood Glue

jig saw

Drill

Hammer

Crow bar

Table saw or circular saw

TUTORIAL

Shipping Pallet Dog Bed 4

The first step in this, and any pallet wood project, is breaking down the pallets.  My favorite method for this is cutting through the nails holding the wooden slats to the support beams with a reciprocating saw.  Sometimes it is necessary to use the crow bar and hammer to create enough space for the reciprocating saw blade, then you just cut through the nails and free one board at a time.

Here is a quick video showing the pallet breakdown process:

Shipping Pallet Dog Bed 5

To build the bottom bed, I cut two 35 inch pieces and two 28 inch pieces from the pallet wood for the sides.  I picked these measurements based on the dimensions of the pillow I already had on hand. Using my Kreg® pocket hole system (I showed you how to use a Kreg® jig HERE), I attached the four sides together with 1 1/4 inch screws and wood glue. For the top “bunk”, I followed the same process, cutting two sides 20 inches and two sides 18 inches long.

Shipping Pallet Dog Bed 6

To create floors for the beds, I placed the bed frames on a large piece of 1/2 inch plywood and used a marker to outline the inner edges of the frame onto the plywood.  I cut along these lines using my table saw, for a floor that fit right inside each frame.

Shipping Pallet Dog Bed 7

To attach the floors, I placed pocket holes every 5-6 inches around all four sides and screwed the floor into the frame with 1 1/4 inch pocket hole screws/wood glue.

After building the individual beds, it was time to join them.  For this, I created three 2×2 poles by ripping a 2×4 with my table saw.  Two of the poles I cut to 19.5 inches and one to 15 inches in length.

Shipping Pallet Dog Bed 8

I attached the three poles to the bottom bed, using the top bed to guide placement.  The shorter pole goes in the back right corner of the bottom bed, and the top bed rests on top of it (which will become clear in the next step).  The two longer poles will go through the floor of the top bed, nestling up against the right front corner and back left corner of it.  Once they were placed in the correct location on the bottom bed to fit where they needed to on the top one, I used wood glue and 2 inch wood screws to secure them in place.  I placed clamps to hold everything in place until the glue was dry.

Once that dried, it was time to secure the top bunk in place.  I needed to create holes in the floor at the right front and back left corners for the poles.

Shipping Pallet Dog Bed 9

To do this, I took a scrap 2×2 and traced it where I wanted the holes to be.

Shipping Pallet Dog Bed 10

Shipping Pallet Dog Bed 11

I drilled a hole in the middle of the square I just traced, for the jigsaw blade.

Shipping Pallet Dog Bed 12

Using the jigsaw, I cut out the square for the pole.

Shipping Pallet Dog Bed 13

Shipping Pallet Dog Bed 14

To finish the assembly, I just placed the top bed with the poles extending up from the bottom bed in their corresponding corners.  The back right corner was secured in place with a 2 inch wood screw going through the floor of the top bed, into the top of the back right pole.  The other two corners where the poles extended up through the floor were secured with 2 inch wood screws though the side of the top bed, into the poles.

Finishing

Once the bed was built, I decided to paint randomly patterned stripes.

Shipping Pallet Dog Bed 15

Shipping Pallet Dog Bed 16

Shipping Pallet Dog Bed 17

Shipping Pallet Dog Bed 18

I placed the ScotchBlue™ Painter’s Tape and began painting with the first color.  The paint coverage was great!   I wanted a distressed look, so I used the dry brush technique with Wooster® Shortcut Brush.

Once the first color was dry, I taped again and repeated for the 2nd and 3rd colors.  It was no problem to tape over the paint, but keep in mind that Delicate Tape is the recommended tape to use on freshly painted surfaces (24hrs).The lines were perfect, and the tape didn’t remove the paint when I taped over the stripes I had already added.  There was no pattern in the colors, I just painted randomly.

For the top bunk, I dry brushed the entire bed in Aquifier.

Shipping Pallet Dog Bed 19

I love it, and so do my boys!  Way better than the pillow on the floor, right?!

I am proud to be a 3M, Behr®, and Wooster® – sponsored blogger, and, as part of my responsibilities, I get the opportunity to evaluate products. Opinions are my own and additional product used in the project were selected by me.

Find the products used for this project, and tons more inspiration at the following links:

Wooster® Brushes Behr® Paint

The Home Depot

The Home Depot Consumer Program

ScotchBlue™ Painter’s Tape Facebook

ScotchBlue™ Painter’s Tape Twitter

ScotchBlue™ Painter’s Tape Pinterest

The Home Depot Facebook

The Home Depot Twitter

The Home Depot Pinterest

320 Sycamore: Front Porch Project

Simply Designing: DIY Board & Batten

Brooklyn Limestone: Farmer’s Market Display Stand

Fave Crafts: DIY Aztec Planters

Domestic Imperfection: Rusty Metal Shed Makeover

Studio Pebbles: Faux Frame Modern Art

Whipperberry: BBQ Tool Storage

Dukes & Duchesses: Color Block Umbrella Table

HoneyBear Lane: Patriotic Lanterns

Uncommon Designs: Striped Workbench

Better After: Geometric State Art

I Heart Nap Time: Striped Hall & Gallery Wall

The Pinning Mama: Oversized Painted Wall Frame

Love of Family & Home: Grain Sack Table

The Girl Creative: DIY Lemonade Stand

At The Picket Fence: Over-sized Outdoor Checker Board


Wood Pallet Planter DIY

How to make a reclaimed wood planter from shipping pallets @savedbyloves

I picked up some mums recently and decided they needed a planter. Using Ana White’s Cedar Planter For Less than $20 Free Plan, I made just a few adjustments and built this planter using pallet wood and 2×4 scraps I had on hand. 

pallet wood project idea

I just grabbed the cut list from Ana’s plan and hit my scrap wood pile to see if I could make things work without having to buy any wood.  I happened to have 5 1/2 inch pallet wood to use in place of the 5 1/2 inch cedar planks.  Perfect!

To make the 2×2 posts for the four legs, I ripped 2×4 scrap wood into 2×2 pieces.  For the 1×2 horizontal supports, I had a few scraps of 1×2 on hand and ripped pallet wood for the rest.

Shipping Pallet to Planter

The biggest change from Ana’s plan is that I cut the 2×2 legs to 23 inches instead of 23 3/3.  I attached the legs flush with the top of each panel, and added a “frame” to the top of the planter with 1×3 scrap wood that I mitered to fit.

As for the finish, I am just going to leave as is and seal with Polyurethane.  I love the various raw wood pieces.

Pallet Wood Projects

What do you think?  What are you building from pallets these days?

DIY Farmhouse Table and Bench Using Free Plans from Ana White

Farmhouse bench plan
How to build a farmhouse table and benches rustic decor woodworking plans @savedbylovesI have wanted to build a farmhouse table since I first started building a couple of years ago. Our new house I showed you in the recent Home Tour has just the spot for one, so we got busy woodworking and today I am sharing the fruit of our labor. Using free plans from Ana White, we built a lovely table and matching benches.  I have seen similar sets going for around $1200.  Ours cost under $200!  Building saves so much money, and is super gratifying.  If you are intimidated by power tools, I am here to tell you that you can overcome the fear, just like I did!

Minwax Wood Conditioner Gel Stain and Polyurethane

I built my table using Ana White’s free DIY Farmhouse Table Updated Pocket Hole Plan, and the benches using her Farmhouse Bench Plan.  As always her plans are amazing, and free!  This site is my go to for all things woodworking.  It is where I went to begin this journey, and as you can see in my Woodworking Project Gallery, I have built several of her lovely pieces!  Our house is becoming a hand-built home, one plan at a time.

We decided to stain the top and paint the base white.  Finishing each before attaching them together made things easier.  We did this for the benches too.

I used Minwax Pre Stain Wood Conditioner on the table tops before staining.  This evens out the surface of the wood and makes the stain take more evenly.  I kinda feel like a pro when I stain after conditioning!  The conditioner is easy to apply and one can is enough for several projects.  You just apply with a lint free cloth, let it soak in for about 5 minutes and wipe away any excess conditioner.  After 30 minutes, apply stain.

I used Minwax Gel Stain in Aged Oak.  This is my first time using it, and it is gorgeous!

Staining with Gel Stain

This is my first time using the Gel Stain.  I applied it with Minwax’s Staining Brush.  It is definitely less drippy/runny than the regular stain, but not as mess free as the Wood Finishing Cloths.  Those are still my favorite, and if I didn’t want to try the Aged Oak so badly, I would have used the cloths!  I am hooked and you will be too.  Find out why they are so magical here: DIY Reclaimed Wood Headboard.

After Staining

After the stain dried overnight, it was time to seal.  I used Minwax Polyurethane in Clear Satin.  I applied two coats, drying 4 hours between and sanding with 220 grit paper between coats as well.

For the legs, I primed and painted with white glossy latex paint we had leftover from painting out trim.  It took 2 coats.

DIY Farmhouse Table woodworking plan

I am completely in love with this set.  It took a couple of weeks to build all three pieces and finish them, but I was busy with several other projects at the same time.  If you were determined, you could do this in a weekend.

Have you braved power tools?  If not, I hope you are a little closer to taking the leap now.  It is so worth it!!

Make Wood Shims From Reclaimed Wood and Resurface a Coffee Table


[pinit]
Reclaimed Wood Coffee Table Revamp

[pinit]

What is better than revamping a garage sale find?  Revamping a $5 garage sale find that you got in 2006 a second time, that is what!  Today I am sharing how I did just that to create this reclaimed wood resurfaced, chalk painted coffee table.  I am super proud of this bad boy.  With some old deck wood I inherited when my mom demolished her deck and my table saw, I created wood shims, attached them to the table top, framed them in with the same deck wood, and stained them with Minwax Wood Finishing Cloths.  The result is exactly what I was going for, and I am loving it with the decor where it landed.  Wanna see how you can make your own?  Let’s do this!

Make a Coffee Table

TUTORIAL:

Paint your table base as desired.  I used gray chalk paint.

Rip thin “wood shims” from reclaimed wood with your table saw, or buy wood shims!

Resurface a table

Place your shims with excess stick over both edges.

Attach Wood Shims with Air Nailer

Use wood glue and Air Nailer to secure wood shims into place.

Mark straight edge and cut with Jigsaw

Draw straight edge and cut off excess wood with jigsaw.

Frame in and fill in gaps with wood putty

Frame in by measuring length and width of table and cutting wood at 45° with short edge the same length and width as your table.  Attach with glue and nail gun.  Fill in gaps and holes from nailer with stainable wood putty.

How to use orbital sander

When wood putty dries, sand with orbital sander to smooth out surface.

Minwax wood finishing cloths

If you have been around here long, you know I am a huge fan of Minwax Wood Finishing ClothsMinwax 30820 Wood Finishing Cloths, Natural Oak.  They are super awesome.  Stain and seal with just a swipe.  Here I used Natural Oak and went over that while still wet with Dark Mahogany for a custom color.

Reclaimed wood table tutorial

That is it!

The inspiration for this project came from the recent 50+ Wood Shim DIY Projects we shared:

Check it out for tons more inspiration!  Enjoy.

DIY $45 Five Piece Outdoor Adirondack Furniture Set

[pinit]DIY Adirondack Outdoor Furniture Plan @savedbyloves Chalk Paint[pinit]

There is nothing quite like relaxing in a nice adirondack chair on a gorgeous day.  That is why I decided to tackle this DIY Adirondack Chair Woodworking Plan from Ana White for Home Depot.  Once we finished the chairs, we had to have the DIY Footstools to go with them!  For the table, I loosely based the design on this DIY side table I shared with you in the fall.  I had to wing it some to make the scrap wood I had on hand work for the project and I love its rustic look.  Read on to see how I finished my 5 piece set using my new paint line obsession; Chalky Finish Paint From DecoArt Americana Home Decor.

DIY Outdoor Furniture Woodworking plan

Let’s talk about the table first.  Check out the above link for the plan details.  This wood was super rustic and scrappy, so I wanted the paint to be as well.  I went for “Cameo” color from DecoArt Chalky Finish line.  LOVE.  It looks kinda coral, kinda barn red, 100% lovely.

DecoArt Cameo Chalky Finish Paint Project

I love that you have to do zero prep with this paint.  Even if you are painting an already finished surface, no sanding, no priming… just go for it, and have a gorgeous outcome.

How to use Chalk Paint

I recommend painting the individual table to slats before attaching them.  It is easier to get to the sides and bottom when they are individual.  You can still countersink your screws, fill the holes in with wood putty, sand away the excess and paint over just that area to touch it up after attaching.How to seal outdoor furniture

Since this project will live outdoors, my first choice of finish (Clear Creme Wax and Aging Wax) isn’t recommended since it won’t stand up to the harsh elements over time.  That’s why we sealed the entire set of furniture with Americana Decor Soft-Touch Varnish, two coats!  It is approved for outdoor use, and we want our pieces to last a long time.

How to finish outdoor furniture

At first we were going to do the whole set using Cameo, but decided to do the chairs and foot stools in “Timeless.  Before I get into that, I want to save you some headache…

Adirondack Chair Woodworking Plan

On page 5 of the Adirondack chair plan from Ana and Home Depot (linked in the first paragraph), the red circled area says 1/2 inch, which is totally not what it means to say.  That measurement should be 1 1/2 inch, like it says in the text below the diagram.  If you are a visual kinda builder, and don’t read the text (like me), you will be super frustrated.  Let’s just say that these chairs almost didn’t happen!  Finally dear husband realized the typo and the rest of the build went smoothly.

DecoArt Chalky Finish Paint Timeless

I had already painted Cameo on the chairs before deciding to go with Timeless.  We just went over the red with the cream and one coat did it!

The other point I want to make sure I share is that using scrap cuts from your local hardware store cuts the price of this project way down, like more than in half.  We went to Menards where they had 1×4 and 2×4 in various lengths from 12-36 inches from cuts they had made in store, for just $0.49 each!!  This is less than half of what it would have cost to buy full length boards and cut them at home.  Just take a tape measurer with you, your cut list and be ready to inspect and dig through the scrap stock.  It is totally worth it!

I found the outdoor pillows at Menards, and don’t they look like they were made for this set?!?!  I was planning to make my own, but come on.

DIY Adirondack Outdoor Furniture Plan @savedbyloves

Big thank you to DecoArt for providing the paint for this project.  I am so in love with this line, and my new outdoor furniture!

What are you working on for your outdoor space?  Have you tried Chalky Finish Paint yet?

Dollar Store Craft Make $3 Wall Art Trio

 [pinit]

Dollar Store Craft Three Dollar Wall Art DIY

 [pinit]


I am so excited to share with you this great Dollar Tree wall art project that you can make for $3!  I found some adorable spring/summer print gift bags on my most recent trip there and decided to bring them home and make barn wood frames from scrap wood for them. While there, I also grabbed the coordinating navy blue planter, knowing I would put the DIY Paper Daisies I showed you last spring in there to go with the daisy on one of the cute gift bags.  Once I got the three bags framed, I decided there needed to be text on the chevron backgrounds, so I cut out “Oh Glorious Day” using my Cricut.  You can get the cut file too!

How to Make Wall Art

DIY Barnwood Frame Tutorial Reclaimed Wood


Here are the three bags.  I loved the daisy and the chevron prints in coordinating colors on the other bag.

TUTORIAL:

I measured the bags to see how big to make my frames.  I decided I wanted the opening to be 9×10 inches.


How to Cut Wood With Table Saw

I shared an Ana White Barnwood Frame Plan in this DIY Barnwood Frame Tutorial with Free Printables.  For this project, I wanted different dimensions and learned a couple of tricks I want to share along the way.  I wanted to use 1×2 inch boards, but didn’t have enough of that dimension on hand, so I ripped 1×4 scraps with my table saw by setting the guide arm at 1.5 inches (which is the actual width of a 1×2 board).  I

How to cut with Miter Saw

Next I set my miter saw to 45º and cut one end of my homemade 1×2.

How to cut Mitered Corners for frame

I measured from the short inner point of the angle 9 inches over and cut the other side going the opposite direction (so I moved my miter saw 45º to the left).

How to Make a Barnwood Frame

I lined the inner frame up with 1×2 flipped up on its side to know where to make the 45º cuts for the outer frame.  This was easier and quicker than measuring!  I used 2 paint stirrers to give me the thickness for attaching the inner frame to the outer so that the back of the frame would be recessed for my foam mounted gift bags (foam mounting happens after the frames are made, see below).

Ryobi Air Strike Nailer For Joining Inner and Outter Frame

Use wood glue at the join and clamp the inner and outer frame together.  Nail in place with 2 inch nails.  Did I ever tell you I love this Ryobi AirStrike cordless nailer?  I do.  It is a go to tool for me.  So easy to use, CORDLESS, goodbye hammer and nails.

Mount Picture on Foam Board

Cut foam board to fit in the back of the recessed frame.  Cut the desired image area off of the gift bag and adhere it to the foam board with Super 77 or other mounting adhesive.

Smooth out Wrinkles with Hand

Smooth wrinkles from the center out with your hand.

Paint Frame With Chalk Paint

Paint frame with color of choice.  I used white chalk paint and antiqued the edges with  FolkArt Antiquing Medium .  I sealed with Krylon Clear Coat Matte Finish because it was nice outside and I was excited that I could use spray sealer after such a long winter!  Wax or varnish would be fine too.

Put Image in Barnwood Frame

Since the foam board is cut to the same dimensions as the recess in the back of the frame, the picture pretty much fits and stays.  I used clear packing tape to secure it in place.

I used Coordinations adhesive cardstock in yellow and my Cricut with SCAL software to cut out the text, which I created in Photoshop (“oh” is “Always in My Heart” font and “GLORIOUS DAY” is Ostrich Sans Black).  Since the paper was adhesive I just peeled off the letters and put them on the chevron patterned framed backgrounds like you see in the photo.  You could use the cut file to make a stencil and paint the letters on, or print them in your favorite color and cut them out by hand too.

Download “oh”

Download “GLORIOUS DAY!!!”

Attach sawtooth hanger or wire to the back to hang!

Privacy Policy