Reclaimed Wood Wine Bottle Vase Trio

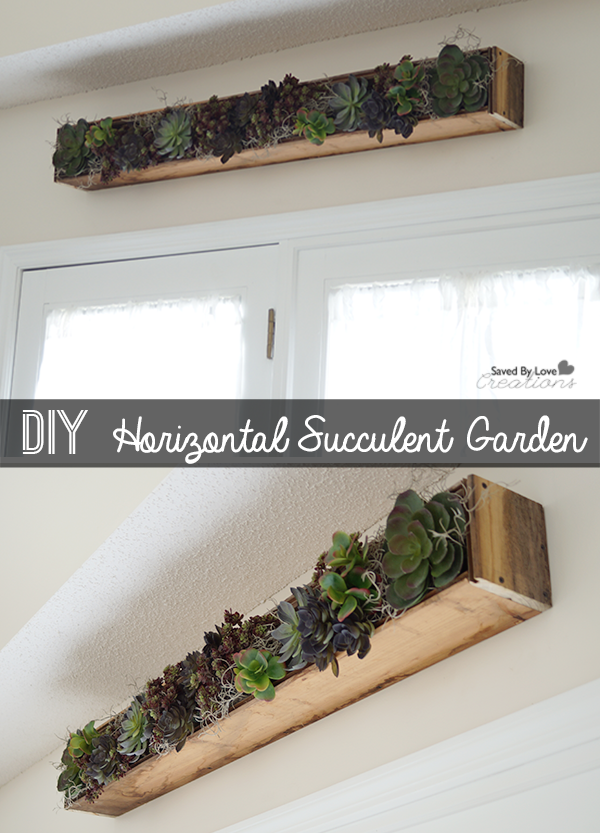
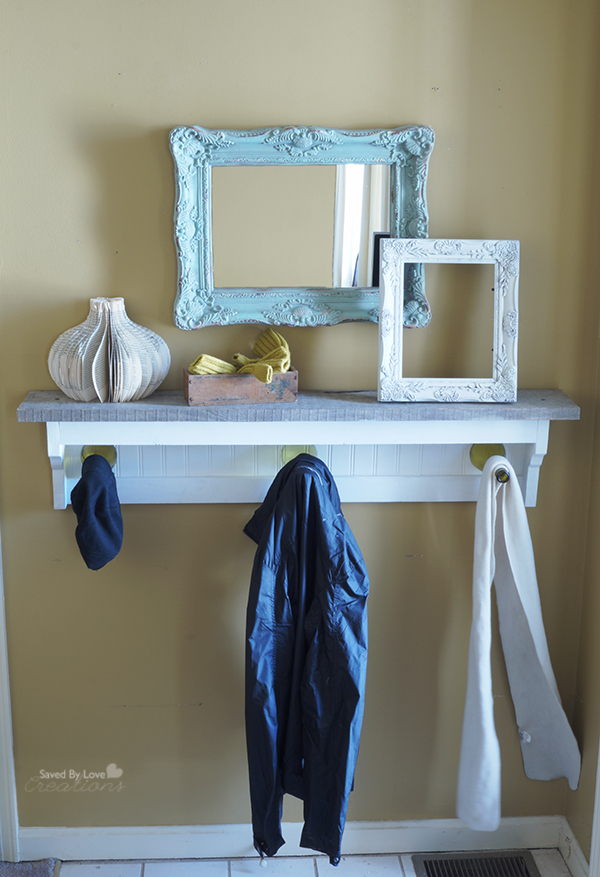
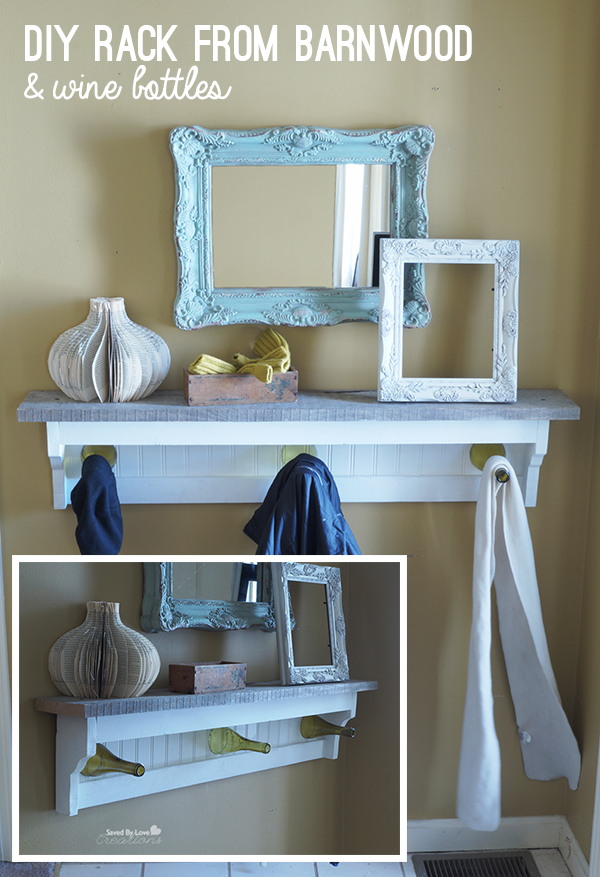
Salvage Wood Wine Bottle Wall Vase Trio

Wine Bottle Wall Vase2 copy

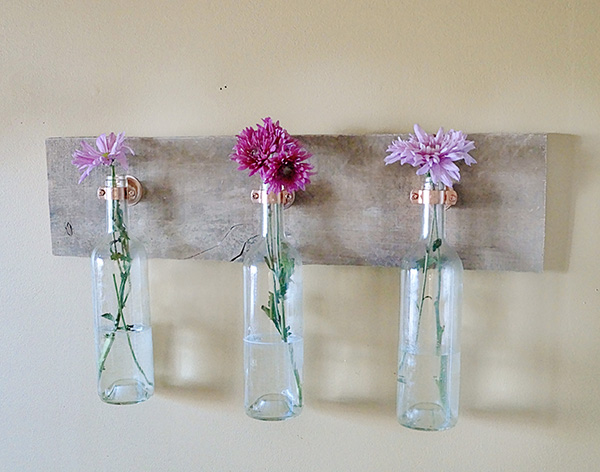
 Reclaimed wood and recycled bottles combine with inexpensive copper hardware for this rustic, ecofriendly wall vase set.  Make it in under an hour with just a few dollars for hardware!  This is perfect inexpensive wall decor, and makes a great, unique handmade gift for the holidays.
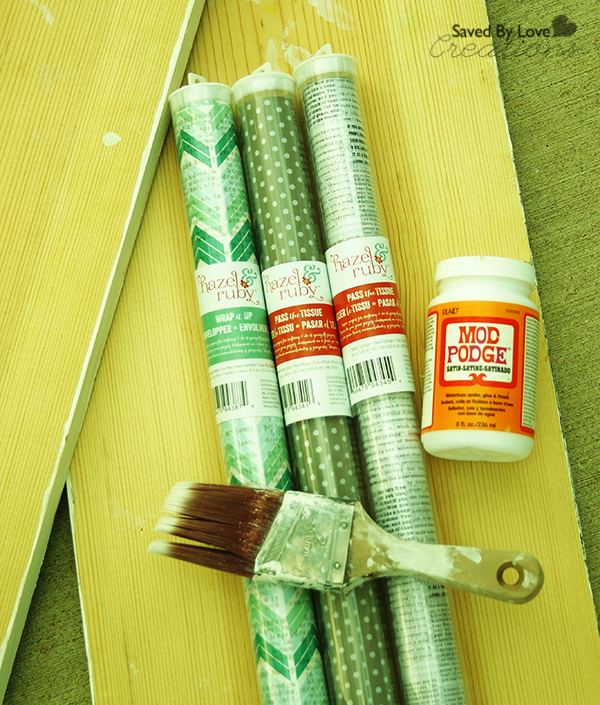
MATERIALS

Wine Bottle Wall Vase 4

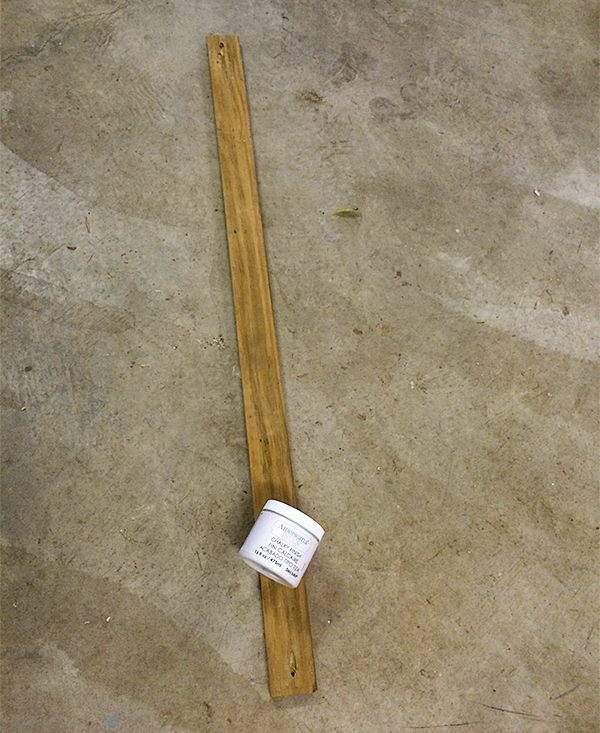
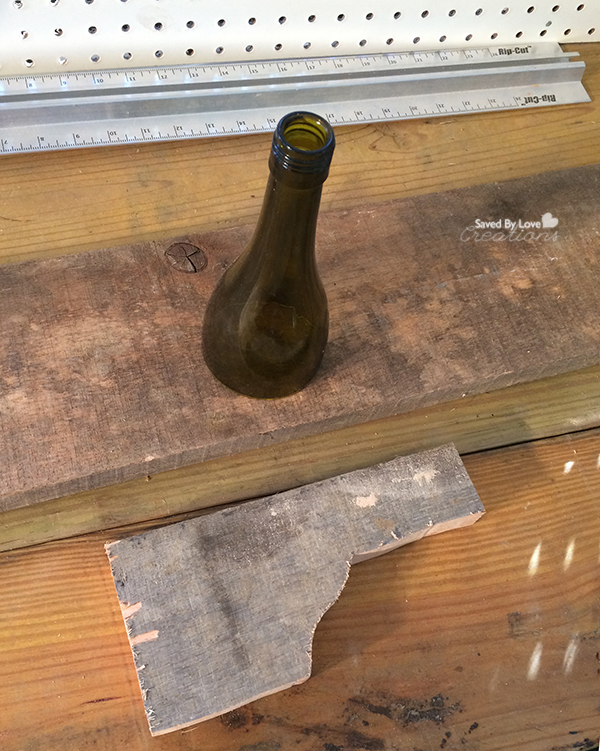
-Scrap wood cut to desired width (The board I had was 25 inches, so I went with that.  Use any number of wine bottles, and cut your wood the appropriate length for that number.)

-Drill

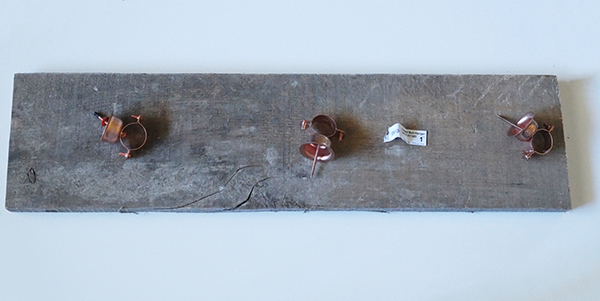
-1 inch copper bell hanger kit (available in plumbing section of most hardware stores for less than $2 each)

-Picture hanging hardware

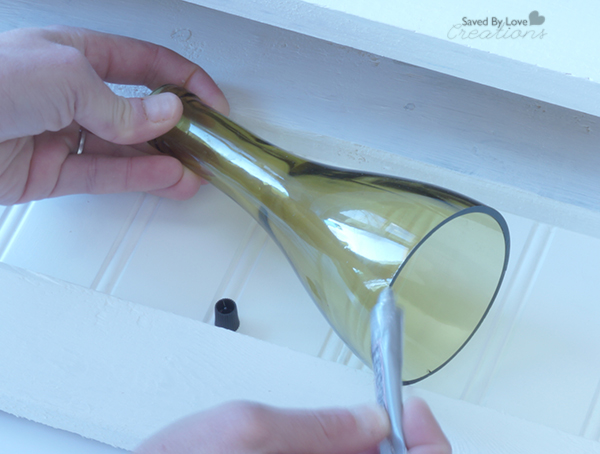
-Wine bottles (clean and remove labels if desired as described in Techniques)

 DIRECTIONS

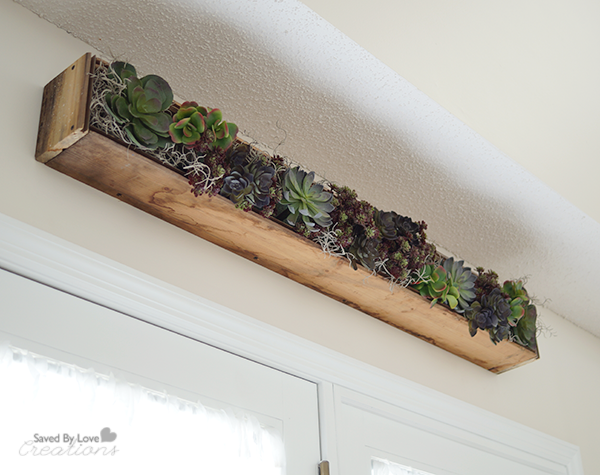
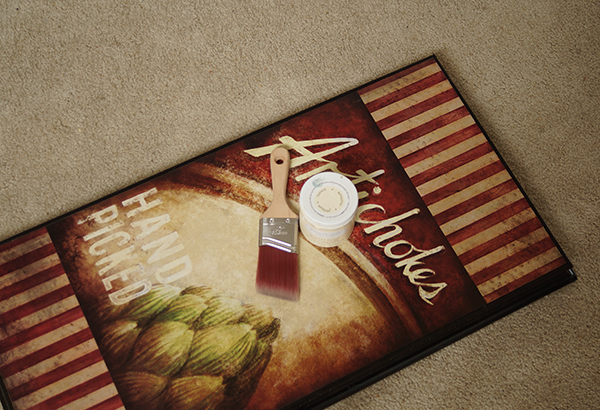
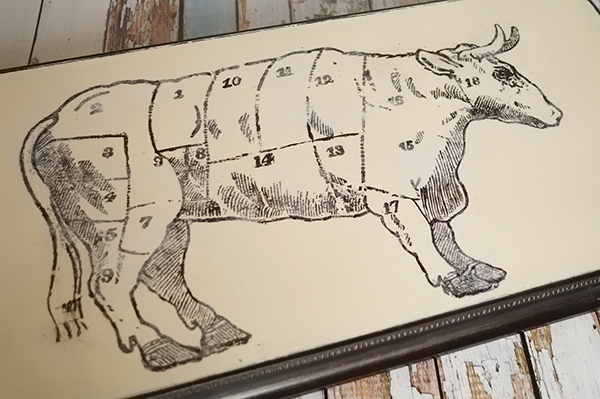
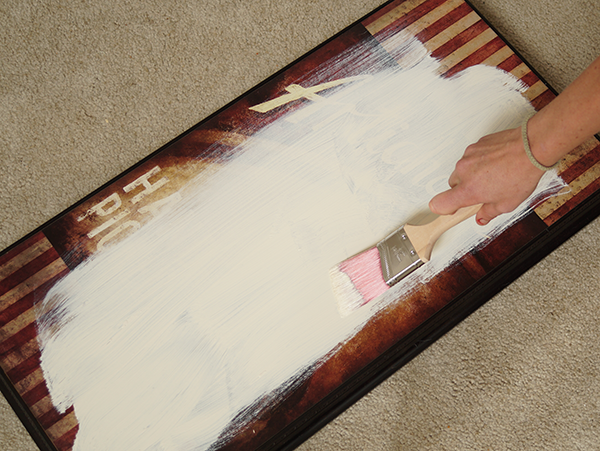
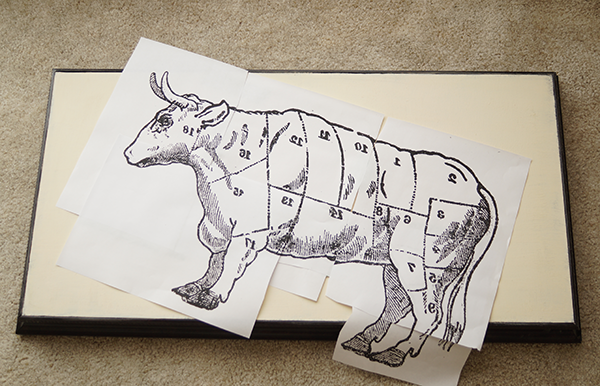
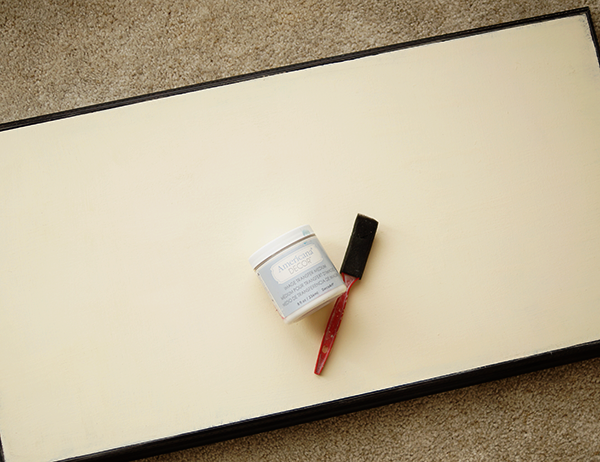
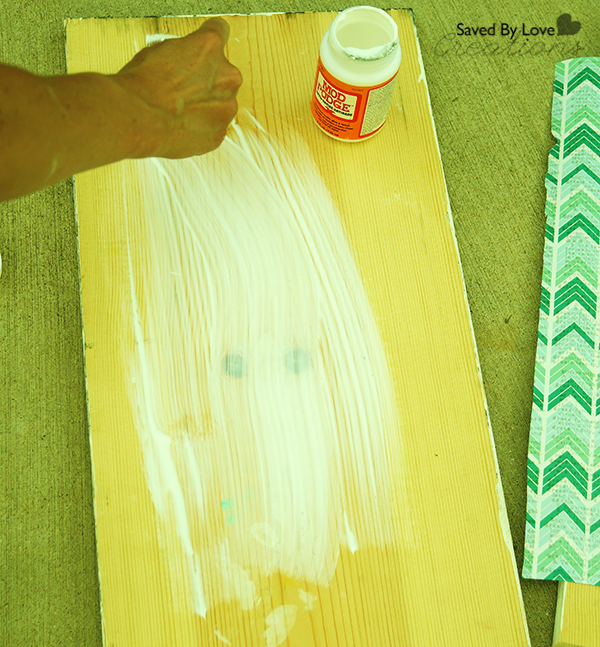
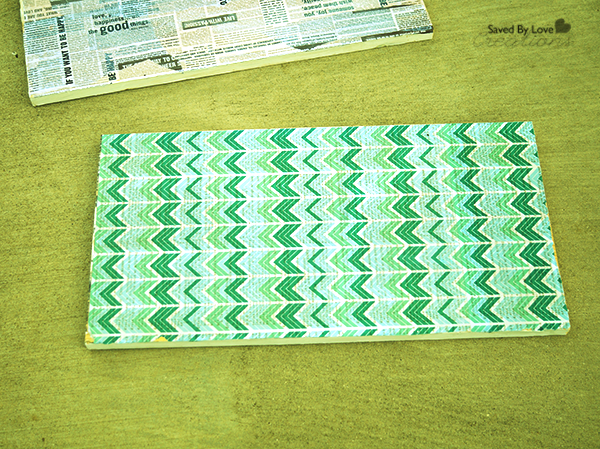
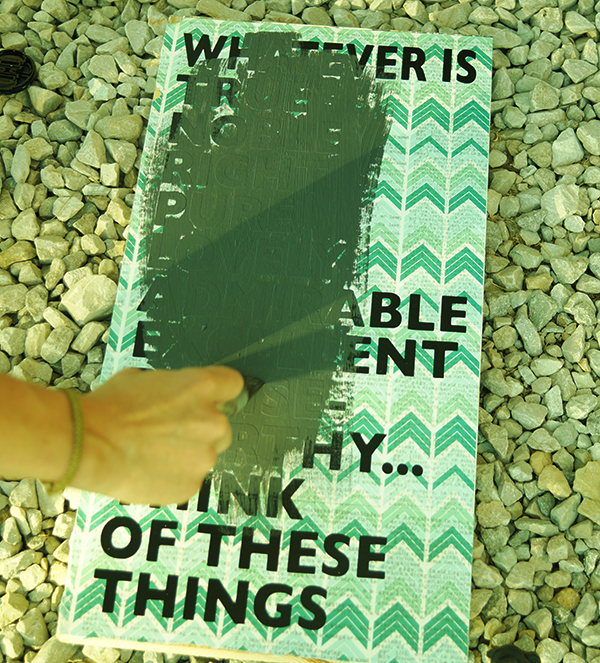
 1.  Paint, stain or decoupage your wood any way you like.  I left mine as I found it since it had the weathered look I love.  Same goes for the bottles.  Paint or decorate them to fit your decor or occasion.

Measure for holes

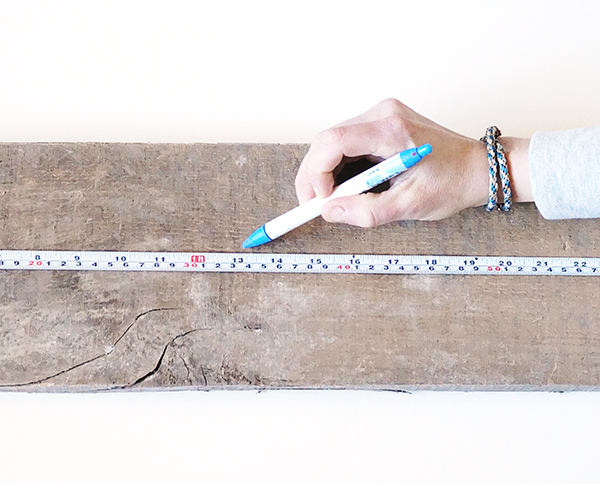
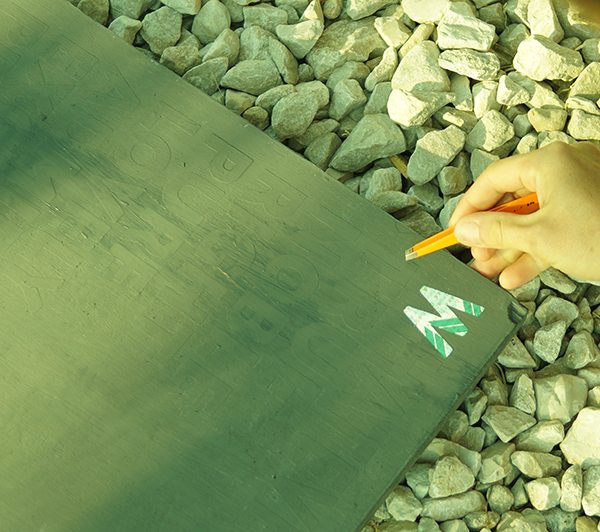
2.  Measure and mark placement of your bottles, leaving even spacing between each and centering them on the board.  Yay math!

Drill hole for clamps

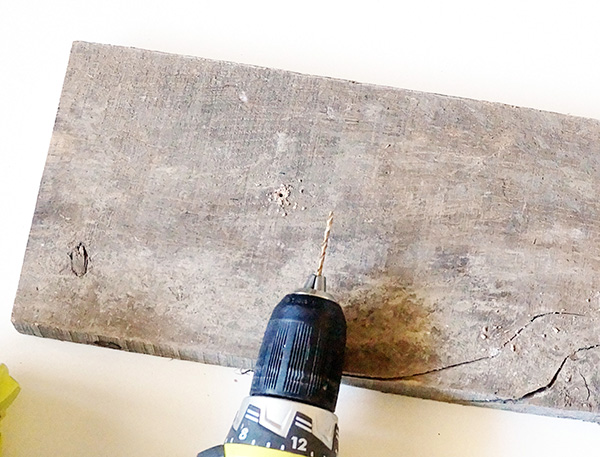
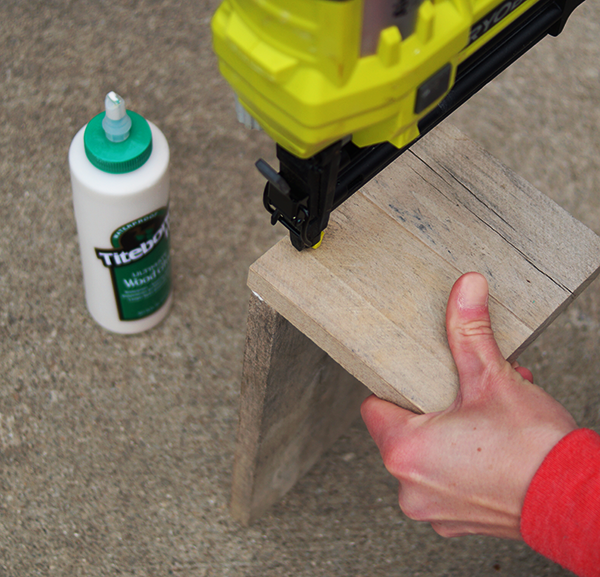
3.  Drill a pilot hole with a drill bit just smaller in diameter than your screw.  If you aren’t using a drill, use a hammer and nail to make a pilot hole.

Wine bottle wall hanging

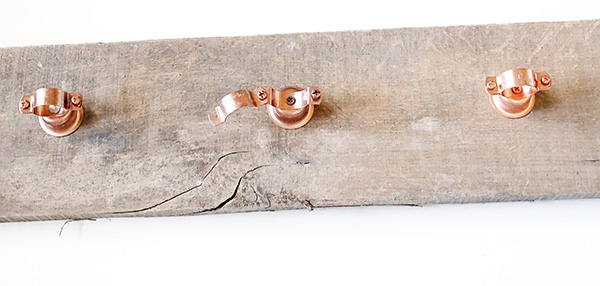
4. Attach bell hanger using the screw that came in your kit and a drill or screwdriver.

How to make a reclaimed wood wall hanging

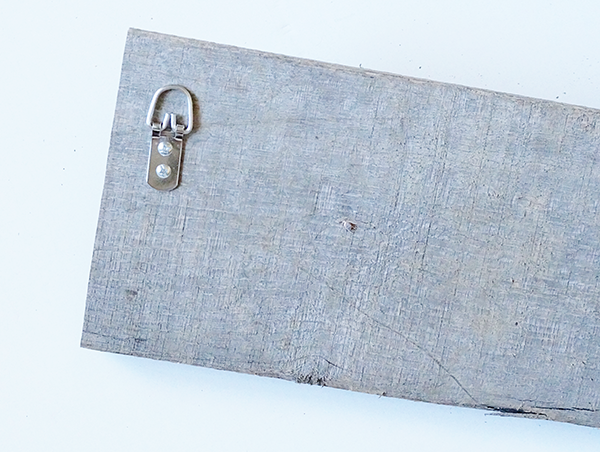
5.  Attach a loop for hanging on each side.

Wine Bottle Wall Vase3

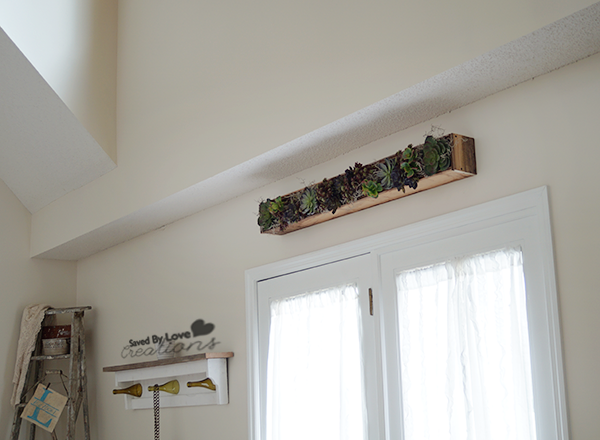
6.  Place on wall and add wine bottles.  Time to head to the farmer’s market for some fresh flowers!

Recycle Wine Bottles into Inexpensive Wall Decor with Reclaimed Wood @savedbyloves

DIY Wine Cork Bulletin Board

How to Upcycle Wine Corks into Home Decor

Stay organized, eco-chic style with this cork board made from… corks!  This project is simple, functional, stylish and can be super inexpensive with a thrifted frame.  Start saving those wine corks, ask your friends to save them, and hit your local recycle center to see if they can hook you up with some.  You are going to need quite a few, especially if you have a large frame.

SUPPLIES

Framed Cork Bulletin Board

-Wine Corks

-Utility Knife

-Hot glue gun and sticks

-Frame without glass 

TUTORIAL

1.  Remove glass from frame, leaving just the backing.

Framed Cork Bulletin Board2

2.  Decide on a pattern for your corks.  Simple and repeating looks best.

Framed Cork Bulletin Board3

Framed Cork Bulletin Board4

3.  Starting in the center, begin gluing corks in your chosen pattern directly onto the frame backing.

4.  When you come to the edges where full corks no longer fit, cut the corks where necessary to create the appropriate shape to fit the space.  Continue until the entire frame is full.

Framed Cork Bulletin Board5

EXTRA TIPS

Seal corks after they are all placed for a glossy finish if desired!  These would be great for displaying bride and groom photos for your wine themed wedding reception.

For more inspiration, visit our 50+ WINE CORK CRAFTS:

DIY Horizontal Succulent Planter Box Display

[pinit]DIY Horizontal Succulent Garden @savedbyloves[pinit]

Decorating with succulents is a top design trend that won’t be going away!  That is why I am thrilled to share how we created this horizontal succulent garden placed above our double deck doors.  I took the easy way out and went with artificial plants, even though succulents are easy as can be to grow and maintain.  I was gifted an excess supply of the fakes from Michaels that a friend had leftover and just went with it.  The project was simple and quick, and cheap!  The planter is (no surprise if you have been around here much) made from reclaimed wood.

Here is how I did it!

I had some tongue and groove wood that I picked up from Habitat Restore.  I ripped it with my table saw to about 4 inch wide pieces, and cut 3 of those to 4 feet in length for the 2 long sides and the bottom of the box.  I cut 2 of them to about 5 inches for the short sides.

Ryobi-Airstrike-Nailer

I nailed all of the pieces together with my trusty Ryobi Airstrike Nailer.  The pic shows the creation of this Stenciled Planter Box, but the process was the sam for today’s project.   If I could have just one tool in the whole “stuck on a desert island” scenario, this would be a top contender.

DIY Succuulent Garden

We used 4 3 inch wood screws to attach the finished box into the studs above the double deck doors.  I found a 12x36x2 inch styrofoam sheet in my stash and cut it to fit tightly in the planter box, all the way a cross.

Then I just hopped on a step stool and arranged my faux succulents, shoving the wire stems into the foam to hold them in place.

DIY Succulent Garden

What do you think?  I am going to be honest… I seriously like it bunches.

It is hard to hang things on the freshly painted walls in our new home.  What if I change my mind, what if it looks dumb… so many holes to patch.  Not in this case.  Totally satisified!

If you want to make live succulent gardens, check out our popular DIY Terrariums and Succulent Plants:

How about our 50+ DIY Terrariums and Creative Planters?


Succulent in Decor DIY Horizontal Planter @savedbyloves

DIY Butcher’s Chart Cow Vintage Kitchen Art With Free Graphic

[pinit]DIY Kitchen Art Tutorial With Free Printable Butcher Cow Art @savedbyloves[pinit]

Vintage kitchen art in the form of the butcher’s beef chart is tops in the design world these days.  That is why I was thrilled to score a cookbook from 1898 with the perfect image for such a piece!  I scanned it in, cleaned it up in Photoshop and enlarged it to fit a 28 in x 14 in piece of art scored from a garage sale.  This tutorial shows you how to transfer a large image to a chalky finish surface, and provides the butcher beef chart cow art for you to download for use in your own projects!

SUPPLIES:

Vintage Butcher’s Beef Chart Image  (Click link for image download page)

Image transfer kitchen cow art

Paint brush

Chalky Finish Paint by DecoArt in Whisper

Image Transfer Medium

Clear Wax DecoArt

Laser Printer and Photoshop or other editing software

Painter’s Tape

Spray bottle with water or cup of water

Image Transfer Cow Butcher Art

TUTORIAL:

Image Transfer Vintage Cow Butcher Art

Prepare the surface for the image transfer by painting with Chalky Finish in your choice of color.  I used Whisper.  It took 3 light coats with 15 minutes of drying in between to cover the image on the garage sale art.

While that is drying, prepare your image.  I resized mine in Photoshop to fit the 28×14 inch recipient surface.

 Make sure you reverse the image before printing it so the numbers won’t be backwards in the transfer!

If you are making art larger than your printer will print, you will need to print it in sections and tape it together like I showed you in the video found here:

DIY Rustic Sign Tutorial Using DecoArt Chalky Finish Paint

How to Make Vintage Wall Art

Print the sections, align them and tape together on the back with painter’s tape.

Chalky Finish Home Decor Project Vintage Kitchen Art

Large Art Image Transfer Tutorial

Paint the surface with a thin layer of Americana Image Transfer Medium, and paint the ink side of the image to be transferred with the medium too.  For more detail on using this product, see my Vintage Image Transfer Coaster Tutorial shared at Printable Decor.

How to do an image transfer

Spray water on the back of the printed image and let soak for 3-5 minutes.

Rub paper backing away with your finger tips (there are detailed pictures of this in the graphic coaster tutorial linked above).

Seal the piece with clear wax and you are all set!

DIY Kitchen Cow Art Tutorial With Free Printable Butcher Cow Art @savedbyloves

Check out more cool ideas in our 50+ Image Transfer Projects

Reclaimed Wood Display Shelf For Upcycled Old Book Letters

[pinit]5 minute DIY shelf from Pallet Wood @kregtoolcompany to display "FAITH" letters cut out from old books @savedbyloves.png[pinit]

I am obsessed with old books, well old things in general, but when I saw these words from old book letters I was sold!  There is a cute store in Nashville called Island Cowgirl that we stumbled upon while looking for Archeology Antiques.  The couple just opened the store 12 days before we wondered in, and they know how to do it!  Such rusty, wonderful upcycled home decor and jewelry filled the industrial space.  The prices were what got me.  See, I don’t usually buy handmade things because of the whole “I can make that for like 1/100th of the price tag” thing that happens in my brain.  Not so in this shop.  I left with my arms full, contemplating where I would display my new found treasures when I got home.

Things to make from old books

Did you happen to see my recent DIY Kitchen Cabinet Upgrade with Crown Molding and Chalky Paint post?  It was quite the transformation if I do say so myself.  The kitchen is coming along great, but there was this sad space between the regal cabinets above the window.  It has been begging me to decorate it.  Enter words made up of letters cut from old books.  Yes please!  I bought “Faith”.  Now, where would I put such a special accent?  That is when I decided to attach a narrow display shelf to those cabinets to fill the desolate space above the windows.  How to make a shelf using Kreg Jig

First, I ripped the pallet wood to about 2.5 inches with the table saw.  I used the miter saw to cut the wood to length for the space in between the cabinets.  I used my Kreg Jig to drill a pocket hole on each end for attaching to the cabinets.  If you haven’t used this tool, you are in for a treat.  I use it in nearly every woodworking project for joining pieces together.  The joins are super strong, and the jig takes out all of the guesswork.  I showed you how to use a Kreg Jig in this Easy DIY Pallet Sign Tutorial. Next I painted it using two coats of Deco Art Chalky Finish Paint in “Everlasting”, the same color I used on the cabinets.  A coat of wax sealed the deal, then I attached the shelf with 1.25 inch pocket hole screws.

Old Book Crafts

Wanna have a little fun?  

Guess how much I paid for “FAITH” from old books.  Leave your anser in the comments.  If you are right, I will send you an andvanced copy of my upcoming ebook, with 5 upcycled wine bottle home decor project tutorials you are going to love!

*By the way, if you want to make some yourself, check out this great tutorial from The Merry Thought; DIY Book Letters.  Pretty easy to do with a printer and a scroll saw. 

DIY Wine Bottle Craft Coat Rack

[pinit]

WIne Bottle Shelf Rack3


[pinit]
WIne Bottle Shelf Rack1


Scrap Wood Shelf With Wine Bottle Hooks

This project involves building a simple shelf from scrap wood and adding cut wine bottle tops to act as “hooks”.  It is perfect for the entryway or mudroom, as the ultimate upcycle and conversation piece.

MATERIALS

– Scrap wood in lengths and widths you want for your shelf

-One of the following; Table Saw, chop saw, miter saw, circular saw

-Jig saw

-Hammer

-Pencil

-Tape Measurer

-Wood Glue

-1 ½ inch finishing nails

-Medium grit sandpaper

 -Glass Cutting Supplies (see techniques page )

-Rubbing Alcohol

-Lint Free Cloth

-3 Wine Bottles

-E6000

-2 Sawtooth hangers

-Chalky finish paint or paint of your choice

-Sealant such as wax or polyurethane

DIRECTIONS

WIne Bottle Shelf Rack6

This was a project I made up as I went along, based on the scrap wood I had on hand.  You can adjust the plan according to your materials. For most of the cuts I used a table mount chop saw but a handheld circular saw would be fine to.

The only cut that isn’t a straight cut is the one used to cut the shelf brackets. For this I used a scroll saw:  I drew a shelf bracket shape sized to fit my shelf onto a piece of wood, cut out the bracket and traced it onto another piece of wood as a template for cutting out the second bracket.  This is covered in step 2.

1.  Cut board for shelf surface.  For this I used an old piece of barn wood I had that measured 1 X 6.5 by 55 inches. I cut it to one 46 inch long piece and one 9 inch long piece. The 46 inch piece will be for the top and the 9 inch piece will later be used to cut the two shelf brackets.

WIne Bottle Shelf Rack9

2.  Cut shelf rails. There are three of them (see pic). They are 1 x 3 inch boards cut to 40 inches in length.

WIne Bottle Shelf Rack7 

3.  Cut shelf brackets.  Taking the 9 inch long piece of the old barn wood from above ( 1 X 6.5 X 9 inch ) I free handed a pattern onto the board that looked somewhat decorative but had fairly simple curves. I included the drawing I used as a template.  Using the scroll saw I cut out the two identical shelf bracket pieces. Tracing one line for two pieces was easier than trying to make two identical individual pieces.

Sand all rough edges.  Medium grit sanding by hand or with an orbital sander will do.

*Clamping the two shelf brackets together while sanding them ensures that they will remain identical to one another.

WIne Bottle Shelf Rack8

5.  Using wood glue and 1 ½  inch finishing nails attach the shelf rails to the shelf bracket on the inside face (see pic). This made the over-all length of the shelf support unit 42 inches. (40 inch rails plus the thickness of the two 1 inch brackets).

6.  Mount the shelf support unit on the 46 inch top board, centering it along the length dimension ( 4 inch overhang on each end) and flush at the back edge of the top board.  Use 1.5 inch wood screws and wood glue to attach the top to the support rails.  Make sure to square the support unit as best you can before you attach to the top( a quick check to make sure the long diagonal measurements are equal will tell you).

7.  The last addition to the unit is for the back board. I used 1/8 inch hard board that has one side grooved. You can purchase a 4 x 4 ft piece that will be much easier to handle than a full 4 x 8.  I laid the shelf unit onto the board and traced the outline. I positioned the unit on the board so that the grooves run vertically.  Cut the back out using a jig saw, table saw or circular saw. The cut is hidden so just be sure to cut a little inside the line so that you don’t have any over-lap and you don’t see the back hanging over the edges. I attached using 1/2 brads and wood glue. Make another quick check of the diagonals to verify the square of the unit before you attach the back.

8.  Allow the glue to set for 24 hours and then caulk all the seams using standard white caulk.

9.  Sand any rough spots and paint.  I went with chalk paint in antique white for the entire shelf except for the top surface board.  I like the weathered wood with the chalk finish.

10.  Seal with Wax or desired sealant.  I applied clear wax with a lint free cloth.  Let cure per instructions before handling.

11.  Measure your shelf and mark with a pencil where your bottles will go so that they are evenly spaced.

WIne Bottle Shelf Rack10

12.  Attach cut wine bottles tops (see How to Cut Wine Bottles) by placing a generous amount of industrial strength glue such as E6000 around the cut rim where it will contact the shelf

13.  Attach a sawtooth hanger on the back with hammer, a couple of inches in from the edge of the shelf top.

WIne Bottle Shelf Rack2

Make a shelf from reclaimed wood and recycled wine bottles @savedbyloves

EXTRA TIPS

○ Power tools can be intimidating.  They don’t need to be though!  I started at ana-white.com and found everything I needed to know to be successful and safe.  You can too!

Check out craigslist for used tools, or see if your town has a makerspace where you can pay a small membership fee and have access to the tools you want to try.


DIY Wedding Gift Art

Hello friends! It’s Barbara from Chase the Star, as always elated to be here!

It’s wedding season! Whether you’re planning a wedding or going as a guest, you can’t deny that new nuptials are all around us.

[pinit]

DIY-Wedding-Art-via-Chase-the-Star-for-Saved-By-Love-Creations-wedding-diyArt-DIYcraft-silver

[pinit]

Although I’m already happily married, I am about to celebrate a milestone anniversary, 10 wonderful years! So many weddings are DIY these days, and they look amazing! For all of the brides to be, I have a pretty and easy to make craft for your wedding decor, that can even be used in your home later on!

DIY Wedding Art

Here’s what you’ll need:

Wood plaque

Wood applique

Wood letters and ampersand

{I picked all of these up at Michael’s}

Glue gun/glue stick

Silver and white craft paint {or any color combination you like}

Make DIY Wedding Art or Gift 550px

DIY Wedding Art 550px

How to Make DIY Wedding Art:

Step 1:

Paint the wood pieces. I used silver on the plaque and letters, and white on the applique.

550px DIY Wedding Art

Step 2:

After all of the pieces have dried, glue the applique to the plaque with the glue gun. Then, glue the letters to the applique in the pattern you like.

Step 3 {Optional}:

Glue a 2 inch strand of jute or heavy string to the back of the plaque, or a saw-tooth hanger for easy hanging!

I bet this would be gorgeous in gold too! Any combination of colors to go with your wedding or home decor makes sense. I also love this idea to use as a family crest, or to give as a gift, there are tons of possibilities.

DIY Wedding Art via Chase the Star for Saved By Love Creations #wedding #diyArt #DIYcraft #silver

This will be up on my bedroom wall just in time for our big anniversary!

Check out my DIY Wedding round up for more ideas. For more crafts, recipes and home decor visit me at Chase the Star, and on Facebook, Google+, Pinterest, and Instagram!

Until next time friends!

New Signature

DIY Tissue Paper Scripture Chalky Finish Wall Art

[pinit]DIY Chalk Paint Reclaimed Wood Scripture Art @savedbyloves[pinit]

On a recent trip to Michaels, I found Hazel and Ruby tissue paper that just had to come home with me.  It is big, comes in super cool prints and is perfect for decoupage projects.  I used it to make this scripture word art on reclaimed wood, with a stencil mask technique.  Today I will show you how to create your very own.  You can use the text provided in a downloadable file below, or bring your own verse to the game.  Let’s do this, want to?!

SUPPLIES:

Decoupage Home Decor

Hazel & Ruby Tissue Paper

Mod Podge

Paint Brush

Wood Surface

Chalky Finish Paint (I used color “Relic”)

Vinyl Sheets and Cricut or Adhesive Word Stencils

TUTORIAL:

Tissue Paper Decoupage Wall Art DIY

Apply a generous layer of Mod Podge to your wood surface.  I am using the back of the art I showed you several years ago here:

DIY Cheap Wall Art Faux Oil Painting

It was time to change this art to fit my new decor!

https://savedbylovecreations.com/2011/03/bird-faux-oil-painting-frugal-wall-art.html

Apply the tissue, smoothing out wrinkles with the palm of your hand.  This tissue didn’t really wrinkle, so that was pretty awesome! Apply another layer of Mod Podge to seal the tissue and cut or tear the excess paper from the edges.  I actually cut mine to fit the board before applying, so there wasn’t excess.  Either way is fine.  The edges don’t have to be perfect since you are painting over them in a future step!

Phillipians Bold

I used the jpg file to cut the text out of adhesive vinyl using my cricut and Sure Cuts Alot.  You are free to use this file as well.  Just right click the thumbnail to pull up the full resolution version and save to your computer.

DIY wall Decor

I applied the stencil to the tissue paper after letting the Mod Podge cure overnight.  I used Cricut transfer tape to transfer the vinyl words.  You can do this by hand, but the transfer tape makes the process way easier, faster and neater.

DIY Wood Sign

Next I painted over the entire surface with Chalky Finish Paint in “Relic”.

Cricut Home Decor Project Tutorial

I used tweezers to remove the letters before the paint dried completely.

DIY Scripture Sign

I sealed the piece with Clear Creme Wax to finish.

DIY Budget Friendly Wall Art

I am super happy with how it turned out!!

If you like this project, be sure to check out 50+ Scripture Art DIY Tutorials:

50 Plus Gorgeous DIY Flowers to Make

[pinit]
50 Plus DIY Paper Flower Tutorials @savedbyloves[pinit]

Whether you are decorating for a DIY Wedding, spring our summer party, or simply want to make your space more beautiful, this roundup of DIY paper flower tutorials is a great place to start!  We have gathered our 50+ favorite handmade paper flowers from all around, and you are sure to find what you need to add some zero maintenance, everlasting floral decor to any occasion.  Enjoy!


50 Plus Awesome Wood Shim DIY Projects


[pinit]

50 DIY Wood Shim Projects to Make

[pinit]

Wood shims are inexpensive and can be used to create gorgeous DIY home decor.  Make faux pallet art, cover an ugly thrift store dresser, create a designer starburst mirror on a shoe string budget.  Here are 50+ of the best DIY wood shim project tutorials from creatives everywhere.  If we missed your project, send us a link so we can include you!  Enjoy.


Privacy Policy