DIY Slim Color Block Blanket Stand


How to make a blanket stand

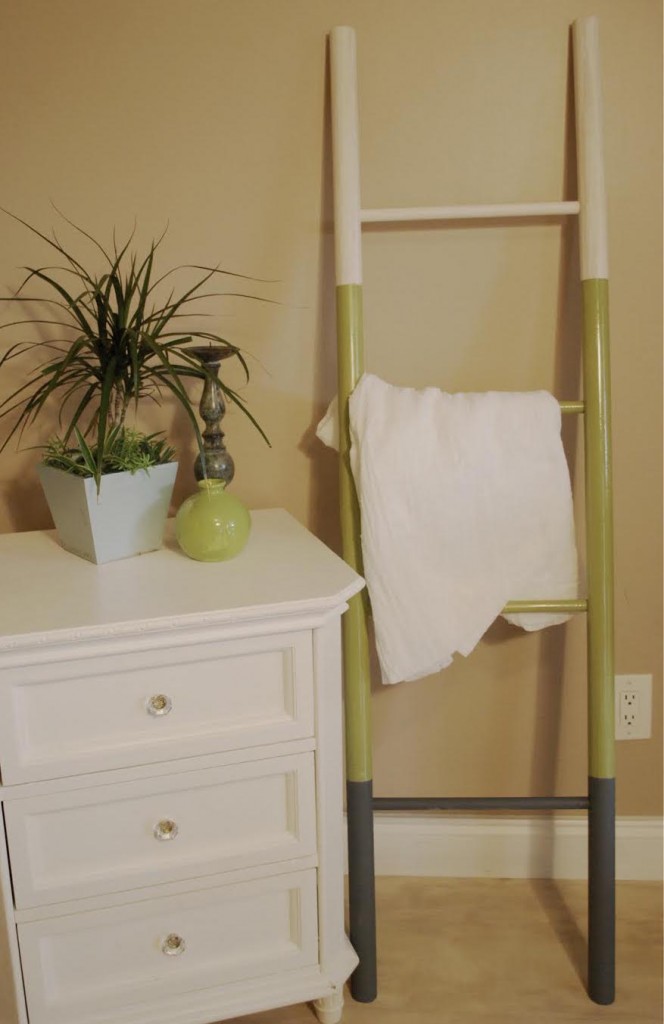
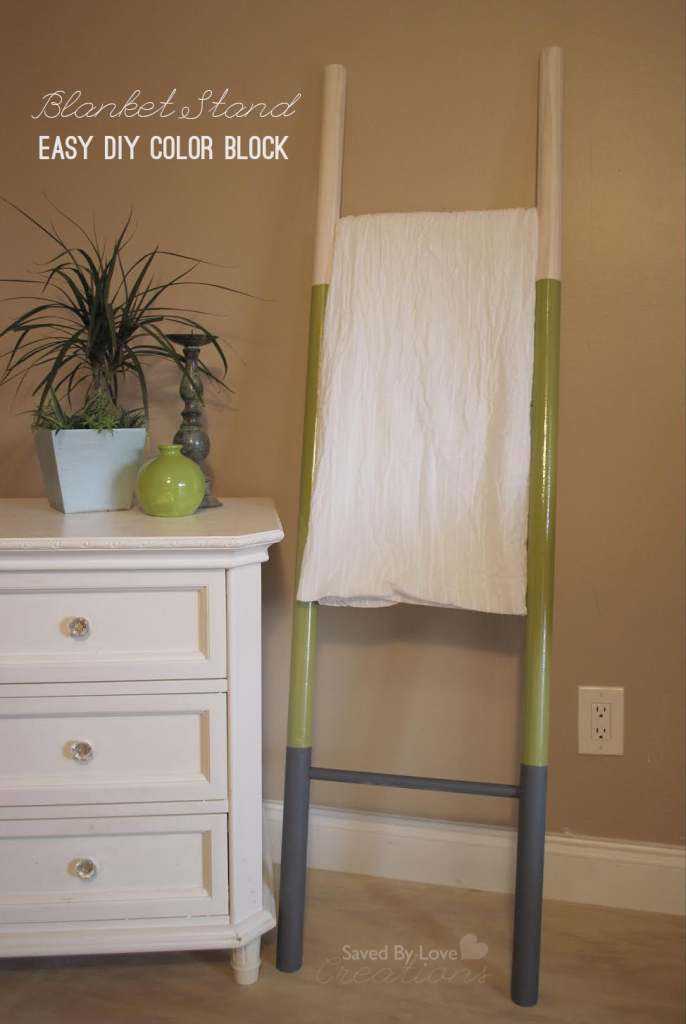
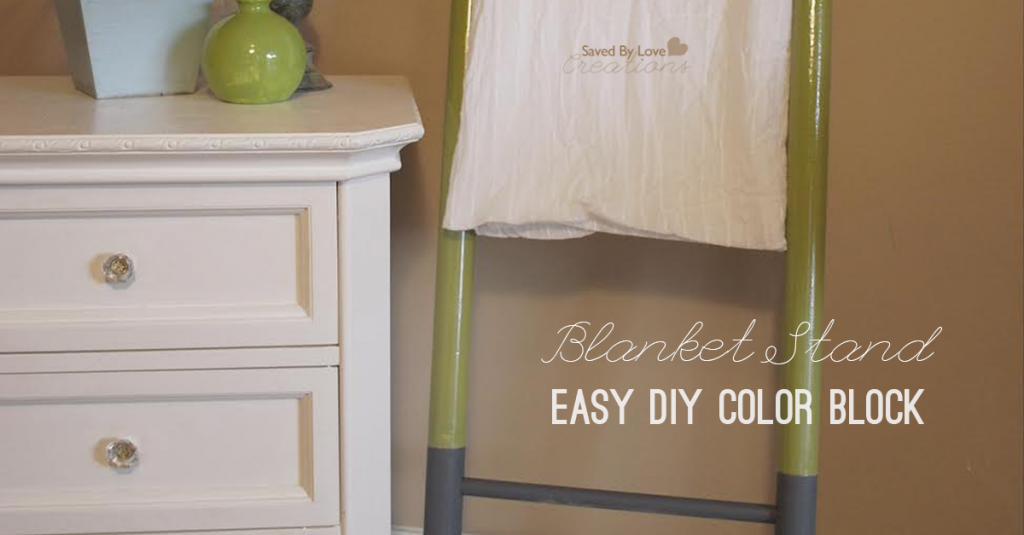
As functional as it is chic, this blanket stand can hold several blankets while only taking up minimal floor space. The fun color block pattern adds some visual interest to your walls, and depending on the blankets, you can create a variety of interchangeable styles for your living room. Lean it against the wall by your couch for easy access to blankets on movie night and when the weather is warm, the blanket stand’s slim design stays out of the way.

Supplies:

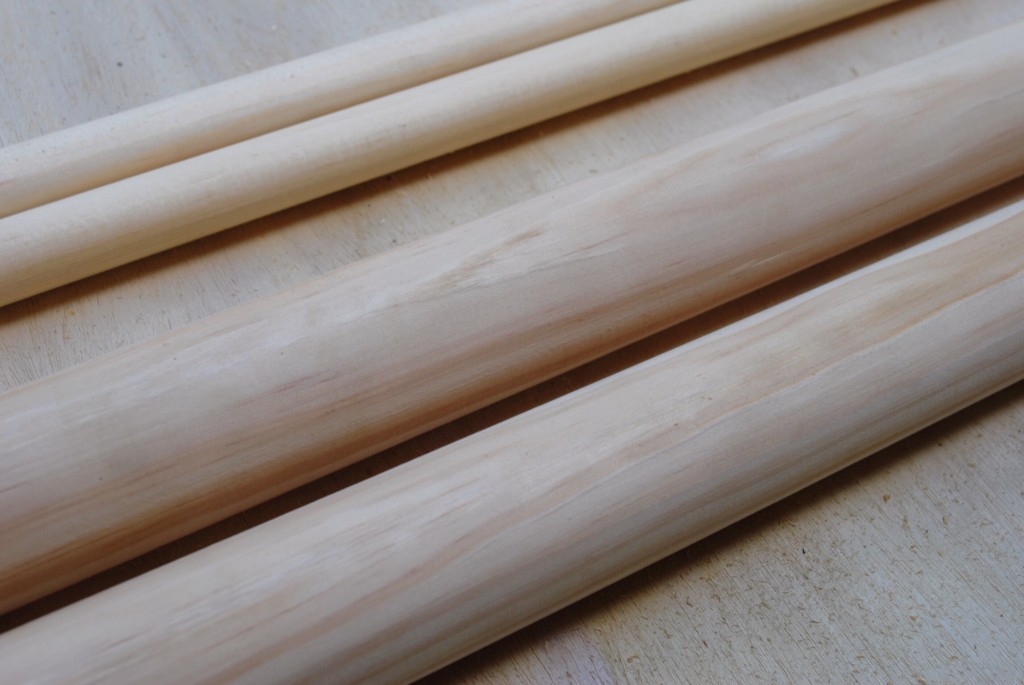
  • Two 1 ½“ x 5’ pine handrails
  • Four ¾” x 14” wood dowels
  • Miter saw
  • Electric drill
  • ¾” Forstner drill bit
  • Orbital sander
  • Sanding sheets (220 grit)
  • Wood glue
  • Four strap (or trigger) clamps
  • Rubber mallet
  • Paint and/or wood stain
  • Painter’s tape
  • Blankets!

Easy beginner woodworking projects

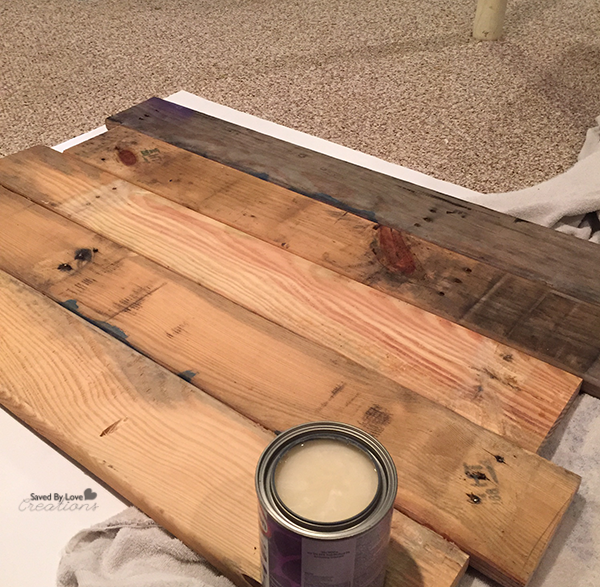
Step 1: Gather Your Materials

This project calls for a slim ladder profile with a modern, clean look. Because of this, I went with round wood stock and dowels, as they are lightweight but still sturdy enough to support the weight of a few blankets. Handrails work perfectly for the sides of the ladder because they have a flat side that can butt up against the wall without rolling.


Cut Dowels and Handrails with Mitre Saw

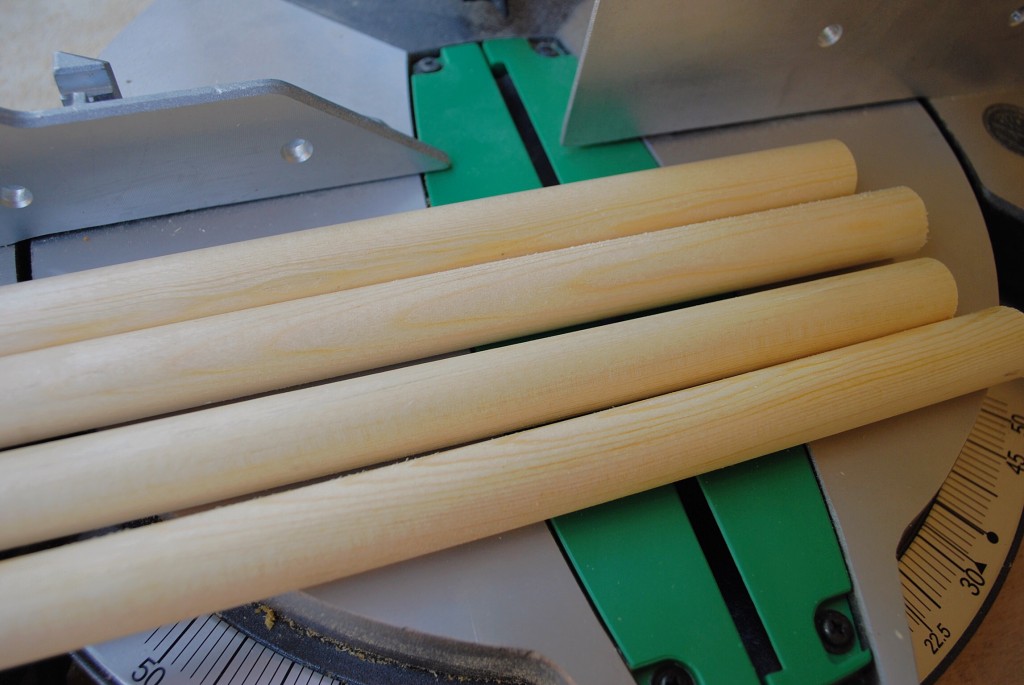
Step 2: Cut the Handrails to Size

Using a miter saw, cut the two pieces of handrail material down to five feet in length, and the dowels, which will serve as the ladder rungs, into 14 inch pieces. To help keep the blanket stand propped up against the wall at the right angle, miter the bottom end of both handrails.


Prep wood for stain or paint

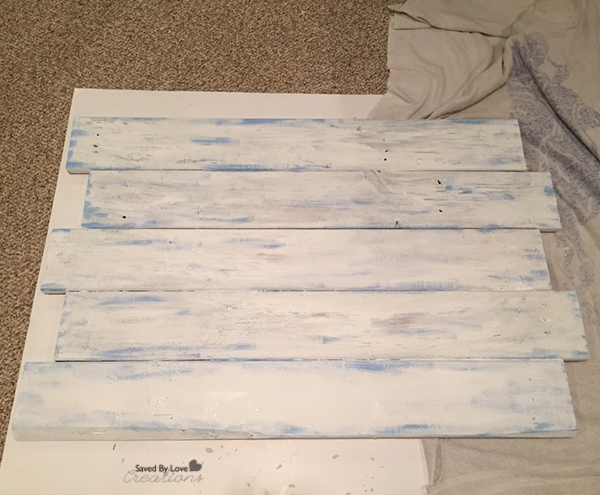
Step 3: Sand and Prep

A quick sanding with an orbital sander will clean up any splintering on the ends and prepare the wood for paint and stain.


Drill holes for dowel rods


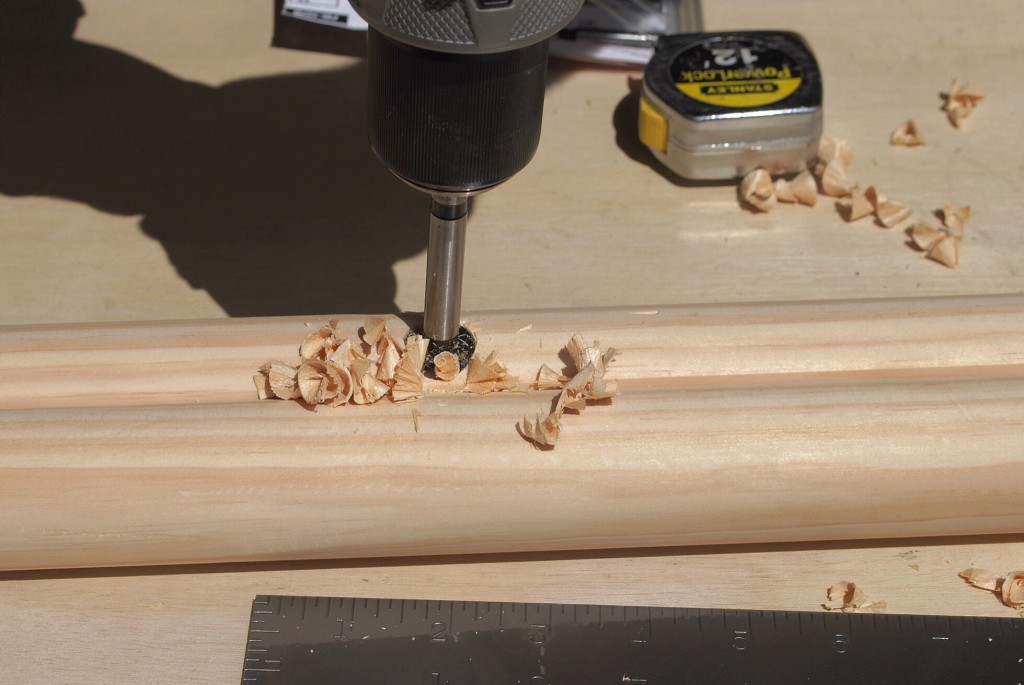
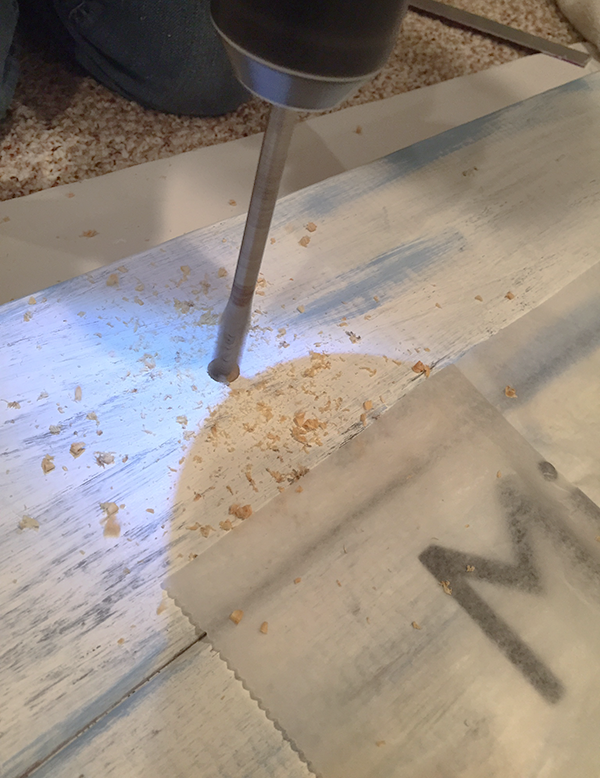
Step 4: Drill the Holes for the Rungs

To make sure the holes are even, clamp the handrails together and mark out the placement for the ladder rungs. Leave enough space between the ladder rungs so that the blankets can fit. Once you have the placement marked, use a ¾-inch forstner bit to drill one inch into the handrails on both pieces. A forstner bit drills neat-flat bottom holes that are more precise than what you can usually accomplish with your standard drill bits or spade bits. The flat bottom holes will allow the dowels to fit securely and ensure the ladder rungs maintain equal length. Use some scrap sandpaper to clean out the holes and remove any stray wood curls.


Assemble dowel rods using glue

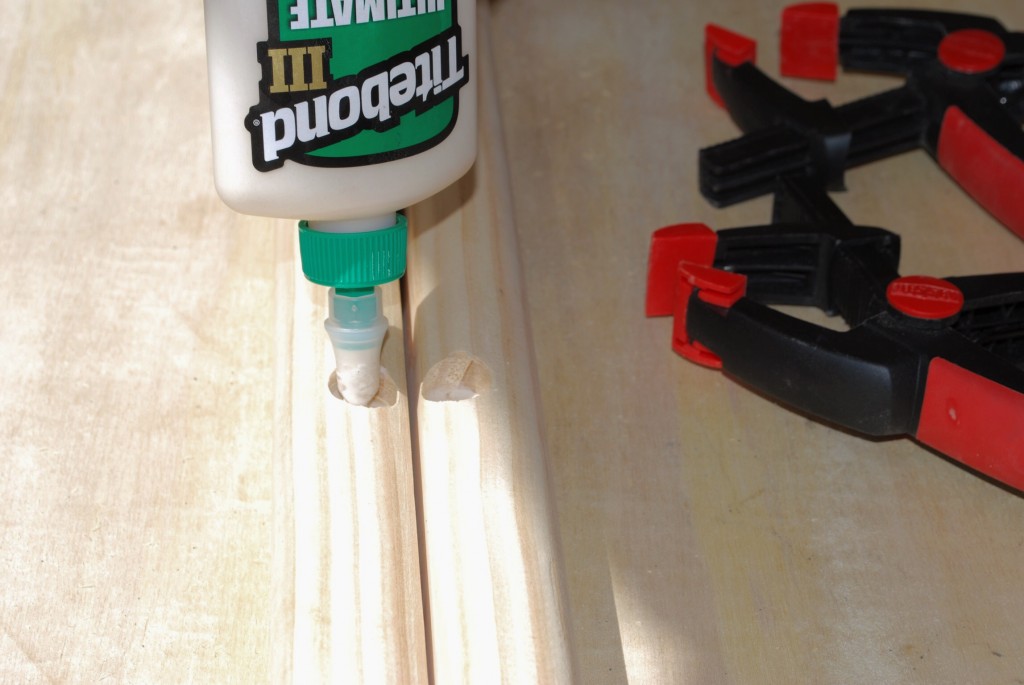
Step 5: Assemble the dowels
Squeeze some wood glue into the drilled holes and use a rubber mallet to gently tap the dowels into place. Repeat the process for the other handrail to bring both sides of the ladder together.


Clamp overnight

Step 6: Let the Rungs Set
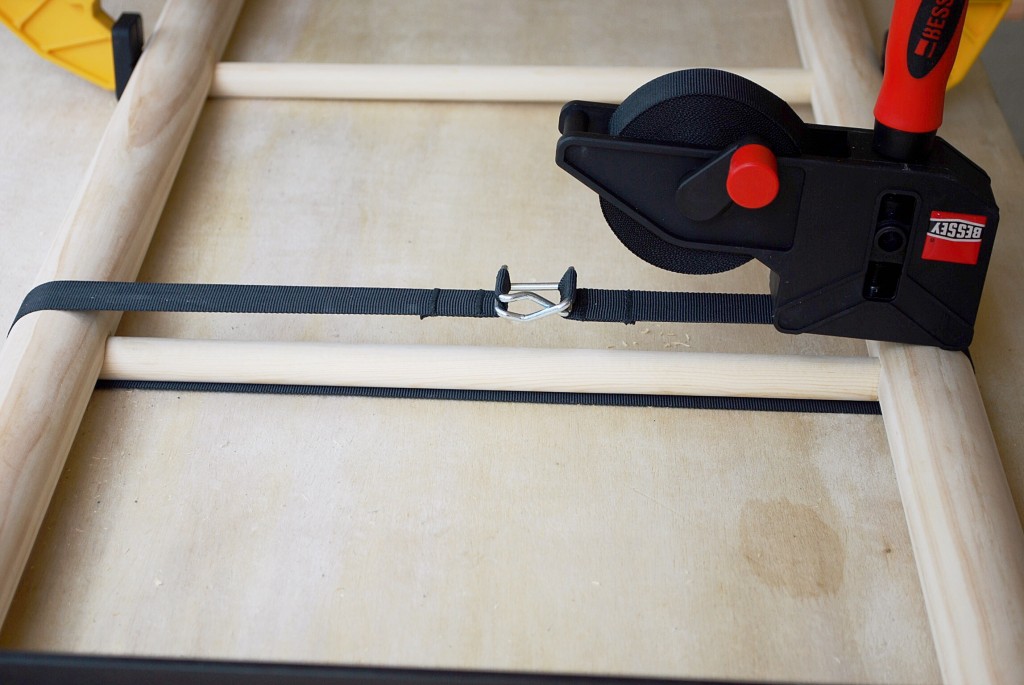
To ensure a strong glue bond, use 4 flexible strap clamps (or adjustable trigger clamps) to place pressure on the joints. Clean up any excess glue and leave the clamps on until the glue dries, usually eight to 24 hours.


Apply chosen paint

Step 7: Apply the Color Block
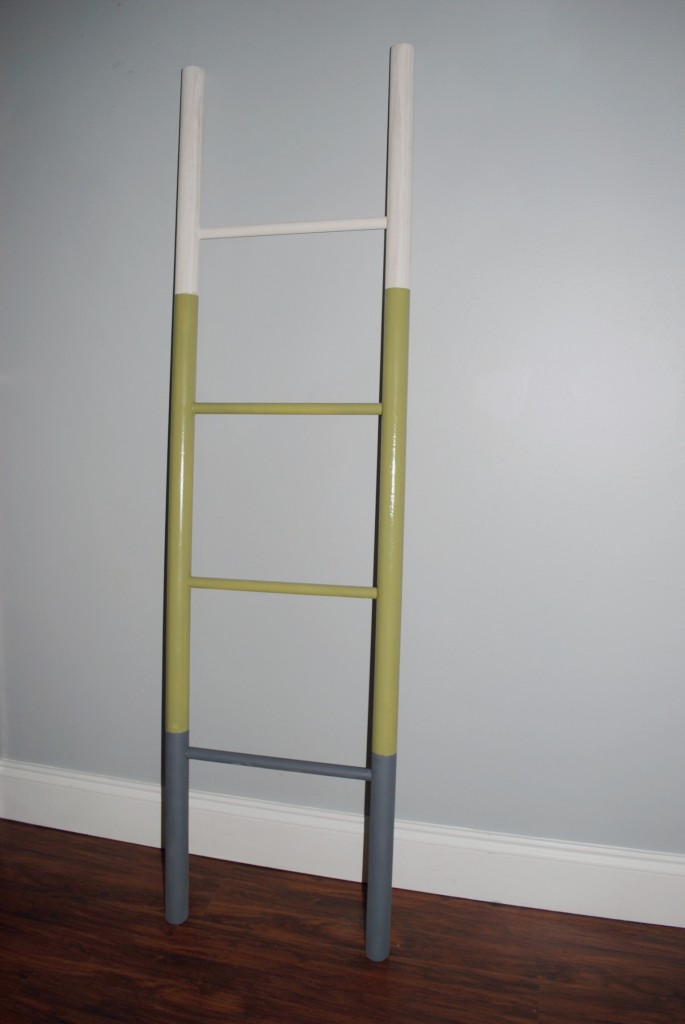
Now that your ladder is constructed, you can begin adding a fun color block pattern. I went with a combination of finishes that draws your eye up, going from a dark matte grey, into a glossy green, into a light white stain that shows off the wood grain. Use paint-block painter’s tape to keep your paint and stain edges clean and straight.


Final Option 3

Step 8: Find the Perfect Spot, and Enjoy!
Lean the blanket stand up against the wall and place your blankets on the ladder rungs. Have fun experimenting with different colors, textures and patterns to see what works best in your space!


Mateo Londono is an avid DIYer and vegan cook who has a passion for improving and personalizing homes with cool projects. Mateo and this DIY are featured here on the TenX Homes site, where you can find out more about creating your own unique space. You can also visit The Home Depot to find other wall decor accents to make your home your own.

Pinterest DIY Blanket Stand

Easy DIY Blanket Stand FB

How to Make a Gorgeous Fall Wreath

DIY Fall Decor

It has been way too long since I made and shared a DIY wreath project with you all. That is why I am a super stoked about today’s simple, cheap tutorial – a gorgeous gilded wreath to adorn your front door. You are going to need just a few supplies and an hour to create your very own. Let’s get started!

how-to-make-a-fall-wreath-savedbyloves

SUPPLIES:

how-to-spray-paint-plastic

Plastic or foam pumpkins and gourds (I got mine for 50% off at Michaels)

Krylon Dual spray paint in metallic gold, or your favorite color

A wreath form, or cardboard with and scissors(I used a pizza box)

Hot glue gun and sticks

Ribbon to coordinate with your paint choice

Drop cloth or old sheet to protect surface from overspray

diy-fall-decor

Begin by laying out your pumpkins on the drop cloth. This project is best done outside since you will be spray painting.

how-to-spray-paint-plastic

Spray pumpkins per instructions on can. Make sure you are using paint that has primer in it. If not, you will need to prime the pieces first. I love Krylon Dual because it has paint and primer in one. It is my go to product for spray painting.

how-to-make-your-own-wreath-form

Now for the wreath form. I showed you how to make your own from cardboard in this DIY Poinsettia Wreath tutorial. For this project, I wrapped the cardboard wreath form in duct tape for durability since I planned to hang the wreath outdoors.

diy-metallic-pumpkin-fall-wreath-wm

Before attaching the painted, dry pumpkins, place the ribbon around the wreath. Hot glue it into place, then begin attaching pumpkins.
how-to-hang-a-wreath

It’s as easy as that!

pumpkin-diy-fall-wreath-from-savedbyloves

TIP: For more cohesiveness, once all the pumpkins are in place, use the same spray paint to spray the wreath form where it is visible in the spaces.

For more of our festive wreaths, click:

Saved by Love Creations DIY Wreath Tutorials

DIY Repurposed Shelf to Jewelry Display

DIY Jewelry Display

I don’t know what your earring situation is like, but mine was pretty sad until I took action. Today, I am sharing how I turned a piece of metal shelving from Habitat Restore into a cool earring display, with a little spray paint and some reclaimed wood.

Shelf

Here is the wire shelving section I used. Pictured is black chalkboard spray paint I used initially. I decided I didn’t love it, and went with metallic silver Krylon spray paint instead. Just spray evenly over a protected surface, in a space with good ventilation (preferably outdoors). Let dry completely. I let mine sit overnight.

How to Make a Repurposed Jewelry Display

Next it was time to build the frame. I used old wood that I found in the free section on Craiglist. This is by far my favorite source for free wood. My second favorite way to acquire free wood is to drive around alleyways near businesses or behind strip malls, looking for piles of pallets. I always make sure I ask, and most people are happy to have help getting rid of them. I have only been told “no” once.

Mark the wood with a pencil, using the shelf for measuring. Cut to 45° angles on each end of the wood, going in opposite directions. Cut two for the sides and two for the top and bottom. I used Kreg Jig pocket holes to connect the pieces at each corner to form a frame. For more details, see my post on How to Use a Kreg Jig and DIY Barnwood Frames.

DIY Shelving to Jewelry Display @savedbyloves

If you like this project, you will love our round-up of 50+ Creative DIY Jewelry Organizers:

Over 50 Creative DIY Jewelry Organizers to Make

25 DIY Mountain Crafts and Decor Tutorials

DIY Mountain Craft Roundup @savedbylovesIt’s been way too long since I created and shared with you, my lovies! The reason for that is a move across the country from Indiana to the Colorado Rocky Mountains. I’ve wanted to take this leap for years, and now that I have, my only regret is that I waited as long as I did!

Sky Pond Rocky Mountain National Park Estes Park Colorado

Mountain National Park Estes Park Colorado

In honor of the new residence, I bring you 25 DIY mountain themed craft and decor tutorials from my fellow creatives!  You’ll find everything from advent calendars, to wall art to printable coloring pages and more. As soon as we find a permanent home, we will be able to bring the tools and supplies out of storage to begin creating again. While I am looking forward the unleashing my inner maker, exploring the new surroundings has been a gift! If you can’t get to the mountains where you are, you can bring them to you with this fun round-up! Enjoy and as always, if I left out your project, email me the link!


Over 50 Easy Watercolor Inspired DIY Tutorials

50 Plus Easy Watercolor DIY Decor and Art Tutorials @savedbyloves
I am thrilled to share today’s 50+ round-up! It is a colorful collection of watercolor inspired DIY tutorials that you can make, even if you aren’t an artist! From fashion to wall decor to kid’s crafts and more, you will be ready to create with these detailed tutorials. Enjoy!

50 Plus Awesome Yarn Crafts to Make

50 Best Yarn Crafts to make from @savedbylovesDon’t let the title scare you. For this collection, no crochet or knit skills are needed. This week’s crafty round-up is all about things to make with yarn. You will find all kinds of kids crafts, home decor, paper crafts and more. Enjoy!

50 Plus Awesome Accent Walls

50 Plus Amazing DIY Accent Wall IdeasWhen we moved into our new house, we went neutral with the walls as we painted. My thought was to save the boldness for accents. Well, now it is time for some accent walls. I gathered some of my favorites creative accent wall ideas on a budget to share with you. If I missed yours, leave me the link in the comments below. There are some great ideas on the cheap, and several easily removable temporary ideas. I hope you are inspired to liven your favorite space with some stencils, planks, stripes, panels or something else new!


50 Plus Amazing DIY Accent Wall Ideas FB

DIY Upcycled Cookie Sheet Memo Board

Easy Upcycle Cookie into Copper Patina Magnet Board @savedbyloves @petscribbles

Hi everyone! I’m Laura from Pet
Scribbles
, and I’m thrilled to be guest posting for Johnnie
today!

I’ve got a fun DIY project to share: a copper patina magnet
board from an upcycled cookie sheet!

After seeing so many cookie sheet makeovers on Pinterest, I began
collecting some of our older ones. I also bought this new round one at
the dollar store:

Copper Patina Magnet Board

As regular readers of my blog know, I love the look of copper and
patina. I’ve made over quite a few pieces using this technique, from
glass
vases
made to look like copper pipes to large wooden planter boxes made to look
like metal. In each DIY, the steps are the same but the patina effect is
always different – just like real patina on aging copper.

Step One: Apply one coat of Modern Masters Copper Reactive
Metallic Paint to both sides of the cookie sheet.
Let dry.

For many surfaces, I use the Metal Effects Primer (also by Modern
Masters) as the first coat. On metal, it isn’t necessary as the first
step. However, as you’ll see in the image below, the first coat of paint
did go on a bit more streaky than I would have liked. (Using a primer
always provides some tooth for any subsequent coats of paint to adhere to.)

Copper Patina Magnet Board

Step Two: Apply a second coat of the copper paint to the back
side of the cookie sheet only.
Let dry.

Isn’t the paint gorgeous? There’s real metallic particles in the paint,
which is what reacts with the patina solution that will be added in the
next steps.

Copper Patina Magnet Board

Step Three: Apply a new coat of the copper metallic paint to the
front of the cookie sheet, then immediately spray the patina solution
onto the cookie sheet right over the wet paint.
The patina
solution comes in blue and green. I used the green shade:

Copper Patina Magnet Board

Using a sea sponge, I then played around pouncing the solution on the
cookie sheet, just making random patterns. It isn’t necessary to do
this, but it sure is fun!

Copper Patina Magnet Board

Step Four: Add a bit more of the copper paint, if
desired.
After everything dried overnight, I used the same sea
sponge and pounced a bit more copper paint here and there onto the front
of the cookie sheet. There’s no right or wrong way to do this, just play
with the look until you love it.

Here’s a close-up of the gorgeous patina finish:

Copper Patina Magnet Board

Step Five: Drill two holes into the cookie sheet. These
holes will be where you thread your ribbon through, to make the hanger
for your magnet board.

Copper Patina Magnet Board

Step Six: Cut two pieces of thin velvet ribbon (or a ribbon of
your choice), which will become small bows on the front of the magnet
board.
Cut two longer pieces of the same ribbon, which will be
used to create the hanger. (I didn’t measure my pieces, instead I just
eyeballed it.)

Copper Patina Magnet Board

Step Seven: Create the velvet ribbon hanger. Make a
loop with the smaller piece of ribbon (A), then thread
it (B) through the drilled hole, with both ends coming
through to the front. (C) Turn the tray over and slide
one end of the longer ribbon through the loop of the smaller piece.
(D) Tie the longer piece onto that loop with a simple knot.

Repeat this step for the other drilled hole.

Copper Patina Magnet Board

Step Eight: Pull the ends of the smaller pieces of ribbon all
the way through the drilled holes.
(They will be stopped by the
knots underneath that you made in Step Seven.

Step Nine: Tie the ends of each ribbon together with a simple
knot, then trim the edges to a length you like.
I trimmed mine
so each looks like a very basic bow shape and covers the holes
completely. (See image below.)

Step Ten: Tie the long ends together and make a large, floppy
bow.
Hang up on the wall and enjoy!

Copper Patina Magnet Board

Since it’s Christmas time, I decorated my magnet board with some of my
favorite vintage Christmas postcards. (I also made the glitter marble
magnets, and you can find that tutorial here.)

Copper Patina Magnet Board

I added a sprig of a faux pine branch too.

upcycled-cookie-sheet-memo-board

And when the Christmas season is over, my magnet board will be ready to
take on the new year and hopefully keep us more organized! (Unless I
decide to decorate it with more vintage postcards!)

Copper Patina Magnet Board

I’ve been a long-time admirer of Johnnie. Whether she’s crafting
bracelets or building furniture, her creativity knows no bounds!

Thanks Johnnie for having me guest post today, and thank you Saved By
Love readers too!

Happy crafting!

~Laura

Pottery Barn Knock Off Christmas Decor Printable

Pottery Barn Christmas Art Knockoff


Sometimes when I am having trouble coming up with a project, I visit my favorite store catalogs or websites for inspiration. This project is inspired by a Christmas Wall Art piece from Pottery Barn that cost $99 on the website. I got the print for $1.75 at Office Depot by downloading it to my flash drive and taking it to my local store. Total, my version was under $20!

Reindeer Wreath Printable

Download the 11×14 Reindeer Wreath Printable and grab a frame with your Michaels 40% off coupon and you can have your own Pottery Barn winter art knock off for 1/5 of their price. You can click the above link or thumbnail to pull of the full res version and save to your flash drive for going into the store, or save to your computer and order a print electronically.

*I used this classic wreath graphic from The Graphics Fairy and this Reindeer Silhouette from Lolly Jane on this burlap background in Photoshop to create the print!

I hope you enjoy!
Pottery Barn Christmas Printable Art Knockoff from @savedbyloves

Do you want to see more knock off designs for decor, jewelry and more? Visit our 50+ Knock Off Designs Roundup:

Psalm 93 DIY Wood Pallet Nursery Sign

DIY Nursery Decor Wood Pallet Sign Psalm 93 @savedbylovesMy friend Jordan will be a momma any day now. I wondered if I would end up delivering the little guy the day she came over to make this nursery wall art, but he is not here yet! Today I am sharing how we created this lovely Psalm 93:4 sign for next to nothing out of pallet wood. It is so perfect in her nautical themed nursery! Download the cut file below and follow the steps to make your very own!

SUPPLIES:

Five pallet wood planks (Here is my video: How to Break Down Wood Pallets)

White chalky paint

Blue acrylic or chalky paint

Black vinyl for your die cut machine and transfer tape if you are die cutting the letters (if you don’t have a die cut machine, you could download the phrase below and transfer the letters to the sign to hand paint it like I showed you here: DIY Hand Painted Rustic Wood Signs)

Die Cut machine and software to trace jpg file provided below (this is not needed if you are hand-painting the sign as shown in the previous link)

Drill and 1/2 inch hole saw bit

Rope

Kreg jig

1 1/4 inch Pocket Hole Screws

2 inch flat paint brush and round stencil brush

Psalm 93:4 text download

Free Anchor Clip Art

Mod Podge Matte Finish

TUTORIAL:

DIY Nursery Decor

Cut your boards to about 45 inches wide and attach them with pocket holes, staggered as shown – (Here is How to Use a Kreg Jig).

DIY Nursery Decor2

Paint the sign white with chalky paint (we used Folk Art Home Decor Chalk).

Let that dry, then dry brush blue randomly as shown.  We used a round stencil brush for this.

Let dry and cut or print and transfer text and anchor.  We used a 12×24 inch mat  and filled the entire area with the text.  We sized the anchor to 5 inches and cut everything in black vinyl.

DIY Nursery Decor3

Center and adhere vinyl letters and anchor using transfer tape. Seal letters and sign with Mod Podge Matte or desired finish.

DIY Nursery Decor6

Mark desired placement of holes and drill with spade bit to fit diameter of rope you are using. (We have the letters covered in this image because the Mod Podge wasn’t dry and the saw dust would stick in it.  Don’t judge, we were in a hurry)!

DIY Nursery Decor8We inserted the rope and hung it from a cool anchor hardware piece that Jordan found at Hobby Lobby for just $3!

DIY Nursery Decor Ideas

We LOVE it!! Jordan did a fantastic job with this nursery, and our sign tops it off perfectly.

We hope you are inspired to create your own!

Privacy Policy