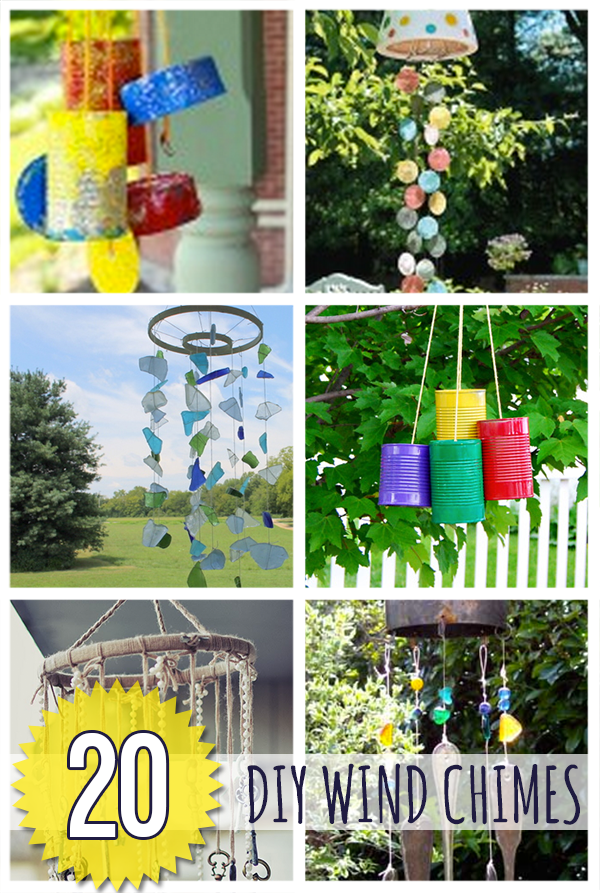
20 DIY Wind Chimes to Make

[pinit]20 DIY Wind Chimes @savedbyloves outdoordecor[pinit]

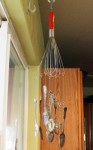
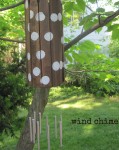
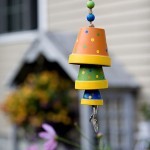
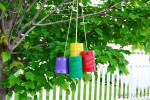
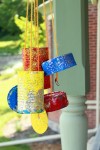
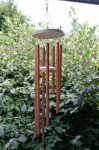
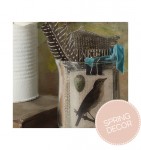
Spring is here and it time to get busy on your DIY outdoor decor.  Today I am sharing 20 great DIY wind chime ideas you can make.  We are busy making our own as we speak!  If you have made wind chimes you are proud of, send us a photo so we can include you.  Enjoy!


Make a Burlap Spring Wreath

Hi everyone! It’s Laura again from Inspiration for Moms.
Today is a beautiful day in Colorado.
The sun is out, the windows are open and the birds are chirping.
Spring is in the air!
So I though it would be the perfect time to make a Spring wreath for my front door.

[pinit]

DIY Spring Wreath with Burlap @savedbyloves

[pinit]

First you will need your choice of burlap and a floral wire wreath.
I was going to pick a green color but my son suggested the teal blue.
I think he has a good eye! 🙂
DIY Spring Wreath - Supplies
If you are intimated by those fancy looking burlap wreaths, don’t be!
I’m hear to tell you there as easy as a simple tuck and fluff!
The first step is to tie your burlap around a middle cross wire.
Then it’s time for step two, gently tuck the burlap
from behind the wreath and push it through the wire spacing to make a loop shape.
Work your way through all three rows.
DIY Spring Wreath - Step-by-Step
Now it’s time for step number three, fluff those loops.
Sounds really technical right?! 🙂
Once you have fluffed, continue on until you get to the next middle wire.
I try to pack as many loops in between the middle dividers
to make the burlap really secure which is step number four.
Continue your way around the wreath until completely covered.
Now it’s time to make the Spring banner.
I already had six burlap triangles but these can be found at most craft stores.
I wanted to add some chalkboard triangles for a little contrast.
I took some chalkboard tags from a previous craft project and cut them into triangles.
DIY Spring Wreath - Chalkboard Tags
I then hot glued my chalkboard cut outs onto the burlap triangles.
I added some white stickers to spell “Spring” and then hot glued
the banner together on some twine.
I had a burlap flower leftover from a previous project and thought
it would be a perfect accessory for this wreath.
You can never have too much burlap! 🙂
Now that my door is ready for Spring maybe the weather will cooperate too.
Hey there is only 9 more days until it’s officially Spring. Then it has to get warmer, right?!
Thanks for hanging out with me today and I can’t wait to see you again next month!
  Until then we can stay in touch by visiting Inspiration for Moms,

Want more?  Check out 50+ Burlap Crafts and Decor Ideas!

Burlap DIY Decor

Over 50 Amazing Spring Decor Ideas

[pinit]50 Amazing Spring Decor ideas @savedbyloves[pinit]

This has been one long, cold and snowy winter.  Are you ready for spring?  Today I am sharing 50 of the best DIY spring decorating projects out there.  I hope you are inspired to usher in the spring.   It is coming, truly!


Rustic Hand Painted Sign Giveaway With Little Red Porch

[pinit]Win a you are my sunshine handpainted sign from @savedbyloves
[pinit]

UPDATE:  CONTEST OVER.  WINNER SELECTED!! I am so thrilled to bring you all a chance to win another beautiful hand painted sign from Little Red Porch.  I first introduced you to Pam and her signs with this DIY Rustic Hand Painted Sign Tutorial and you couldn’t get enough!

So here is the scoop.  Pam and I are ready for spring.  We are guessing you are no different.  How great would it be to usher in the sunshine with a “You are My Sunshine” sign?

Here is the deal.  You get to pick one of the 4 signs in the intro photo.  If Little Red Porch on facebook gets above 2500 fans by the giveaway end date, you get to choose from the large signs and if not, the smaller signs.  Make sure you share the page with your friends!

Enter Here!!

a Rafflecopter giveaway

Make a Cool Wreath From Fabric Scraps

Hi everyone! It’s Vidya from Whats Ur Home Story. Great to back here sharing an exciting project!

Don’t know about y’all but after all the cold and snow this winter I’m so ready for Spring! I know we have got over a month to go but no harm in pretending that it is already Spring around here especially when you have this bright and cheery wreath made out of fabric scraps and felt flowers hanging on your front door.

[pinit]

fabric scraps wreath, spring wreath, felt flower wreath

[pinit]

Other than buying a fake fern sprig from Micheals I didn’t spend a penny to make this beauty. The chevron fabric scraps are from a chair makeover while the vintage lace I salvaged from a neighbor’s trash. The yellow felt strips for the flowers are leftovers from my felt circles pillow, †the other pieces of felt from my handmade Christmas ornament project. The wreath frame is the same one I used to make my Magnolia wreath.

Materials

Foam Wreath form
Fake Greenery
Fabric Scraps
Felt flowers (I made them using this tutorial.)
Hot Glue Gun
Scissors
A small pieces of poster board
2 Pipe cleaners


fabric scraps wreath, spring wreath, felt flower wreath

Tutorial

  • Before you start try wrapping the fabric scraps around the wreath form to see if you have the required length to cover the form. Nothing fancy just some slopping wrapping would do. All you are trying to gauge is how much fabric you need. Also place your flowers on the wreath to get an idea of their layout.

fabric scraps wreath, spring wreath, felt flower wreath

  • Now that you have your pattern figured out start by hot gluing one end of your fabric scrap to the underside of the foam and wrap tightly as you go. If your scrap is not long enough just end it on the back of the foam and start with a new piece. Hot glue the other end. Start with the next scrap in this case, the vintage lace.†I liked the look of the lace over the chevron fabric so I made sure that I started the 2nd chevron wrapping before I hot glued the other end of the lace.

fabric scraps wreath, spring wreath, felt flower wreath

  • For the flowers, trace the wreath form (where the flowers are supposed to go) onto a piece of poster board, cut out, and glue the flowers in the layout that you liked from Step 1.

fabric scraps wreath, spring wreath, felt flower wreath

  • Hot glue the pipe cleaners to the back of the poster board at places where the weight of the flowers would be the most. Ideally you should use pipe cleaners that would match your fabric but black is all I had on hand.

fabric scraps wreath, spring wreath, felt flower wreath

  • Glue the fake leaves to your poster board too. Now attach the poster board ‘flower piece’ to the wreath by tightening the pipe cleaners. And there you have it, your fabric scraps Spring wreath.

[pinit]

fabric scraps wreath, spring wreath, felt flower wreath

[pinit]

Are you ready for Spring too? do you usually make Spring Wreaths?

For more easy DIY ideas stop by†Whats Ur Home Story†or follow me via†Facebook,†Pinterest,†Twitter, G+ or†Instagram.

How to Print on Burlap with Free Spring Printable and DIY

[pinit]DIY how to print on Burlap with free Printable wall art @savedbyloves[pinit]

Hi there everyone!
I’m so happy to be back chattin’ with you!
Do you love the look of burlap prints?
If you do, this is your lucky day because I’m going to teach you how
to make your very own right in the comfort of your home!
Honestly, this whole project took me less than 15 minutes to make
and I absolutely adore it!

SUPPLIES:

-burlap
-card stock
-scissors
-home printer
-spray adhesive

TUTORIAL:

DIY Burlap Printable-Supplies Needed

You first step is to cut your burlap to the same size as your card stock.
Spray the card stock with your adhesive and then apply your burlap on top.
 Press down and make sure that there are no lose ends.
How to print on burlap
Now it’s time to insert the burlap into the printer.
You want to make sure the burlap in on the side that will be printed on.
For my printer, I placed it in upside down.
(Please ignore the dust on my printer. Dusting is not my favorite activity!)
if I had a flower

If you would like to print my quote, 
just right click on the image below and save to your computer.
Printing on burlap at home
Then it’s time to print your design or quote.
 I chose this quote because I thought it was beautiful
and I knew I had the perfect burlap accessory to go along with it. 🙂
Now sit back and watch your fabulous art appear.
Burlap home decor
Once it’s done printing some tutorials may tell you to remove the card stock.
But I won’t. Nope.
I am going to use the card stock to give my burlap some support for when I frame it.
I didn’t want my printable behind glass because I wanted to accessorize
with some pretty burlap flowers.
So I placed the burlap print in the frame first and placed the glass behind.
To add my flowers, I simply used my glue gun.
And that was it.
Can you believe how easy that is?
I know right. I better go stock up on ink because I am going to be
a burlap printing fool!  🙂
 Are you addicted to burlap like I am?

I hope you enjoyed this easy burlap craft. 
If you would like to see more of my projects or keep up with my latest updates,
follow me on FacebookPinterestTwitterGoogle+ or Instagram.


Want more?  Check out 50+ Burlap Crafts and Decor Ideas!

Burlap DIY Decor

Spring Printable Chevron Bunting

Chevron Printable #SpringDecor #Garland @savedbyloves

Are you as anxious for warm weather to arrive as I am?  It is time to update that winter decor to bring in the spring!  Someone needs to tell the snow that its time is up around here.  I went for some quick, easy printable chevron garland this year.  I found the perfect gray and yellow chevron printable bunting flags from Detail Oriented Diva!

I just uploaded them to Snapfish and ordered them for 1 hour pickup at my local Walmart.  The cost was $15.  I got 5 8×10 prints.  In retrospect, I should have just thrown them on a flashdrive and had them printed at my local Office Depot or Staples on cardstock for about half that price, but there is always next time.

How to Make #Easter #Bunting

This is what the prints looked like.  I just cut them out with a straight edge and craft knife.

Printable Easter Garland

Detail Oriented Diva shows you how to use bias tape and sew your bunting.  I went for jute twine and white tiny clothespins.  Super lazy, it’s true, but I love the look.  I also like that I can change the distance between the flags to fit whatever space I am using the bunting to decorate.

How to decorate for spring

What do you think?  Have you started decorating for spring yet?

For more garland and bunting ideas, check out our roundup!

Over 50 bunting and garland projects to make


Photoshop Tutorial and Free Printable Spring Subway Art


Head over to Printable Decor for this spring subway art printable and Photoshop tutorial detailing how you can easily change the color scheme and size to fit right in with your spring decor.

I cover using crop to quickly resize, as well as altering the hue of the entire photo, of just the blue, and turning the image into a monochrome.

Exciting stuff, I know!  You can use what you learn to alter freebie printables and your own images to complement your style.

Spring Chevron Subway art printable

Spring Chevron Subway art printable

If you like subway art and Photoshop tutorials, check out this detailed post on how to make your

own subway art.

Spring T-Shirt & Paper Rose Wreath

Spring wreath DIY

What to do with all those paper roses I have been showing you?  How about a T-shirt paper rose wreath?  Remember this t-shirt wreath from winter? I stripped it down to just the shirt covered wreath form and added a burlap bow and 3 paper roses.

TshirtRoseWreath

This is a great basic wreath to embellish for every season.  And don’t forget all the other things you can do with those old t-shirts…

{Guest Post} Dollar Tree Spring Decor Project


spring

TODAY LAUNCHES A WEEK OF GUEST POSTS HERE AT SBLC! 

I am so excited to introduce

to you Debbie from Debbiedoos’s.  Check out her great projects, her Monday Newbie Party,

blogging tutorials and more.  Today she is sharing a dollar store spring decor project.

Take it away Debbie!

Happy Spring! I know not officially here yet, but it is in my house.
Thought I would share a Spring craft, that I whipped up in a few minutes.
All from dollar tree items,and of course a can of spray paint.
I used my new favorite color Blue ocean breeze.
I spray painted my white canvas.
What you will need:
Easter grass
Spring Easter Foam cut outs  {dollar tree}
Foam eggs {dollar tree}
Faux Spring flower {dollar tree}
First I glued my grass on the board, both with craft glue, and my handy dandy glue gun.
I added my foam eggs with a dab of hot glue.
Then I glued my foam chickie..
Topped it off with my fun faux orange flower..
How C A Y U T E!
{ I say that often don’t I?}
I am all about budget friendly cute crafts.
If you are looking for Candace Olson designs…oops sorry you made a wrong turn.
HOWEVER, if HGTV would like to give me my own show, and a pocket full of money…
I will give Candace a run!
My cutsie did not stop there.  I filled the apothocary jar up with some grass, another faux flower and some foam eggs…
Tied the top with some dollar tree ribbon!
Say it again with me… C A Y U T E!
I also bought the pretty fun paper napkins for the bathroom at the dollar tree.  They are not really for the bathroom, but hey why not?
For the record my painted Giani counter top is holding up great! You may see that project here, if you missed it.
Today I am guest posting over at Johnnie, from Saved by love creations.
I thank you Johnnie for this opportunity to share with your wonderful friends and readers.
Photobucket
Privacy Policy