DIY Upcycle Lighted Santa Bottles

DIY Santa Light Bottle Upcycle Project @savedbyloves


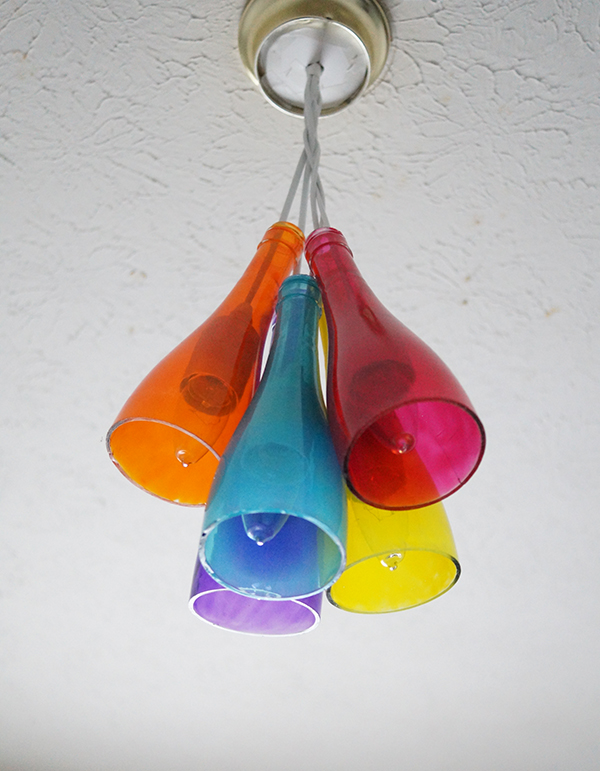
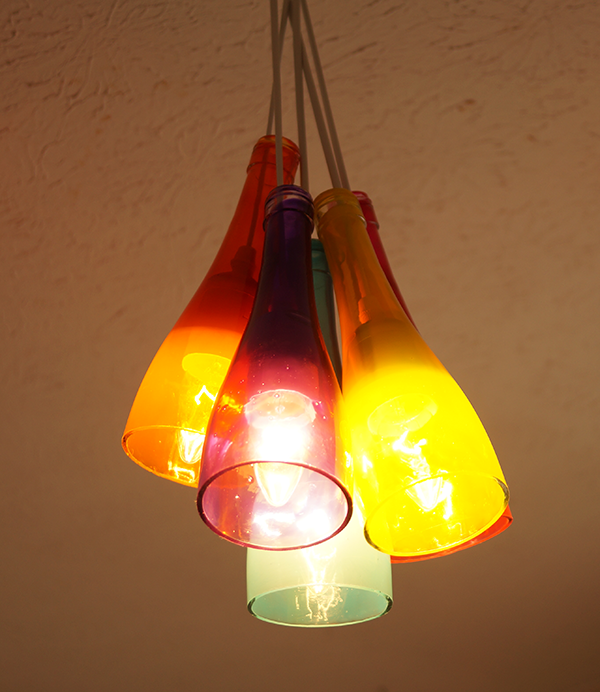
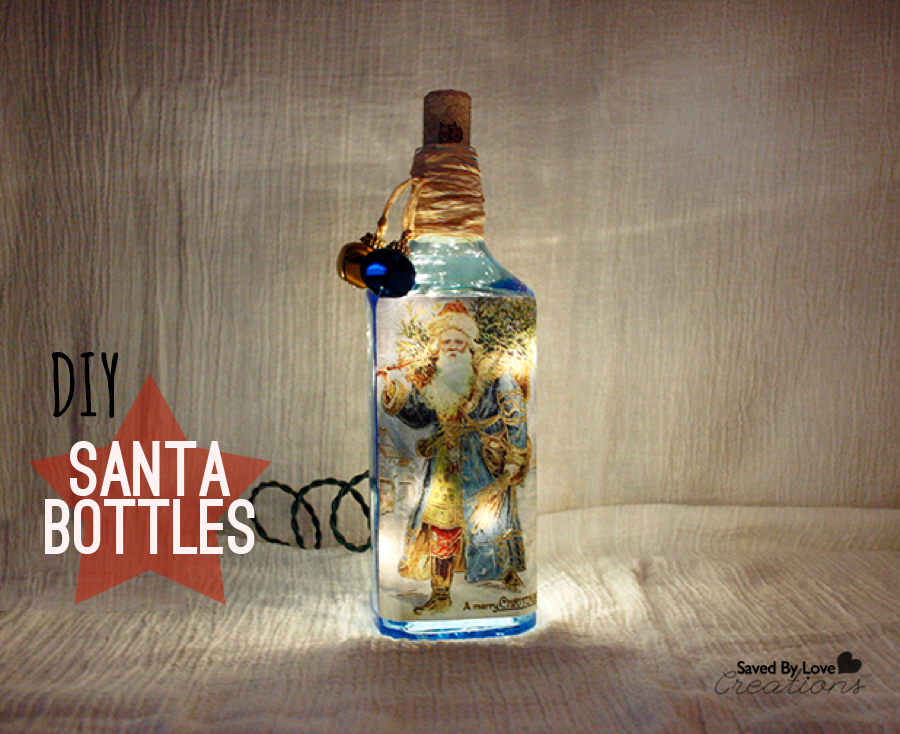
This handmade Santa light-up bottle adds a warm and cozy feeling to any space for the Christmas season. This project requires a recycled bottle and drilling a hole in the lower backside of the bottle. Also required is a fun search for a Santa image. The choices are endless, ranging from recycled Christmas cards, magazines, printed images, and the imagination goes on. Most importantly don’t forget a strand of Christmas lights. Now let’s get started and enjoy the fun.


Materials for drilling a hole in glass

  • Drill
  • Drill Bit
  • Safety Glasses
    • Facemask
  • Spray Bottle With Water


image 1 Drilling Materials


Directions

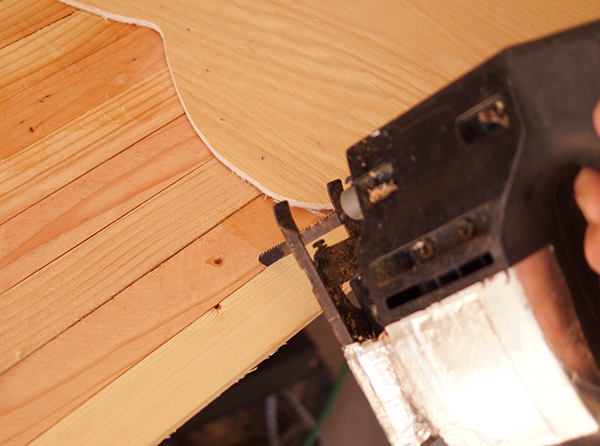
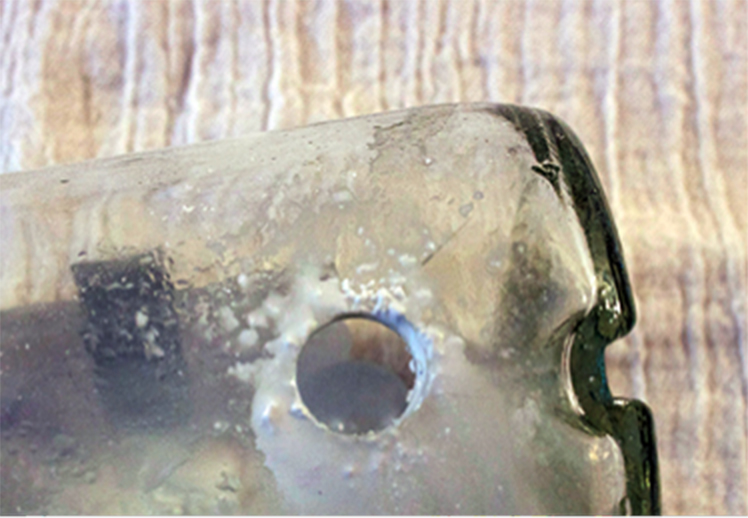
  1. Drill a hole in the bottle. Through my research I found that using a 1/2 inch hole saw diamond grit drill bit works best for drilling a hole in a bottle. You can find this type of drill bit in most hardware stores and online.


  1. Safety first: Wear safety glasses and a facemask to prevent eye injury and inhaling glass dust.
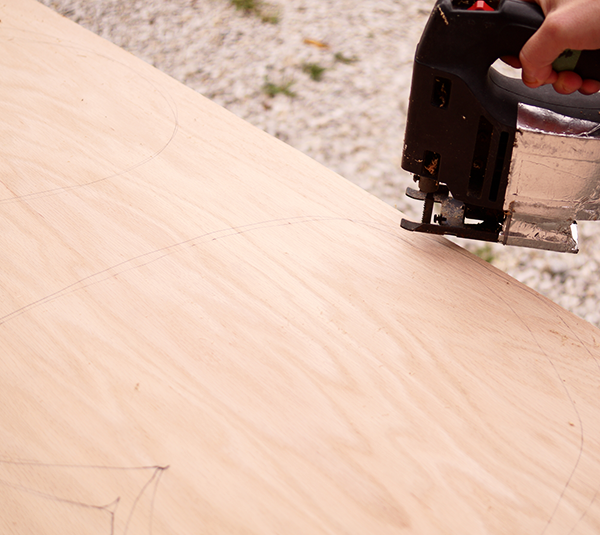
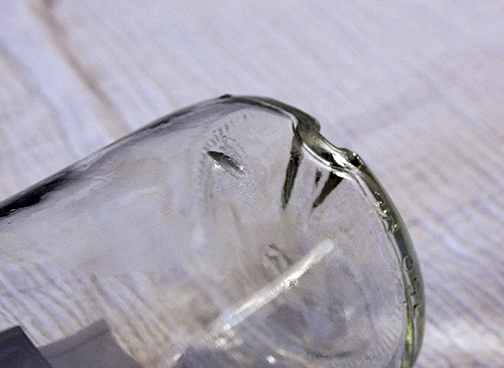
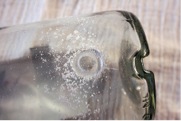
  2. Starting on the backside and lower end of the bottle place the drill bit at an angle. This will allow you to start a groove in the bottle. Once you have the groove started you will begin to slowly bring the drill to an upright position. Apply pressure but not too much as this will cause the bottle to break. Periodically stop drilling and spray the drill bit and bottle where you are drilling the hole to keep the drill bit and bottle cooled off. This also keeps the glass dust level down while you are drilling.

image 2 drill at angle

image 3 b groove started

image 2b Drill Perpendicular

image 3c spritz with Water

image 3d Hole Drilled


Tip: I have also seen websites online where you can purchase predrilled bottles from suppliers.


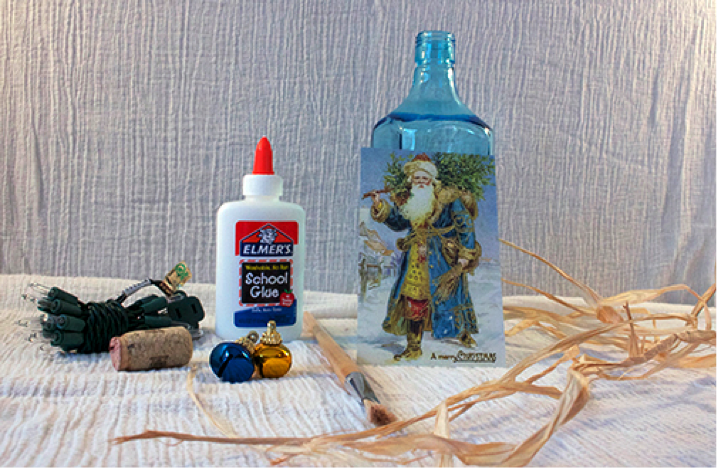
Materials for Santa bottle


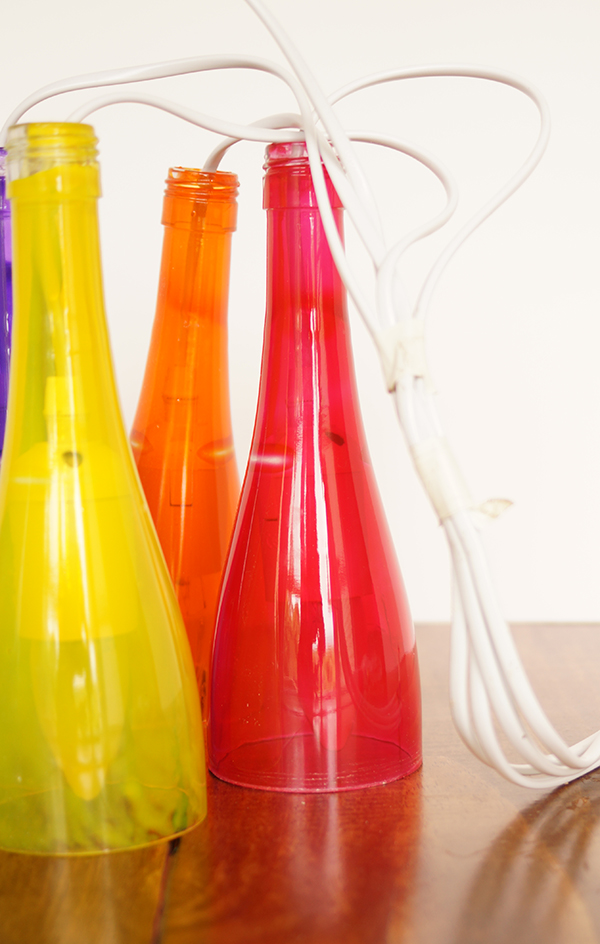
  • Empty Bottle (most types of bottles will work for this project)
  • Cork (optional)
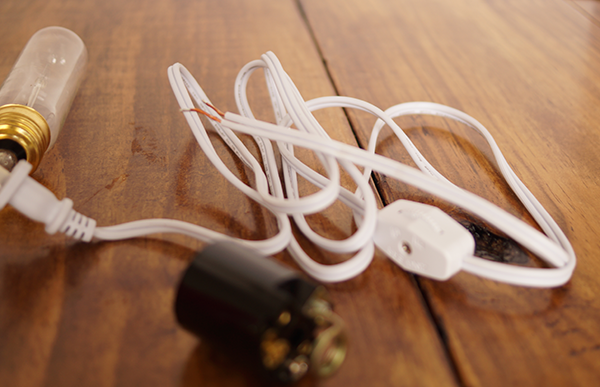
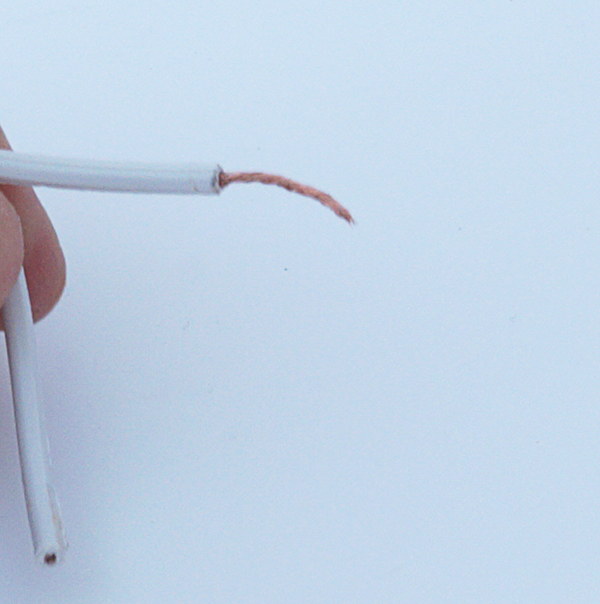
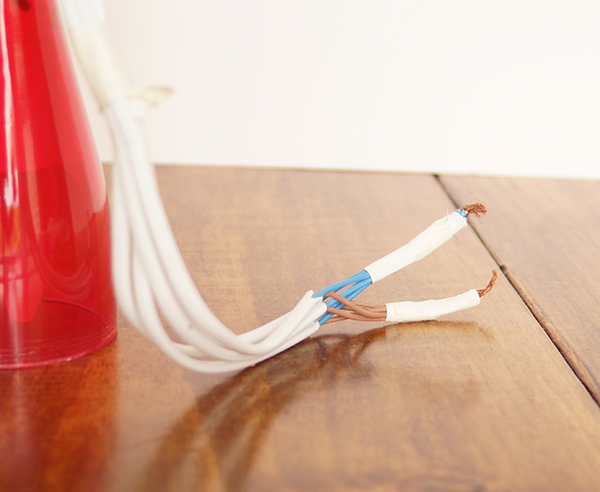
  • Strand of Christmas Lights (20-30 bulb strand with a one-ended plug)
  • Santa Image (of your choice)
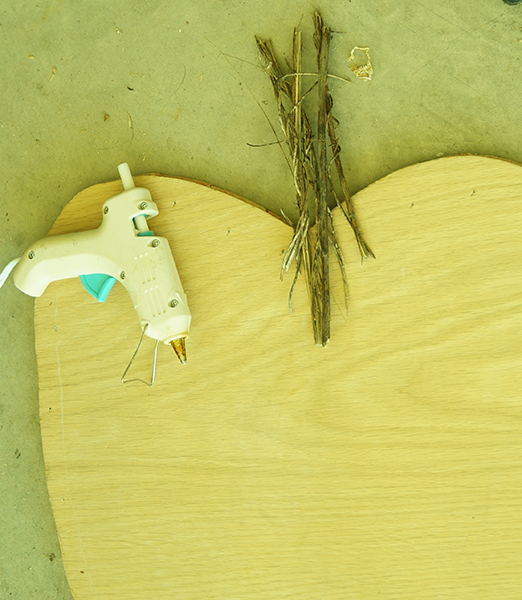
  • Raffia
  • Christmas Bells (two)
  • Glue
  • Water
  • Paintbrush

Santa Bottle DIY


  1. Removing labels from the bottle. Soak bottle in warm soapy water until the label is saturated with water. Use a putty scraper or a scraper with a razor blade on the end. Once the bottle is clean allow it to dry.

Tip: If the inside of the bottle has any residue from the drilling process you can tear off a small piece of a cleaning cloth and swish it around with the water in the bottle and that will help to rid of it.


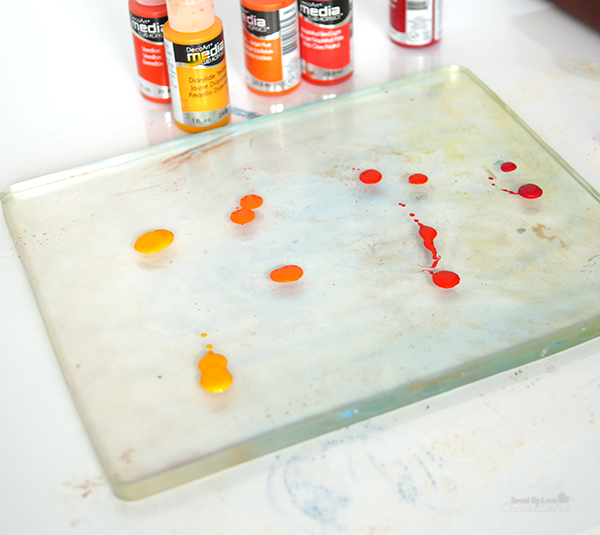
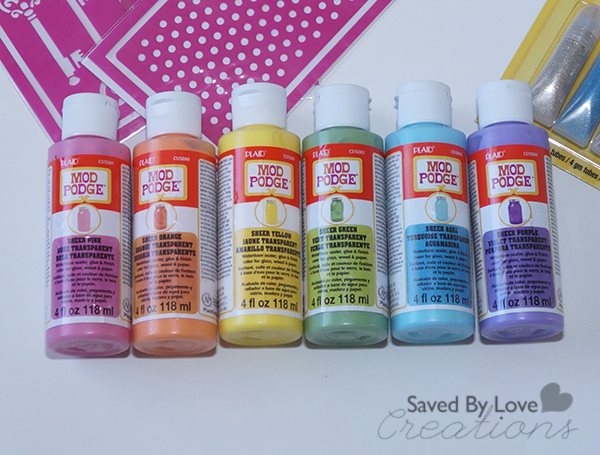
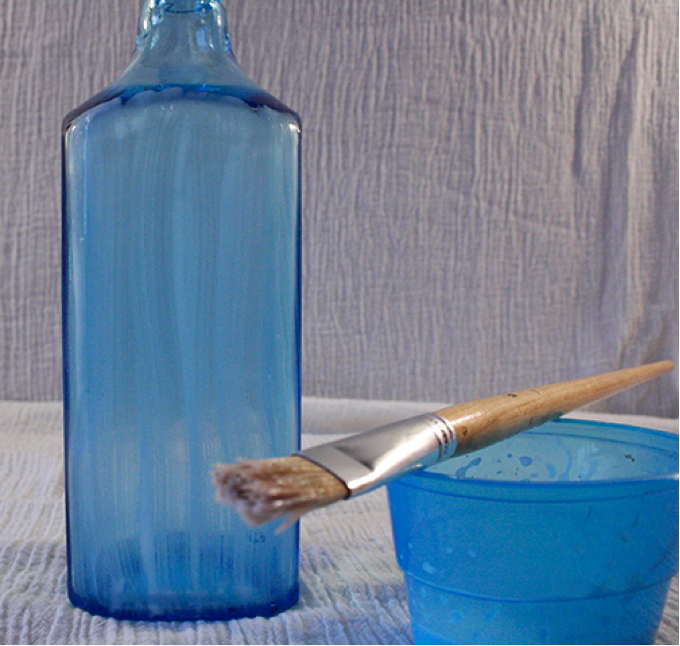
  1. Apply the Santa image. I prefer to make a mixture of Elmers glue and ¼ water. If the image is on thick paper this mixture will work well. If the image is on a thinner paper use a thicker consistency of glue (less water). Note: Other types of glue or Mod Podge products will work. Check your local craft stores to see what products they carry.


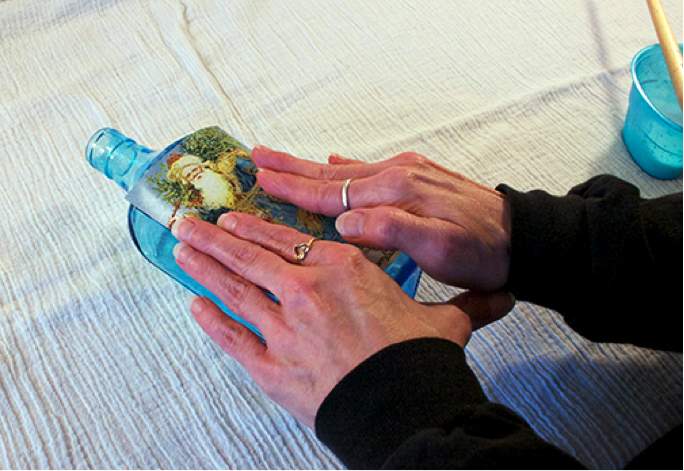
Measure the Santa image up to the bottle to insure the placement of the image will be where you want it. Using your paintbrush brush glue on the area where the image will be placed. Starting from the center of the image place your image on the bottle and gently glide your fingers from the center to outer edges of the image. Once you have the image glued down brush some more glue over the top of the image. Start this from the center working your way out as well. If any bubbles occur on the image you can smooth them out with your fingers from center to outer edges. Allow image to dry. Note: Once dry you can add glitter or a coat of crafting varnish on the Santa image.


Santa Bottle DIY 2Santa Bottle DIY 3


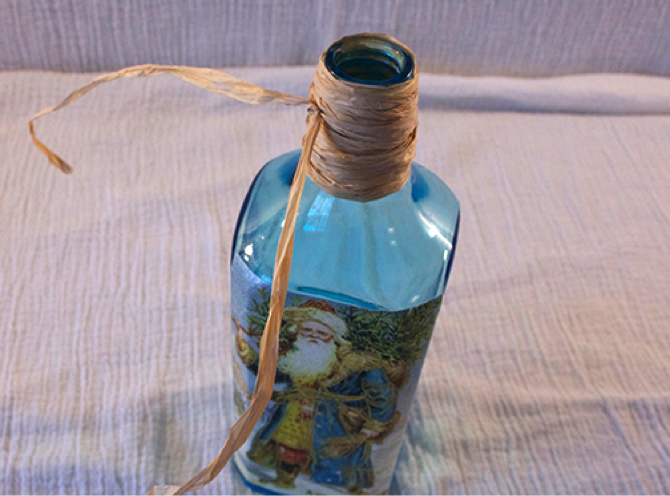
  1. Wrap raffia around neck of the bottle. Two or three strands of raffia will cover the neck of this size bottle. More strands may be required if your bottle is taller. Start by tying one end of the raffia around the neck of the bottle leaving a little excess on one end to tie off in the end of the wrapping process. Begin wrapping it fairly tight around the neck of the bottle. If your strand starts to run out tie the next strand to the one you started with and keep going until you have covered the neck of the bottle. Now tie off with the excess. Note: Twine, yarn, or ribbon can be used in place of the raffia.


Wrap Raffia around bottleWrap Raffia around bottle 2 

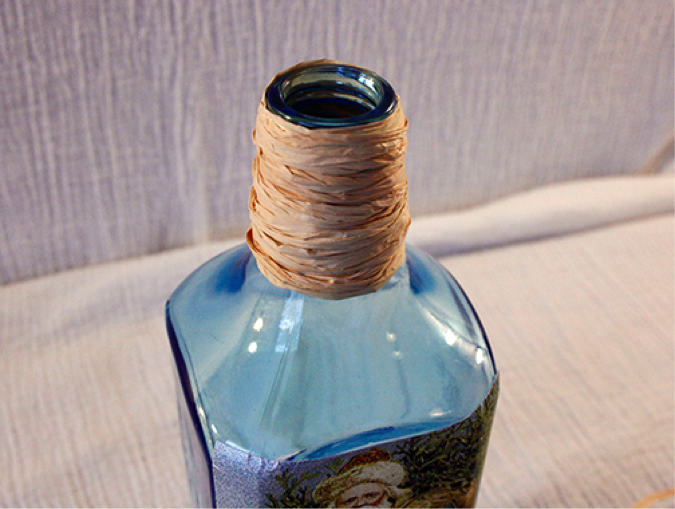
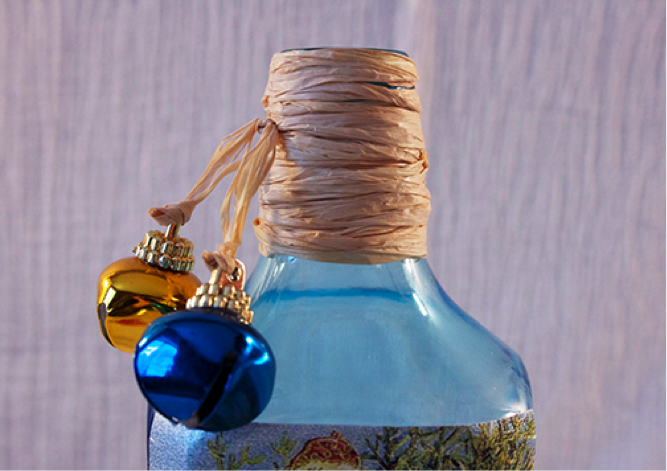
  1. Tying on the Christmas bells. Using another strand of raffia, tie the raffia around the top of the bottles neck, leaving a generous amount on both ends so that you can tie one bell on each end.Tying on Bells

 Tying on Bells 2

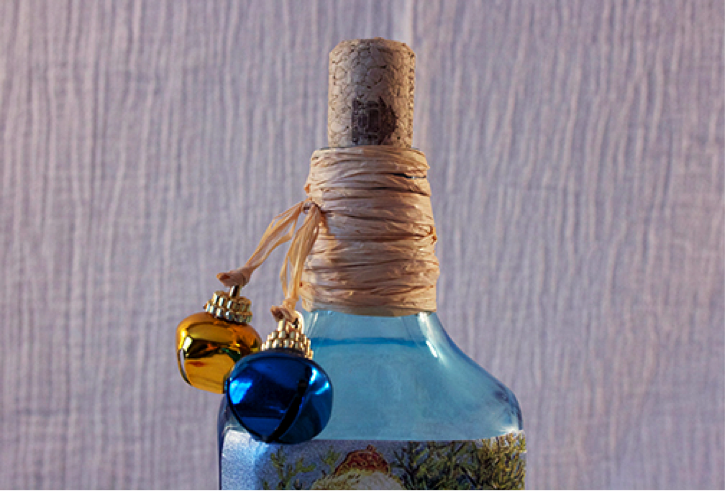
  1. Place a cork in the top of the bottle. (Optional)Place Cork
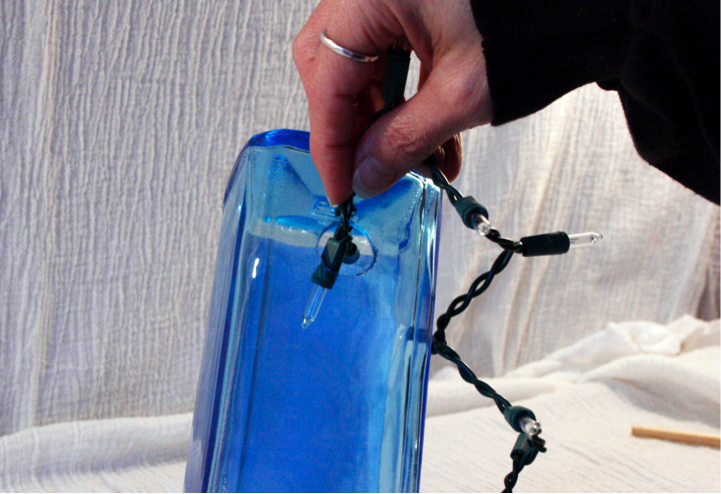
  2. Inserting the strand of Christmas lights. Turn the bottle upside down to insert lights (this helps the light strand to flow more evenly throughout the bottle). Starting from the bulb end of the light strand insert each bulb individually into the bottle. Once you have your strand of lights in it is time to plug in and enjoy.Insert Lights

Insert Lights 2

Gelli Printing DIY Fall Art

DIY Gelli Printed Fall Art @savedbyloves

A creative friend introduced me to gelli printing, and I am hooked. I think you will be too! Today I will show you how to use leaves from your yard and die cut leaves to create beautiful one of a kind fall art prints. Use gelli printing for your art journal and mixed media backgrounds, for handmade greeting cards or frame them for instant art!

DIY Fall Art

MATERIALS

DecoArt Mixed Media

Gelli Printing Plate; I purchase this 8×10 inch plate (*this is my Amazon affiliate link)

Brayer

Acrylic Paints in fall reds, oranges and yellows; I used DecoArt Media Fluid Acrylics

White Card Stock 8.5 x 11 inches

Rubber Stamps, bubble wrap or other texture materials

Leaves from outside

Die cut leaves

TUTORIAL

Gelli Printing Tutorial

Drip paint in yellow, orange and red as shown.  It doesn’t take much paint to cover the gelli plate.

Mixed Media Background Technique

Use the brayer to spread the paint over the gelli plate.

Use Bubble Wrap to Create Texture

Create texture in the wet paint with bubble wrap, stamps, combs, etc.

Crafting with leaves

Place the real leaves or die cut leaves over the texture you just made. Now you are ready to lift your first print!

How to Gelli Print

Place the white card stock over the gelli plate and smooth out with hands, ensuring contact all over the card stock.

Gelli Print Ideas

After lifting the first print, and removing the leaves, you are left with this, which creates a cool second print.

How to Create Mixed Media Backgrounds

The left is the first print and the right is the second print after removing the leaves.

Mixed Media Techniques

Here I followed the above steps, but used leaves I die cut from cardstock with the Sizzix Tattered Leaves Die instead of real leaves.

DIY Leaf Art

I love this technique, and the DecoArt Media Fluid Acrylics are great to use for it.  I tried a few other paints, but got blurred lines with the leaf outlines.  I am excited to do more gelli prints!

Have you tried gelli printing?

Over 50 of the Best Pumpkin Recipes

50 Plus Best Pumplin Recipes @savedbylovesSweaters, pumpkins, orange, leaves, hay rides, these things make me happy. That is why fall is my favorite time of year. I couldn’t resist the urge to search out and share over 50 of the best pumpkin recipes out there. If you have a favorite fall pumpkin recipe that I missed, leave a link in the comments after this post and I will add it to the collection. Enjoy!


DIY Graphic Centerpiece from Reclaimed Wood

How to Make a Reclaimed Wood Crate Centerpiece


Make a Reclaimed Wood Chicken Wire Crate

Now that I have your attention with a seriously adorable puppy and his one blue eye, I would like to show you how to make this chicken wire reclaimed wood graphic centerpiece! This piece definitely evolved as it was being made.  My friend came over to see if we could come up with a centerpiece for her square kitchen table, and we started at my wood pile.  We ripped some chippy painted trim, and added it to some pallet wood and wire.  We thought we were finished there,  but had the idea to visit The Graphics Fairy where we found the perfect vintage spoon and fork images to transfer onto the pallet wood sides.  The result is just what she had in mind, and now I want to make one for myself!

SUPPLIES:

Scrap wood (we used wood pallets and old trim)

Chicken Wire

 Ryobi Air Nailer

1 inch brad nails

Kreg jig

1 inch Kreg Screws

Wood Glue

White Tissue Paper

Mod Podge Matte

Printer (laser jet or ink jet printer are fine)

Card stock

Painter’s Tape

Mitre Saw

Drill

Metal Snips

TUTORIAL:

DIY How to Make a Reclaimed Wood Crate Centerpiece

We knew we wanted a square crate.  Starting with the bottom, we used two 5.5 inch wide pieces of pallet wood that we cut to 11 inches long with the mitre saw.

We attached the pieces together with the Kreg Jig Pocket Hole System and 1 inch screws (I showed you how to use that here: How to Use a Kreg Jig).  The blue circles show the Kreg pocket holes.

We cut two pallet wood sides to 11 inches and attached them with pocket holes and .75 inch screws since the pallet wood sides were to thin for 1 inch screws.

Next we lined up the trim pieces we had ripped and marked them, cutting them with the mitre saw to the appropriate length.

How to build a crate

Next we cut the chicken wire with aviation snips to fit the sides of the crate.  We attached the chippy painted trim piece over the chicken wire to hold it in place.

DIY Centerpiece idea and beagle puppy

We thought we were finished, but then Victoria had the great idea of adding the chippy trim to the pallet wood sides where the arrows are in the photo.

DIY Reclaimed Wood Decor

We cut the trim to fit and nailed it into place with the Ryobi nailer.  This is what we were left with at that point.  I decided the wood area at the arrow and the side opposite it were perfect for graphics.  We chose the vintage spoon and fork graphics linked in the first paragraph and used the tissue paper image transfer technique I showed you here: DIY Image Transfer Recycled Glass Bottles.

DIY Fall Centerpiece

Not bad for a couple of hours and $0 spent!

How to Make a Reclaimed Wood Chicken Wire Crate

For more inspiration, visit our  50+ Image Transfer Techniques!

Wood Pallet Planter DIY

How to make a reclaimed wood planter from shipping pallets @savedbyloves

I picked up some mums recently and decided they needed a planter. Using Ana White’s Cedar Planter For Less than $20 Free Plan, I made just a few adjustments and built this planter using pallet wood and 2×4 scraps I had on hand. 

pallet wood project idea

I just grabbed the cut list from Ana’s plan and hit my scrap wood pile to see if I could make things work without having to buy any wood.  I happened to have 5 1/2 inch pallet wood to use in place of the 5 1/2 inch cedar planks.  Perfect!

To make the 2×2 posts for the four legs, I ripped 2×4 scrap wood into 2×2 pieces.  For the 1×2 horizontal supports, I had a few scraps of 1×2 on hand and ripped pallet wood for the rest.

Shipping Pallet to Planter

The biggest change from Ana’s plan is that I cut the 2×2 legs to 23 inches instead of 23 3/3.  I attached the legs flush with the top of each panel, and added a “frame” to the top of the planter with 1×3 scrap wood that I mitered to fit.

As for the finish, I am just going to leave as is and seal with Polyurethane.  I love the various raw wood pieces.

Pallet Wood Projects

What do you think?  What are you building from pallets these days?

DIY Scrap Wood Halloween Pumpkins

How to make scrap wood pumpkins with @savedbylovesThese three pumpkins were made entirely with materials I had on hand, which is always a plus! With my huge pile of wood pieces from previous building projects, I am pretty excited when I can use up some of the leftovers. I used my table saw to rip scrap 2×4 into what are essentially wood shims.  You can do that, or use purchased wood shims or paint stirrers. Let’s go make some free pumpkins!

MATERIALS:

Plywood (i used 1/4 inch since that is what we had on hand, but you can use thicker)

2×4 scrap pieces and table saw or pre made wood shims or paint stirrers

Wood glue or construction adhesive

Sharpie

Jig saw

Ryobi Air Strike Cordless nailer

5/8 inch brads

TUTORIAL:

Plywood Pumpkins

Use a sharpie to draw pumpkin shapes on your plywood.  I made three of varying heights and widths.  You can print templates and transfer your design to the wood with transfer paper too.  I just wanted rustic looking pumpkins so I went free hand.

Use table saw to rip wood

To make the wood shims, I set the table saw guide to the thickness I wanted using a shim from another project.

How to make wood shims

Then I just cut my 2×4 scraps using that guide setting.

Scrap Wood ProjectsI cut out my pumpkin shapes from the plywood using my jig saw.

Adhere wood to pumpkin with construction adhesive

I placed each pumpkin on top of side by side wood shims and glued them into place with construction adhesive.

Secure wood shims with air nailer

For added strength, I nailed each shim in two places with my cordless nailer and 5/8 inch brad nails.

Let glue dry overnight

I added weight to my pumpkins and let the glue dry overnight.

Cut with jig saw

Once dry, I cut the excess wood shims off, using the plywood pumpkin as my jig saw guide.

Hot glue twigs for stems

To finish, I hot glued twigs to the back of the pumpkin for the stem!

Check out these other great Halloween DIY projects for your favorite bloggers!
12 Halloween Projects from your favorite DIY bloggers


DIY Paper Flower Fall Wreath

Make a Paper Flower Fall Wreath

I finally got my hands on the Cricut Giant Flowers Cartridge, and had myself a great time! There are tons of ways to use these paper flowers in decor.  I opted to make this festive fall flower wreath.

DIY Paper Craft Fall Decor

Following the instructions that came with the cartridge, I made the Lotus, Zinnia and Rose in oranges and purple Core’dinations paper.

DIY Paper Flower Fall Wreath Tutorial

DIY Paper Flower Fall Wreath @savedbyloves

I wanted a flat wreath form, so I made one using cardboard.  I do this a lot.  Just find something round in the size you want your wreath, and trace it onto cardboard using a sharpie.

DIY Recycled Cardboard Wreath

I like to cut two pieces of cardboard per wreath form and tape them together…

How to make a fall wreath

Once I made the wreath form, I began laying out my flowers until I had the wreath full.  I glued the flowers into place with hot glue.

***TIP:  I also used got glue for making the flowers.  Gluing each petal into place as they are added keeps them from falling out all over the place as you continue building the flowers.

DIY Paper Flower Fall Wreath

Before gluing the last flower into place, I added a loop of burlap ribbon for hanging the wreath.

How to Make a Fall Paper Flower Wreath

Although it was simple, it did take some time.  Now I have an eternal paper flower wreath!  Totally worth it.

Be sure to visit our 50+ Paper Flower Projects for more inspiration:

Rainbow Recycled Wine Bottle Chandelier

Make a rainbow chandelier from recycled wine bottles @savedbyloves Hi there, recycled wine bottle decor lovers!  Today I am sharing a project that will add color to and illuminate any space.  Get your rainbow on with this wine bottle chandelier or match it to your style. You can make this light to go with your home decor using your favorite Mod Podge Sheer color, or use as many as you can get your hands on, like I did.  The project involves cutting wine bottles, which is easier than you may think, so let’s get started!

SUPPLIES:


Wine bottles cut to the size you want (I have showed you how to cut them HERE:  How to Cut Wine Bottles)

Mod Podge Sheer Colors

Mod Podge Sheer Colors

Wax paper or non stick craft mat

Craft Knife

Pendant light kits (I used these 12′ Hanging Lantern Cords I found on Amazon)

TUTORIAL:

Coloring the cut wine bottles

Pour Tinted Mod Podge

Squeeze a generous amount of Mod Podge Sheer Colors into the cut end of your bottle.

Upcycle Home Decor Wine Bottle Crafts

Twirl Bottle to disperse color all over the inside of the bottle.

DIY Wine Bottle Crafts

If you are having a hard time getting it to flow, you can tap the bottle against your wrist as shown.

Let the excess Mod Podge drip into back into the product bottle to save as much as possible for your next project!

I placed my bottles on my kitchen table, on a non stick craft sheet, with the ceiling fan on.  Place them with the mouth down so they dry faster.  This will be an overnight process.

Wiring the lights

How to make a pendant lamp

For this project I used a standard E27 base pendant light kit available at almost any Walmart or big DIY store.  The one I used actually had an in-line switch between the plug and the socket base.  I didn’t have a need for the switch or the plug since I was going to be direct wiring it to an existing switched circuit.

Step 1

Wine Bottle Pendant Lamp tutorial

I cut the wire using wire cutters at the socket side of the switch.  I left about 2 ft. of wire to the socket base but you should test and see what distance looks best in your application.

Step 2

DIY Lights from wine bottles by saved by love creations

Run the cut end up through bottle and out the neck of each of the six colored bottle shades.  The sockets will fit snuggly up in the taper of the neck of the shade.

Step 3

Wine Bottle Pendant Lamp 6

Wine Bottle Pendant Lamp 7

Bare the ends of each of the wires using your wire cutters to peel away the plastic coating (there will be 12 wires, hot and a neutral for each lamp or 18 if the kit is wired for a ground).

Step 4

I chose a room that already had a simple ceiling light on a wall switch. This made it easy to take down and I just used the existing junction box and cover plate from the old light.

Step 5

With wall switch OFF ( throw the service breaker for extra safety) take down the old ceiling light and find the white(neutral), black(hot), and green (ground) wires.  Pull them down out of the box and make sure you have enough room to go back with the new wire bundle you’re going to create.

Step 6

DIY Rainbow Chandelier

Combine all the neutral wires from the lamp kits together into one pigtail. DO the same for the hot and the ground if present. Use some electrical tape to help hold them all together while you get ready to connect them to the junction box.

Step 7

Using an appropriately sized wire nut, connect the white pigtail of the lamp kit to the white (neutral) wire from the ceiling. DO the same with the Black (hot) and ground( green, if present).

Step 8

Carefully push the wires up into the junction box and allow the weight of the lamps to be carried by the bundled lamp cords over the junction box support bar.

Step 9

Slide the fixture cover you used from the old light up into place to cover everything.

DIY upcycled lighting tutorial

Step 10

DIY upcycled lighting

Flip the breaker and the switch on. Put bulbs in the lamps. Let there be light !!!

***Extra tip: Use Mod Podge Rocks Adhesive Stencils and Glitter Spouncers to add your favorite pattern for added sparkly goodness, like I did with this Upcycled Bottle Lamp:

Not up for electrical wiring?  Use your colored bottles to create Upcycled Rainbow Lanterns:

DIY Ornaments Christmas in July

[pinit]

DIY Christmas Ornaments with Mod Podge Sheer Colors @savedbyloves Christmas in July

[pinit]

Hi everyone! It’s Colleen, from Just Paint It. You know, every year, it’s the same thing. I tell myself I’m going to do one Christmas project each month so when December comes, I’ll be ahead of the game by eleven projects or so. Every year I fail and right after Halloween the craziness starts and before I know it, the holidays are over and I find myself saying, once again, ‘next year will be different’.

If you’re like me, you’ll enjoy this project. Especially if you like giving handmade presents for the holidays. I love giving ornaments as gifts because it’s something most people will actually use. With this tutorial, you can make a few or more and start checking names off your list before school starts!

So let’s get started!

DIY-Xmas-Ornaments

You’ll need some clear ornaments. These are plastic but glass will work too.

DIY-Xmas-Ornaments

You’ll also need something to ‘tint’ the inside of the ornaments. I used Mod Podge Sheer Colors in aqua and green. It comes in a variety of colors.

You can also tint plain Mod Podge with food coloring and make your own colors.

You just pour the Sheer Color in, swirl it around a bit and turn the ornament upside on a plastic cup or something similar for the excess to drain into.

DIY-Xmas-Ornaments

Now, I won’t lie to you, it takes a long time for this stuff to dry. I even thought I’d done something wrong but no, it just takes a while. I finally took a hair dryer, blew on both the inside and the outside of the ornament. Be careful though. Plastic can soften and glass can get hot!

A friend of mine suggested placing them into a bowl of rice overnight. Apparently the rice will absorb the moisture. Now I wish I’d paid attention in Science class.

DIY-Xmas-Ornaments

Once the color has dried, take a cotton ball moistened with rubbing alcohol and clean the outside to remove any oil from handling them.

If there are any drips around the ornament’s opening, a utility knife will easily remove them. Then put the ornament hanger will fit easily.

DIY-Xmas-Ornaments

You’ll want some place to set the ornaments while you’re painting them. A few split peas or beans in a bowl or the box they came in works great.

Of course, if you use rice to dry the inside then you’re all set.

DIY-Xmas-Ornaments

To decorate the outside of the ornaments, I used Martha Stewart’s Multi-Surface Craft paint in Silver. Since it’s multi-surface, it’ll work fine on glass or plastic. But the other reason I love it is because they make these fine tip tops that screw right on to the paint bottle. Instant puffy paint or paint writer!

I used silver to match the ornament hanger but gold would be lovely too.

DIY-Xmas-Ornaments

Like with anything, you’ll want to practice a bit – even though all we’re doing is basically dots. You still want to get a feel for the flow of the paint thru the tip.

It only requires minimal pressure on the bottle to get the paint to flow. If you have to squeeze it, get a straight pin or needle and remove the clog. Otherwise you’ll wind up with a spurt of paint when and where you don’t want it. Trust me on that.

DIY-Xmas-Ornaments

There’s no right or wrong way to do this. I just start making dots, then I decide if I want to connect them with a line or not.

DIY-Xmas-Ornaments

This is where having a place to set the round ornaments comes in really handy. Although I prefer holding them in my hand while I’m dotting them.

The silver will dry pretty quickly – nothing like the Sheer Colors. The paint will ‘cure’ after 28 days.

DIY-Xmas-Ornaments

That’s all there is too it!

DIY-Xmas-Ornaments

Now you have two less presents to buy. Unless you keep them for yourself.

I won’t tell. I promise.

Thanks so much for hanging out with me today! I hope you’ll come visit me at Just Paint It soon. You can also find me on Facebook, Google+, Pinterest and Instagram. And of course, I’d love for you to drop by my Etsy and Zazzle stores.

signature

Vote for SBLC – Bob Vila Thumbs Up Blogger Contest

[pinit]Bob Vila Thumbs Up[pinit]

Remember that one time, when Bob Vila gave me a thumbs up?  Ok, well, my mason jar chimes are in the running with 5 amazing DIY mason jar projects for the grand prize in the Bob Vila Thums Up DIY Competition.

DIY Chimes from Mason Jar

You have to know that I use to religiously wake up at 6 a.m. every Saturday to watch this guy on This Old House.  Love the man, so just being noticed by him is winning, but I still wanna win… you know, for real win.  You can help by clicking the link and voting for me.  Everyday.  Between now and July 31st.  Please? Thanks!

Privacy Policy