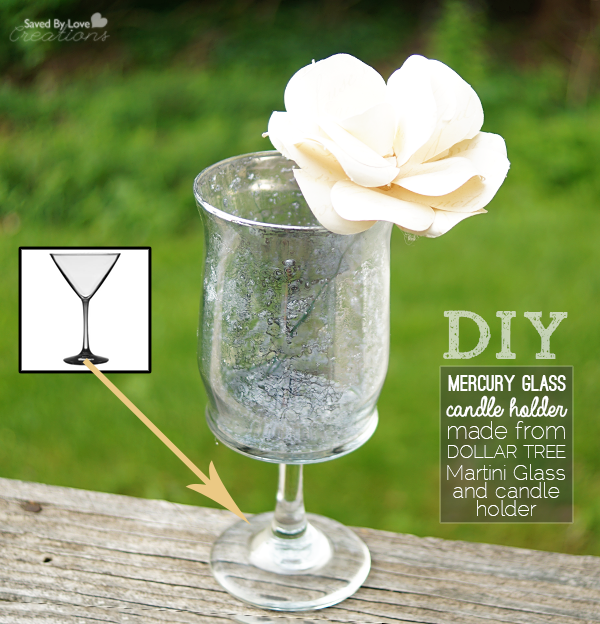
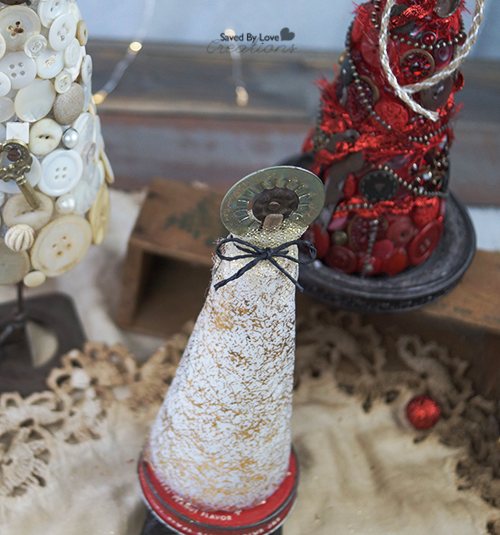
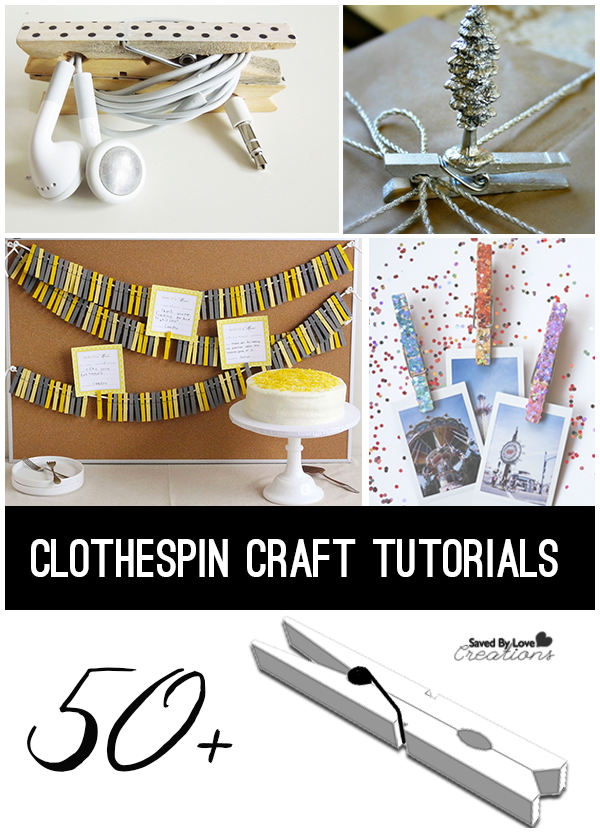
50 Plus Clothespin Crafts To Make

[pinit]Clothespin Crafts to Make Over 50 Great Tutorials @savedbyloves[pinit]

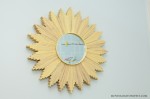
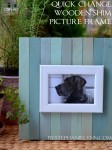
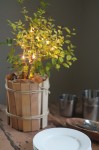
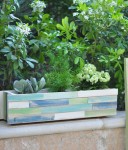
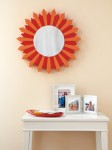
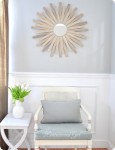
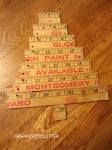
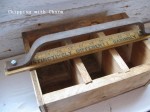
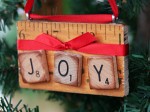
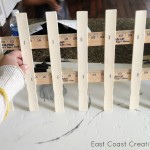
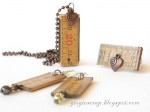
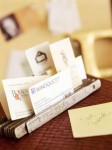
How have we gone this long without sharing a collection of clothespin crafts? It is a mystery.  Whether you have the one piece wooden peg, or the two piece wood or plastic version held together with a spring, you can use these simple laundry inventions to make some cool stuff.  From home decor, to jewelry, to toys and games for kids, we are all sure to find something we can enjoy in this gallery of things to make from clothespins.

clothespin craft for headphone storage

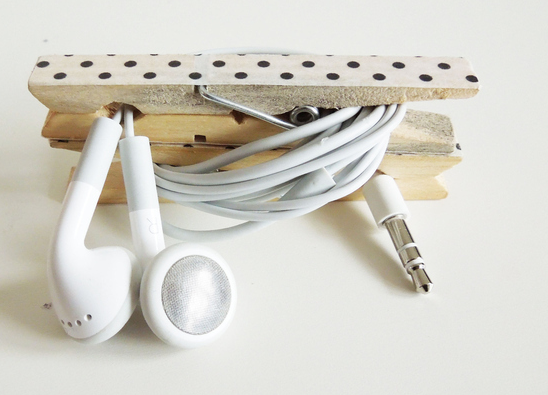
My personal favorite?  This headphone cord organizer found at Buzzfeed.  

Are you with me on this?

What are your favorite clothespin crafts?  Do you have one we missed?  If so, let us know!

ENJOY!!

DIY Ornaments Christmas in July

[pinit]

DIY Christmas Ornaments with Mod Podge Sheer Colors @savedbyloves Christmas in July

[pinit]

Hi everyone! It’s Colleen, from Just Paint It. You know, every year, it’s the same thing. I tell myself I’m going to do one Christmas project each month so when December comes, I’ll be ahead of the game by eleven projects or so. Every year I fail and right after Halloween the craziness starts and before I know it, the holidays are over and I find myself saying, once again, ‘next year will be different’.

If you’re like me, you’ll enjoy this project. Especially if you like giving handmade presents for the holidays. I love giving ornaments as gifts because it’s something most people will actually use. With this tutorial, you can make a few or more and start checking names off your list before school starts!

So let’s get started!

DIY-Xmas-Ornaments

You’ll need some clear ornaments. These are plastic but glass will work too.

DIY-Xmas-Ornaments

You’ll also need something to ‘tint’ the inside of the ornaments. I used Mod Podge Sheer Colors in aqua and green. It comes in a variety of colors.

You can also tint plain Mod Podge with food coloring and make your own colors.

You just pour the Sheer Color in, swirl it around a bit and turn the ornament upside on a plastic cup or something similar for the excess to drain into.

DIY-Xmas-Ornaments

Now, I won’t lie to you, it takes a long time for this stuff to dry. I even thought I’d done something wrong but no, it just takes a while. I finally took a hair dryer, blew on both the inside and the outside of the ornament. Be careful though. Plastic can soften and glass can get hot!

A friend of mine suggested placing them into a bowl of rice overnight. Apparently the rice will absorb the moisture. Now I wish I’d paid attention in Science class.

DIY-Xmas-Ornaments

Once the color has dried, take a cotton ball moistened with rubbing alcohol and clean the outside to remove any oil from handling them.

If there are any drips around the ornament’s opening, a utility knife will easily remove them. Then put the ornament hanger will fit easily.

DIY-Xmas-Ornaments

You’ll want some place to set the ornaments while you’re painting them. A few split peas or beans in a bowl or the box they came in works great.

Of course, if you use rice to dry the inside then you’re all set.

DIY-Xmas-Ornaments

To decorate the outside of the ornaments, I used Martha Stewart’s Multi-Surface Craft paint in Silver. Since it’s multi-surface, it’ll work fine on glass or plastic. But the other reason I love it is because they make these fine tip tops that screw right on to the paint bottle. Instant puffy paint or paint writer!

I used silver to match the ornament hanger but gold would be lovely too.

DIY-Xmas-Ornaments

Like with anything, you’ll want to practice a bit – even though all we’re doing is basically dots. You still want to get a feel for the flow of the paint thru the tip.

It only requires minimal pressure on the bottle to get the paint to flow. If you have to squeeze it, get a straight pin or needle and remove the clog. Otherwise you’ll wind up with a spurt of paint when and where you don’t want it. Trust me on that.

DIY-Xmas-Ornaments

There’s no right or wrong way to do this. I just start making dots, then I decide if I want to connect them with a line or not.

DIY-Xmas-Ornaments

This is where having a place to set the round ornaments comes in really handy. Although I prefer holding them in my hand while I’m dotting them.

The silver will dry pretty quickly – nothing like the Sheer Colors. The paint will ‘cure’ after 28 days.

DIY-Xmas-Ornaments

That’s all there is too it!

DIY-Xmas-Ornaments

Now you have two less presents to buy. Unless you keep them for yourself.

I won’t tell. I promise.

Thanks so much for hanging out with me today! I hope you’ll come visit me at Just Paint It soon. You can also find me on Facebook, Google+, Pinterest and Instagram. And of course, I’d love for you to drop by my Etsy and Zazzle stores.

signature

50+ Ways to Upcycle CDs and Vinyl Records

[pinit]50 Plus Best DIY Upcycle Vinyl Records and CD projects to make @savedbyloves[pinit]

Since most of us no longer listen to CDs or records, our planet is left with a ton of these seemingly useless items. Today I am sharing with you 50+ upcycle projects that solve this dilemma using some outside of the box creativity. You will think twice before considering old records and CDs to be useless!


Dollar Store Craft DIY Mercury Glass Votive Holder From Martini Glass

[pinit]How to Make Mercury Glass Candle Holder[pinit]

I am excited to share with you this Dollar Store Craft, a lovely DIY mercury glass candle holder.  I made it from the stem of a dollar store martini glass and a dollar store candle holder!  Read on to see how I removed the stem and attached it to the holder, and how I created the mercury glass finish with Krylon Looking Glass Spray Paint.

SUPPLIES:

DIY Mercury Glass With Looking Glass Spray Paint

Dollar Store Martini Glass

Krylon Looking Glass Spray Paint

Martini Glass

Glass Cutter

Butane Micro Torch or candle and lighter

Bucket of cold water

Coarse sand paper or grinder with diamond bit for glass

E6000

TUTORIAL:

Make a score line around the stem of the martini glass at its top where the stem meets the upper part of the martini glass.

How to cut glass

Apply heat to score line and submerge in cold water to separate the stem at the score line like I showed you in this DIY Wine Bottle Rings tutorial.

Sand or grind top of separated stem to give a flat surface for gluing to the bottom of the glass candle holder.

Dollar Store Craft

Here is the glass I used to glue onto the stem of the martini glass.  I used E6000 on to attach two pieces, and placed the glued pieces against the wall for support while drying.  Let dry several hours before applying the mercury glass finish in the next steps!

DIY Mercury Glass Tutorial

Mercury Glass DIY

Pour Epson salt into the glass so that to about one inch from the bottom.  It is not important to be exact here.

 In a well ventilated area with protected work surface, spray looking glass paint inside of the glass at the rim. Make sure to follow instructions on label. You want to shake the can vigourously before using.

Shake the glass a snow globe (holding your hand over the top), so that the salt grabs the paint and drags it around. This will create the mercury glass look.

Repeat steps 5 and 6 a few more times, allowing each coat to dry for about 5 minutes before applying the next. Stop when are happy with the look!

50 Plus Awesome Wood Shim DIY Projects


[pinit]

50 DIY Wood Shim Projects to Make

[pinit]

Wood shims are inexpensive and can be used to create gorgeous DIY home decor.  Make faux pallet art, cover an ugly thrift store dresser, create a designer starburst mirror on a shoe string budget.  Here are 50+ of the best DIY wood shim project tutorials from creatives everywhere.  If we missed your project, send us a link so we can include you!  Enjoy.


Easy Kid’s Christmas Ornaments Craft

[pinit]

Make a Kids Christmas Craft

[pinit]
Easy DIY Kids Christmas Craft Popsicle Stick Snowmen, puzzle piece snowflakes and reindeer #christmas #kidscraft #handmadeornaments @savedbyloves

We were asked to host the kid’s craft table at a recent Christmas party with 50 kids expected!  You can make adorable snowmen from craft sticks and use puzzle pieces to make reindeer and snowflakes.  The kids loved this project, and so will you!

Just use acrylic paint in white for the snowmen and brown for the reindeer.  We got the puzzles at the Dollar Tree, but you could use one you have on hand, or hit Goodwill.

SNOWMAN:

For the hats, we used black cardstock.  The noses are orange foam.  The eyes and buttons are made with Sharpies, after the paint dries.  Glue one the hat, nose and string for hanging with Tacky Glue and tie yarn or ribbon for the scarf.

SNOWFLAKES:

Paint six puzzle pieces and a round wooden disc (1.5 inch diameter, available at Michaels)  white.  When dry, glue pieces onto circle and attach twine for hanging.

REINDEER:

Paint 3 puzzle pieces brown and glue as shown.  Glue on eyes and nose.  Tie on ribbon and add twine for hanging.

Kids Craft


How to make Christmas Stockings from Recycled Tea Towels

[pinit]

Sew Stockings Burlap[pinit]
Bringing you back a blast from the past.  I am not a seamstress, it’s no secret.  You will be able to whip up these adorable burlap, lace, tea towel stockings even if you are scared of your sewing machine!  Enjoy.

These Christmas stockings are made from canvas tea towels from Target, the same towels I used to make this stenciled pillow a few posts ago.   Two of the towels made all seven.  If you are looking for a quick, easy, inexpensive sewing machine project for your stockings this year, you are in luck.

Supplies:

  • Tea towels or canvas drop cloth
  • Fabric Scissors
  • Stocking Template (click here for the one I used)
  • Pencil for marking fabric
  • Straight Pins
  • Jute or twine
  • Embellishments of your choice

Burlap Christmas Stocking Pattern

Instructions:

  • Print stocking on to heavy paper and cut out
  • Iron fabric and trace stocking onto towel folded in half.  I used the seams already in the towels as the top of my stockings.  Cut shape from front and back halves at same time.

Christmas Stockings Pattern

Christmas Stockings tutorial

  • With right sides together, pin in place.  Loop a 2 inch piece of jute on the top at the heel side for hanging your stocking and pin in place.  Double back over the twine while sewing to make it extra sturdy.

DIY burlap stockings

  • Turn stockings right side out and embellish as desired.  I printed on burlap for the text, pieces of scrap towel and lace on mine.

Christmas Stockings Pattern

Handmade Christmas Decorations

Christmas Stocking Pattern

DIY Vintage Holiday Centerpiece With @Floracraft Foam Trees

[pinit]Holiday Centerpiece using found objects and vintage buttons on @floracraft Styrofoam trees @savedbyloves[pinit]

Styrofoam Christmas Tree Centerpiece Vintage Buttons DIY

The holidays are here, and many of you are busy planning decorations and meals.  Today I am sharing with you an easy DIY holiday centerpiece using vintage buttons, found objects and Styrofoam™ cones.  This is the perfect project for using up those antique embellishments I can’t resist buying every chance I get!

This post is sponsored by Make it Fun: Crafts and Crafts ‘n Coffee!  All opinions are mine.

SUPPLIES:

Floracraft Christmas Centerpiece Using Stryrofoam

Styrofoam™ cones in 3 sizes

Hot glue gun

Vintage buttons, twine, lace, ribbon, doilies, hardware

Decorative eyelets, pearl and jewel stickers in creams, whites, golds and reds

Gold and white tissue paper

Mod Podge

TUTORIAL:

how to make a vintage button christmas tree

For the white button tree, I randomly hot glued buttons from the bottom to the top.  I made a paper foil star with my Tim Holtz 3D star die  and attached it to the top of the tree with a bamboo skewer.  The end.

Vintage button crafts

For the red tree, I did the same thing, but wrapped the tree in red organza before attaching the buttons and hardware.  This was to prevent the white foam from showing.

I placed it on a candle holder as the stand.  Using a gold sparkly mini clothespin, I attached a Christmas tag to the top and tied a bow around that with twine.

DIY christmas centerpiece ideas

For the white and gold tree, I decoupaged gold and white tissue paper onto the cone using Mod Podge.  I added a random piece of hardware with a vintage clothespin, and wrapped that with gold organza and black twine.  It sits on an old jar lid (same jar that use to hold all those vintage buttons)!

Led mini lights strands

Those pretty, warm lights you see in the background are Design it:® LED Light Strands, which I love because they are light weight and ready to go out of the package.  No outlet needed or batteries to buy is always a plus in my book!

Vintage Styrofoam Centerpiece Holiday @floracraft

I hope you enjoyed this project as much as I did, and are inspired to make the old new again!

50+ Repurposed Yardstick Crafts and Projects

[pinit]

50+ yardstick crafts to make #repurpose #upcycle @savedbyloves[pinit]

Yardsticks aren’t just for measuring anymore.  You can repurpose cool vintage yardsticks into some unique upcycled decor, jewelry and accessories.  Here are 50 of our favorite repurposed yardstick projects from around the web.  If we missed yours, send us a link so you can be included!


Christmas Holiday Neighbor Treat Bags + Printable Tags

[pinit]
Free Printable Modern Christmas Tags copy[pinit]

We made some modern printable Christmas gift tags for our neighbor holiday treat bags and you can download them here for free at the end of this post.  The download contains all versions of the tags on one 8×11.5 sheet so you can print them all on one page.  I customized 2 of the tags with a neighbor message in case you want to make some festive Christmas baked goods for inexpensive, handmade neighbor gifts.

Holiday printable gift tags

I found an old vintage Christmas tin at the antique market and decided to use it to package my famous no-bake cookies; Quick and Easy Chocolate Peanut Butter No-bake Cookies.  I taped the “Holiday Treats” tag onto brown craft paper, added washi tape, hole punched and added a twine bow.  For a vintage look I sand distressed the edges.  Easy, fast, and totally sweet.

Cookie Printable Christmas Neighbor Gift Tags

These cute treat bags are from the Dollar Tree.  I think 4-5 per package is what you get for your buck.  My neighbors loved what they found inside, and I think you would too…

Make White Chocolate DIpped Holiday Pretzels

White Chocolate Dipped Holiday Pretzel Rods

Christmas cakepops #christmasdesserts

Holiday Cake Pop DIY

How to make Holiday Cake Pops

Neighbor Gift Printable Set copy

To download the printable, right click the above thumbnail and the full res version will appear.  Print at home or at your favorite printer service.  I recommend white cardstock.

Privacy Policy