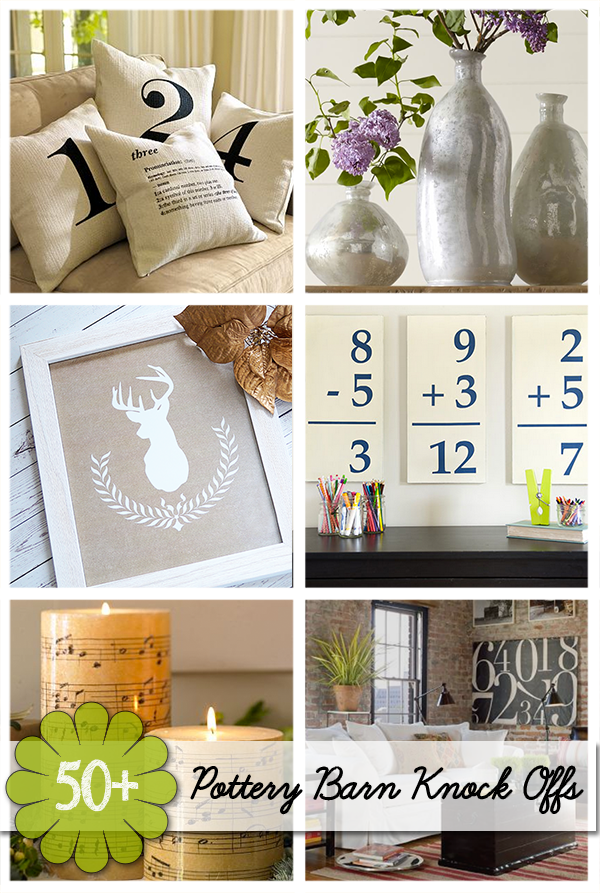
 Who doesn’t love getting designer home decor and furniture for a fraction of the price? Today I am sharing our favorite Pottery Barn knock off decor DIY tutorials from around the web. If we missed your project, leave us a link!
Upcycling DIY home decor, woodworking and Crafts

Who doesn’t love getting designer home decor and furniture for a fraction of the price? Today I am sharing our favorite Pottery Barn knock off decor DIY tutorials from around the web. If we missed your project, leave us a link!
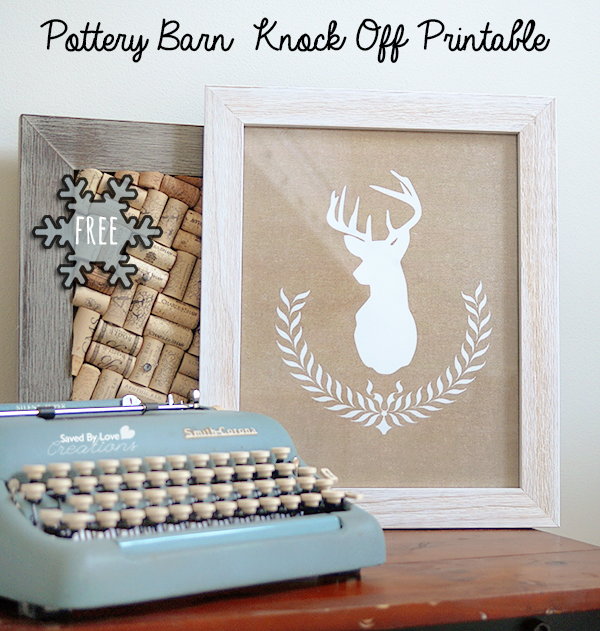
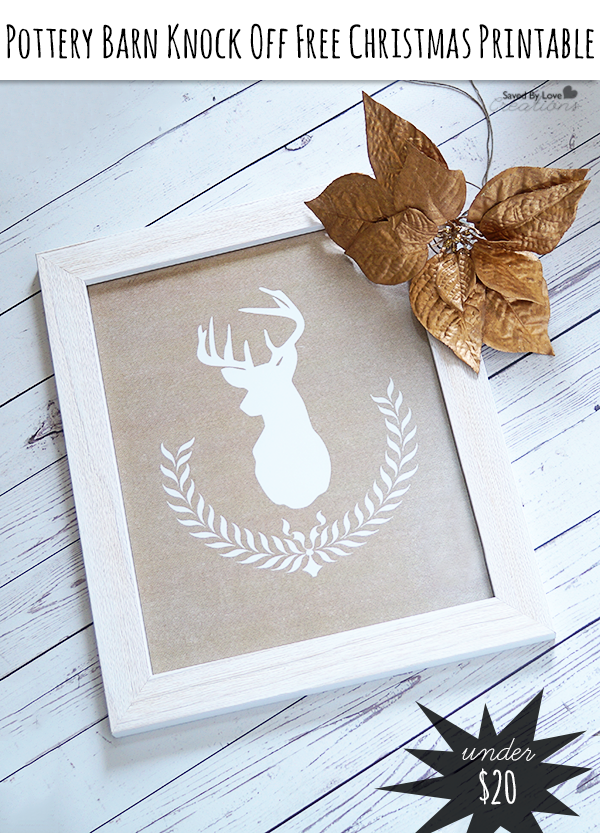
Sometimes when I am having trouble coming up with a project, I visit my favorite store catalogs or websites for inspiration. This project is inspired by a Christmas Wall Art piece from Pottery Barn that cost $99 on the website. I got the print for $1.75 at Office Depot by downloading it to my flash drive and taking it to my local store. Total, my version was under $20!

Download the 11×14 Reindeer Wreath Printable and grab a frame with your Michaels 40% off coupon and you can have your own Pottery Barn winter art knock off for 1/5 of their price. You can click the above link or thumbnail to pull of the full res version and save to your flash drive for going into the store, or save to your computer and order a print electronically.
I hope you enjoy!
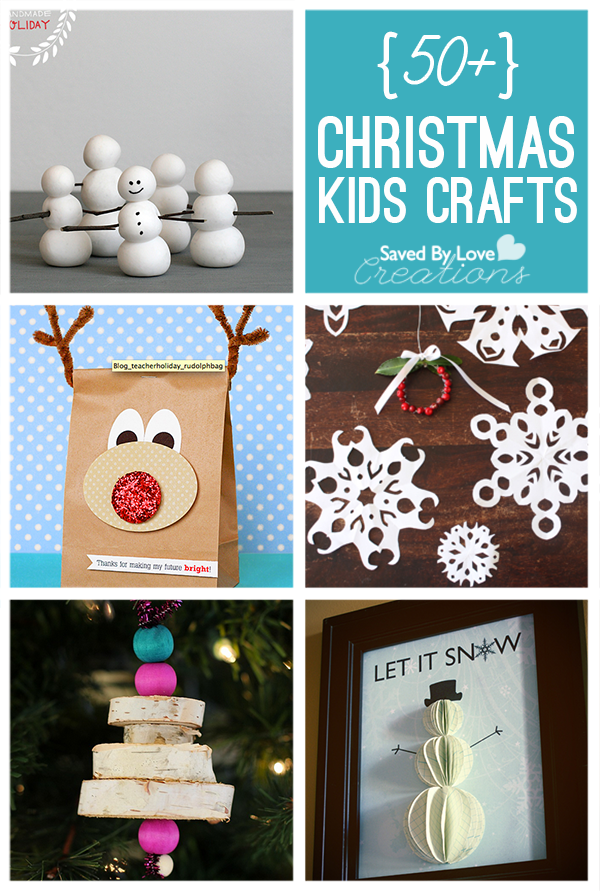
Do you want to see more knock off designs for decor, jewelry and more? Visit our 50+ Knock Off Designs Roundup:

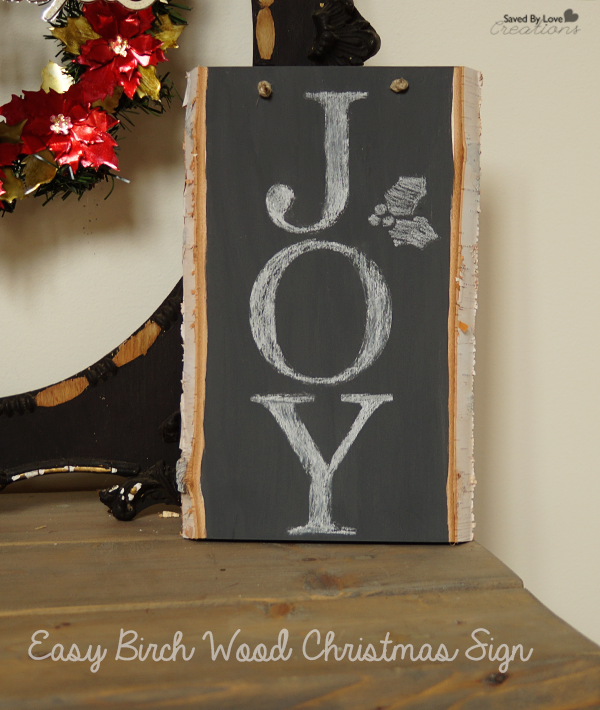
Today I am sharing how to make this easy Christmas sign on birch wood with Chalky Finish Paint. Have you ever used this paint? It is amazing. I am hooked! It comes in so many gorgeous colors and is easy to use without having to sand and prime the surface. That’s my kind of paint. You have a chance to win 8 colors of your choice and more, but we will get to that later!
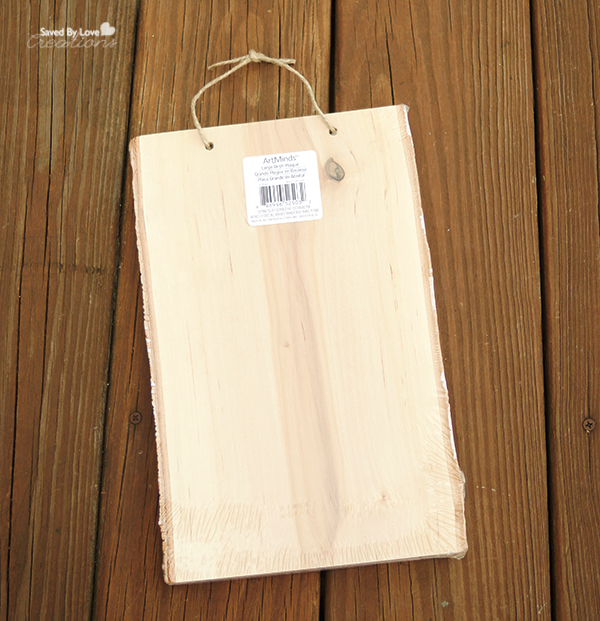
I scored this birch wood plaque from Michaels.
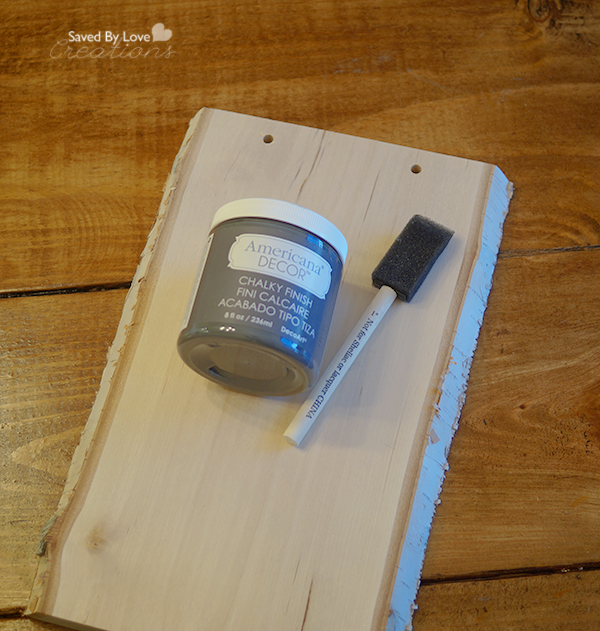
The paint color I used is Relic. It is beautiful!
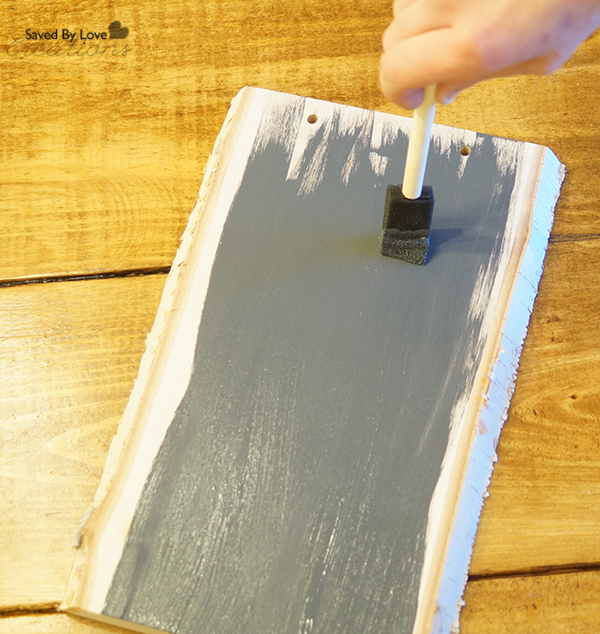
I used a foam brush to apply the paint.
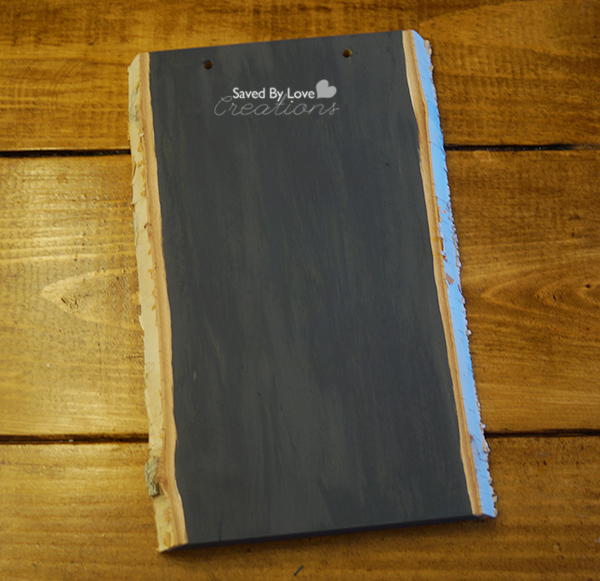
Initially I planned to paint the letters on, but I decided to use chalk instead. Now I can change it with the seasons!
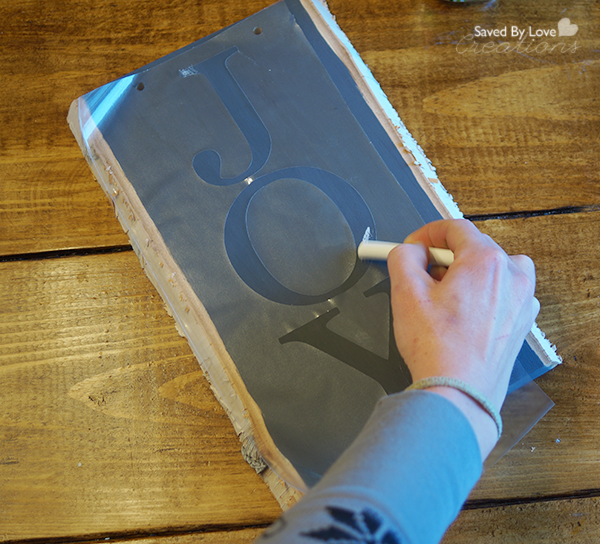
I used my Cricut make a stencil out of clear contact paper. I love to use contact paper for stencils because it is way cheaper than adhesive vinyl. You can download the image file here: Joy and Holly Berries. If you don’t have a cutting machine, you can print and transfer the image using transfer paper like I showed you here: DIY Reclaimed Wood Sign.
 To finish, I added twine to hang the sign. I love it!
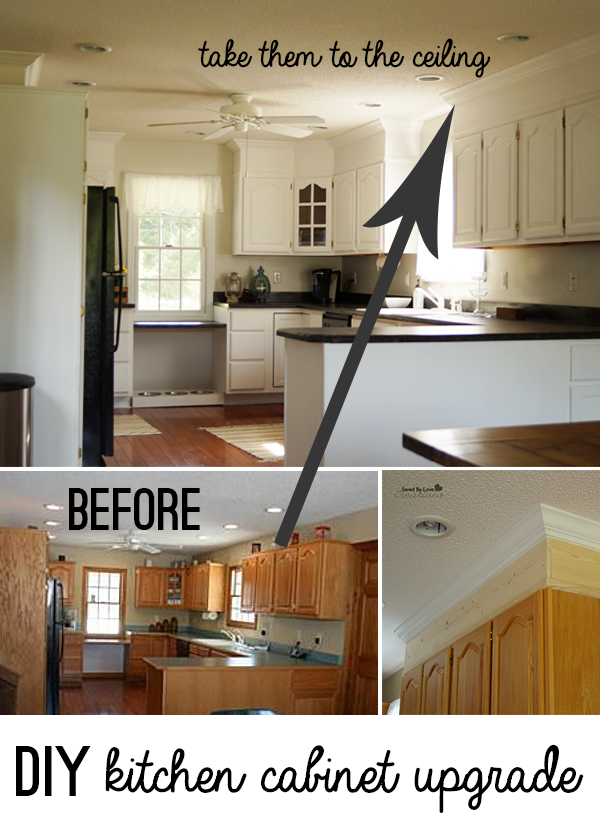
Remember when we painted our kitchen cabinets? We used Everlasting Chalky Finish paint. It was a huge time saver to not have to sand/prime the cabinets and we are thrilled with them.
Americana Decor Chalky Finish paint is available in Michaels in the wood and finishes aisle. Visit the DecoArt Chalky Finish website for more chalk paint ideas and inspiration.
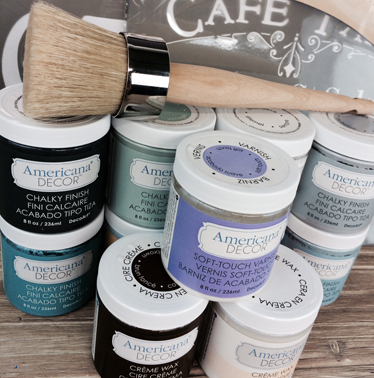
Now for the giveaway! Enter for a chance to win 8 colors of your choice, clear and dark creme waxes, Soft Touch varnish, waxing brush and 2 stencils of your choice *.
a Rafflecopter giveaway
* The items pictured are representations only. The stencils and paint will be selected by the winner.
Disclosure: I received product and compensation from DecoArt in exchange for my campaign. All opinions are honest and mine, as always!

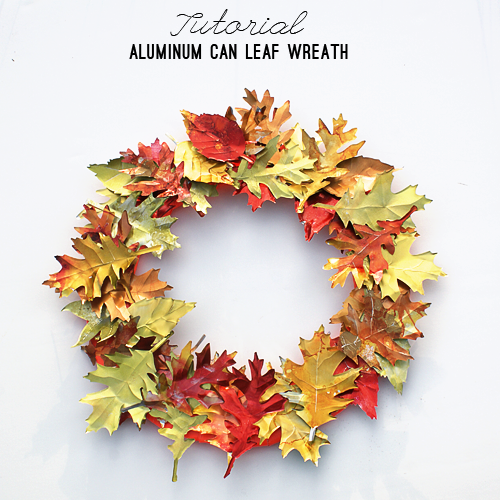
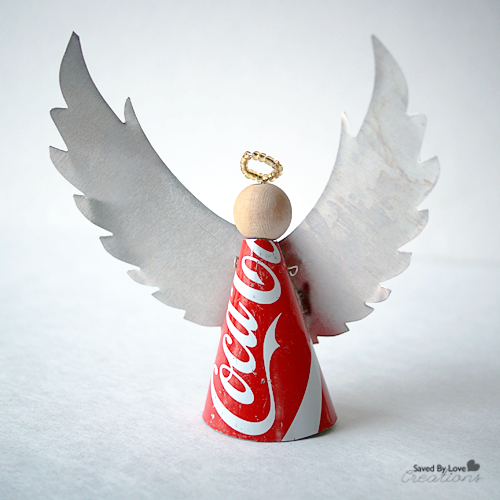
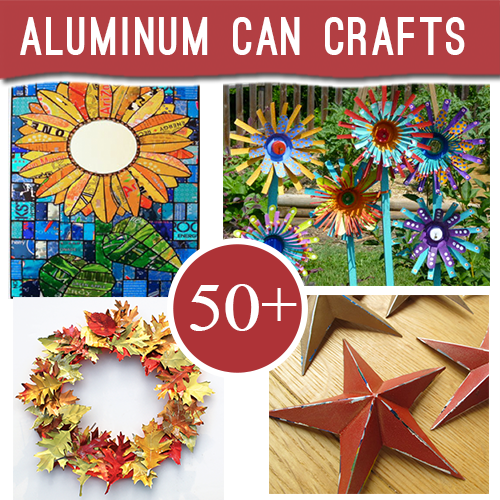
If you are anything like me, you love Ranger Ink products. I am particularly obsessed with alcohol inks, which paint vivid color on non-porous surfaces such as aluminum and glass. How excited was I to be invited to share a Christmas project on the Ranger Ink Blgo?! Very. Come see how I created this Recycled Pop Can Poinsettia Wreath for less than $3 with cans, dollar store supplies and alcohol inks! With tons of other projects to inspire you, you will want to make sure to look around while you are there!
If you like this project, I have lots more you don’t want to miss!

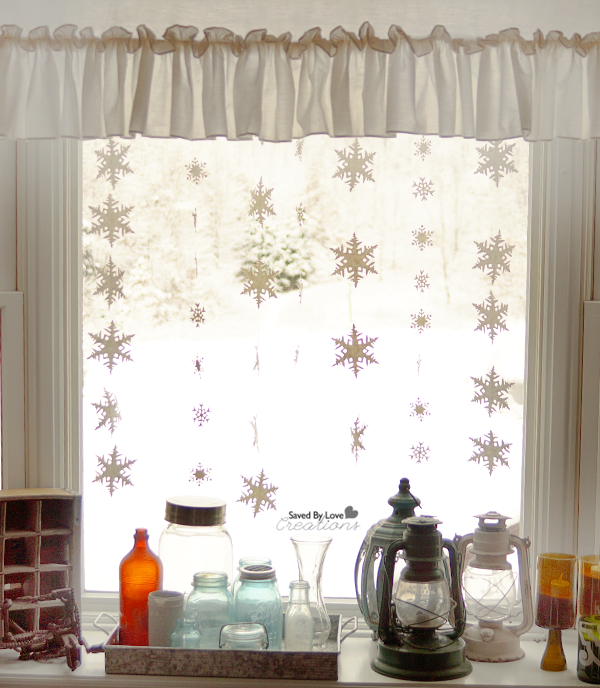
Today I am sharing with you a simple way to add some wintery snowflake decor to your house for the season! This project is super quick, easy and cheap with the right supplies. I love it with the first snowfall of the season painting the landscape beyond the window. Perfect!

White paper (I used filter paper I was given from the local recycling center)
Sizzix Snowflakes #3
Sizzix Snowflake With Texture Fade by Tim Holtz
Clear string
Hot Glue and glue gun
Sticky foam mounts or other removable tape
Die cut several snowflakes from white paper.
Add a line of hot glue to the back of the snowflakes and adhere the clear string.
Continue adding snowflakes this way until the strand is as long as you want.
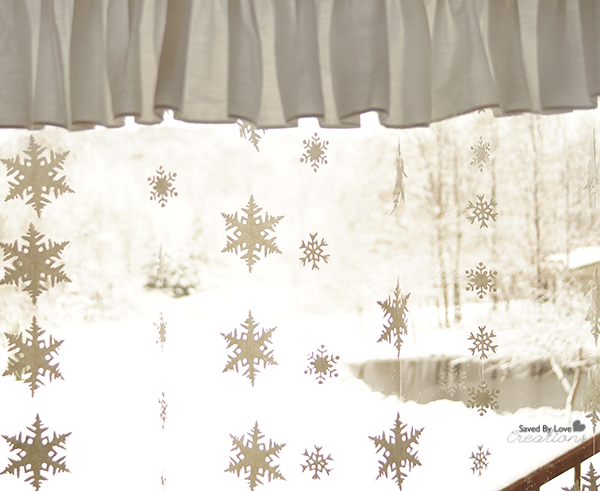
I made 7 strands of snowflakes and stuck them to the window’s “ceiling” using removable foam mounting tape.
If you don’t have a die cut machine, you can make your paper snowflakes with this detailed tutorial from Instructables:

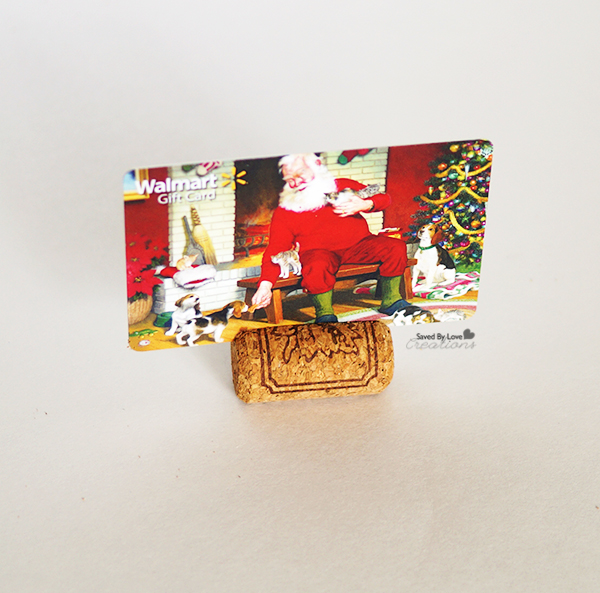
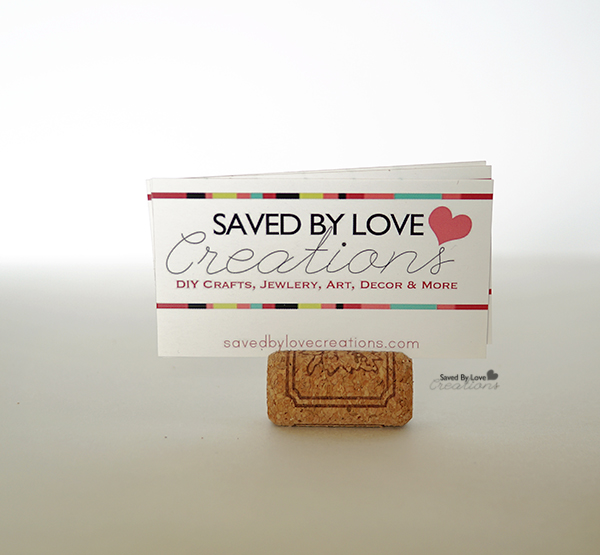
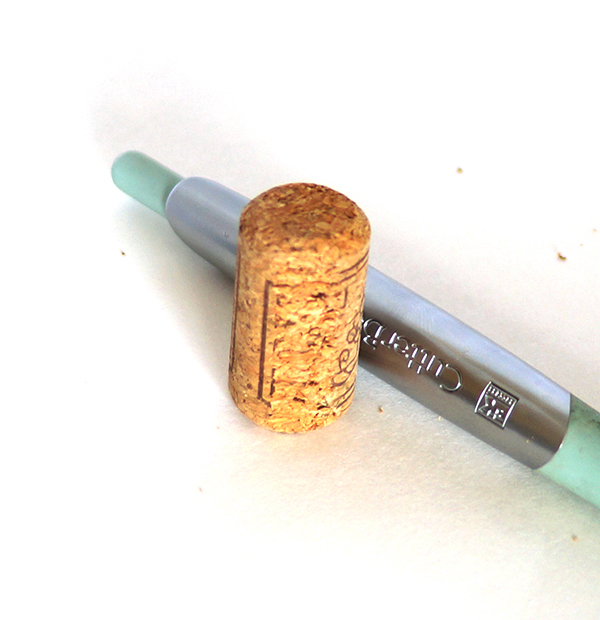
Display your business cards in eco-friendly style with this simple wine cork to card display upcycle. The same cork can be used for placeholder cards, or to display gift cards, just in time for the holidays. This project is free and requires just a cork and a craft knife!
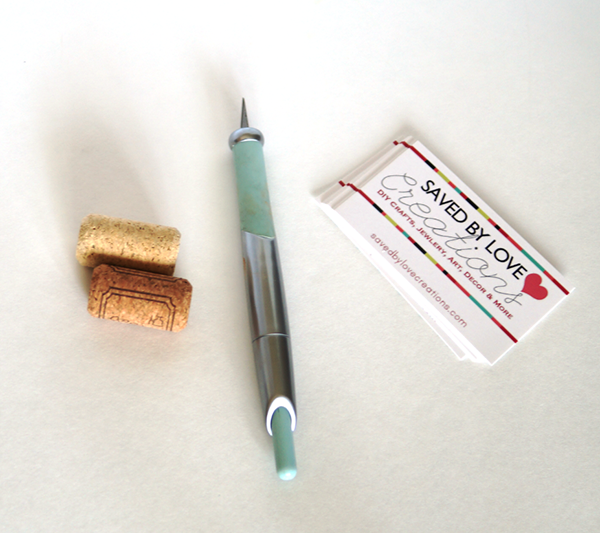
Cork
Craft Knife
Gift card or Credit card
Business cards
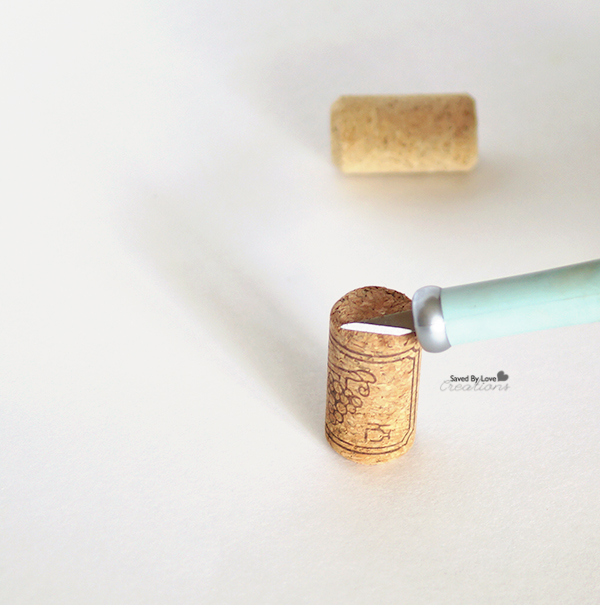
Use the craft knife to level the bottom of your cork by shaving a small section flat, down the length of the cork.
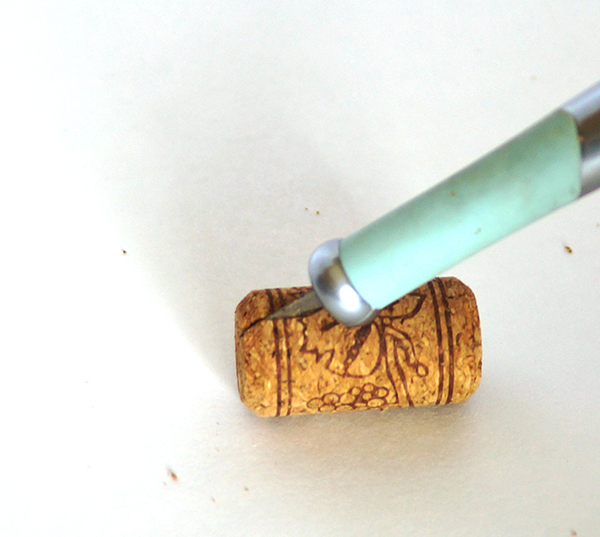
On the opposite side of the cork, make a slice with the knife down the length of the cork.
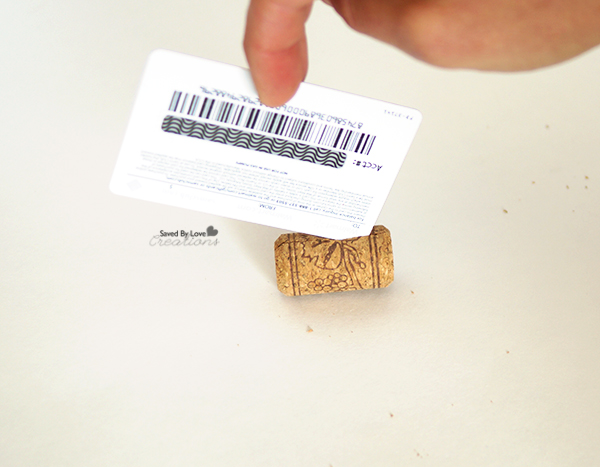 Make the slit wider by running a credit/gift card down the length of the slit.
I told you it was easy! You could add a string to one end of the cork and hang these on your Christmas tree with gift cards, or set them next to the stockings on the mantel as a creative way to display your gift cards!
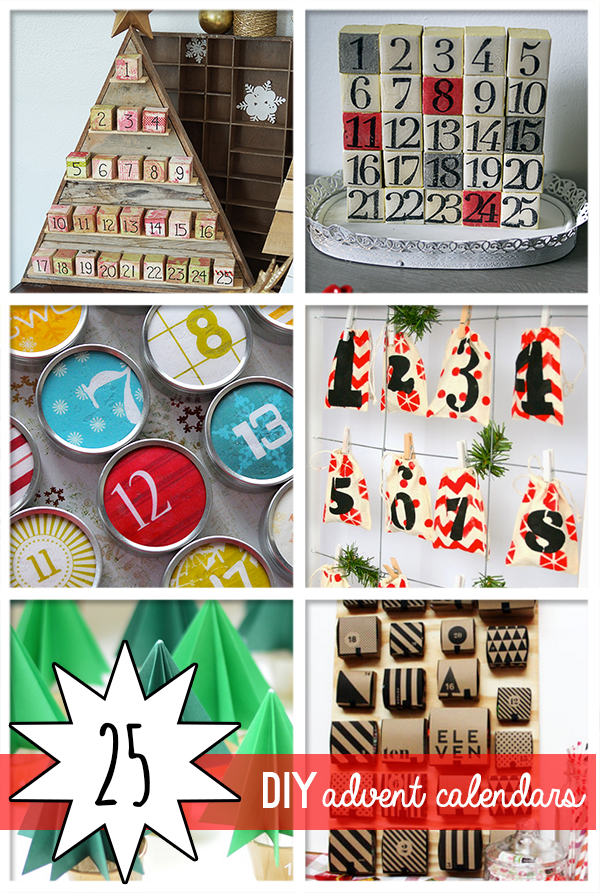 Since the mid 1800’s, we have been counting down to Christmas with advent calendars, and the tradition continues. It is a favorite childhood Christmas memory for people around the globe. Get a jump start on your Christmas anticipation with this round-up of 25 amazing DIY advent calendars you can make!
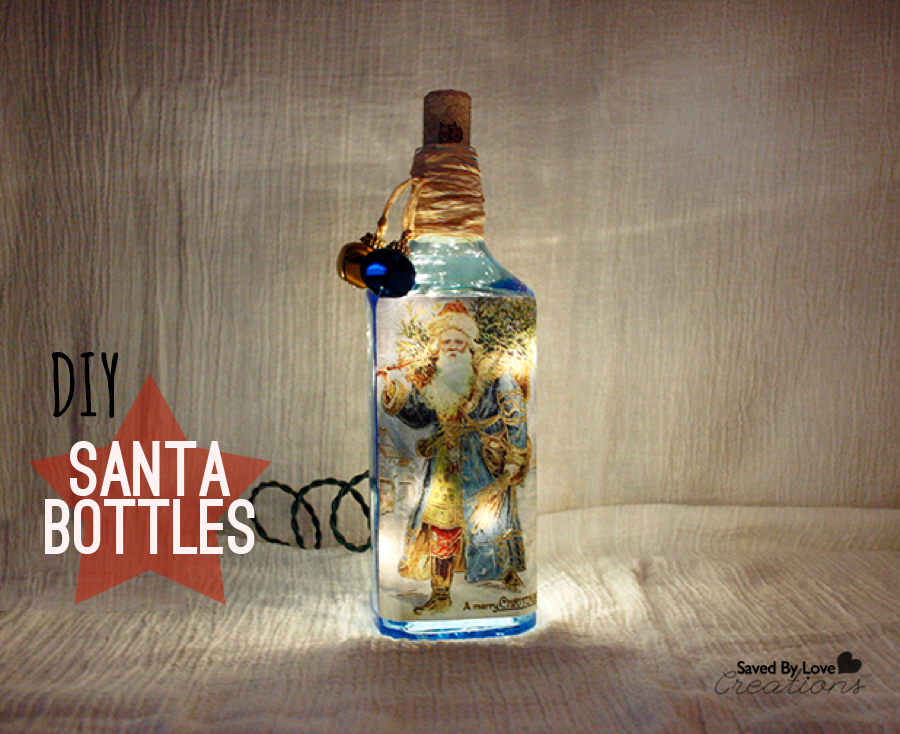
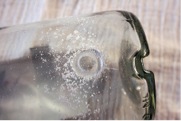
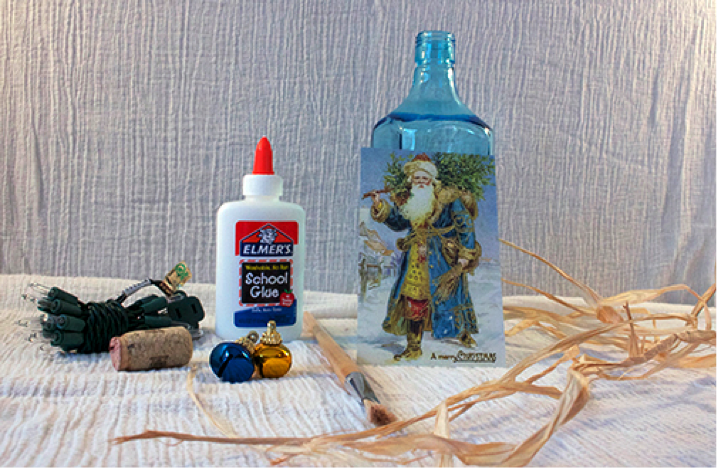
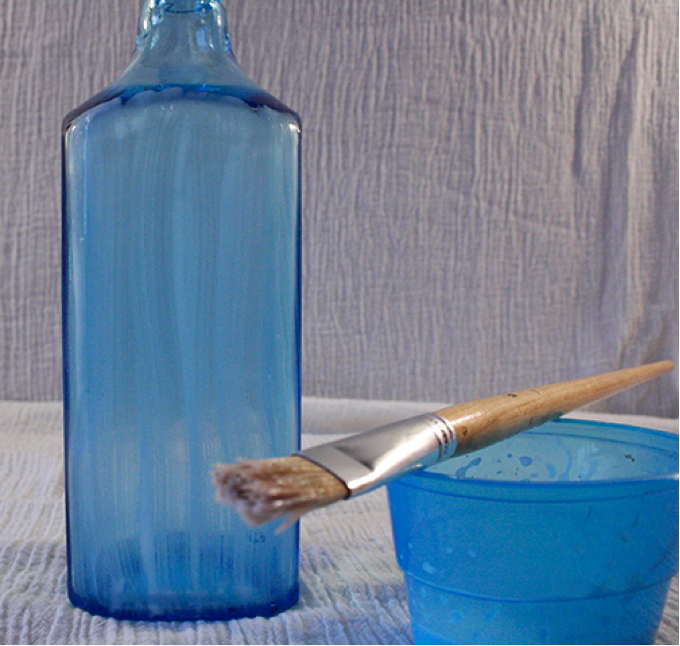
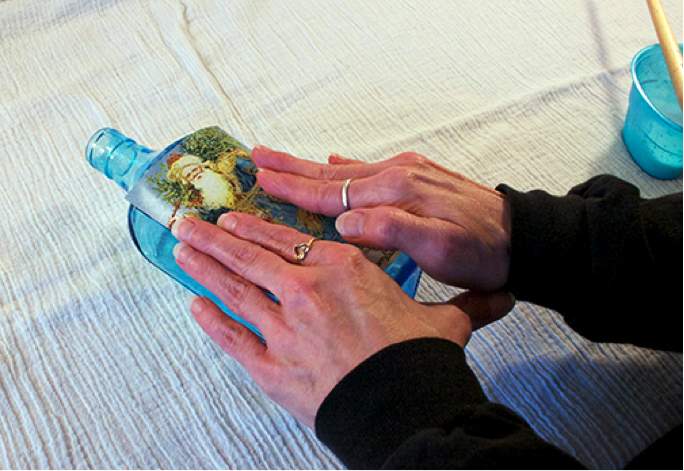
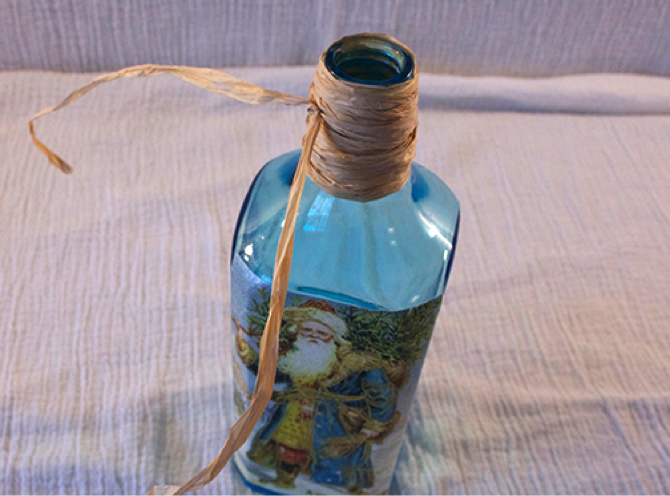
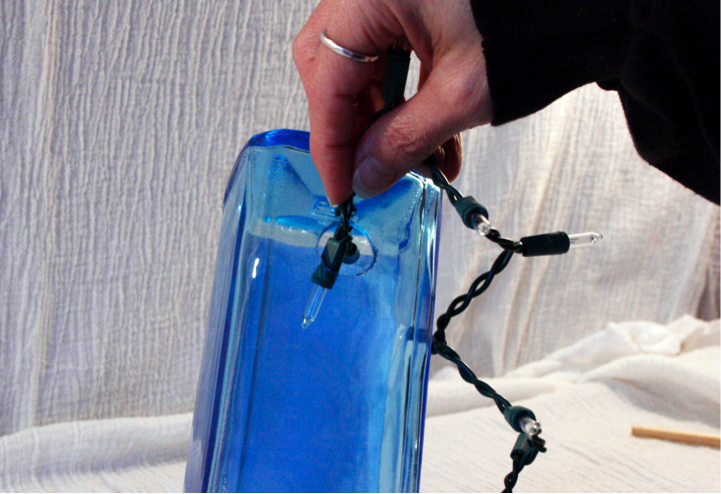
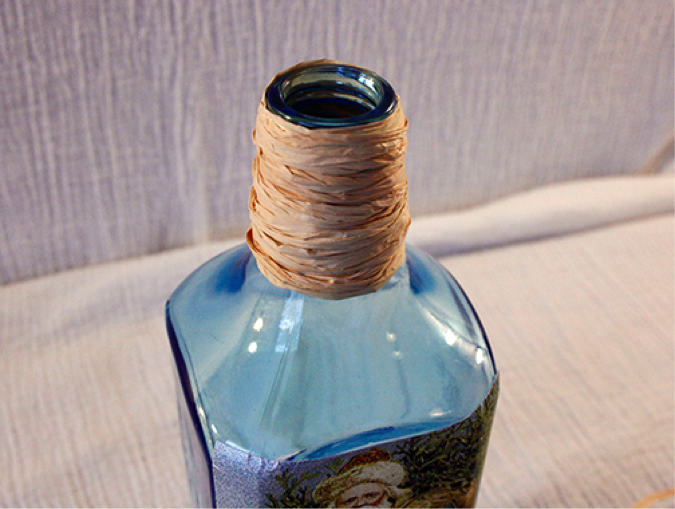
This handmade Santa light-up bottle adds a warm and cozy feeling to any space for the Christmas season. This project requires a recycled bottle and drilling a hole in the lower backside of the bottle. Also required is a fun search for a Santa image. The choices are endless, ranging from recycled Christmas cards, magazines, printed images, and the imagination goes on. Most importantly don’t forget a strand of Christmas lights. Now let’s get started and enjoy the fun.
Materials for drilling a hole in glass

Directions

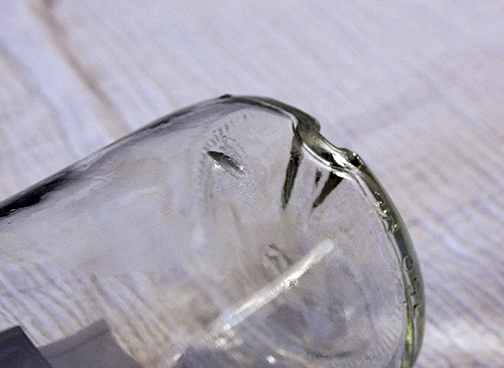

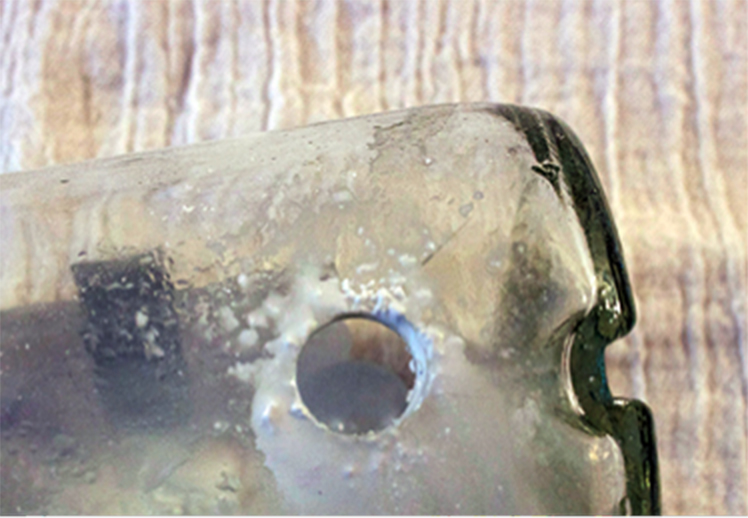
Tip: I have also seen websites online where you can purchase predrilled bottles from suppliers.
Materials for Santa bottle
Tip: If the inside of the bottle has any residue from the drilling process you can tear off a small piece of a cleaning cloth and swish it around with the water in the bottle and that will help to rid of it.
Measure the Santa image up to the bottle to insure the placement of the image will be where you want it. Using your paintbrush brush glue on the area where the image will be placed. Starting from the center of the image place your image on the bottle and gently glide your fingers from the center to outer edges of the image. Once you have the image glued down brush some more glue over the top of the image. Start this from the center working your way out as well. If any bubbles occur on the image you can smooth them out with your fingers from center to outer edges. Allow image to dry. Note: Once dry you can add glitter or a coat of crafting varnish on the Santa image.


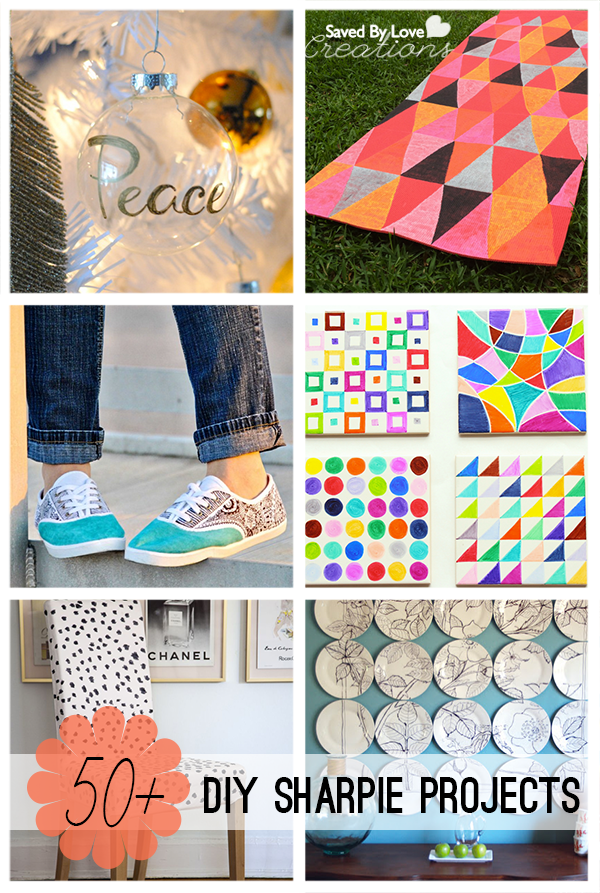 It amazes me that I have yet to curate my favorite Sharpie projects! With all of the 50+ round-ups I have brought to you, seems like I would have covered this by now. You will be blown away at the beautiful DIY home decor projects you can make with these popular markers, and there are loads of handmade gift ideas just in time for the holidays.
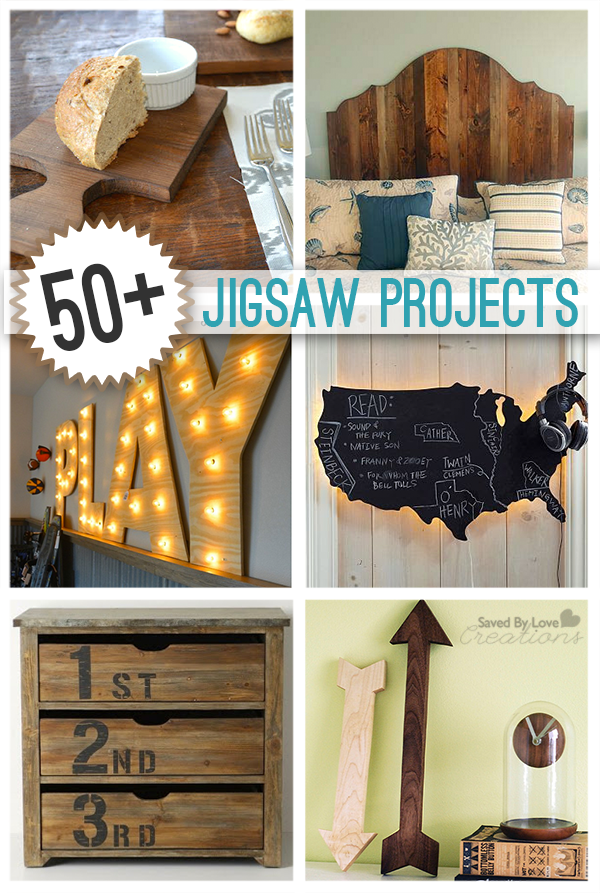
The jigsaw is a super versatile tool, and a great place to start the power tool journey. It is handheld, can be fairly inexpensive (like this Corded : Skil Saw. Variable Speed 4290-02), and cuts shapes in a variety of materials, with the appropriate blade. I did a number of projects with a the above linked Skil Saw I scored at a garage sale for, and only recently splurged on a new one because of a gift card I received. The new one is fancy pants and cordless, but it doesn’t do anything the bare bones version can’t. You can build the same projects with a basic jigsaw and a little practice. That is great news, since as you will see below, you can make some seriously stylish and functional pieces for your home with this tool. Enjoy!


