Easy DIY Mother’s Day Gift Idea

[pinit]

teatime-totebag-723x1024

[pinit]

Hello! Colleen here, with a way to decorate a totebag that will make it worthy of gift-giving. You do realize that Mother’s Day is right around the corner, right? I know! With Easter being so late in April, we have to really move fast if we want to give any handmade gifts to the moms in our lives. No worries because this happens to be a fast project. And cute too.

tea-time-totebag

You only need a few supplies –

  • Tulip Fabric Markers (available at craft stores and Walmart)
  • a paintbrush
  • a totebag (this is a shopping bag from the Dollar Store)
  • a pattern
  • a piece of cardboard to fit inside the tote

While this tutorial is for a totebag you could also use the markers on almost any fabric. Tee shirts are cute too. However, I made this for my own mother who can always use another totebag.

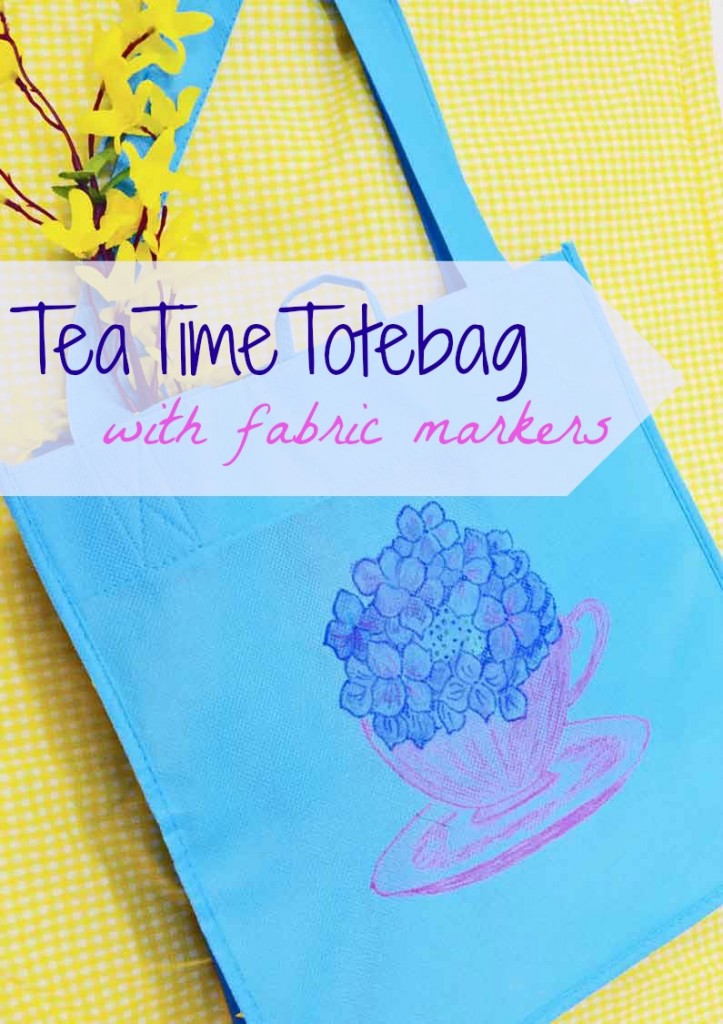
I’ve provided the Hydrangea in a Teacup pattern for you to download. If you’d like, I have other patterns that are free to download too. Most of them would work fine for this project.

tea-time-totebag
After you print your pattern, place it on top of the cardboard and slide it into the totebag. This prevents the markers from seeping to the backside as well as holds the pattern a little more stable.

You could also iron the pattern onto the shiny side of a piece of freezer paper, then iron that to the tote or tee shirt to prevent slipping. However, make sure you do a test for iron safeness on any shopping bags. The one I used above needed a press cloth between it and the iron.

tea-time-totebag

Now all you need to do is outline the pattern with your choice of colors.

tea-time-totebag

You can mix more than one color too.

tea-time-totebag

This was the finished design after outlining with purple, pink, and a few green dots in the center for the hydrangea buds.

tea-time-totebag

Dampen your paintbrush with a little water and go over the marker lines. The more water you use, the more of the markers will blend. The less water, the more defined the lines will be.

tea-time-totebag

You can do a little of both – leave some outlining and blend other parts. There is no right or wrong way to do this.

tea-time-totebag

You can fill in the pattern completely or leave spaces for the totebag to show thru.

It’s a great kids’ project too. If they’re too young to outline, they would still love to grab a paintbrush and “paint” a present for Mom or Gramma, wouldn’t they?

tea-time-totebag

Isn’t this a great craft for Mother’s Day? Or any other day, actually.

If you use the markers on a shirt, they’re washable after drying 24 hours. To be on the safe side, I think I’d heatset them anyway with an iron, although the instructions don’t mention that.

Have fun with this! I hope you’ll stop by Just Paint It and say hi one of these days. I’m always painting . . . or drawing with markers! You can also find me on Facebook, Google+, Pinterest and Instagram too.

Happy Crafting!

Colleen

More SBLC Mother’s Day DIY Inspiration!

Over 60 Mother’s Day Gifts to make for Less than $10!!

60+ DIY Mothers Day Gifts for under $10

Dollar Tree Pallet Wood Bathroom Organizer Tutorial

[pinit]$3 Dollar Store Craft Idea Reclaimed Wood Organizer @savedbyloves[pinit]

Could you stand to be a little more organized in your bathroom?  I know I could.  I find organizing rather boring, unless I can combine it with creating a cool home decor accent.  Today I am sharing a project fitting that bill- a rustic, chalkboard reclaimed pallet wood bathroom organizer using cute little jars I scored at the Dollar Tree recently!  For only $3 and some supplies I had on hand, this project packs a big punch on the cheap.  You can totally make this.  Give it to Mom for Mother’s Day!

SUPPLIES:

How to make wood pallet bathroom organizer

Pallet wood plank about 15 inches

Amazing Goop or E6000

Saw tooth hanger

Hammer

3 Dollar Tree Jars

Chalkboard Paint

Small Paint Brush

Tape Measurer

Marker or pencil

TUTORIAL:

Begin by hammering the sawtooth hanger in the middle upper back of the wood.  You want to do this before gluing the jars in place.

How to attach jars to wood with Amazing Goop

Measure placement for the jars and mark three evenly space dots on the front of your board with pencil or marker.  This board already had 3 evenly space holes drilled for a project that never happened.  Apply a generous dot of Amazing Goop on the board on the marked spots and on the jars in the middle back.  Let this sit for 2-10 minutes, then place jars, holding gentle pressure on each for about 1 minute.  Let this cure for a couple of hours before the next step.

How to make wood pallet art

Paint the indented area with Chalkboard paint.  This took several light coats, drying 15 minutes between each.

DIY Wood Pallet Dollar Store Craft

Label with chalk and hang on wall!

Do you love it?  I do!

Be sure and visit our 60+ Dollar Store Crafts Roundup:

And our 50+ Wood Pallet Projects Roundup!

DIY Mother’s Day Sign

Hello friends! It’s Barbara from Chase the Star, and today I’m happy to share another simple DIY project. Mother’s Day is almost here and Moms love it when we make them gifts, right? Well they did when we were kids, so why not continue the tradition?

DIY Mother’s Day Gift

[pinit]

DIY-Mothers-Day-Gift-via-Chase-the-Star-for-Saved-By-Love-Creations-bibleverse-proverbs31-

[pinit]

I love Proverbs 31 and I think verse 28 is perfect for mothers as a reminder of how much she should be cherished and appreciated! Of course it would make a great DIY project, so I headed to the thrift store and picked up this picture:

DIY Mother's Day Gift..update a thrift store picture! via Chase the Star for Saved By Love Creations

It’s the perfect size and the back already has a hanger!

How to DIY a Sign

Materials:

Second hand sign (thrift store, garage sale, etc.)

Sanding block

Spray paint

Die Cut Machine (I used the Cricut Explore)

Adhesive vinyl / Transfer paper

Step 1: This picture is actually a sticker, so I wet the whole thing and peeled it off with a scraper. After it was dry I went over it with a sanding block.

IMG_4464

Step 2: Spray it in the color of your choice; I went with gloss black.

IMG_4468

Step 3: Create the verse on the cutting machine, cut it out, and adhere it to the painted wood (for instructions on how to do that click here). Instead of peeling the lettering and painting, I just kept the white vinyl on there.

IMG_4469

Step 4: Go over the whole piece with the sanding block, carefully! This step is optional but it will reduce some of the gloss (if you used gloss paint) and give it an overall ‘worn’ look.

Since the hardware is already on, all you have to do is wrap it up in pretty paper and give it to the Mom in your life!

DIY Mother's Day Gift Proverbs 3128 via Chase the Star

Play around with the fonts on your machine and choose the one that you like the best. I wanted my sign to be simple, so I went with cursive. I think I will make a few more so I can pass them out to friends, back to the thrift store I go!

For more creative DIY ideas stop by Chase the Star, and follow me on Facebook, Google+, Pinterest, and Instagram!

See you next time!

New Signature

More SBLC Mother’s Day DIY Inspiration!

Over 60 Mother’s Day Gifts to make for Less than $10!!

60+ DIY Mothers Day Gifts for under $10

DIY Macrame Mason Jar Hanging Planter

[pinit]

Easy Macrame Mason Jar Hanging Planter DIY @savedbyloves

[pinit]

Mason jars are being cut like crazy around here.  Today I am showing you how to make this easy macrame mason jar hanging planter.  I have always wanted to make a macrame planter like this, and have finally marked it off of my to do list.  It was super simple and fast to make.  I truly thought it would be  a long, complicated process and am pleased to report I was wrong! If you can count to five and tie a knot, you can make this.  Let’s go!

Outdoor Mason Jar Decor Idea

SUPPLIES:

Twine

Mason Jar with bottom 1/3 cut off (How to cut mason jars)

Scissors

Masking Tape

Butane Micro Torch or Candle and Lighter

Bucket of Cold Water

Plant

Chain

TUTORIAL:

Cut 5 pieces of twine, each six feet in length.

How to Make a Macrame hanger

Tie a knot in the middle, leaving a loop at the top for hanging by chain.

Macrame Plant Hanger DIY

Tie the pairs of strings together to make five knots  about 4 inches down from the big knot you made.  In the photo I have completed 2 knots and the third one is in progress.  Tie all 5 pairs of string into 5 knots.

Macrame Plant Hanger DIY

Now you will be making your hanger into a cylinder by joining the outer edges.  About 1.5 inches down from previous knots, tie knots with pairs using one strand from each adjacent knot.  For the final knot, tie the remaining string on each outer side (at the black arrows in the photo) together.  You have a tube.

Mason Jar Decor Idea

Repeat this step one or two more times, depending on how tall your planter is.  You can insert your jar or other container into the planter to determine if you want another row of knots.  I aligned mine so that the first row of knots is at the top of the container and decided that I would like one more row.

Knot Tying

When you are happy with the number of knot rows, Insert plater and gather strands at the base of it to determine where to tie your final knot.

How to Tie a Knot

Tie the knot at the base, insert chain in top loop of planter and hang!  (These last two pics are with a different container, but it is the same process for a mason jar.  Sorry about the graininess!).

Mason Jar Outdoor Decor

Upcycle Craft How to Make a Mason Jar Candle

[pinit]

How to Make a Mason Jar Candle

[pinit]

Last week I shared this DIY Mason Jar Chimes tutorial and I bet you were left wondering what was to come of the bottom part of the jar.  Since I cut the jar just above the “Perfect Mason” lettering, I thought it would be so cute as a candle.  Turns out I was right, don’t you think?!  Read on to see how to upcycle a mason jar into one of your very own,  These would also be great as part of your DIY wedding decor, or as gifts!

SUPPLIES:

DIY Mason Jar Candle

Beeswax

Soy wicks on metal tabs

Double sided adhesive

Melting Pot

Mason Jar bottom (see tutorial:  How to cut mason jars)

Bamboo Skewer or pencil

Clips

Scissors

Lint free cloth

Soap and water or glass cleaner

TUTORIAL:

Melt wax per instructions.  I used my Ranger melting pot, which was not really the best plan on earth since I could only melt a little bit of wax at a time, but that is what I did.

DIY Candles Mason Jar Decor

Mason Jar Crafts @savedbyloves

While that is melting, prepare container and wick. Clean container well and dry with a lint free cloth.  Adhere wick tab to double sided adhesive, and stick other side into container.  I used two wicks since the jar is big.  Three might have been even better.  That is yet to be seen.

How to Make a Mason Jar Candle Upcycle

Wrap excess wick around dowel rod, centered so that wicks are straight up and down.  Use clips to secure in place.

Recycled Craft Make a Mason Jar Candle

Pour in wax until container is as full as you would like.  Let sit overnight, trim wicks and enjoy!


Make a Mason Jar Candle @savedbyloves

I just love my candle, and the smell of beeswax is wonderful.  This is my first time tackling candle making.  Do you make candles?  Do you have any tips and tricks to share?

Beginner’s Glass Fusing ; Recycled Glass Dichroic Earrings

[pinit]

How to make dichroic glass with microwave kiln

[pinit]

I have had a microwave kiln kit by Fuseworks for at least a year, and have finally gotten around to experimenting with glass fusing for the first time.  This pair of earrings showcase the very first attempt using the kiln!  I love them.  For so many reasons, I love them.  First, fusing in your microwave is super easy and fun.  It takes like 3 minutes for the glass to turn all glowy and molten.  So awesome.  Secondly, you can use recycled glass and you all know how all about repurposing and eco-crafts I am, right?  Once you invest in the kiln, you can break old bottles for your base, and purchase dichroic, fusible glass for not too high a price.  Especially considering how beautiful it makes the pieces.  I got sheets of it at Hobby Lobby for $4.99, and can get at least 10 fused glass focal beads out of that.


How to fuse glass in microwave tutorial

SUPPLIES:

Fuseworks Microwave Kiln Tutorial

I got my Beginner’s fusing kit at Hobby Lobby.  It is cheaper on Amazon; Fuseworks Beginner’s Fusing Kit

Broken beer or wine bottles in colors of your choice

Dichroic and other fusible glass

Glass cutter

Running Pliers

Flush Wire Cutters

Round nose pliers

flat nose pliers

Antiqued Copper Wire 20 Gauge

Bead Landing Jig to make earring findings – you can make them your own way or buy them made, but I love this jig and it saves money to make my own!

TUTORIAL:

Kiln with glass bead layers

I used very imperfect rectangles of wine bottle shards, one slightly larger than the other, and a piece of transparent dichroic glass that came in my Fuseworks kit.  Per the instructions that came with the kit, I placed the include fusing paper on the kiln, then stacked my glass layers on top of that.  It is easiest to do this in the microwave because moving the kiln will cause your pieces to go all over the place and it gets really annoying.  Put it in place in the microwave, then start layering your glass.

The larger green piece went first on top of the kiln paper.  Next the smaller, then the even smaller dichroic shard, with the foil side face down.  The kiln is small, but I did both of my earrings at the same time (not shown in pic).

Microwave kiln for glass fusing tutorial

Place kiln lid and turn on microwave for 2 minutes at first to begin fusing.  Check after two minutes, making sure to wear gloves, by lifting lid.  If your piece is uniformly glowing orange and the edges are rounded and fused together, you are done, but that is unlikely at 2 minutes.  I kept going for 30 second intervals.  The first attempt fused in 4 minutes.  Then remove the kiln from microwave (without removing lid, which can cause rapid cooling and cracking of the glass) and place on heat resistant surface.  I put mine on my stove burner.

Let cool for at least 30 min before removing lid!  Don’t touch glass for 45 min, and even then, be careful!  You can’t tell if it is hot by looking at it.

DIY Dichroic glass jewelry begginers glass fusing

 I left my pieces alone overnight while I decided what to do with them.  Then I wire wrapped them like I showed you in this Bail free, glue free way to hang pendants tutorial.  Or you can glue on a bail.  Those came in the kit too!

I am addicted!  I have had a couple of fails, but mostly just fun creating with a new technique, resulting in beautiful fused glass creations!  I hope you love this medium as much as I do.  Have you tried it before?  Any tips you want to share?

Make a Button Bracelet

[pinit]DIY Button Bracelet[pinit]

Make a button bracelet in 10 minutes


I found some beautiful wooden buttons in the scrapbook supplies at Joann’s recently and knew I wanted to make a bracelet using them.  This project is super quick and easy.  If you can open jump rings with pliers and use glue, you are well on your way to a cool piece of button bling!


SUPPLIES:

Vintage wood button bracelet tutorial


Jewelry Pliers

Jump rings

Metal connector pieces – These are the base for my bracelet.  I found them at Joann’s on clearance in a pack of 6 (pictured above), perfect for the length of a bracelet.

Wooden buttons

Toggle clasp

E6000

TUTORIAL:

How to make a button bracelet


Attach metal connectors together using jump rings.  Attach toggle clasp bar and ring the same way.

Glue buttons on with e6000

Glue the buttons onto the connectors as shown and let dry overnight.

Make an easy vintage button Bracelet

For more button craft ideas:

Button Crafts

Hand Stamped Leather Bracelet Love

[pinit]DIY leather cuff bracelet[pinit]

Creative bloggers are pretty much just rad, if I do say so myself.  In August, I had the opportunity to gather with my people in Atlanta at  a blogging conference (not  a clogging conference, as my friend Rick misunderstood, although that could be interesting too).  That is where I met Daune from Cottage in the Oaks.  I was admiring a beautiful leather cuff bracelet she was rockin’, and I found out, not surprisingly, that she had made it herself.  How cool would it be to have one with my blog name on it, I expressed.  Guess what came in the mail!!

Custom hand stamped leather bracelet

DIY Hand Stamped Leather Cuff Bracelet

I love that it came with lavender in the package!  My favorite scent.  The bracelet is gorgeous.  You can order your own custom text bracelet from Daune, or pick one that speaks to you in her Etsy Shop.

What.  You are a DIYer and you wanna make your own?  Little Blue Boo has a great DIY hand stamped leather cuff bracelet tutorial:

stamped leather bracelets

For more DIY bracelet tutorials, visit our 50+ Bracelets to Make:

Easy DIY Rose Bracelet

[pinit]
Make an easy diy rose bracelet with #modmelts #resinflowers @savedbyloves
[pinit]

Today’s project is a lovely summer bracelet featuring roses made with Mod Melts.  I showed you this new product last week in this DIY daisy bracelet tutorial.    I love that you can use it with silicone molds to  quickly create detailed flowers that are commonly made with slow curing resin.  You can whip out this bracelet in well under 1 hour!

FlowerBracelet7

SUPPLIES:

ModMelts and Molds with Sticks (see: tutorial for using the mod melts)

Connector Metal Squares (I found these at Joanns)

Jump rings

Toggle clasp

metal chain

2 pairs of flat nose jewelry pliers

E6000 glue

TUTORIAL:

diy how to make a flower bracelet

Create your charms using Mod Melts as in the link above.  I used the smaller rose on the Floral Mold.  I painted 6 of them in a green/blue color palettes.  I sealed them with Mod Podge matte finish.

how to open jump rings

Connect the squares with jump rings.  Begin by twisting jump rings open with 2 sets of pliers.

jewelry making tips

Add a square.

how to connect jewelry pieces with jump rings

Add second square and close jump ring by twisting back with 2 sets of pliers.

FlowerBracelet13

Continue adding squares until you have enough for each rose charm.

how to use E6000 for jewelry; how to glue metal to plastic

Glue each rose onto a square with E6000 and let dry for at least 1 hour.

FlowerBracelet4

To finish, use jump rings to attach toggle clasp on each end for bracelet closure.

how to make resin jewerly

What do you think?  Are you ready to try this stuff yet?  I have tons more charms left from my afternoon of creating with Mod Melts.  As promised, you will be seeing more!

For plenty more DIY bracelets, see SBLC’s bracelet tutorials, and our 50+ bracelet roundup!

Make Metallic Mason Jars With Spray Paint

Spray Paint mason jars for a great vase!

Photo by It All Started With Paint

Mason jar decor is a huge favorite in this house.  Working on a paper bouquet for my grandmother for Mother’s Day, I have been trying to land on the perfect vase.  Recycled wine bottles, tin cans and mason jars always top my list of bouquet containers.  While searching for inspiration, I came across the pictured metallic mason jars by It All Started With Paint.  I am all about metallic spray paint, and really am kinda shocked I haven’t already done this!  You can order your own at the link above, or if you are a DIY kinda person, Lovely Little DIY’s gold mason jar tutorial will get you on your way!

DIY mason Jar Crafts

Photo by Lovely Little DIY

This is not the project I ended up going with for my grandmother’s vase.  That is for another post.  This did make my to do list and if you are looking for a quick vase for Mother’s Day, you still have time to make metallic mason jars that she will love!

For more mason jar crafts, visit our frequently updated collection of the the world’s greatest Mason Jar ideas!

Privacy Policy