Search Results for: magic glos

How to Make Jewelry From Flattened Pennies

pin-how-to-make-upcycled-jewelry-from-pennies

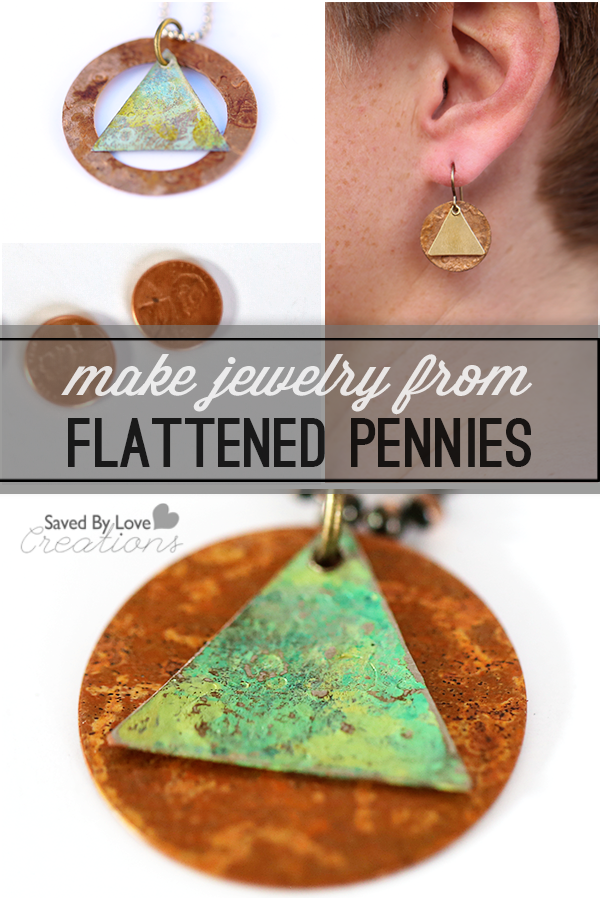
This post has been a long time coming. At this point, I can’t even recall what inspired me to smash pennies and turn them into jewelry, but something did and here we are. I will walk you through the interesting, not entirely legal process I used. Please note that in no way am I encouraging anyone to break the law, or to go anywhere near railroad tracks. The Midnight Rider controversy is no joke. While cute, this jewelry is not worth dying for, so be smart.
how-to-make-aa-jewelry

SUPPLIES:

Pennies or other coins

Clear masking tape

Jump rings

Jewelry Hole punch

jewelry rivets

Vintaj metal paints

Lisa Pavelka Resin Magic Glos

Magic Glos UV Resin, by Lisa Pavelka

Sizzix machine

Butterfly rings Sizzix Die

Media Mixage Triangle Dies

Media Mixage Circle Dies

Vintaj Vogue Stamping Blanks, Triangle 14mm

Your favorite embossing folders

eyelet setter

ear wire

Jewelry pliers (2 pair)

Paint brush or sponge dauber
1/4 cup white vinegar
1 teaspoon salt
Non-metal bowl
Paper towels
 

wm-aa-jewelry

TUTORIAL:

tape-pennies-to-track

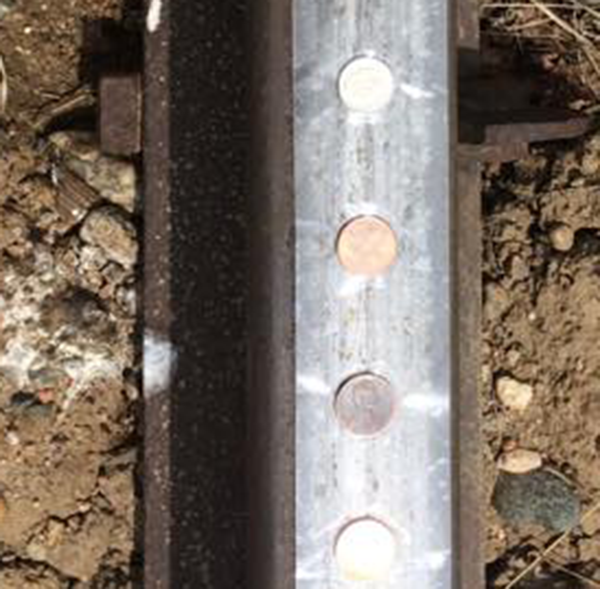
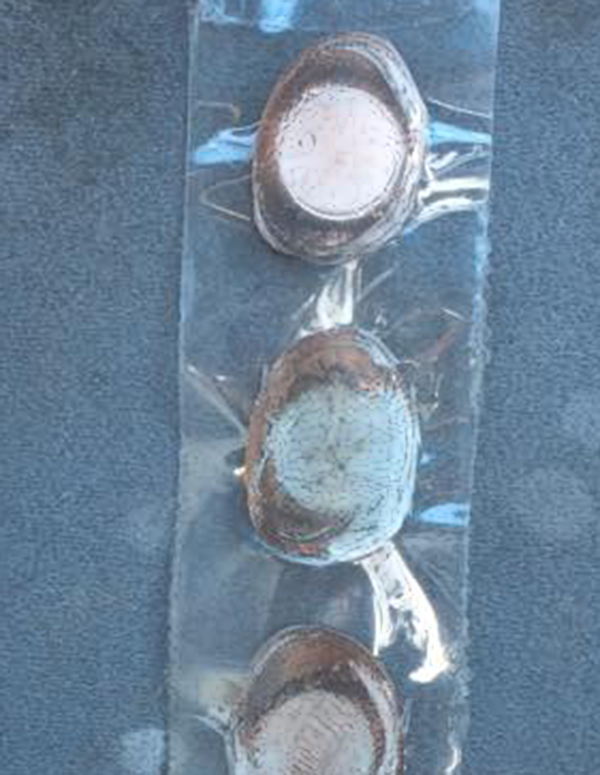
This is the sketchy part. SBLC assumes no responsibility for any injuries that may occur. That said, this is also the super fun part. Tape the coins to the railroad track as shown in the photo. Not taping them just means searching needlessly after the train has passed, since they get thrown from their original location during the process. The tape keeps them in place.
pennies-after-flattening

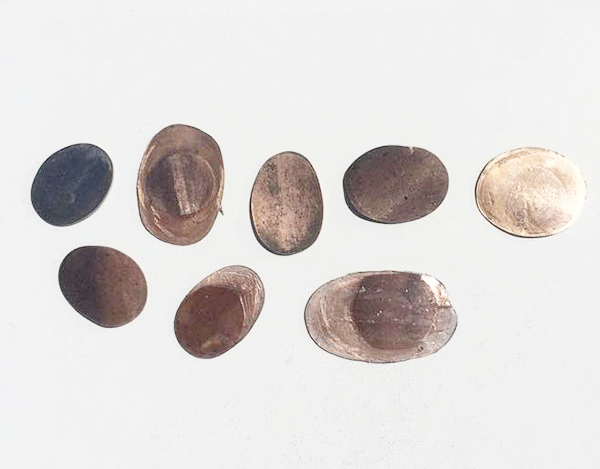
This is what y0u will have when you retrieve your now flattened pennies. Flat, but yucky, right? No problem. To clean the little guys, pour the vinegar into the bowl and stir in salt. Put about 5 pennies into the solution and let them soak for about 10 seconds. Use a toothbrush and running water to remove debris and rinse clean.
how-to-flatten-pennies-for-free

They don’t have to be perfect.

how-to-flatten-pennies

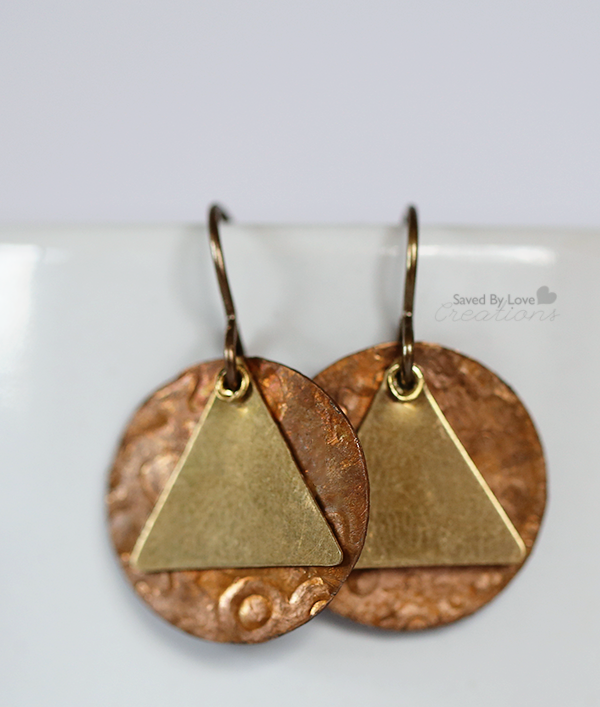
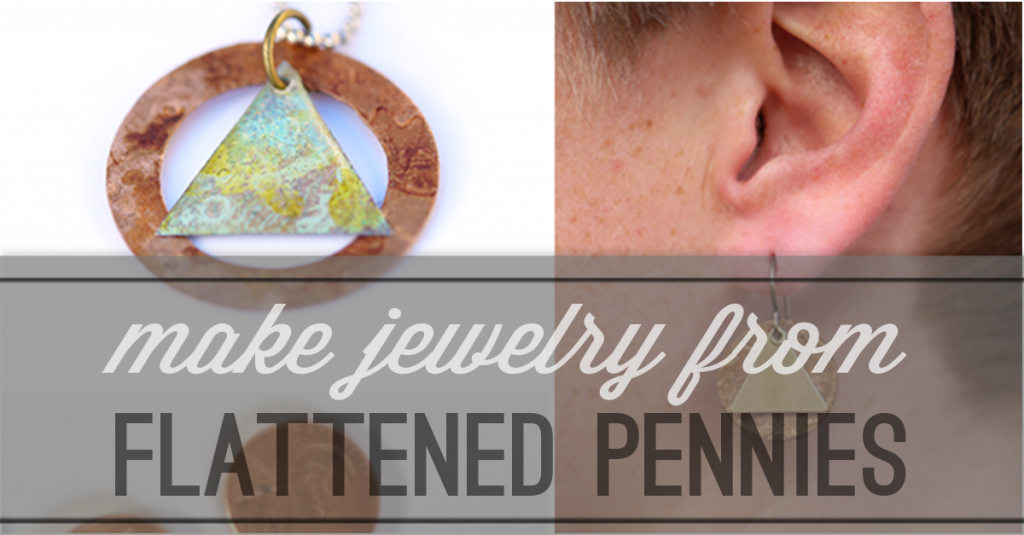
Emboss your pennies and die cut into jewelry shapes. Here i cut the flattened and embossed pennies into circles and attached Vintaj Vogue Stamping Blanks Triangle 14mm using a rivet. Just hole punch the penny circles, insert rivet through triangle and circle, set with eyelet setter and attach jump ring and ear wires. Done!
aa-necklace-circle-triangle

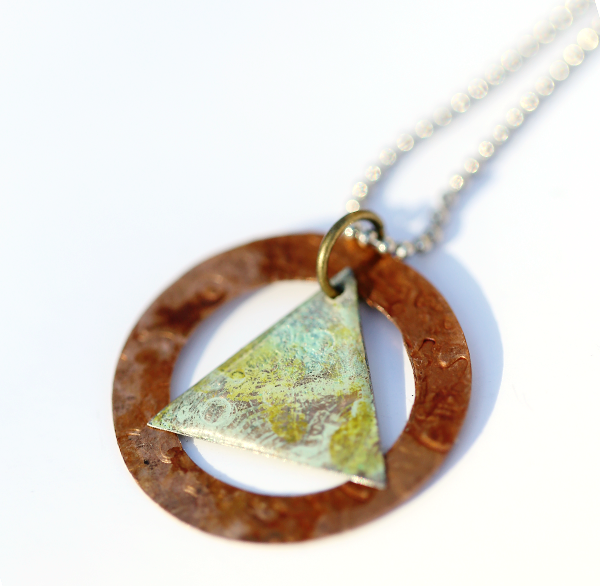
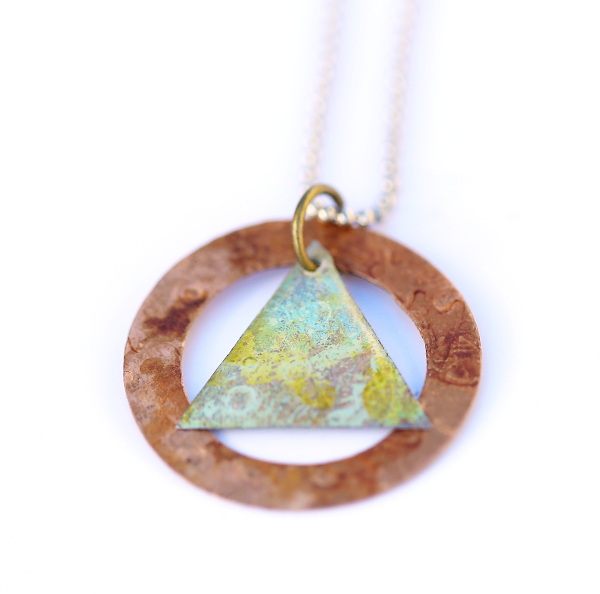
For this pendant, I die cut a ring with the Sizzix butterfly rings die – a favorite die of mine. I cut a triangle with another embossed flattened penny and painted it using vintaj patina paints for metal. Once the paint was dry, I applied Magic Glos UV Resin, by Lisa Pavelka. I love the domed resin look. You can put this in direct sunlight to cure, or cure it in 10 minutes using Lisa Pavelka’s UV light. I went the 10 minute route! It’s been awhile since I used that stuff, and I forgot how fun it is.
upcycled-coin-pendant-jewelry-tutorial

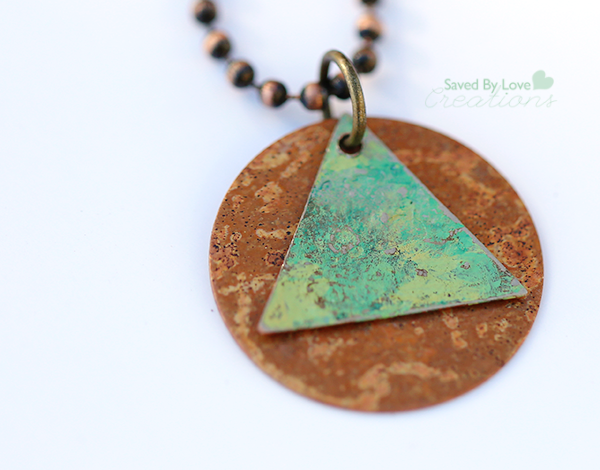
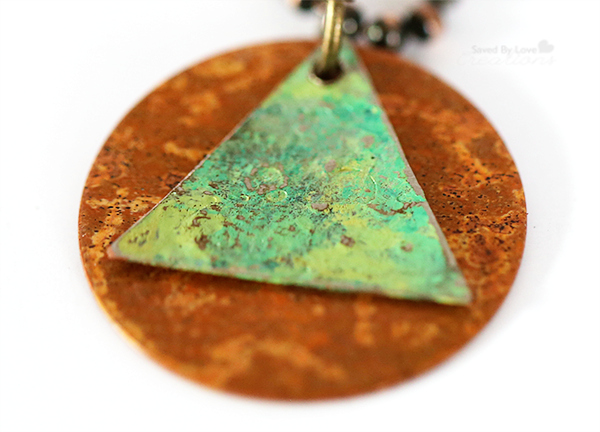
This piece is comprised of a Vintaj metal blank (the background circle) and a flattened penny triangle that I painted with Vintaj Patina. I didn’t seal it. I enjoy the simplicity of the circle/triangle, and love the colors together. After applying the paint, go over the triangle lightly with medium grit sand paper to reveal the raised areas created by embossing previously.

Visit here for more RESIN JEWELRY TUTORIALS
fb-how-to-make-upcycled-jewelry-from-pennies

What do you think? Do you have a less illegal method for flattening pennies? Can your rope your husband into doing it for you, like I did?

You can use any coin, by the way. I just like copper.

I’d love to see what you can do with flattened coins. If you don’t have a die cut machine, you can cut shapes with metal shears or tin snips for your own custom creations! Happy crafting!

Make Paper Feather Earrings

[pinit]
 How to Make Paper Feather Earrings @savedbyloves

[pinit]

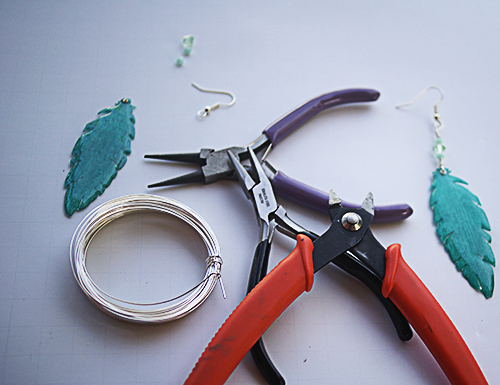
I heart paper and I heart feather earrings.  It was only a matter of time before the inspiration to make paper feather earrings hit.  That time is now.  You can make your very own with just a few supplies…

 How to Make Paper Feather Earrings @savedbyloves

So you may have heard me and my creative bloggy friends mention SNAP!, a conference that took place last month in Utah.  It was amazing to meet these ladies face to face, and share ideas, laughs, even some dance floor moves.  We get into the details, us creatives.  You should have seen the business cards all dressed up with washi tape, glitter, clips, candies and on and on…  Rebecca at the Crafted Sparrow embellished hers with little aqua paper feathers to hers.

Die Cut Paper Feathers

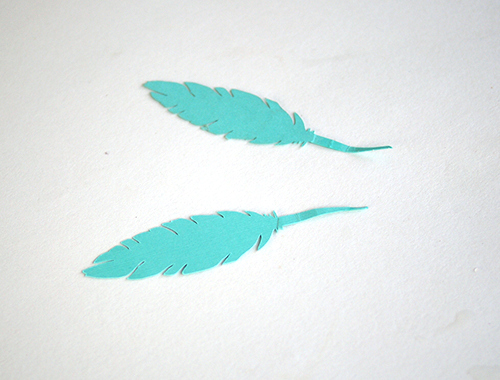
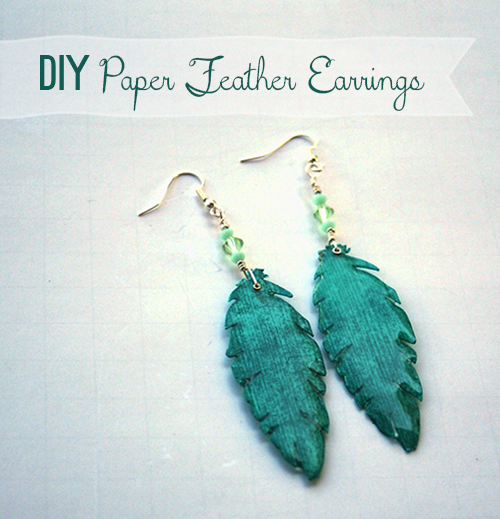
In all the room chaos, I must have ended up with my roommate’s Crafted Sparrow business card, but no fear.  I put it to good use.  When I got home and started sorting through my stash, I saw the 2 paper feathers and knew earrings were necessary.  You can make them too, no problem.  If you didn’t happen to get 2 of Rebecca’s cards with feathers, you can die cut your own, or just download this free feather template and use it to hand cut your feathers from pretty paper!
SUPPLIES:

2 Paper Feathers

20 gauge jewelry wire

Ear wires

Beads or crystals of your choice for feather stem

Tiny eyelet and setter

Flat nose and round nose pliers

Magic Glos Resin or Mod Podge Dimensional Magic

Awl

Wire cutter

TUTORIAL:

PaperFeatherEarrings3

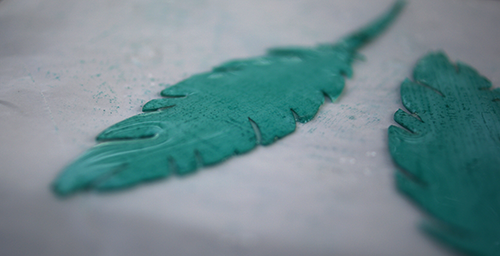
Apply resin to paper feathers.  I did both sides (when one side dries, flip it over and do the other).  For my thoughts on Magic Glos resin, check out my patriotic sprinkle earrings tutorial.  You can also use Mod Podge Dimensional Magic or 2 part resin, but you will have to wait overnight for these to dry before moving on to the next step.  With Magic Glos the wait is 20 minutes in sunlight or under a UV lamp.

PaperFeatherEarrings5

Poke a hole in the tip of your feather where the stem starts, and set your eyelet.  For the best explanation of how to do this with tiny eyelets, go to Retro Cafe Art Gallery’s post on DIY acrylic tags.  That is how I did it, but I used a the pointy end of an aluminum crochet hook because I didn’t have an eyelet setter tool.

PaperFeatherEarrings6

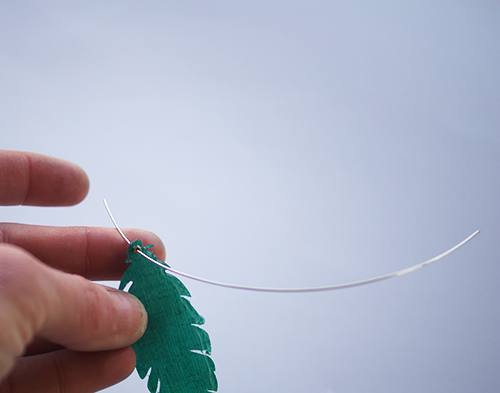
Cut about 5 inches of wire and insert into eyelet from front to back of feather.

PaperFeatherEarrings7

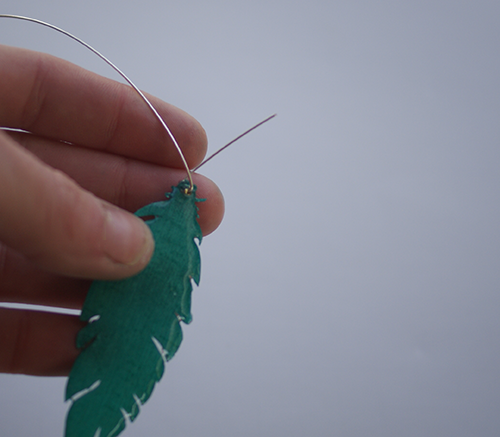
Bend wire up with a one inch tail as in photo.

PaperFeatherEarrings8

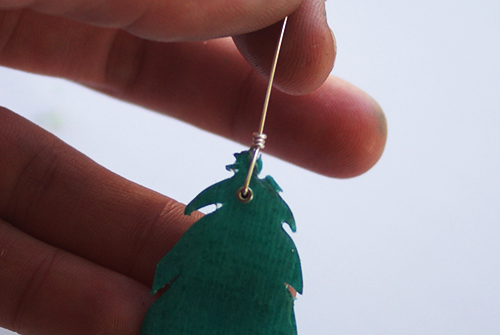
Loop tail around to form coil as shown.  I wrapped four times.  Cut off excess wire from tail if necessary.

PaperFeatherEarrings9

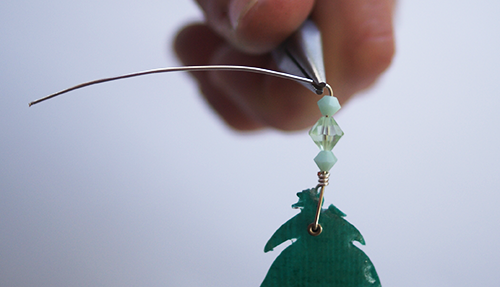
String beads onto wire on top of coil.  I used 2 small faceted beads on either side of a larger crystal.  Bend wire at 90° as shown.  Leave a space between the bend and the top bead for coiling the wire (see below).

PaperFeatherEarrings10

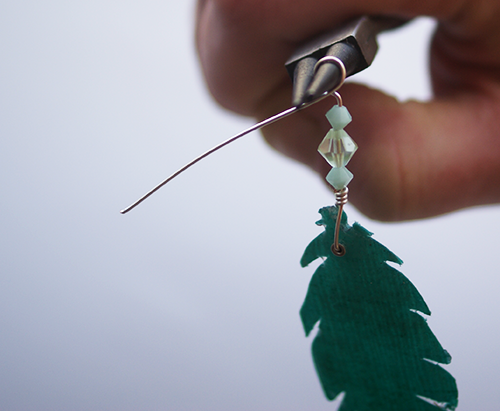
Loop wire around round nose pliers as shown.

TIP: When making earrings, I like to mark with a sharpie where on the pliers I wrap the wire so that I can make the loop on the next earring the same size.

PaperFeatherEarrings12

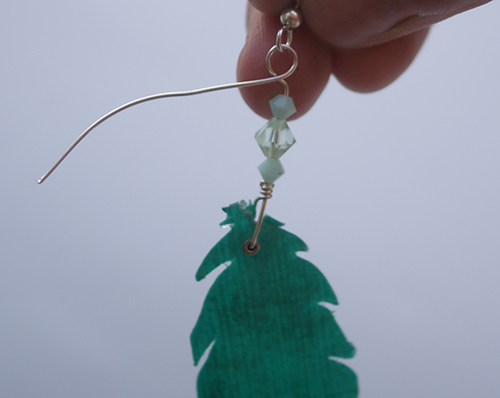
Slide ear wire finding onto loop, making sure you have it oriented so that when you put it in your ear, the side of the feather that you want to be the front is facing towards the front.

PaperFeatherEarrings13

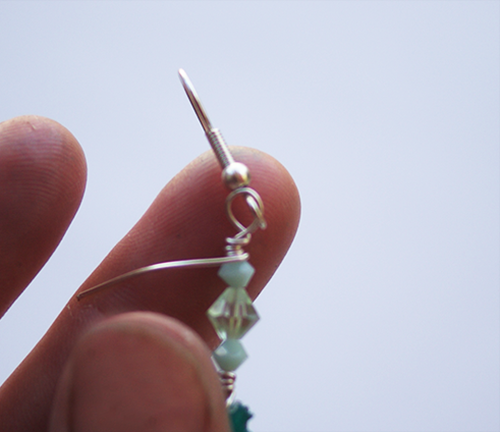
Wrap the wire to the top of the bead, forming a coil as shown.  Clip the excess wire off with the wire cutter.


DIY Upcycled Pop Can & Resin Heart Pendant

[pinit]#Recycle aluminum cans into gorgeous jewelry #Resin #Upcycle @savedbyloves #DIY @Crafts

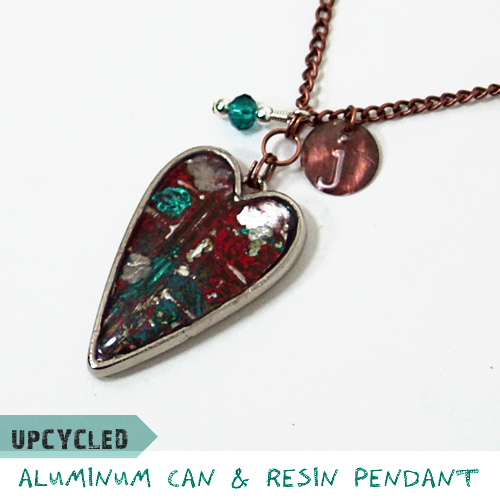
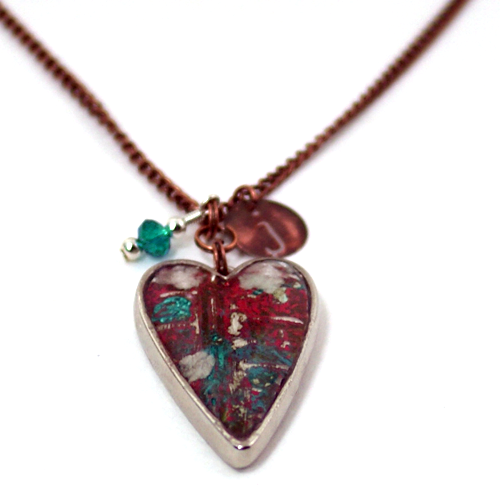
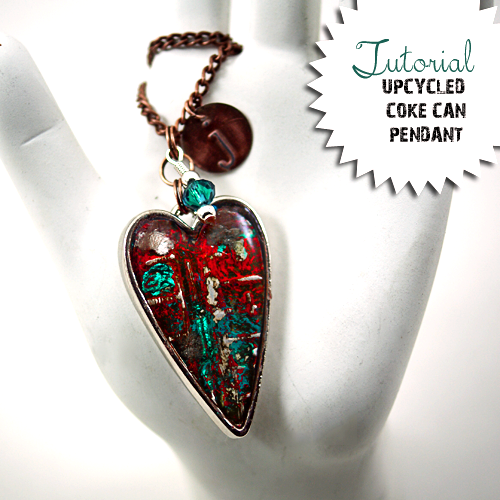
Do you have a pile of aluminum cans in recycling bin purgatory?  Well, if you have been around here long, you know I love to cut my cans and form them into various upcycled jewelry pieces.  Today, I am going to show you how I used a coke can, a bezel and some resin to create this fun, one of a kind heart pendant.  It would make a lovely gift for many occasions, and especially the rapidly approaching Valentine’s Day Holiday.  I made it for a gift and personalized it with a monogram stamped charm.  You don’t need a lot of expensive supplies and equipment to one of these yourself.  Here is how…

SUPPLIES

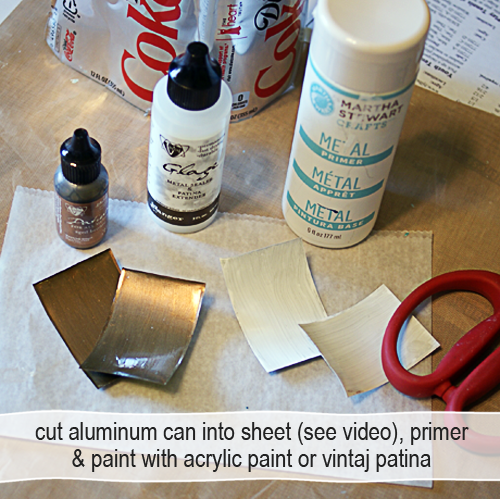
Empty Soda Can, rinsed with warm soapy water

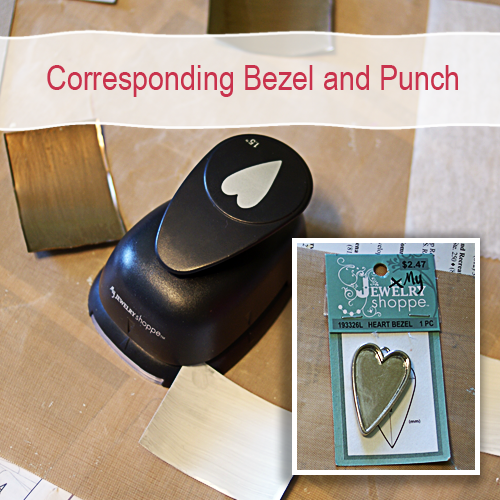
Jewelry Shoppe Heart Bezel and corresponding heart paper punch (got mine at Hobby Lobby)

Resin Jewelry Tutorial, Upcycled Jewelry Tutorial

-OR-

Any heart shape bezel and a sharpie or other permanent marker

Glossy Accents or other metal glue

Grungeboard or scrap cardboard

Embossing folder and machine

Perfect Pearls

3 colors of acrylic paint

Metal paint primer (I used Martha Stewart’s)

Vintaj Sanding Block

Magic Glos Resin

INSTRUCTIONS

#Upcycled Recycled aluminum can jewelry #DIY #Craft tutorial @savedbyloves [pinit]

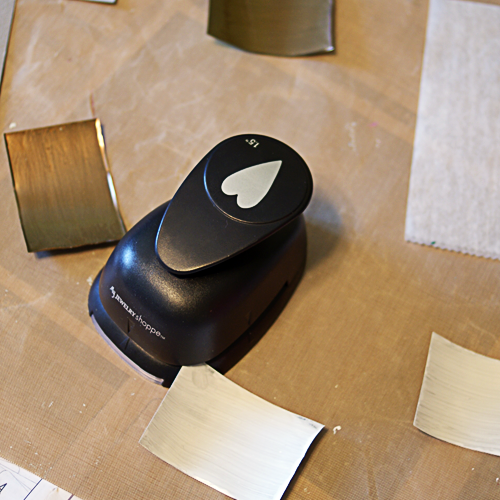
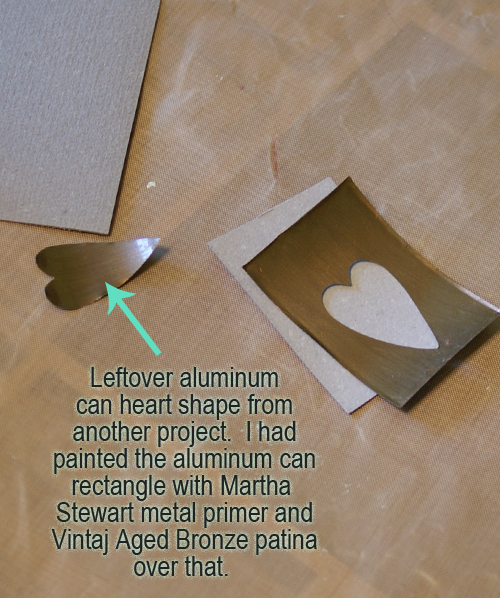
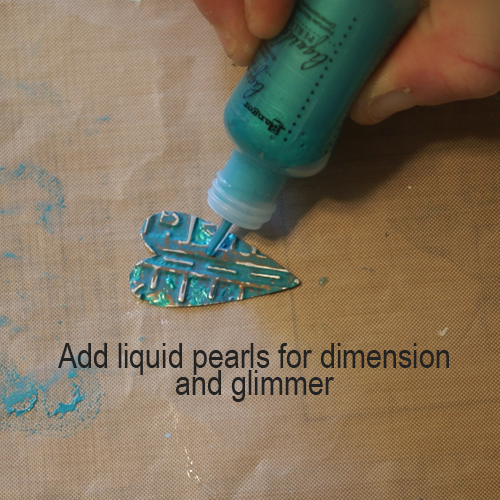
This project came about as I was doing another project that I haven’t shared with you yet.  There was a leftover aluminum can punched heart shape, and I remembered I had the corresponding bezel.  I found the bezel and paper punch at Hobby Lobby (by My Jewelry Shoppe) a couple of months back.  I decided to emboss the heart and add some acrylic paint and Liquid Pearls for a cool effect.

#Recycle aluminum cans into gorgeous jewelry #Resin #Upcycle @savedbyloves #DIY @Crafts

For the other project, I needed rectangles with a heart cut out in the middle.  If you just want the heart shape used in this tutorial, you don’t have to worry about cutting perfect rectangles.  Just primer and paint your can sheet and punch the heart shape from it.  I showed you how to cut the cans into a sheet in the video here…

Make an aluminum can pendant
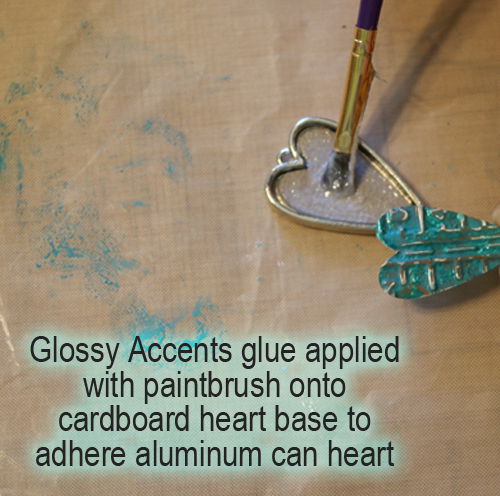
Trace the heart twice onto grungeboard, thick cardstock or cardboard and cut out inside the outlines with scissors.  Glue the cardboard hearts together, then glue to bezel.  Use clothespin to apply pressure for good adhesion.  This gives thickness to the thin can top layer.
Emboss your painted and primed can heart.  I used Tim Holtz Texture Fades embossing folder – Pattern and Stitches Set and my Sizzix Vagabond.  It you don’t have an embossing machine, you can hand emboss, or use the folder and a rolling pin like in this video by Sarah Hamer:

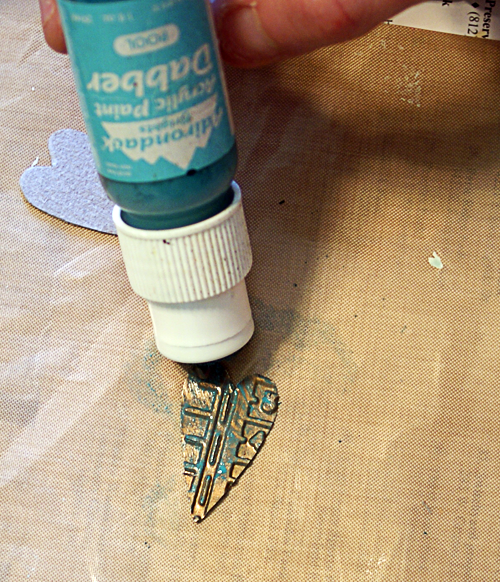
Now apply a second paint color over your base (Ranger Paint Dauber color Pool used here).

Ranger Paint Daubbers Pool

Ranger Paint Daubbers Pool

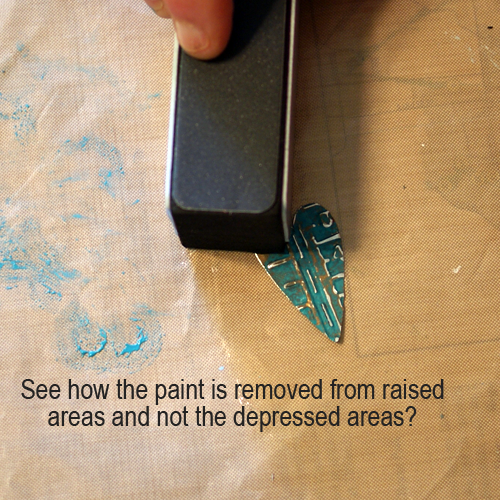
Let dry and and sand with sanding block to distress as desired.  Not shown here, but in my final pendant, I added a third paint color.  The red made the pendant pop.  If you sand away too much paint, it’s ok.  Just paint again and sand until you are happy with your piece.  The raised areas will lose color when you sand, while the depressed areas hold color.  The embossed design is enhanced by the contrast.  So fun!

How to emboss metal jewelry

How to emboss metal jewelry

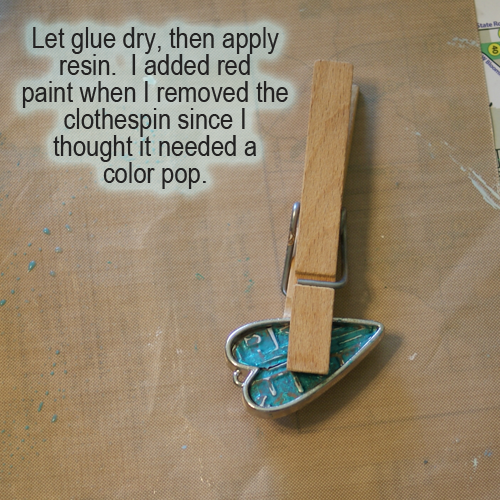
When you are happy with your paint job, glue heart into pendant bezel on top of cardboard base as shown.  Hold in place with clothespin while glue dries.

How to emboss metal jewelry2

How to use Magic Glos resin

Let glue dry completely, then apply Magic Glos resin like I showed you in this Plaid Ring Bling tutorial.

You can use any resin you want.  I just had this on hand, and love the fact that it cures in minutes vs. the hours it takes 2 part resins to cure.  Maybe you are more patient than me!

Add chain and charms as desired and you are done!

#Upcycled Recycled aluminum can jewelry #DIY #Craft tutorial @savedbyloves

HeartBezelPendantDIY8

Sizzix Embossed Poly Clay Pendants

Sizzix embossed clay pendants

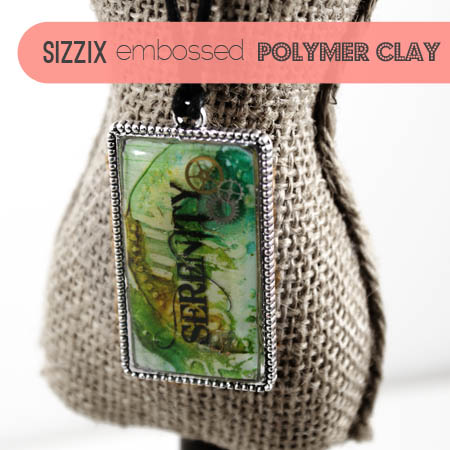
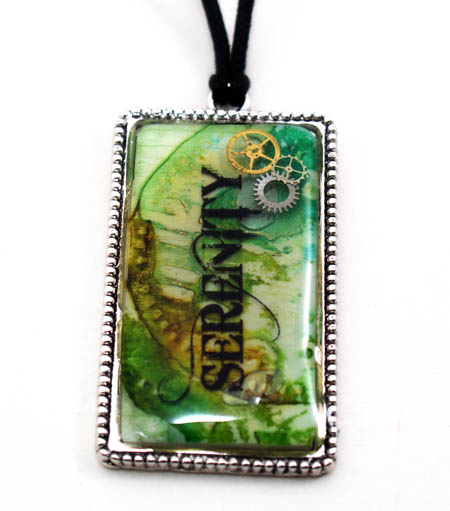
Today, I thought I would share some more polymer clay + Sizzix creations.  For this piece, I baked a very thin (6 on my pasta machine)  sheet of polymer clay (white fimo) for 45 min at 275°.    I let it cool, then embossed with Sizzix using  a Tim Holtz clock embossing folder.  Then I colored it with alcohol inks.  I cut a piece to fit the bezel, used Crafter’s Pick glue to adhere it into the bezel, and layered watch parts and the word on a transparency in resin (Lisa Pavelka Magic Glos).

Polymer Clay and Resin Jewelry

Here is another pendant I made using the same technique.

Polymer clay and resin jewelry

Much more to come with clay and Sizzix.

Polymer Clay & Resin Word Bracelet

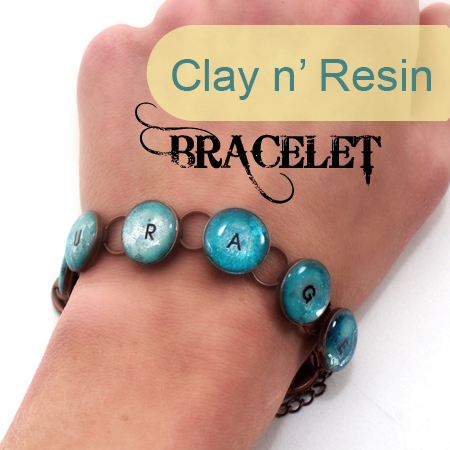
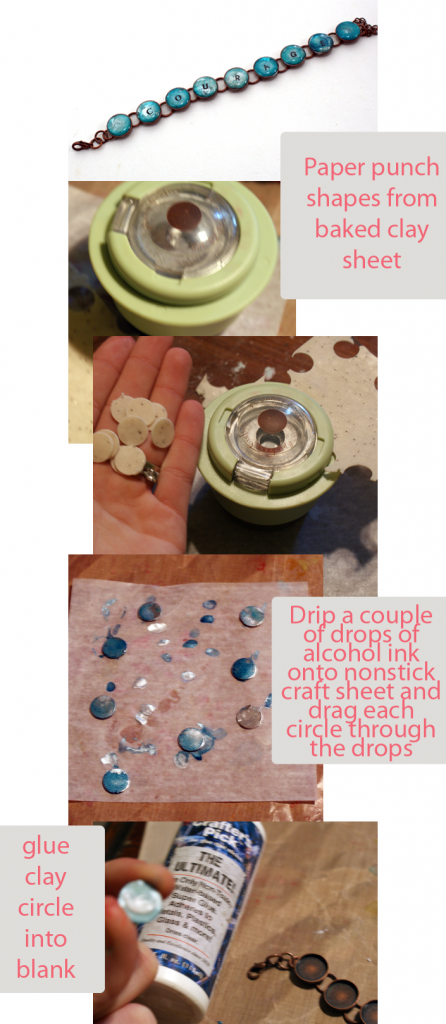
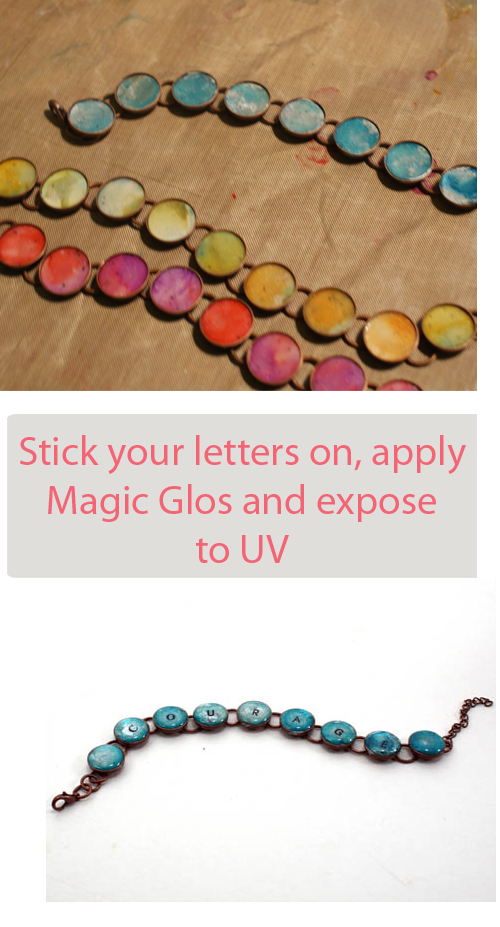
Have you seen the polymer clay/Sizzix kick going on here at SBLC?  Well, I didn’t have a die to cut the exact circle I needed for these bracelet blanks, so I used a paper punch for a circle that fit perfectly.

You can easily make this beautiful custom word bracelet at home.  Here is how…

For this project you will need:

  • Polymer clay sheet at thickness of  7 (9 being thinnest), white, baked 45 min at 275
  • Alcohol inks in desired colors
  • Crafter’s pick glue
  • Circle punch to fit bracelet bezels (Epiphany Crafts 14 circle used here)
  • Letter stickers or rub ons
  • Magic glos resin

Instructions:

Polymer Clay Bracelet Tutorial

Polymer Clay Jewelry TutorialThat is it!


Resin Rings With Plaid Ring Bling

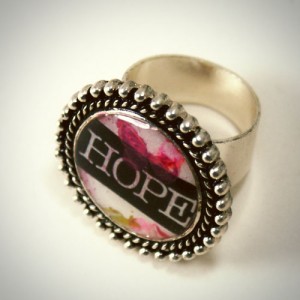
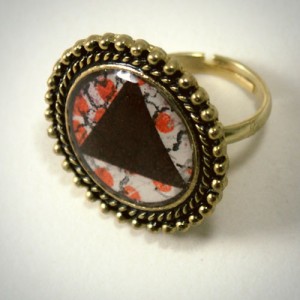
Resin jewelry tutorialMake your own customized ring using Plaid Ring Bling bezels and ring forms.  These are simple, quick and inexpensive, and the possibilities are endless.  Follow along and you will have your own image immortalized in bling form in no time.

Supplies:

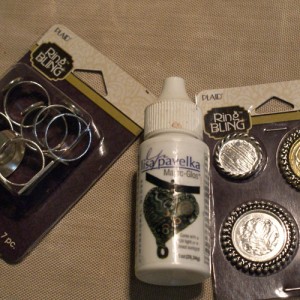
  • Plaid Ring Bling forms and bezels (I got mine a Joanne’s)
  • Magic Glos resin (shown in this tutorial), or Diamond Glaze, or Dimensional Magic
  • Glossy Accents
  • Image to place in bezel (I used a sheet of paper I stamped for the colorful background and ran through my inkjet printer for the words
  • Sunlight or UV curing lamp if using Magic Glos resinusing resin with inkjet images

Instructions:

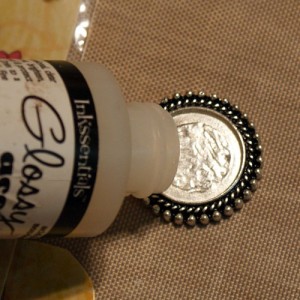
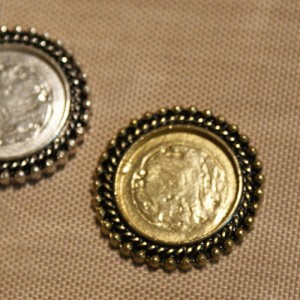
  • Cut out your images to fit the bezels, and glue them into place using Glossy Accents inside the bezel.  Glossy accents by Inksentials
    making photo jewelry


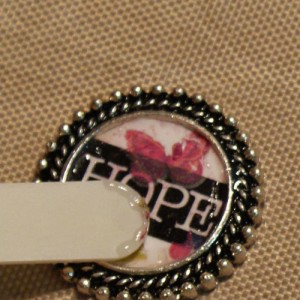
  • Burnish image to make sure in is secure using a popsicle stick or toothpick.  Use your finger to spread the excess Glossy Accents over the top of the image.  If you need to add more to completely cover the top, do so.  This seals the paper and prevents the resin from discoloring it.  how to make your own photo jewelry
  • Let this dry completely before applying Magic Glos, otherwise the Glossy Accents will interfere with curing.  I use a heat tool to speed this up.  If you do not use a heat tool, about 20 minutes dry time will do.
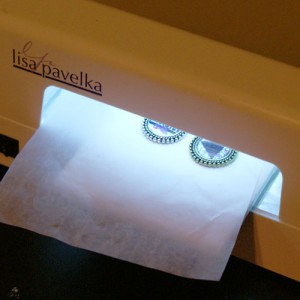
  • Apply Magic Glos and cure under your UV lamp or in direct sunlight.  Magic glos jewelry
    Lisa Pavelka UV curing lamp

I use Lisa Pavelka’s 9 watt curing lamp, which works great for Magic Gloss.  My pieces cure in 10 minutes or less.

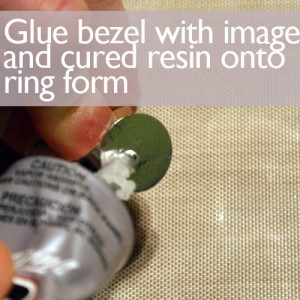
  • Now just glue the bezel with image and cured resin onto the ring form using E6000.  Let that dry and you are finished.  I love the bezel and ring form being separate so that the bezel is easier to set completely flat while the resin is curing.  It makes using the UV lamp way easier for making these rings. 
    Resin jewery


I am planning to make a ring using the Valentine’s Day sprinkles and resin I showed you a couple of weeks ago…

Valentine's day sprinkles jewelry


What have you submerged in resin lately?

Make Charms With Resin and Paper

how to make resin charm
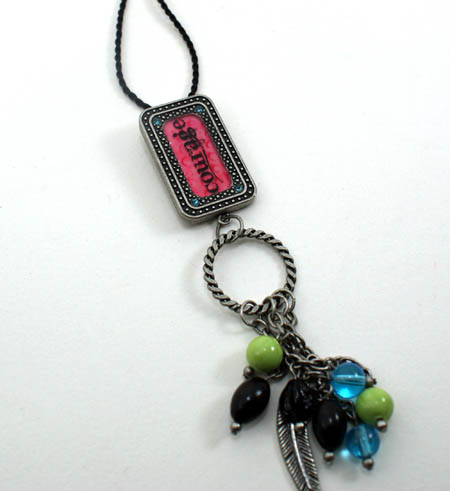
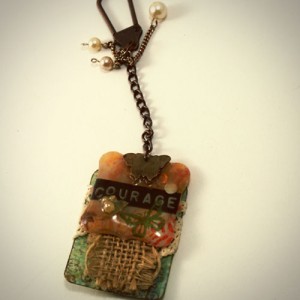
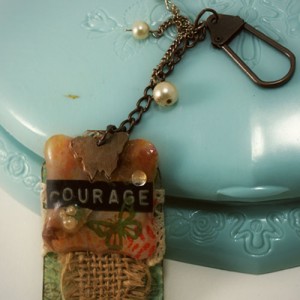
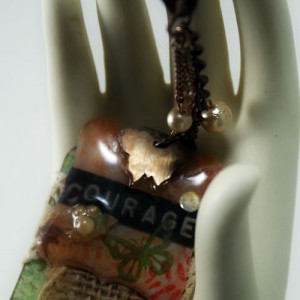
No need for a bezel or pendant blank.  You can make charms with a simple paper shape and resin.  Here, I used my paper punch to get the shape of this orange courage charm, decorated it with word label and rub-ons, and layered Magic Glos resin.

How to make resin charmsTo hang, I just puched a hole in the top and added a jump ring.  I placed it on top of a paper tag wrapped in lace, with a burlap strip on top.  Add a key fob and some dangly pearl charms, and you have a gorgeous mixed media keychain.

mixed media resin jewelry

Valentine’s Sprinkles and Resin Jewelry

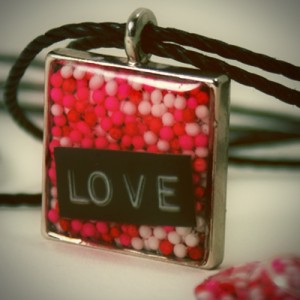
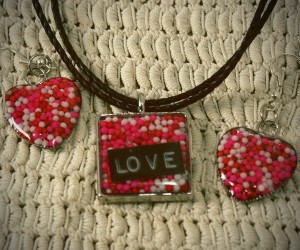
Resin jewelry tutorial Love text & candy sprinkles from @savedbyloves

[pinit]

Looking for a quick and easy gift for Valentine’s Day?  This project fits the bill.  Remember this post on patriotic resin jewelry?  The process is the same, except I used Valentine’s Day sprinkles instead of red, white and blue.  I also used heart shape bezels which I found with the polymer clay at Hobby Lobby.   Follow along for the step by step, and you will be on your way to your very own LOVE jewelry.

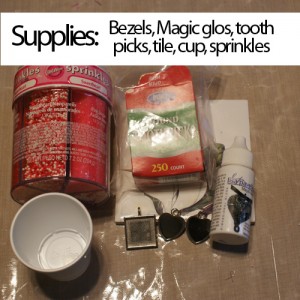
Supplies:

  • Magic Glos
  • Pendant and earring bezels and desired jewelry findings
  • A sunny day, or UV curing lamp; I use Lisa Pavelka’s and it works like a charm
  • Toothpicks
  • Tile small enough to fit into lamp to cure your pieces on
  • Sprinkles
  • small mixing  cupResin jewelry supplies

Instructions:

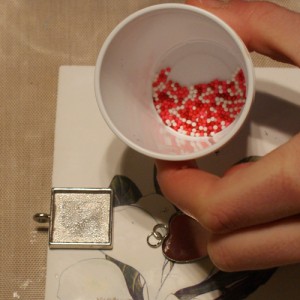
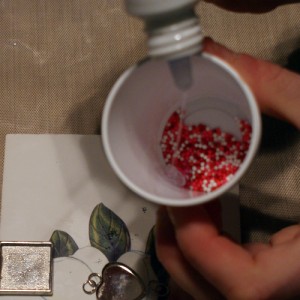
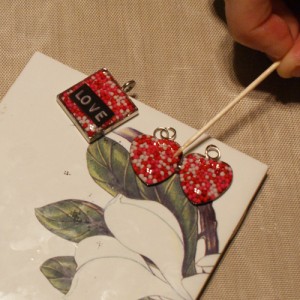
  • Pour some sprinkles into the cup, along with a few drops of Magic Glos and using toothpick, mix resin and sprinkles so that sprinkles are coated.

resin jewelry

Valentine's Day crafts

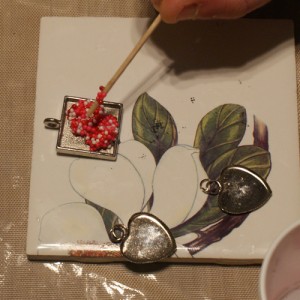
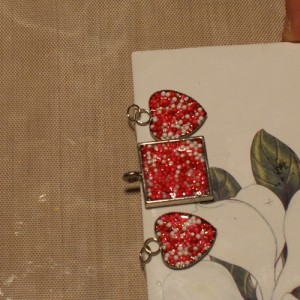
  • Use toothpick to pick up a clump of sprinkles/resin and spread into bezel.  You don’t want the sprinkles to go higher than the lip of the bezel.  When you are happy with the coverage, put a drop or two of Magic Glos in the middle and expose to UV to cure (either outside on a sunny day, or under a UV lamp.  Valentine's Day crafts
  • Once cured, add another layer of resin to get the dome effect and cure again. You can add embellishments, stickers or whatever you can think of at this point too. I used my label maker to make this love sticker. I put it on top of the cured layer, then put resin over it, then cured.

Valentine's Day crafts

TIP:  Use toothpick to “pull” resin from middle of piece out to the edges

Valentine's Day crafts

I just love this UV resin.  There is another, way less expensive brand called UltraDome, which is being shipped to me soon.  I hope I love it as much as I love Magic Glos.  I will keep you posted!

How to Make Resin jewelry


Charmed Joy Butterfly Resin Pendant

Resin pendant with image

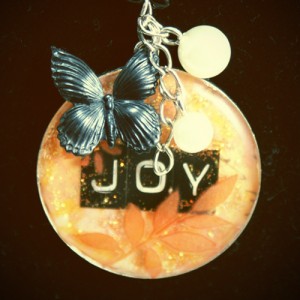
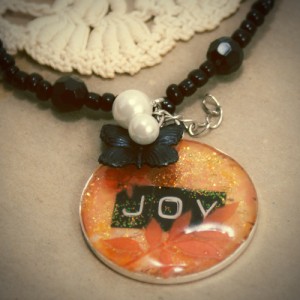
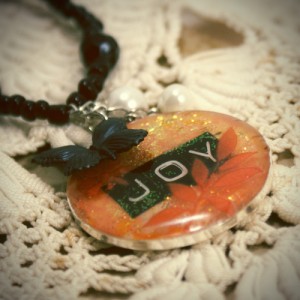
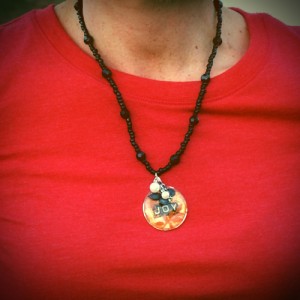
This pendant is made from decorative paper, adhesive “JOY” punch stickers, rub-ons, Magic Glos resin and some charm embellishments (a black butterfly and a couple of pearls I got from some old costume jewelry).  I have been on a resin kick as of late, making pieces for an upcoming show.  I am happy with how this one turned out.  I love how versatile scrapbooking supplies are… home decor, jewelry, all kinds of altered art, and even scrapbooks.

How to make resin pendants

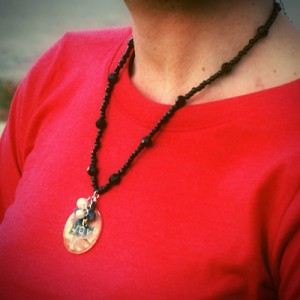
Here, I traced the bezel on scrapbook paper and cut out the circle to fit.  I adhered the letters to spell joy, added some Stickles (glitter glue), then a thin layer of Magic Glos, which I cured under my UV lamp.  Then I did the orange leaves from a rub-on pack I had in my stash.  A  couple of more layers of resin with curing in between, and that was that.  Using a jump ring, I added the pearls from old costume jewelry, and the black butterfly charm I had on hand.  I paired the pendant with a black beaded strand for the finished necklace.

How to make resin pendants

How to make resin pendants

resin jewelry tutorial

Serenity Resin Bracelet

Resin jewelry

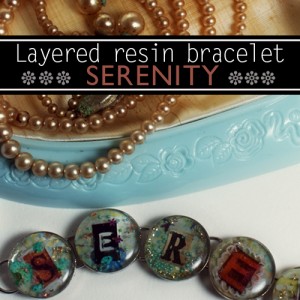
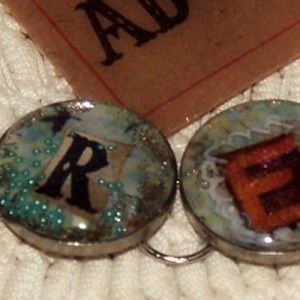
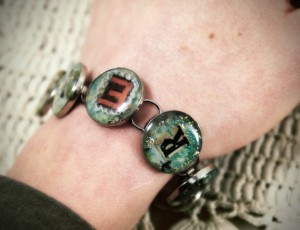
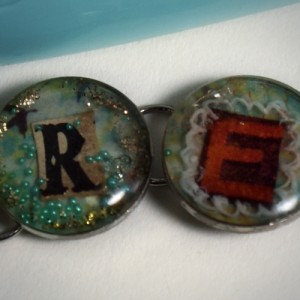
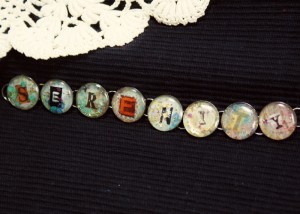
Creating resin jewelry has never been easier with Lisa Pavelka’s Magic Gloss resin that has been out for a couple of years now.  Pieces that use to take a couple of days can be finished and cured in less than an hour!  Today I am showing you my ransom letter “serenity” bracelet.

resin and paper

Serenity resin bracelet

What I love about Magic Gloss is that it is one part, so no messy mixing to deal with.  Not only that, but it cures in UV light and doesn’t harden until exposed to UV.  That means you have all the time in the world to work with it.  No more hurrying to finish in the 25 minutes or so that you have before 2 part epoxy resins start to harden.

What I don’t like about it is that it is way more expensive than Envirotex Lite and ICE resin, both 2 part epoxy resins used in jewelry making.  At Hobby Lobby, a tiny 1 oz bottle costs $10.99.  I found it on Amazon linked above for $5.88.  I can’t say exactly how many pieces of jewelry you can get from a bottle, as that obviously depends on how much resin per piece, but it is definitely pricey in my book.  Also, unless you buy a UV light you are at the mercy of the weather.  On a sunny day, or under a UV lamp of sufficient wattage, pieces cure in minutes!    This makes layering so fun and instant.

In this piece, I cut scrapbook paper to fit the circle bezel and adhered them inside the bezel with glossy accents.  Then I cut out letters from random papers to spell “Serenity”.  I adhered them with Glossy accents and let dry for 30 min.  This is important because the resin will not cure if it mixes with wet glue.

I added a thin layer of resin at a time with various sprinkled glitter, glass micro beads, metal leaf and fibers, curing between each layer using Lisa Pavelka’s UV lamp ($40 at Hobby Lobby).  It looks super cool.  I wish you could see the layer effect better in my photos.  I am very pleased with how it turned out.   I can’t stop looking at it.

Resin and paper jewelry

how to make resin jewelry

Embedding with resin jewelry

Stay tuned for more fun with resin!

Privacy Policy