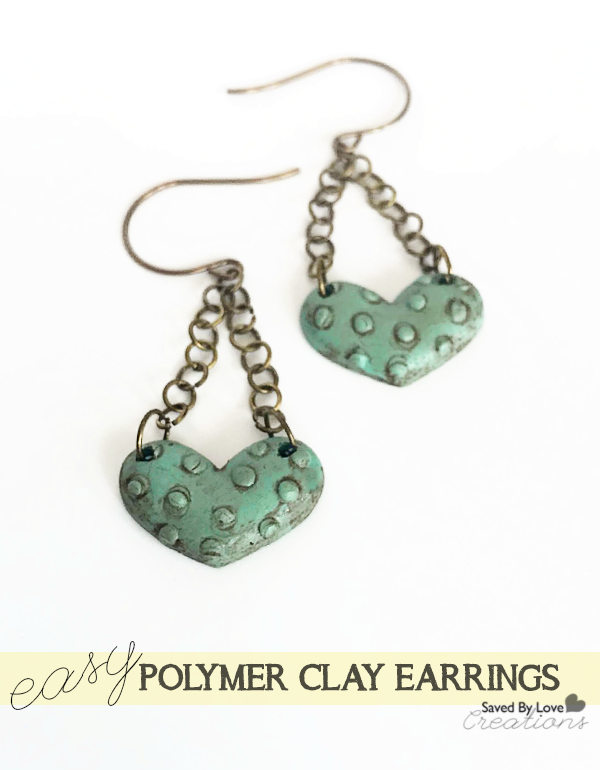
The thing that is awesome about polymer clay, or one of the many things I should say, is that it doesn’t require many tools or supplies. I decided to quench my desire to create with this simple polymer clay earring project that I could pull off with a quick trip to the craft store. Simple is an essential until I get my studio unpacked and set up, and this project fit the bill. These cuties were so easy to make, and I get tons of compliments and requests for a pair every time I wear them. They compliment many outfits and styles, are lightweight and would make great christmas and birthday gifts. Let’s get started!
SUPPLIES:
Polymer Clay in color of your choice
Mod Melts Mold Trinkets
Hand drill or toothpicks or bead reamer
Vintaj Ear Wire
brown acrylic paint
paper towels
oven
ruler
ink pen or sharpie
4mm and 6mm jump rings in antique brass finish
INSTRUCTIONS:
Condition clay by hand or in clay roller machine.
I highly recommend using the Sculpey machine over the Amaco craft roller machine. I started with the latter and was super frustrated. I found it at Michaels and grabbed it since I didn’t have my materials with me on my trip back to Indiana for my sister’s wedding. The handle kept flying out as I was rolling the clay, landing on my feet a few times (ouch)! Not only that, but it broke less than 24 hours after I bought it and wouldn’t roll. I am an experienced polymer clay enthusiast, and this machine was a huge disappointment. Luckily Joanns had a Sculpey machine and it rocks!! It is so smooth, and the handle hasn’t popped out once. Phew!
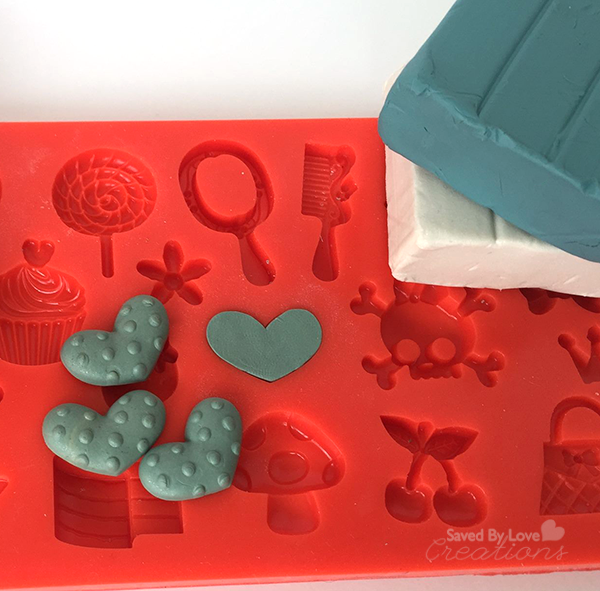
Roll a ball in your hand and press into mold. Play around to find out how much clay you need to fill the mold flush with the top. You don’t want to much or too little clay. Also, roll the clay into a smooth ball so there aren’t creases on the front of your finished piece.
*Tip: You can use Armor-All or baby powder as a cheap alternative to mold release.
With this project I didn’t use anything and it popped out pretty easily by turning the mold upside down and pushing it out. Be careful not to distort the piece since the clay will still be soft! Waiting for a half hour before removing it will make it easier since the clay won’t be as warm from just being worked.
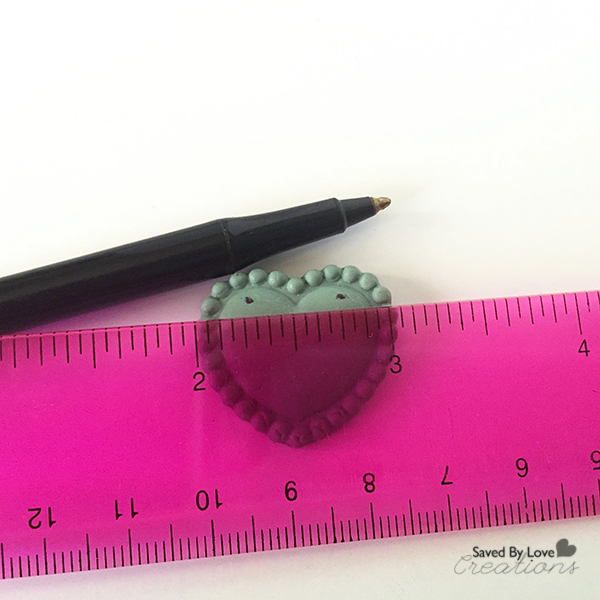
Next, Bake in oven per instrucions. I like to bake before piercing so that the piece doesn’t distort. If you want to pierce while soft, use a tooth pick or bead reamer to poke a hole. If you bake first, you can measure and mark as shown.
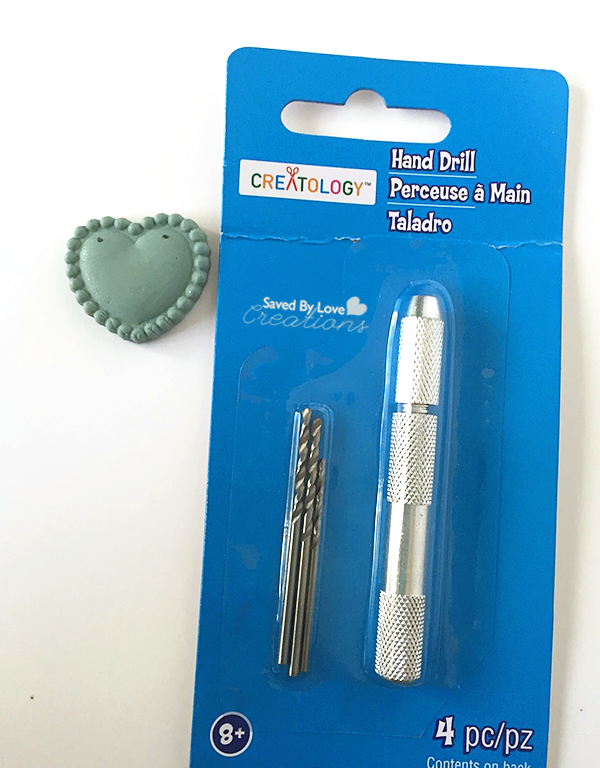
Using a hand drill instead of a bead reamer makes it less likely your piece will chip at the hole site.
Pics are of a different heart, but the process is exactly the same.
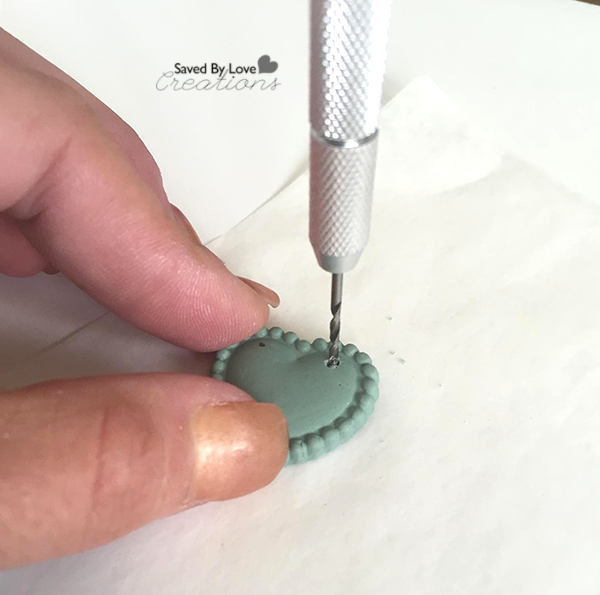
Work from front of piece to back as shown so if it does chip when it comes through, the defect will be on the back of the piece.
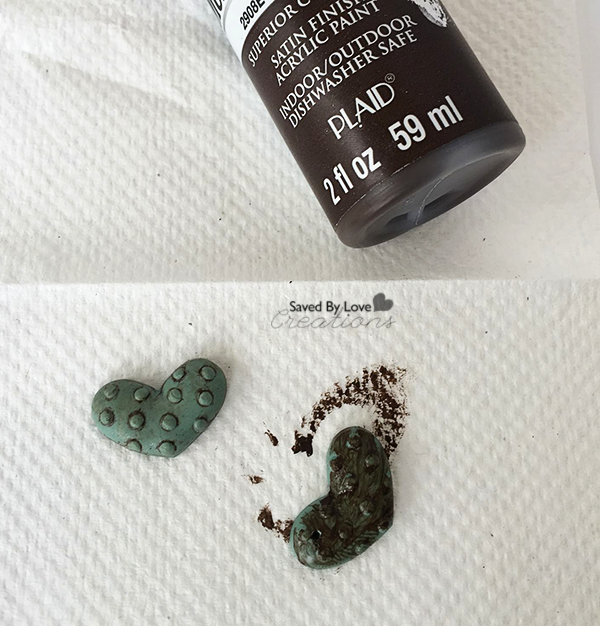
Antique the piece by applying dark brown acrylic paint and immediately wiping away with a paper towel. You can do this before or after drill the holes.
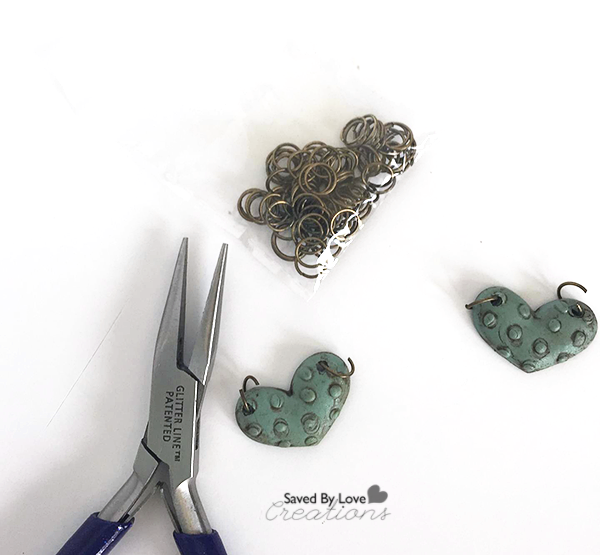
Next, use jewelry pliers to open jump rings and insert 6mm rings into holes.

Make a chain with 15 of the 4mm jump rings and attach each end of the chain to each of the 6mm rings and close them. Attach ear wires to the 8th jump ring in the chain and go show off your awesome creation!
Thanks for reading!
If you like to make jewelry, you are going to need a place to store it. Make that too! Here are 50+ DIY Jewelry Storage Projects you can rock…