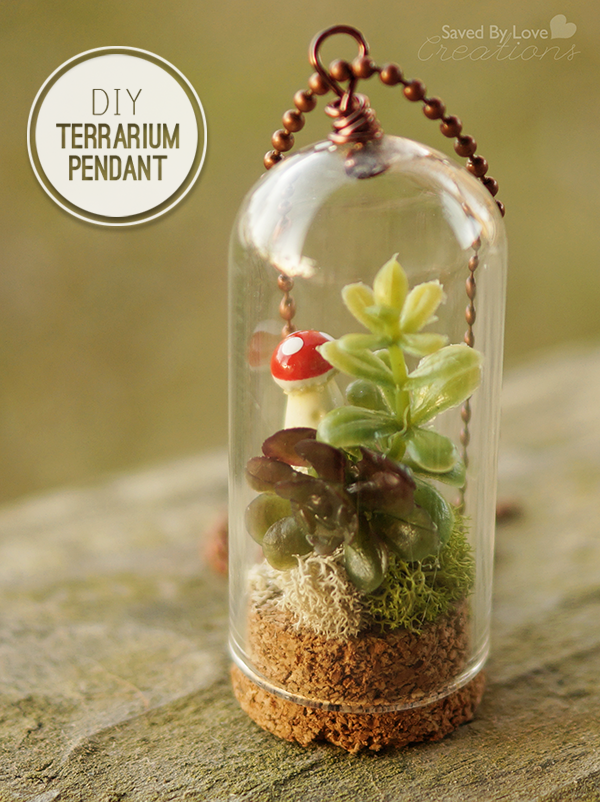
Archives for March 2014

Make a DIY Terrarium Necklace

[pinit]DIY Terrarium Necklace Tutorial using Tim Holtz Corked Cloche @savedbyloves[pinit]

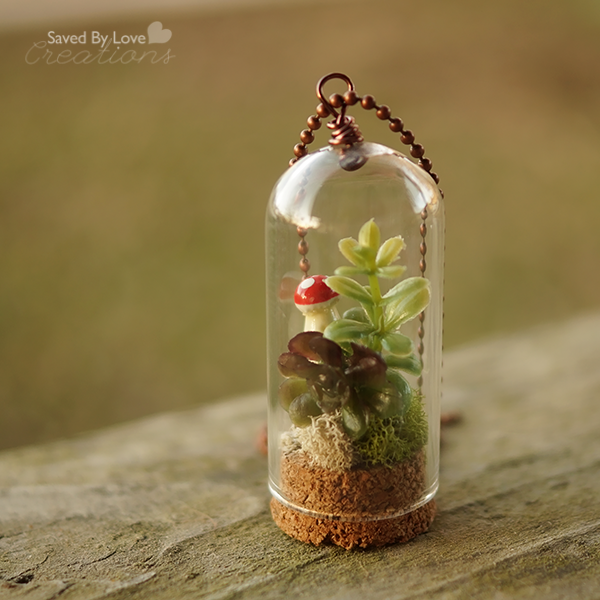
This tiny little treasure is easy to make and takes just minutes.  I found a new to me product from Tim Holtz called Corked Domes and knew immediately that I would be making a terrarium pendant with them.  There is glass drilling required, but do not fear.  You can do it, no problem.  I will help you and you will be a pro in no time.  I am warning you now that I used fake plants to make my terrarium.  You can use live plants.  It is way hipper if they are alive, but I have a tendency not to water things, so I went plastic.  If you are honest and you don’t have a PhD in succulentology, you’ve gotta give me that they look like the real deal.

SUPPLIES:

Rotary tool (I use Bead Landing Rotary Tool
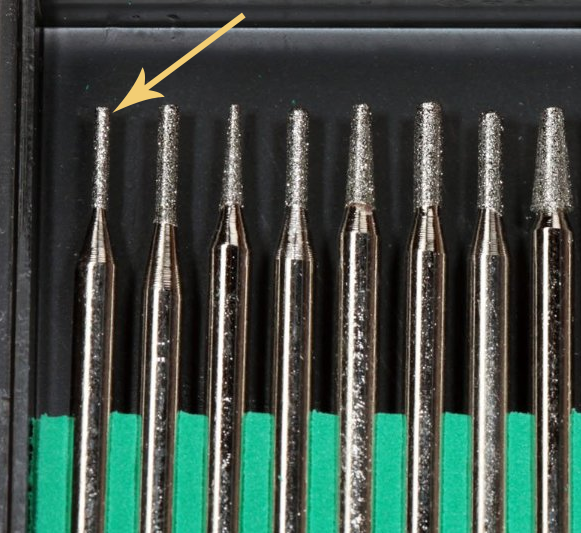
Diamond Drill Bits

Tim Holtz Corked Domes

Small container of water and lint free towel

Hot glue/glue gun or Flora Bond if using live plants

Necklace Tutorial

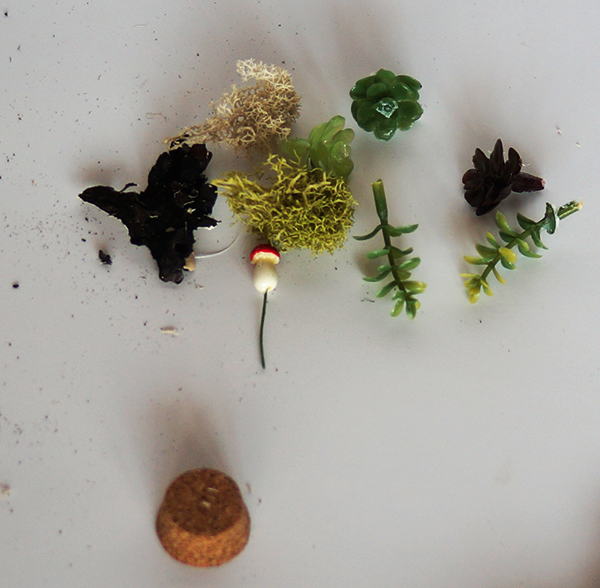
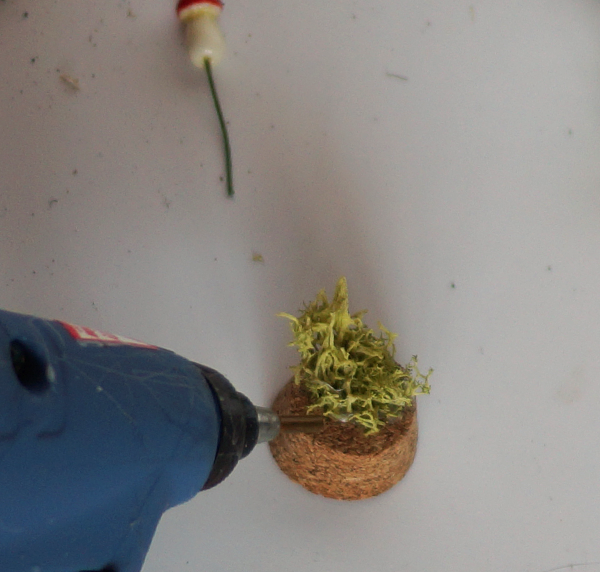
Moss, small stones, mushrooms and whatever you want in your dome

Succulents (live or fake) – I got my fake succulents at Michael’s

20 Gauge copper wire or eye pin

Round Nose jewelry pliers

Flat nose jewelry pliers

Needle nose pliers

 Flush wire cutters

Chain or cord for hanging your pendant

DIY Terrarium Necklace

TUTORIAL:

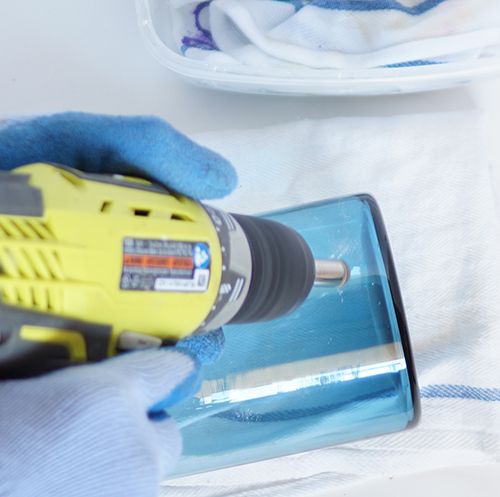
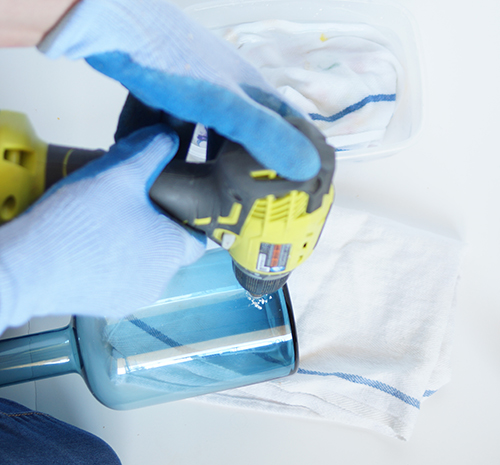
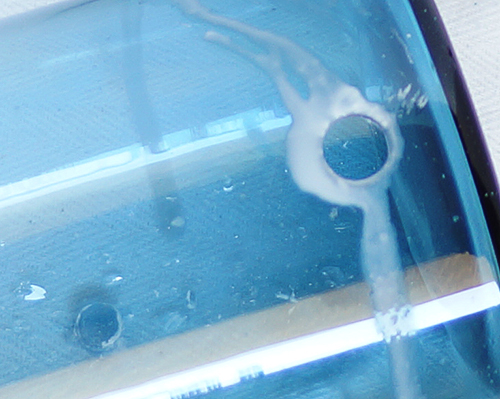
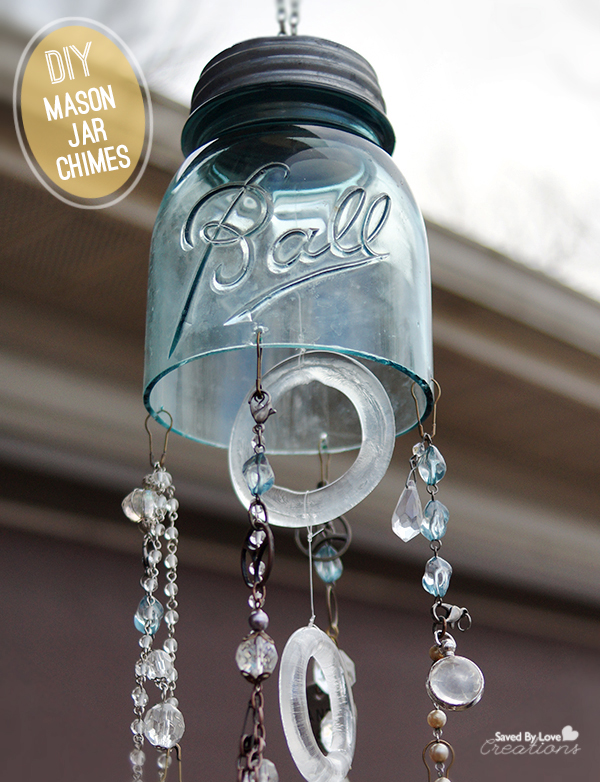
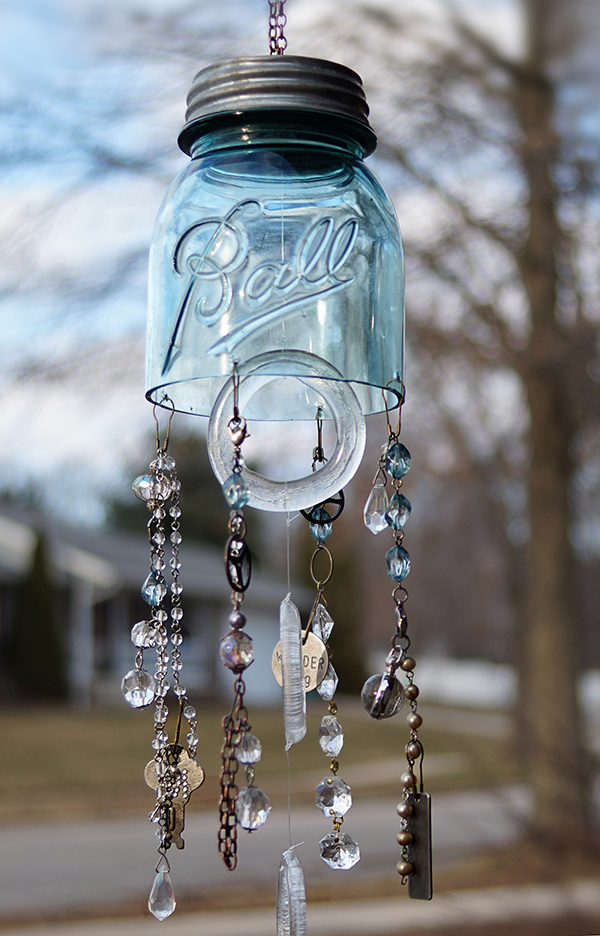
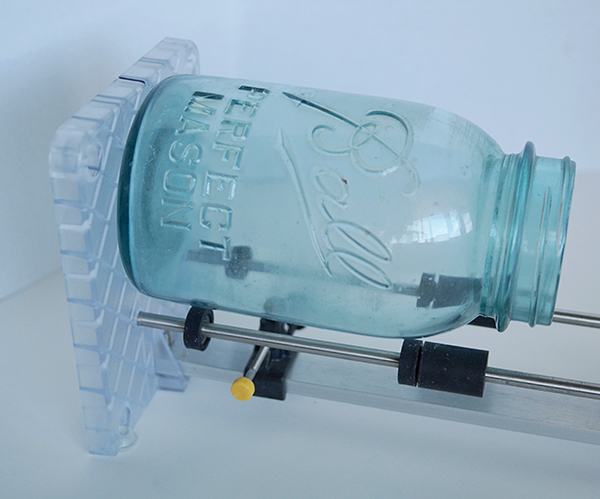
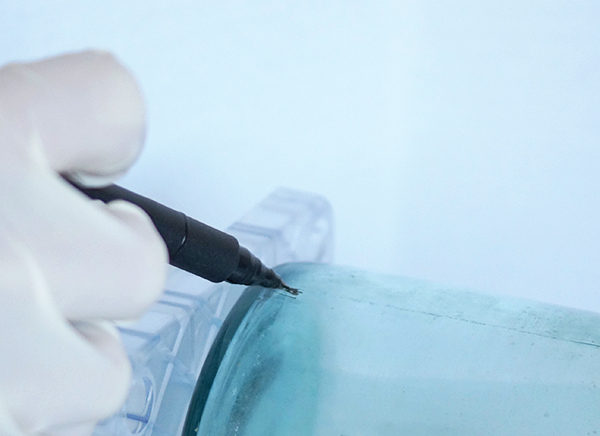
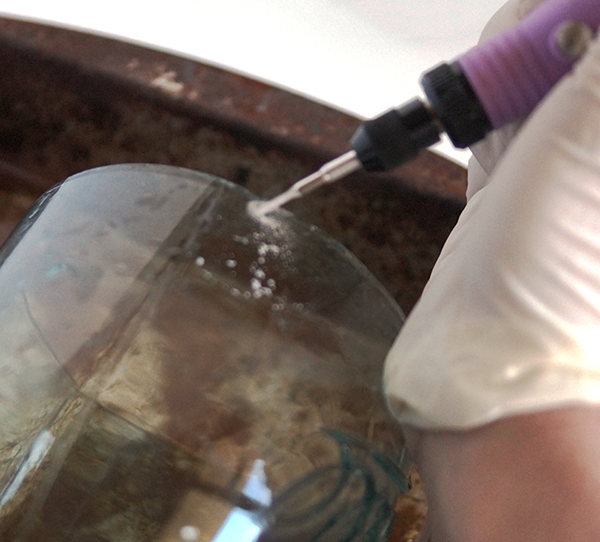
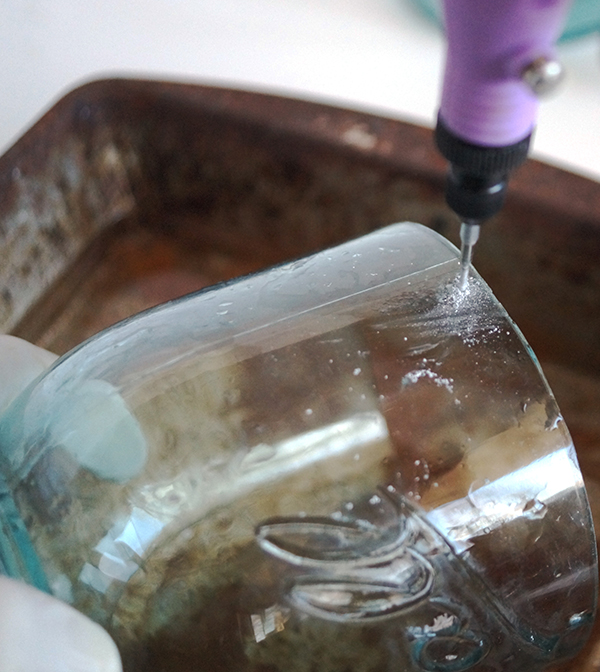
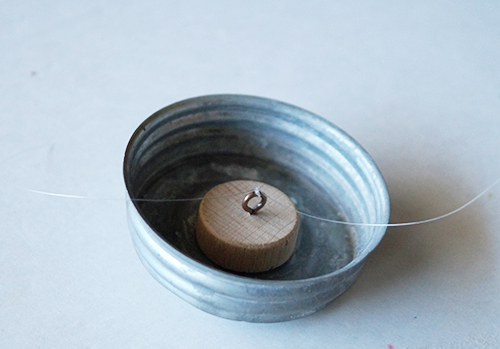
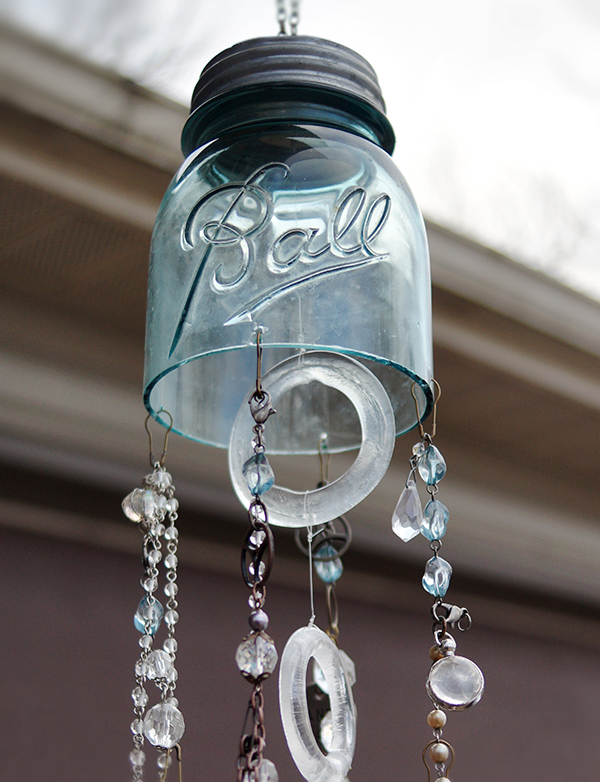
First you need to drill a hole in the top of your dome for a place to insert wire for hanging the pendant.  Follow the detailed instructions I showed you in this tutorial:  Mason Jar Chimes Tutorial and Drilling in Glass.

NOTE:  These glass domes are very thin.  I tried drilling the hole using my dremel and shattered the first dome I attempted.  I like the rotary tool used in the tutorial linked above because it is way fewer RPMs than my dremel and it has adjustable speed.  Many people swear by their Dremels for drilling glass.  I find my rotary tool way easier and I have success 99% of the time with it.

Make a pendant bail

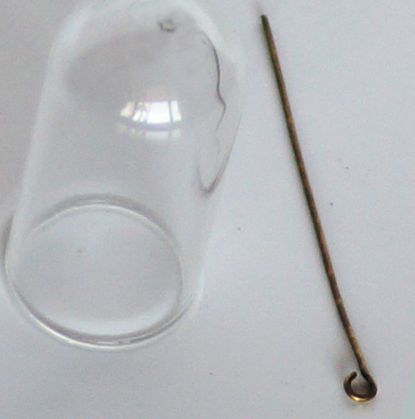
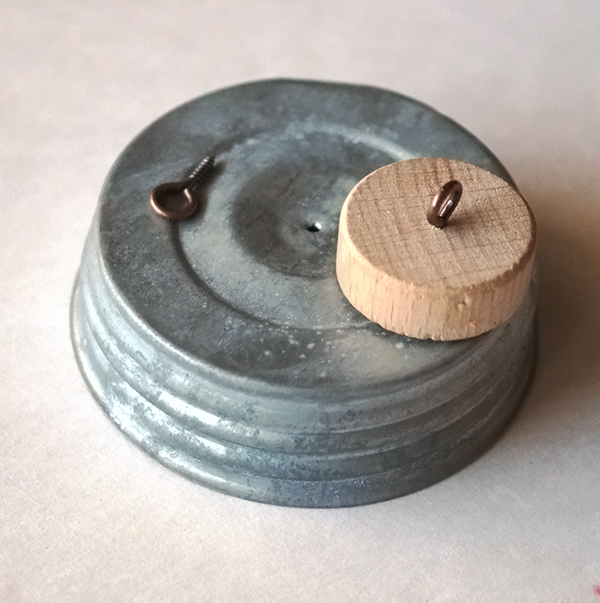
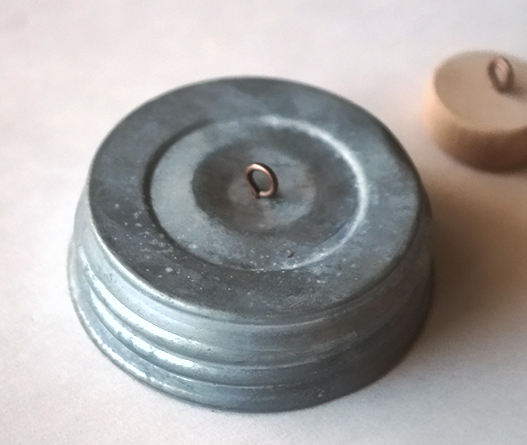
Either use an eye pin (pictured) or cut a lenght of wire about 4 inches and create a loop in one end with your round nose pliers.

How to Wire Wrap

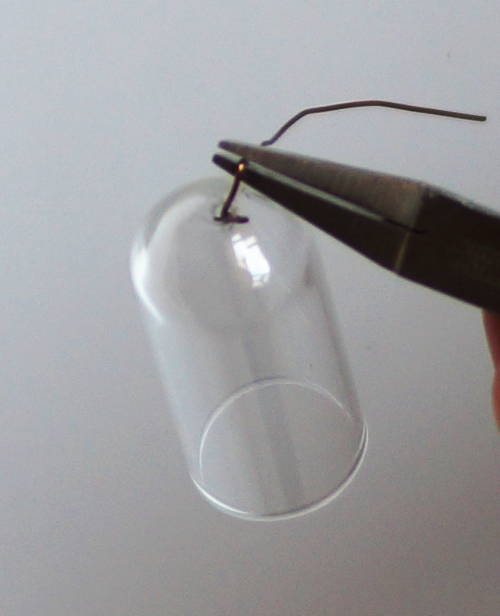
Insert wire through Dome hole so that loop is on inside, then use flat nose pliers to bend wire to 90° about 1/8-1/4 inch above where it exits the top of the dome.

Jewelry Making Tutorial Terrarium Necklace

Use round nose pliers to grab the a few mm past the bend.  With your free hand, grab the wire end and wrap wire around the pliers to form a loop.  (That gunk on the round nose pliers is Tool Magic – it coats your jewelry making tools so they don’t leave scratches and dents in soft wire).

Handmade Jewelry Tutorial Saved By Love Creations

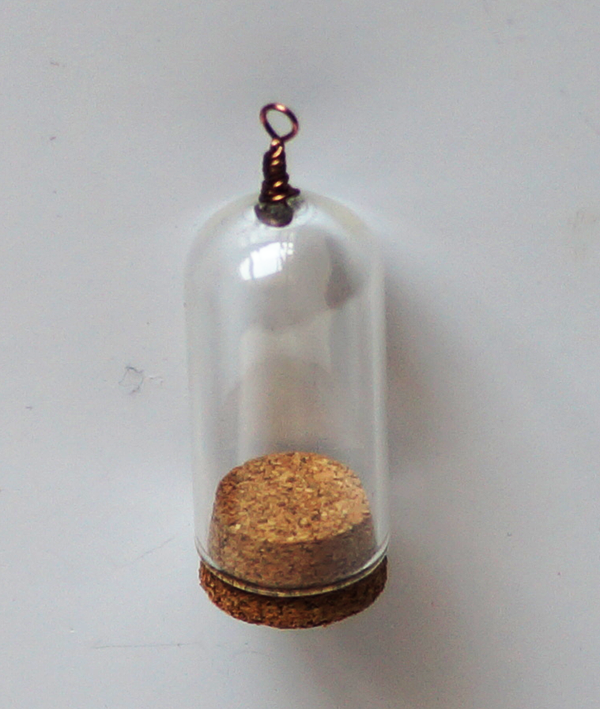
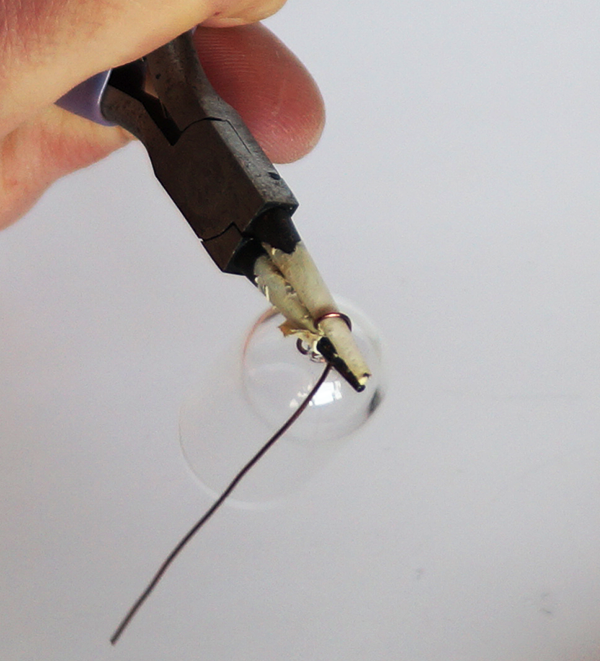
Wrap the remaining wire starting at the base of the loop down to the top of the dome.  Trim off excess wire with flush cutters and tuck in the end with needle nose pliers.  Now you have your wire bail for hanging your pendant!

Necklace Tutorial

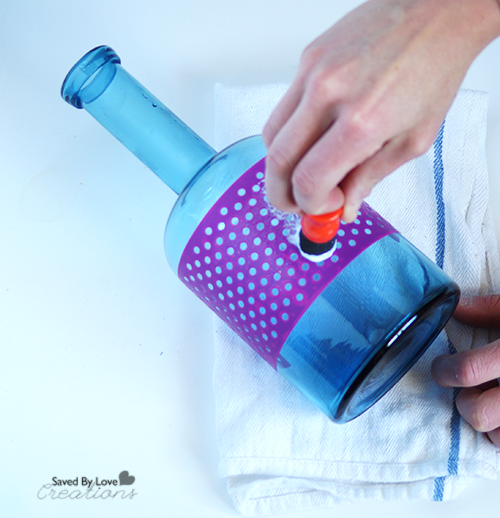
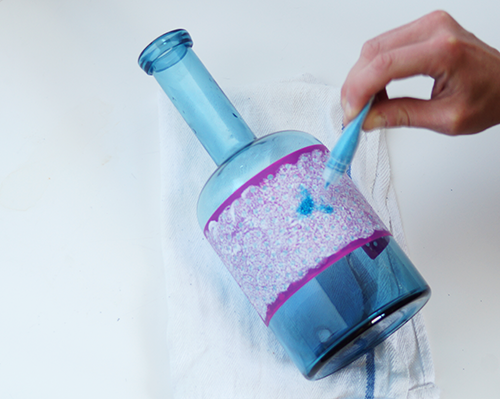
Lay out your goodies and start gluing things into place on the cork.  Flora Bond works with live plants and won’t kill them!  I used hot glue since mine are artificial.

How to make your own jewelry

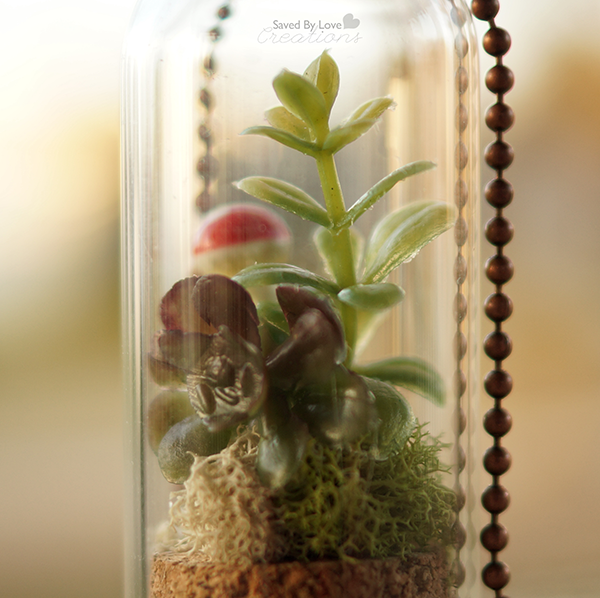
Once you have everything in place, add the dome and string your chain.  You are now super cool…

How to make a Terrarium Necklace

These would be cute as keychains too.  If you go crazy and your junk won’t fit in the dome, just tear some off and patch up any glue spots showing with moss.  Play around until you are satisfied with how it looks.

Remember last year when I showed you how to make bigger terrariums?

How about our 50+ DIY Terrariums and Creative Planters?

Make a Stenciled Planter Box From Reclaimed Wood

*This is a sponsored post written by me on behalf of Blue Print Social for Ed Roth Stencil1 Stencils and FolkArt Multi-Surface Paint by Plaid Crafts.  All opinions are 100% mine and honest.

[pinit]Easy Rustic Planter DIY with @PlaidCrafts @savedbyloves[pinit]

Today’s project is a simple, inexpensive stenciled planter box made from reclaimed wood .  Use this rustic crate for house plants, flower bouquets, to display vintage bottles, candles and more!  I used FolkArt Multi-Surface Paint and an Ed Roth Stencil1 stencil with some scrap wood and chicken wire I had on hand to build this versatile rustic home accent.  Read on to find out how you can make your own version!

Rustic Home Decor Ideas

SUPPLIES:

Ed Roth Stencils @PlaidCrafts

Scrap Wood

Chicken Wire

Metal Snips

Wood glue

Ed Roth Stencils

FolkArt Multi-Surface Paint

FolkArt Antiquing Medium

Foam Brush

Lint Free Cloth

Stencil brush

Masking Tape

Table Saw

Nailer or hammer and nails

TUTORIAL:

How to build a scrap wood vintage crate

Cut wood for the bottom, 2 ends and divider of your crate.  I these all from the same piece of pallet wood.The two ends should be the same height, and the middle divider should be that height minus the thickness of the bottom piece.

Ryobi Airstrike Nailer

Attach the ends to the bottom as pictured, placing a strip of wood glue at the contact point before nailing together.  I used one inch brad nails with my nail gun.

How to make a reclaimed wood planter box

Attach the divider by flipping box over so that the bottom is up and nailing through the bottom into the divider so you are left with the above image.

Reclaimed wood projects to make

For the sides of the crate, I used a wood shim like scrap piece from my stash.  You could use paint stirrers or vintage yard sticks here too.  Cut four of them (2 for each side) the same length.  To get the length just hold the wood up to the crate with one edge flush and mark the other edge to cut.

How to use Nail Gun

Cut chicken wire with metal snips to same length and height as crate.  Put the wire in place and secure by nailing side planks in place over the top of the wire.

Ryobi Nailer

Repeat with the remaining side plank at the top, then flip the crate over and repeat on the other side.

Folk Art Antiquing Medium

Since all of my wood was random and mismatched, I decided to pull it together with FolkArt Antiquing Medium.  This stuff is super easy to use and I love the aged effect, on top of how it unifies the various wood pieces.

How to created aged wood effect

Apply the medium with a sponge brush in a few inch sections at a time, then wipe back with a lint free cloth until you get the desired effect.

Wipe back antiquing medium

If you find it too dark, use a damp cloth to remove more of the stain.

How to use stencils

Once that is dry, tape your stencil into place and apply the FolkArt Muti-Surface Paint using a stencil brush.

I found the stencil I tried easy to use.  The lines were crisp and there was no bleeding.

 The Ed Roth Stencil1 Stencils come in large formats that are ideal for walls, floors and furniture, and are made of durable, reusable mylar that is super easy to clean.  These stencils will be available at Jo-Ann Fabric & Craft stores soon.
As for the paints, they work on any surface, are dishwasher safe and can be used indoor and outdoor.  I personally can’t wait to try them on glass so I am sure you will be seeing that around here in the near future!

Build a Rustic Planter Box

Once that is dry, you are ready to use your awesome handbuilt crate!  I went with ferns, but the customization options are endless.  Make it all you.

If you loved this project, you may want to fcheck out Plaid Crafts on FacebookTwitterYouTubePinterest, and Instagram or visit their blog, The Plaid Palette.

Want more projects with Ed Roth Stencil1 Stencils and FolkArt Multi-Surface Paint from your favorite bloggers?  Here you go…


Upcycle a Glass Bottle Into a Lamp

[pinit]

How to make a lamp from a bottle @savedbyloves with @modpodgerocks adhesive stencils @plaidcrafts

[pinit]

If you have ever thought it would be too hard to turn a bottle into a lamp, I am here to change your mind about that.  Not just any lamp, mind you, but a sparkly, polka-dot spangled, fabulous lamp thanks to Mod Podge Rocks adhesive stencils from Amy Anderson and Plaid Crafts!  Read on to see how you can make your very own in less than an hour.  It is true.

SUPPLIES:

Mod Podge Rocks Adhesive Stencils @plaidcrafts

Glass Bottle

Mod Podge Rocks Adhesive Stencils (Polka Dot Pattern)

Mod Podge Gloss Finish

Foam Spouncer

Podgeable Glitters

GE Bottle Lamp Kit

Lamp Shade

Light Bulb

Drill and 1/2 inch Diamond Hole Drill Bit

Lint free towel and rubbing alcohol

Dust mask

Protective Gloves

Protective Eyewear

Container of water with a a soaked towel or rag

TUTORIAL:

How to Drill A Hole In a Glass Bottle

Wearing gloves, mask and protective eyewear, drill a hole in the bottle where you want the cord to exit your finished lamp (in the back near the bottom).  You will be using a 1/2 inch hole saw diamond bit.

Come in at an angle to start the notch in the glass, then you will be able to come in at a 90 degree angle to continue drilling.

How to Drill in Glass Bottle

Here I am drilling at 90°.  You can see the dust from the glass being drilled.  About every 2o seconds of drilling, take the rag from the water and drip it onto the drilled area and the drill bit to cool things down and get rid of the glass dust.

* Some people do the entire thing in water, but I have found that to be inconvenient to pull off with just one person.

*Don’t press on the drill.  Let the drill bit do the work or you risk breaking the glass.  Don’t forget to cool things off with water.  Again, the glass will break if things get to hot.

How to Drill hole in a Glass Bottle

Here you can see the hole is complete, and the glass circle cut out is now inside the bottle (on the left).  Clean away the debris.

Stenciling on Glass

Clean the glass well with rubbing alcohol and a lint free towel before stenciling.  Once it is dry, place stencil and apply Mod Podge Gloss generously with a foam spouncer.

How to Paint Glass

Apply Podgeable Glitter immediately after applying Mod Podge.  Remove stencil and let dry!

Bottle Lamp Kit Tutorial

I picked up this kit at Walmart for I think $6.

How to make a bottle lamp

It comes with 3 different sized adapters for various bottle opening sizes.  It turned out that all of them were to small for my bottle, so I dug through my stash and found a big cork that fit perfectly.

Drill a hole in bottle cork

I found a drill bit just smaller than the threaded rod I needed to insert in the cork and drilled a hole for the rod.

How to make a lamp

I inserted the rod and assembled the lamp according to the instructions, running the wire through the hole drilled in the back of the bottle.

Upcycle Glass Bottles

I found a burlap lampshade at Walmart as well.  For this kit, you need one attaches at the base of the bulb (the lamp kit doesn’t come with a harp attachment).  Mine was $8.  I added a burlap flower to finish, and I am in love with my new lamp.

Recycled Bottled Art

These stencils are so easy to use!  They give great lines and come in 6 hip designs.  Head to Michael’s to grab your own, or visit Plaid Online.

Here are more awesome projects using Mod Podge Rock Stencils.  Enjoy!!

How to Make Your Craft Storage Beautiful

[pinit]

DIY Beautiful Craft storage in 15 minutes @savedbyloves

[pinit]

Hello there, SBLC readers! This month I have a fun and really quick project for you. I just finished repainting an old desk that took me nearly a week. While I love how it turned out, I was ready to create something cute that only takes a few minutes.

Decorate-Craft-Tubs

I found these cardboard tubs at Target in their Dollar Spot. That place is dangerous! I snagged two, resisting the temptation to buy them all. I thought they’d be the perfect size to corral my paintbrushes, pencils and pens that are always everywhere but where I need them to be when I want them.

Decorate-Craft-Tubs

I had these pretty aqua and turquoise spray paints on hand and gave the tubs a couple of quick coats. The Krylon is Ocean Breeze and the Rust-oleum is Satin Lagoon, if you’re a turquoise-lover like I am.

Decorate-Craft-Tubs

I picked these houndstooth sticky letters up at TJ Maxx a while back, without any idea what I’d use them for. Perfect for labeling some craft tubs.

Decorate-Craft-Tubs-5

To get them to line them up straight, place the bottoms of the letters on one edge of a ruler, or any straight edge.

Decorate-Craft-Tubs

Gently press the tops of the letters onto the tub, give the ruler a little twist, and the letters will pop right off, staying in perfect alignment.

Decorate-Craft-Tubs

Only one problem though . . . with the letters too close together, the houndstooth pattern made it hard to read the word. So I just popped them off, lined them up on the ruler again, farther apart this time, and pressed them back down. Much better.

Decorate-Craft-Tubs

Some other goodies I found in my craft stash were these rolls of washi tape.

Have you used washi tape yet? Oh wow, is it fun! It dresses nearly anything up in a snap!

Decorate-Craft-Tubs

My first attempt was a little too . . . busy, what with the houndstooth already. But you can play around with the letters and washi tape for quite a while without losing too much adhesive and eventually you’ll find a design that works just for you.

Decorate-Craft-Tubs

I wound up layering two tapes, first a plain turquoise and then the polka dots on top of that. So there’s color and just a little extra pattern, without making your eyes go too buggy.

Decorate-Craft-Tubs

Then I loaded them up. The turquoise tub says “Draw” on one side and “Create” on the other and holds my pencils, gel pens, and pigma markers.

The aqua tub says “Paint” and “Inspire” and holds some of my paintbrushes. The brushes I use the most often. Yes, I have quite a collection having painted for nearly 20 years. I actually have more markers too but I don’t use them as often so they’re tucked away on a shelf.

Of course, if Target still has some of these tubs, the markers might just wind up on my worktable with the rest of the group.

Decorate-Craft-Tubs

Yeah, I have a huge worktable. It’s actually a door, set on top of two bookshelves, so it measures 30″ wide by 80″ long.

And that’s why I need these craft tubs . . . because my worktable never really looks like this pic above.

Decorate-Craft-Tubs

No, this is more like it, with four or five projects going at once.

Decorate-Craft-Tubs

So if I’m doing some sketching, I grab my tub of pencils and pens and have everything I need. I usually have two to three paint projects in progress so it’s really helpful to grab all of my brushes at once, wherever I’m working in the studio.

Decorate-Craft-Tubs

I also love the subliminal reminders. I love to draw and paint and I create to inspire others to do the same.

Of course, if you don’t have little tubs like these, you could decorate a shoebox or any other box with a little spray paint, some stick-on letters and washi tape in a matter of minutes. And choose some words that have a special meaning just for you! It’s a great project when you need to get those creative juices flowing but you don’t have a ton of time.

When you do have a little more time, stop by Just Paint It and say hi. I’m getting ready to do some PIY Spring Flowers. (PIY = Paint It Yourself) You can always find me on Facebook, Google+, Pinterest and Instagram too.

Happy Crafting!

signature

More SBLC Storage ideas:

Wanna see how to store your markers for next to nothing?  Click the following image…

How about some free, stylish book storage?  Click the image below…

And here is a quick and easy dollar store 3 tiered organizer DIY:

Finally, for some more fun ideas to use those pallets, check out my 50+ pallet project roundup;

I hope you got some good ideas here today.  Thanks for reading!

xoxo,


Upcycle Craft How to Make a Mason Jar Candle

[pinit]

How to Make a Mason Jar Candle

[pinit]

Last week I shared this DIY Mason Jar Chimes tutorial and I bet you were left wondering what was to come of the bottom part of the jar.  Since I cut the jar just above the “Perfect Mason” lettering, I thought it would be so cute as a candle.  Turns out I was right, don’t you think?!  Read on to see how to upcycle a mason jar into one of your very own,  These would also be great as part of your DIY wedding decor, or as gifts!

SUPPLIES:

DIY Mason Jar Candle

Beeswax

Soy wicks on metal tabs

Double sided adhesive

Melting Pot

Mason Jar bottom (see tutorial:  How to cut mason jars)

Bamboo Skewer or pencil

Clips

Scissors

Lint free cloth

Soap and water or glass cleaner

TUTORIAL:

Melt wax per instructions.  I used my Ranger melting pot, which was not really the best plan on earth since I could only melt a little bit of wax at a time, but that is what I did.

DIY Candles Mason Jar Decor

Mason Jar Crafts @savedbyloves

While that is melting, prepare container and wick. Clean container well and dry with a lint free cloth.  Adhere wick tab to double sided adhesive, and stick other side into container.  I used two wicks since the jar is big.  Three might have been even better.  That is yet to be seen.

How to Make a Mason Jar Candle Upcycle

Wrap excess wick around dowel rod, centered so that wicks are straight up and down.  Use clips to secure in place.

Recycled Craft Make a Mason Jar Candle

Pour in wax until container is as full as you would like.  Let sit overnight, trim wicks and enjoy!


Make a Mason Jar Candle @savedbyloves

I just love my candle, and the smell of beeswax is wonderful.  This is my first time tackling candle making.  Do you make candles?  Do you have any tips and tricks to share?

How to Make Mason Jar Chimes

[pinit]Tutorial DIY Chimes from Mason Jar @savedbyloves upcycle repurpose[pinit]

It was only a matter of time before I tried out my bottle cutter on a mason jar.  Today I am sharing how I pulled off this mason jar to wind chimes upcycle, just in time for spring and outdoor decor.  This project is a great stash buster for those beads and charms you’ve been stockpiling.  There will be some cutting and drilling of glass, but don’t fear, you can do this!

Mason Jar Upcycle Repurpose

SUPPLIES:

Mason Jar with lid

2 eye screws

piece of scrap wood about 1/2 inch thick and smaller than lid

fishing line or other clear string

scissors

beads, chain, charms and connectors of your choice

Bottle cutter (Creator’s Cutter used in this tutorial)

Butane micro torch or candle and lighter

Dremel or other Rotary tool – I used Beads Landing Rotary Tool

measuring tape

Shallow container with cold water for drilling your jar (this will make sense later)

Bucket of cold water deep enough to submerge jar

Protective mask and goggles

E6000

Diamond Drill Bit for drilling glass

Diamond Bits for glass; I used a bit from this set

Permanent marker

Medium Grit Sand Paper

Glass beads or wine bottle rings (see my Wine Bottle Rings tutorial)

TUTORIAL:

How to Cut a Mason Jar Web

I place the mason jar on the cutter (My wine bottle cutting tutorial has a video on using this specific cutter).

Mason Jar Upcycle

Mark the jar so you know when you have made a complete rotation.

Mason Jar Upcycle Mason Jar Crafts

Once the score line is made, it is time to apply heat/cold to it.  I like to do this with a butane micro torch while rotating the bottle on the cutter jig.  I have moved the blade out of the way and am just using the cutter jig to hold the bottle and give me a way to rotate it easily with one hand while holding the torch with the other.

If you are using a torch, one minute is plenty of time for applying heat.  Sometimes this is enough to break the score line.  If not, submerge jar into cold water, covering score line.  That is all it took for me on this mason jar.  If yours doesn’t separate, repeat the heat/cold until it does.

If you are using a candle, watch the video linked above for instructions.

How to make Mason Jar Decor Chimes

 This is what my break looked like.  Not bad!  Now it is time to sand and smooth the edges.

Mason Jar Upcycle 4

Sand lightly with medium grit paper.  Get the inner and outer edges of the break.  This is pretty quick.

You will notice after a minute or 2 of sanding that the edge is smooth to the touch and won’t cut you.

Mason Jar Craft Idea

I measured the diameter of my jar and it was 12 inches.  I marked every 3 inches for drilling a hole.  This gave me 4 holes evenly spaced around the jar for stringing beads and charms.

How to drill a hole in mason jars

Before drilling, put on eye gear and mask!!

Place jar in shallow container of cold water.  I use a square baking tin.

To begin drilling, come in at an angle to start an indentation.

How to drill a hole in glass

Once the indentation is started, move drill to 90°.  Every 30 or so seconds, stop drilling and rotate jar so that hole gets rinsed out and glass where your were drilling gets cooled.  This prevents the glass from breaking due to high heat.  Continue until you have drilled all the way through.

Do this at each mark around the jar.

Use fishing line or beading string to string various beads, charms, found objects and chain to your liking in each hole.

how to upcycle a mason jar

I wanted to use the old lid that was on this jar in the design, so I needed to have a way to hang the chimes by it.  I used a hammer and small nail to make a hold in the top center.

Mason jar crafts

Next I screwed in the eye screw as pictured.

how to make mason jar chimes

I screwed into the wooden disk and screwed the remaining eye pin to the other side as shown.  I later added E6000 to the wooden disk on the side that contacts the jar lid for added strength.  It gets pretty gusty around here in the spring!

I cut a length of fishing line to the eye screw and tied the other end to a wine bottle ring, tied another ring to that one, and another ring to that one for a total of 3 hanging down from the middle of the jar.

DIY Chimes from Mason Jar

To finish, put the lid on the jar and add chain to the eye screw on top for hanging.  Hang and enjoy!

For more mason jar crafts, visit our Collection of 75+ Mason Jar Projects

For more DIY Chimes, visit our 20+ DIY Chimes post!

20 DIY Wind Chimes @savedbyloves outdoordecor

Watercolor Easter Eggs

Hi everyone! It is Vidya from†Whats Ur Home Story, a home decor/DIY†blog where I share how our family of 4 is turning a cookie cutter into†a unique and interesting home that tells our story.

Has the weather gods been nice to you? We are covered in a foot of snow but that is not stopping me from getting started on Easter crafts. Over the weekend my kiddos and I made these pretty watercolor Easter eggs.

[pinit]

Make gorgeous watercolor Easter eggs in a snap @savedbyloves

[pinit]

They are super easy to make and as I mentioned a perfect craft to get the kids involved. My 8 yr old made the blue ombre one all by herself. All you need are blown out eggs and watercolors. Do keep in mind that†watercolors have chemicals and are not safe to use on eggs that you plan on consuming.

watercolor eggs tutorial

You simply cannot go wrong with these. Here are more that we made;

painted easter eggs, Watercolor Easter Eggs

Tutorial

Blue Ombre Egg – Wait till each layer is dry before you paint the next color.

Orange Ombre Egg – Prop the egg on a skewer and add the horizontal bands before the paint colors dry. Use only very little water on your brush.

Pink Plain Ombre Egg – I just dribbled the paint onto different sides of the egg and let the paints do their thing while propping it on a skewer.

painted easter eggs, Watercolor Easter Eggs, how to make watercolor easter eggs

Purple & Gold Egg – Soak a slightly wet paper towel in paint and dab it onto the egg. When dry, paint with gold paint.

Pink Scroll Egg – Same method as the plain pink ombre egg. I just added the scroll with gold craft paint when the water color was dry.

painted easter eggs, Watercolor Easter Eggs, how to make watercolor easter eggs, Watercolor easter eggs tutorial

Seal your masterpiece with Mod Podge when done.

Wasn’t that as easy as pie? Have you already started your Easter prep? Happy Easter!

For more easy DIY ideas stop by†Whats Ur Home Story†or follow me via†Facebook,†Pinterest,†Twitter,†G+,†Instagram.

Want more? Check out our 75+ Easter DIY Ideas:

Easter Craft Ideas

20 DIY Wind Chimes to Make

[pinit]20 DIY Wind Chimes @savedbyloves outdoordecor[pinit]

Spring is here and it time to get busy on your DIY outdoor decor.  Today I am sharing 20 great DIY wind chime ideas you can make.  We are busy making our own as we speak!  If you have made wind chimes you are proud of, send us a photo so we can include you.  Enjoy!


DIY Party Pom Poms

Hey lovelies! It’s Barbara from Chase the Star and in case you don’t know, I love simple and cheap projects! We recently celebrated my son’s birthday with a fun, yet very ‘DIY’ party at our house. One of the easiest decorations I made was party poms, we skipped the balloons and went with poms throughout and they were a hit!

DIY Party Poms

[pinit]

DIY Party Poms via Chase the Star for Saved By Love Creations #party #handmade #birthdayparty

[pinit]

Sure you can buy party poms at the store, but they are not budget friendly! For a fraction of the cost and just a few minutes you can make your own party poms!

Want to liven up your next party? Here’s how to DIY Party Poms:

Materials:

Pack of gift tissue

Pipe Cleaner

Scissors

Make Your Own Party Pom! via Chase the Star for Saved By Love Creations #party #handmade #birthdayparty

Directions:

Step 1:

Lay the tissue on a flat surface, and smooth the sheets out. Start folding the tissue accordion style from the short side of the batch, until the entire pack is folded.

IMG_4095

Step 2: Tightly wrap the pipe cleaner around the center.

Step 3: Snip the ends of the folded tissue in either a rounded or pointed shape (you can get really creative here!)

Party Poms via Chase the Star for Saved By Love Creations

Step 4: Peel each tissue back towards the center, until you have the shape you like!

DIY POM

Repeat, repeat, repeat! You can make these larger or smaller by adjusting the amount of tissue sheets you use. I also love the look of these to decorate a fun space in the house like a kid’s room or nursery, playroom, or a modern living room!

Our son thought these were ‘way cool’, and so do I!

What do you think? Would you substitute balloons for DIY Party Poms?

Stop by and see the rest of the party and even more DIY projects, crafts, and recipes at Chase the Star! Don’t forget to follow Chase the Star on Facebook, Google+, Pinterest, and Instagram!

See you next time!

New Signature

Make a Burlap Spring Wreath

Hi everyone! It’s Laura again from Inspiration for Moms.
Today is a beautiful day in Colorado.
The sun is out, the windows are open and the birds are chirping.
Spring is in the air!
So I though it would be the perfect time to make a Spring wreath for my front door.

[pinit]

DIY Spring Wreath with Burlap @savedbyloves

[pinit]

First you will need your choice of burlap and a floral wire wreath.
I was going to pick a green color but my son suggested the teal blue.
I think he has a good eye! 🙂
DIY Spring Wreath - Supplies
If you are intimated by those fancy looking burlap wreaths, don’t be!
I’m hear to tell you there as easy as a simple tuck and fluff!
The first step is to tie your burlap around a middle cross wire.
Then it’s time for step two, gently tuck the burlap
from behind the wreath and push it through the wire spacing to make a loop shape.
Work your way through all three rows.
DIY Spring Wreath - Step-by-Step
Now it’s time for step number three, fluff those loops.
Sounds really technical right?! 🙂
Once you have fluffed, continue on until you get to the next middle wire.
I try to pack as many loops in between the middle dividers
to make the burlap really secure which is step number four.
Continue your way around the wreath until completely covered.
Now it’s time to make the Spring banner.
I already had six burlap triangles but these can be found at most craft stores.
I wanted to add some chalkboard triangles for a little contrast.
I took some chalkboard tags from a previous craft project and cut them into triangles.
DIY Spring Wreath - Chalkboard Tags
I then hot glued my chalkboard cut outs onto the burlap triangles.
I added some white stickers to spell “Spring” and then hot glued
the banner together on some twine.
I had a burlap flower leftover from a previous project and thought
it would be a perfect accessory for this wreath.
You can never have too much burlap! 🙂
Now that my door is ready for Spring maybe the weather will cooperate too.
Hey there is only 9 more days until it’s officially Spring. Then it has to get warmer, right?!
Thanks for hanging out with me today and I can’t wait to see you again next month!
  Until then we can stay in touch by visiting Inspiration for Moms,

Want more?  Check out 50+ Burlap Crafts and Decor Ideas!

Burlap DIY Decor

Privacy Policy